Dane Kouttron
This project / write up is in progress, check back for more soon!
Project Started: 02/2024
Making open source hardware for a depreciated electric bikeA west coast stateside company makes a cute aesthetic electric bike, sells thousands of bikes and then goes out of business. It is hard to ship hardware and bikes are hard to make at that quantity. What are bicycle owners supposed to do when obsolete e-bike parts fail? It's frustrating that somewhere, there's documentation detailing the communications protocol for the battery, the torque thresholds for the motor controller, and everything in between. Unfortunately that is nowhere to be found. These bicycles were purchased for +3,500 USD, and one winter in a garage results in them being bricks. Lets undo that with opensource hardware and reverse engineered documentation. |
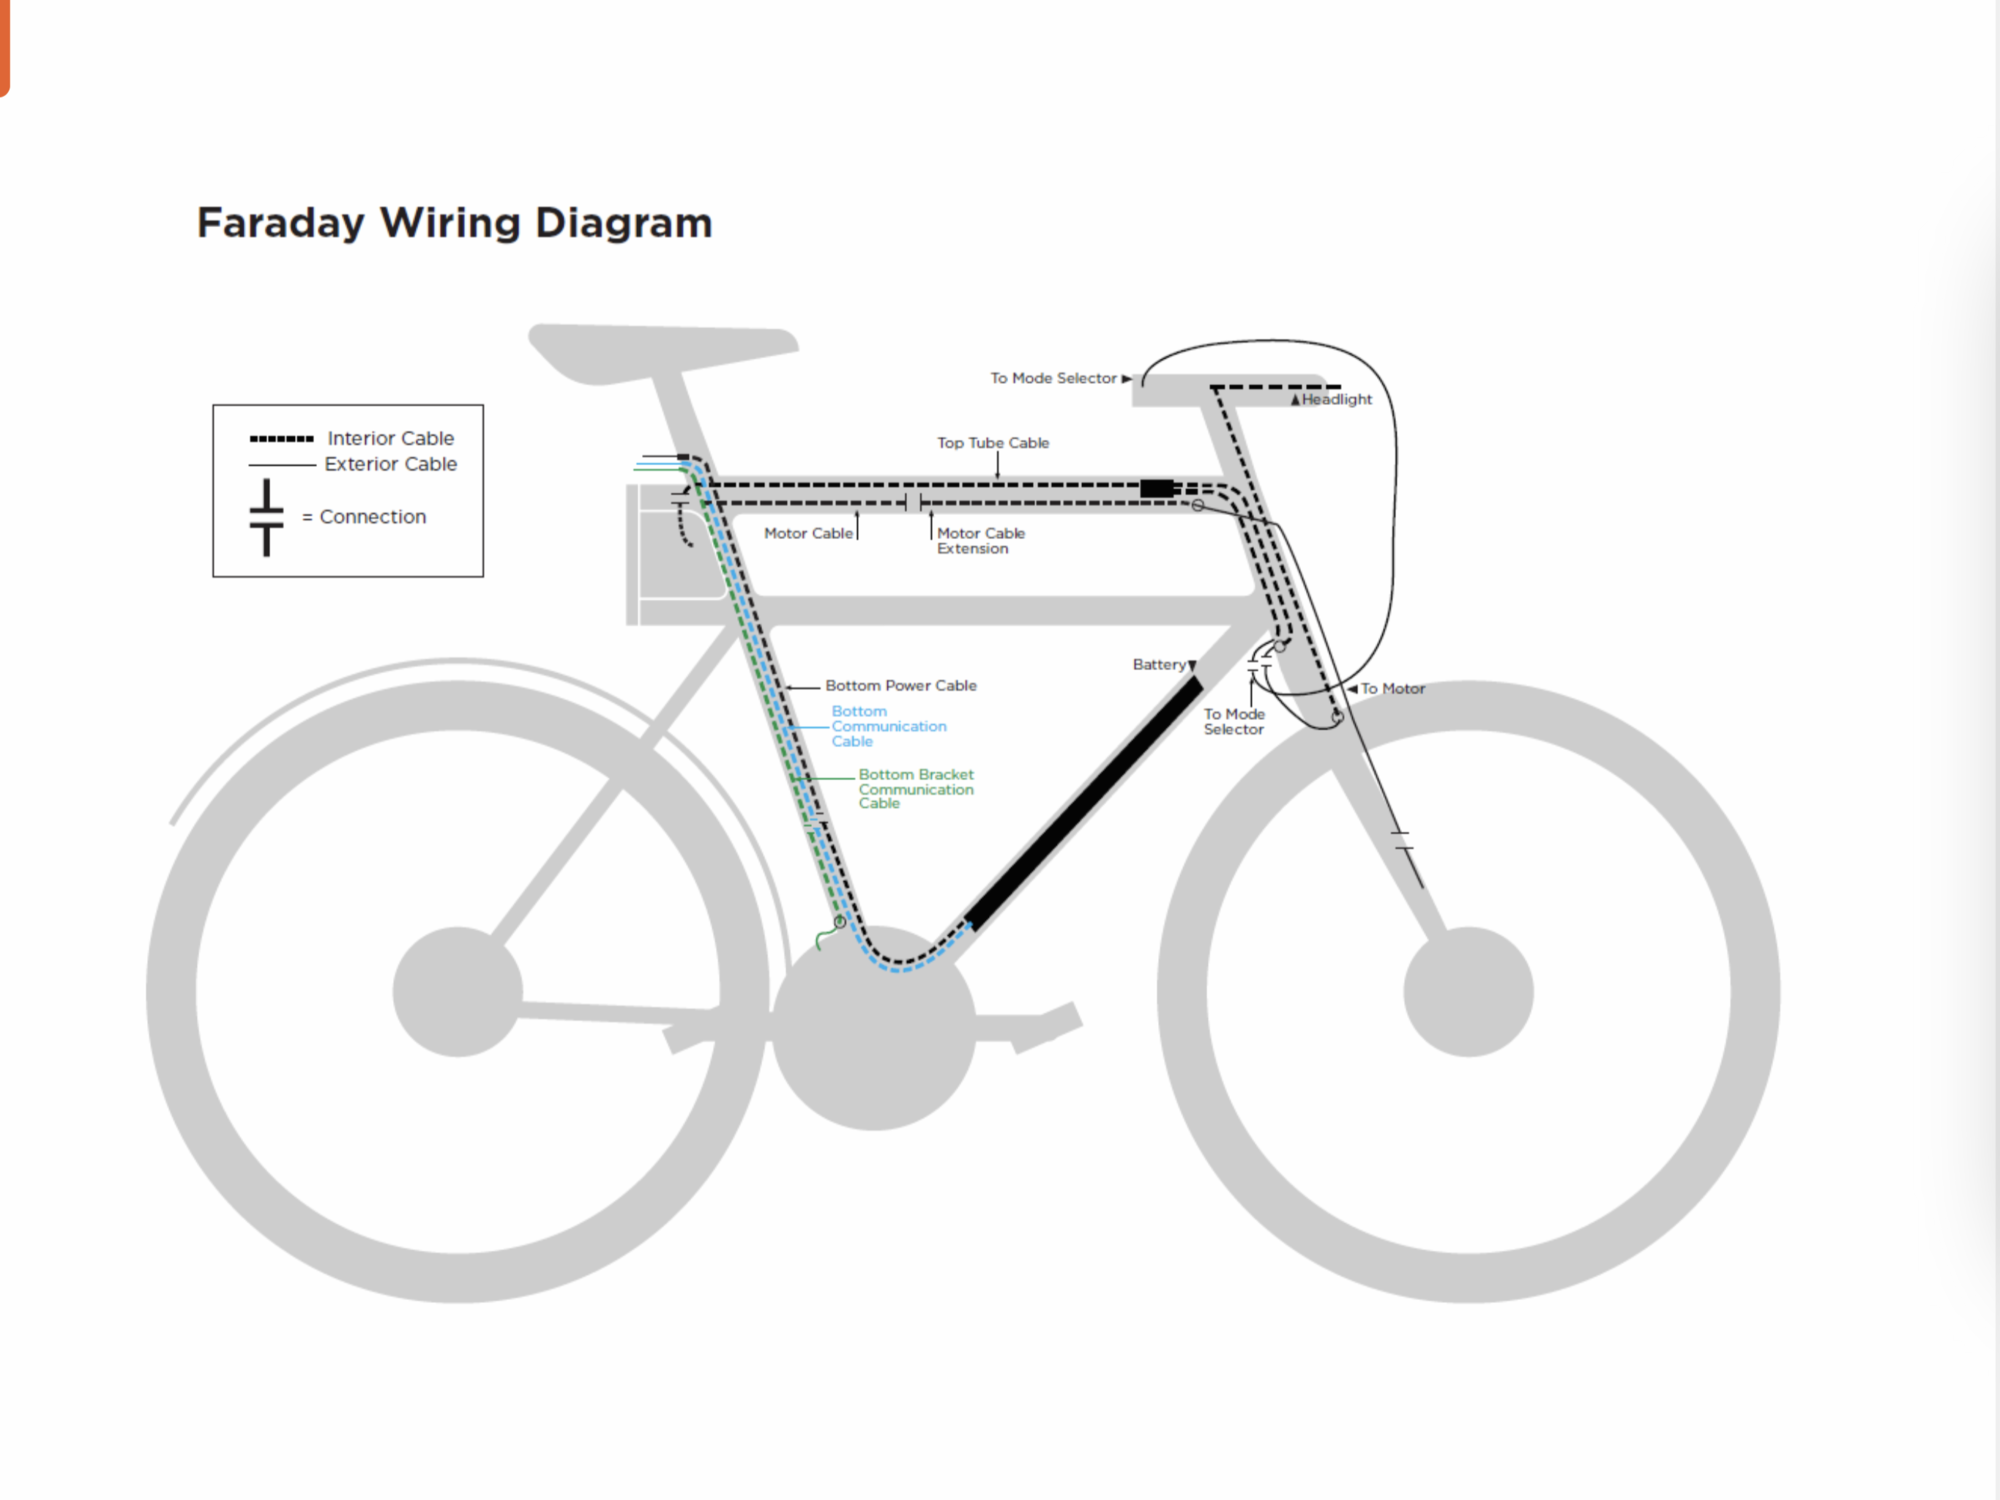
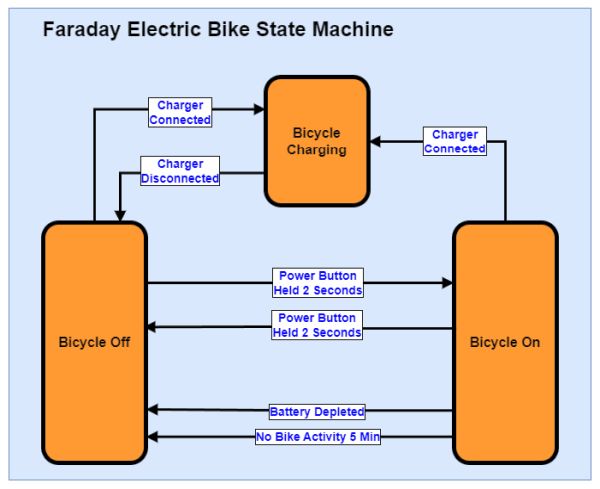
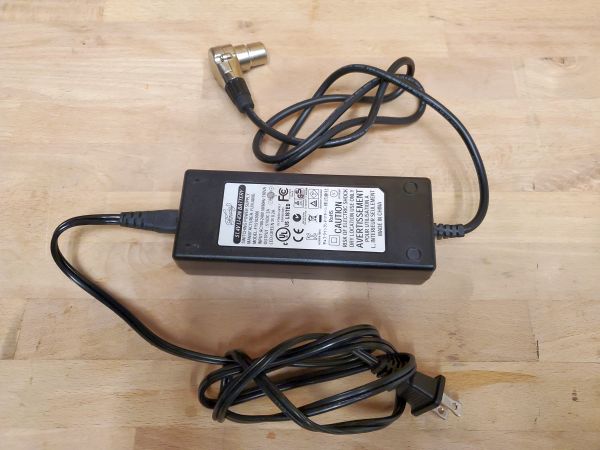
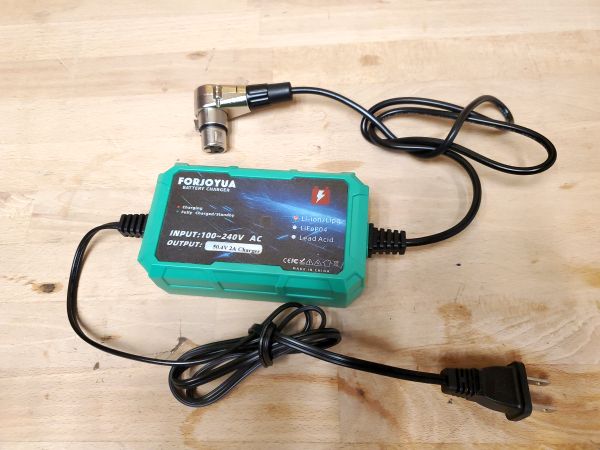
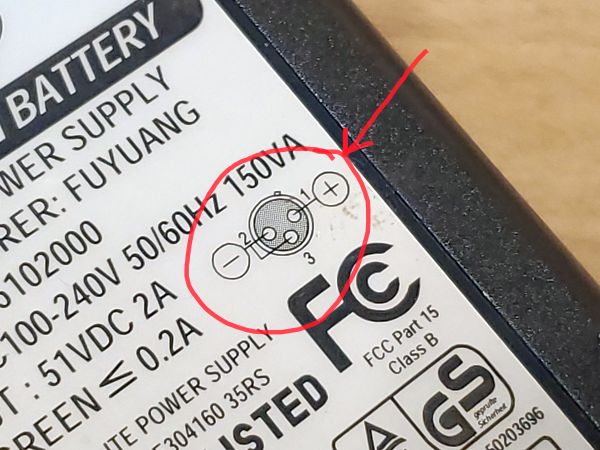
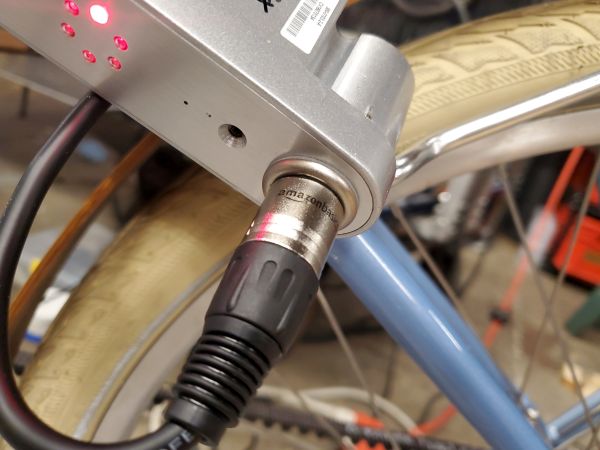
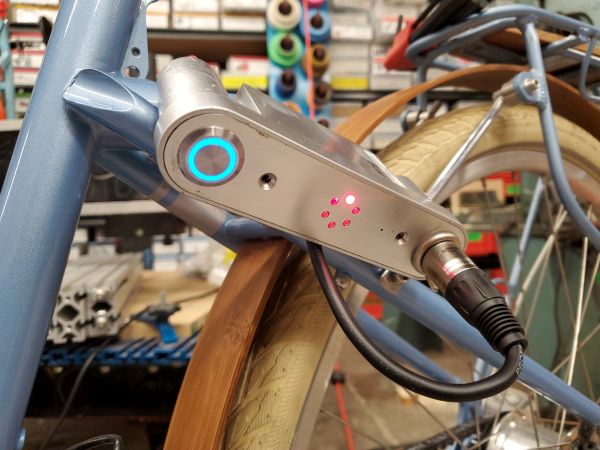
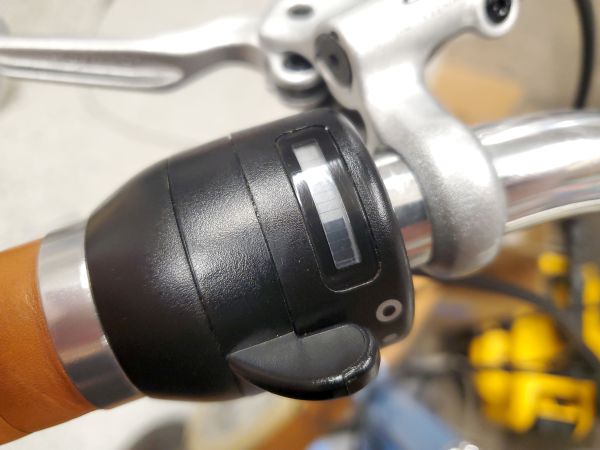
A quick overview of the Faraday Electric BikesHere's a quick advertisement from [Link] listing both the Faraday Cortland and Porteur pricing and some specifications. $3,499 USD is steep. Overall, both are beautiful machines, so lets see how much effort is required to wake these back up and maybe develop some open source hardware for keeping them running. The Faraday's exist in a step-through and conventional topology, both have the same battery module, which lives in the down tube. There appear to be a few variants of controller installed but topologically each bike seems to be the same. Here's some side by side marketing material from Hardware OverviewWe get some basic information from scraping through archive.org, but one of the major selling points of these bicycles initially was the battery-in-tube. This does a great job at hiding the battery in a relatively water tight area while also allowing the bike to appear less electric-bike and more like a fairly standard manual cycle. It's a great idea but it does make servicing the battery a bit difficult. The area the battery occupies is bounded on one side by the steering assembly and the other side by the pedal crank. As a result it's necessary to remove the crank to install or service the battery pack. This is the same on the Porteur or Cortland versions of the bike, both use the same model battery pack in the same location. We also get a hint as to what is going on in the back of the bike. Inside that odd shape is a repackaged sensor-less motor controller with a micro controller middleman board installed. The off the shelf controller is a repackaged xyxyxy, with an intermediate board to interface with the bicycle peripherals. These include the speed selector with e-ink state of charge display, the pushbutton on/off as well as handling some of the rear light animations. We get a slightly more detailed wiring diagram, which is a bit confusing but gives some hints at cable routing, shown below. Bike State MachineAfter doing some testing on-bike while checking against what exists for documentation, we end up with this initial state machine. From this good state machine we can also diagnose when things are not working correctly. Going forward I'm going to refer to these three states defined below. Bicycle ChargingIn this state we observe the bike waking up from the Bicycle Off state. On wake up, it fires up the headlight and begins a charging animation on the rear brake light. The hand-throttle e-ink display begins to update. After X minutes the headlight powers down and the bike continues to charge. At the end of charge, the rear charging animation ends and just displays fully red light. The speed selector switch has no effect at this time, pedaling or requesting torque has no effect. Motion is disabled Bicycle OffIn this state the bike is asleep. Entering this state occurs when there is no bicycle activity for 5 minutes, or if the power button is pressed for 2 seconds. In the transition to this state, the headlight powers down and the rear red light powers off. The e-ink display on the throttle does not appear to update. The speed selector has no effect on removing the bike from this state. Pedaling or requesting torque has no effect. Bicycle OnIn this state the bike is awake. Entering this state results in an animation on the rear brake light, lighting up of the blue ring around the power button, and head light actuation. The e-ink display on the throttle updates to reflect battery status. The speed selector now enables motion. Formulating A PlanMaking a compatible chargerThe Faraday bike wants a 12 cell lithium charger at ~2A. Fortunately this exists on amazon [Link], it just requires re-termination. The Faraday connector is a standard XLR connector, however two of the pins need to be grounded to have correct charger operation. Shown below is the standard charger and a charger I built from amazon parts. The process for making one is included below. Note that the supply from amazon has a Male XLR connector with an incorrect pin-out and does need to be re-terminated. If you do want the exact same connector that is used on the Faraday Bike stock charger, i found it! It's available at Digikey, and the manufacturer part number is R3FZ [Link] Lets quickly assemble a replacement charger. The stock charger does give us exactly what we need . The pin-out is displayed right on the sticker, shown below. This is looking into the connector, not looking at the bike connector. Given that the charger side of the connector is female it's also convenient for testing with a multi meter. The Pin 2-3 connection is bridged. It is very important that this is bridged . The bridged connection tells the bike that it is connected to a charger, if the jumper is not installed, the bike will think it is connected to an external battery. Unfortunately this also opens up the bike to damaging an intermediate PCB, detailed further below. With the supply disconnected from power, cut the connector off of the amazon / Forjoyua charger and separate the two wires. Identify which of the two is positive / negative. With the new female connector from Digikey, feed the new wire through the clamshell and solder positive / negative Collecting all publicly available documentationWith the Faraday website down and some things still working from archive.org We have a few documents to reference from. Note that archive.org seems to have struggled indexing Faraday's site, a lot of things are broken, and there's a lot of digging as a result, so I'm going to dump everything here in an organized fashion. Documentation videos from their YouTube page were moved to unlisted, making finding these instructional clips somewhat difficult to track down.
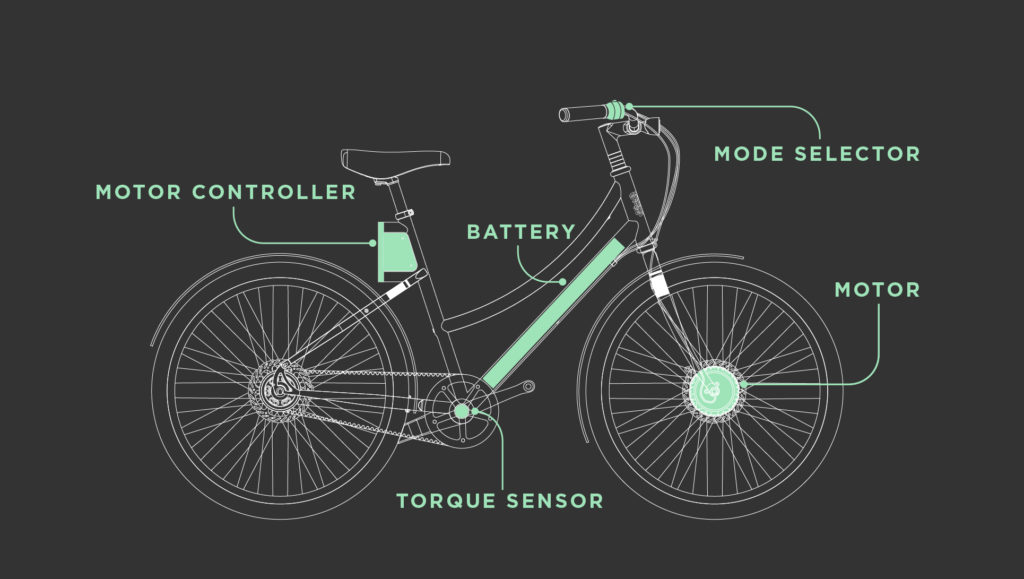
Quick start Guide [PDF][Link] This guide is a basic 2 page how to use the bike, not super useful but it does get us this nice graphic: Guide to replacing mode selector [PDF][Link] This 7 page writeup is specific to the Porteur, but probably also applies to the Cortland model. While this only details removing the module and replacing it, but we do get a note that the throttle and display are all on one cable. normally for these kind of things the "throttle" is hall effect and the display is voltage driven. If I were designing this from scratch, given that we know there are ~12 bars on the state of charge gauge, you could get away with a 4 conductor cable: +5V, Gnd, throttle switch state (analog output) and display input (analog or PWM). Displaying 12 states from analog is fine, but given that the controller is likely some modified bafang-thing, they may have opted for a simple low Hz PWM. Something low enough to not interfere with the three-state assist selector switch. Dealer Handbook [PDF][Link] Now we're getting somewhere, this is a 45 page document intended for dealers who sell, repair or replace parts on these bikes. There is a lot of marketing-speak, but we do get some good diagrams and a lot of step by step photos. Faraday Company Pitch / Tech Talk [2012] [PDF][Link] This is mostly a talk about kickstarter, and a lot of Faraday company lore. The Faraday Bike Patent [2015] [PDF][Link] This is also not super helpful but it is probably the main value for the Faraday company when they were bought out, having a patent to "putting a battery in a tube". We get some hints as to the earlier variant of this bikes construction. Battery Replacement Guide [PDF][Link] This was a broken pdf from archive.org, I was able to recover some images. This is probably intended for a bike shop to replace packs. Owners Manual [PDF][Link] This is a copy from manuals lib, which appears to be a copy from faraday's older website. Headlight Mounting Under Rack [PDF][Link] A quick detailed guide to relocate the headlight to be underneath the front basket assembly. Photos are somewhat low quality but get the idea across Disk Brake Adjustment [PDF]
[Link]
A quick guide to adjust the tension on the disk brakes for adequate brake response Rear Controller Firmware Update Procedure [PDF][Link] This appears to be the process for updating the small middleman controller board between the bike and the off the shelf motor controller. Replacing Bottom Bracket Torque Sensor [PDF][Link] This may be documentation from a third party as it does not match the layout of Faraday's other documentation. Either way it is for a Faraday bike and looks relevant Disk Brake Adjustment [Video]Really basic animation for how the front bike wheel connects to the frame. Video opens in new tab Boxing up a Faraday bike for transport [Video]Video detailing how to box up a Faraday Cortland for shipment in a cardboard box. Seat Technical Bulletin[Link] This doesn't really get us any useful information aside from a note that the bottom brackets are not swappable between different years of bikes, which kind of makes sense as the change from a derailleur to a internal hub gearbox. [Link] Faraday Software Files[Link] Things are getting exciting, we've found some software files up from archive.org. We have the following file folders:
BAC Firmware:Literally just a copy of the battery compiled firmware: BAC Application 5792.exh Battery Utility:A utility to check pack voltage and cell balance. Works best after selecting BAC Update on the Faraday Utility Faraday UtilityThe primary utility for debugging and update a Faraday bicycle, from this you can check status with System Info and enter into a mode where you can fiddle with the motor controller (BAC Door) 
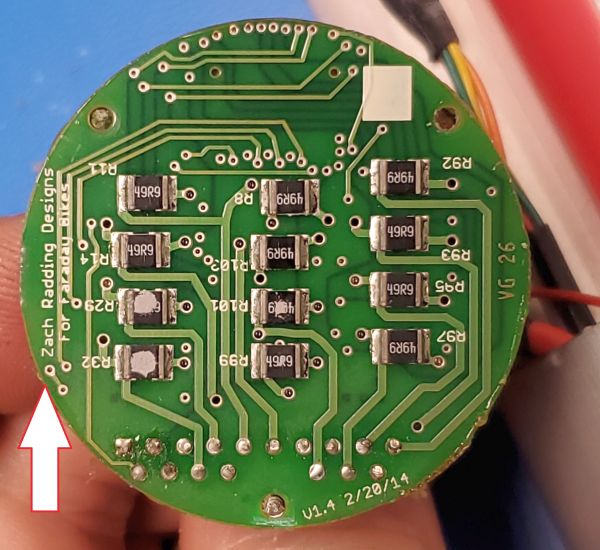
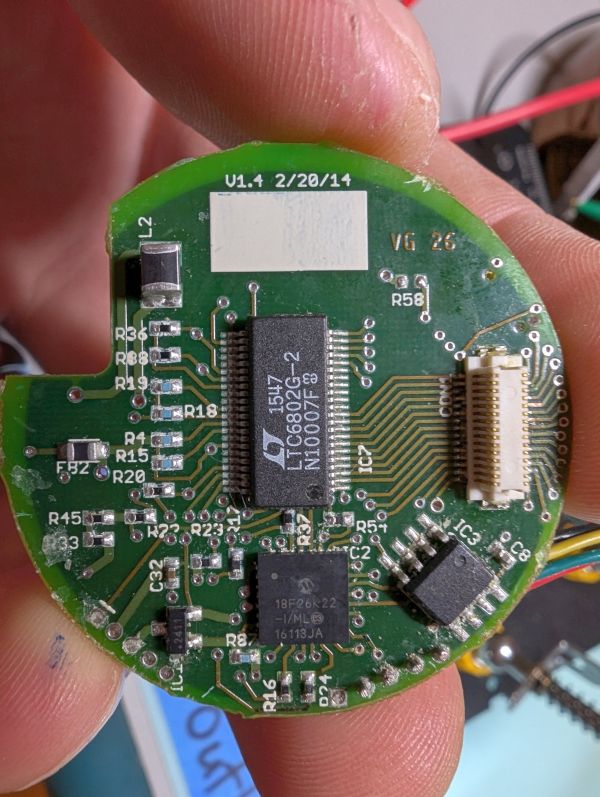
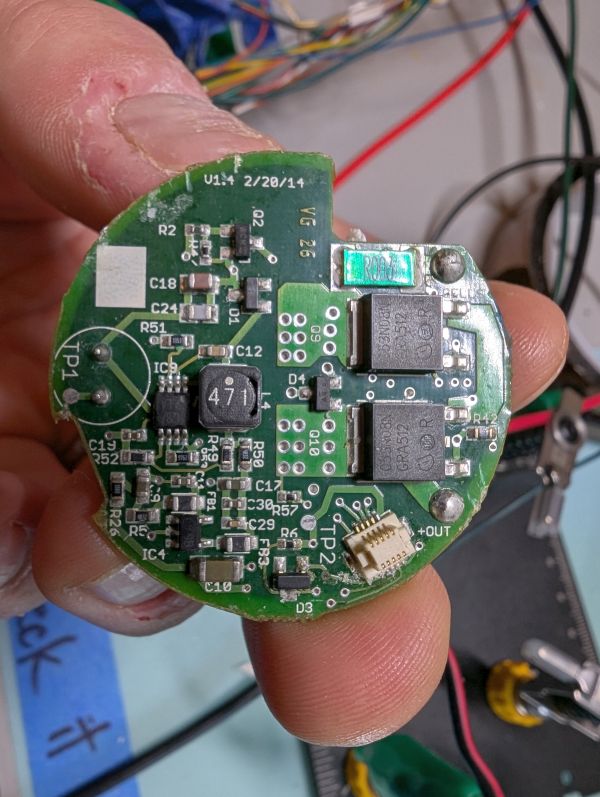
BACDoor ApplicationBAC Door is an application to adjust all of the settings for the motor controller. Motor Parameters:NCTE 43V 11 Rev3.xml TDCM 43V 11 Rev3.xml THUN Rev4 36V.xml RCB FirmwareRearController V2.2.4r.hex Selector FirmwareSelector-nRF51-Firmware-2.1.2r-application.hex Lets look at the motor parameter xml filesWe have three options, and these appear to be specific to the torque sensor used. The parameters in the XML file are unlabeled so it's mostly guessing. There are hints otherwise that the controllers are custom Bafang's, so we can look to see if Bafang has some kind of specification for what parameter is what for their config files. I've seen a Bafang programmer app from Luna Cycle which is probably a good place to start. We can try plugging in an XML file from archive.org and see how it populates. The app is available from here: [Link] and in case it's pulled down it's also served locally from here: [Link]. Curiously the file formats are completely different, so no insights from this tool. We need to make one of these communication cables, without much in terms of documentation. We know it mounts as a COM port, so it's either RS485 or RS232.Recall NoticeIn July 2019 there was a recall for a defective seatpost, which can break off causing rider injury. The specific seatposts have the words “HL” or “Zoom” are engraved on them. Some more details are available here: Consumer Safety Commission. This did not seem to be the cause for Faraday Bicycles closing, it looks like in 2017 they were acquired by Pon Holdings for their patent on in-bicycle-frame battery, and then discontinued the product ~2019. State of Charge Display wakes upWith the battery doing something, lets keep an eye on this custom-ish state of charge display in the handle. Replacing The Stock BatteryI was able to scrounge up some footage from archive.org including a link to a now unlisted youtube video. This appears to be parts of a service video. We see how the battery itself is installed, and yep it requires taking apart the crank assembly which is a bit of work. I get it though, as ideally you never have to replace the battery itself, it's walled off inside the frame. The two little set-screws holding it in place are an interesting choice, I imagine this is mostly to ensure that the pack itself doesnt vertically slide up and down. Here's a full copy of the ~5 minute video for future preservation [74 MB]: [Link] Tearing down the stock batteryWith the donor pack from this blue bike non-responsive, it was time to open up the battery to see how it was constructed and if anything was serviceable With the battery out of the tube we get some more information, this pack is a 12 series cell lithium, and 6.9ah. This puts the cell arrangement as 12S 2P, so each 18650 is 3.45AH. That's a really nice 18650 for this vintage of a bike. The outside of the battery module is aluminum, and so are the end caps. The ends are resistance welded on, via some small spot welds. This somewhat makes sense as they wanted a fairly good seal to prevent water and dust ingress, but it does make the pack really difficul to service. To open the pack I ran a hacksaw blade around the perimiter, taking care to not cut in too deep. This was a slow process but i was able to get the battery to slide out non-cable side first. The bottom 'puck' is the BMS + communications module. This pack seems really difficult to assemble, between the 24 gauge voltage sense wires and the epoxy stackup, it's likely very manual. This is fine for low volume manufacture, but fixing a failed component is not looking promising. Given that this pack was fairly toast, I was up for doing a further disassembly. I did find some contact information buried in this pack, and a design date [02/20/2014]! I bought this bicycle a DECADE after this was designed. Wild. This lowest board is the balancing resistor array for cell balancing, it contacts an aluminum puck heatsink which radiates out to the inside of the bike frame, through the pack outer wall. I did reach out to Zach at http://buildcoolstuff.com/, and will reply if I hear back. Curious to hear the story of this design. Some better shots of the individual boards are available below, these were extracted from other folks interested in reverse engineering these packs. note to check before posting images to see who owns these We get a view below of the microcontroller running the show and the analog front end doing the cell voltage sense The main micro is a Microchip 18F26K22, and the analog front end is an LTC6802G-2, and the back to back fets for charge / discharge control are XYXYXY. There's really not a lot os space to spare on this board-stack design. Talking to the batteryThe battery is an RS485 slave, and as such it does not talk on its own. To check on the battery status, disconnect the blue julet connector and leave the bike power cable connected. Taking a look at the motor controllerThere's not a lot of public information on the motor controller, and this is likely due to it's quite sealed design. We only get a serial number that doesn't turn up useful google results: "300-0103-2-A" The ever attentive reader, [name], emailed and he noticed that the tools provided for the Faraday's matched the software tool that https://support.accelerated-systems.com/wp-content/uploads/2021/04/ASI_eMobility_Controllers_Spec_Sheet_w_Pin_Out-_Table.pdf Designing a replacement batteryWe know that the in-tube battery is a 12S2P configuration, with a nameplate capacity of 306 wh. This equates to 12.75wh 18650's or 3.5ah cells? . That's surprising, given these were manufactured starting 2016. A bike rental goes awryI was visiting New Mexico to give a talk at the TRTR conference on Nuclear Instrumentation, and while the conference occupies most of the day, there are pockets of time that work splendidly for exploring the state. I've previously brought along a bicycle when the conference was on the east coast, as it's fairly easy to bring a bike on an Amtrak, but flying with a cycle and checked bag is a bit of work. I had queue'd up a cycle rental but alas it fell through. New Mexico has a fairly active hot air balloon event, and in this case it was the weekend after the conference. A lot of things, like rental bikes, were gobbled up. Craigslist saves the day
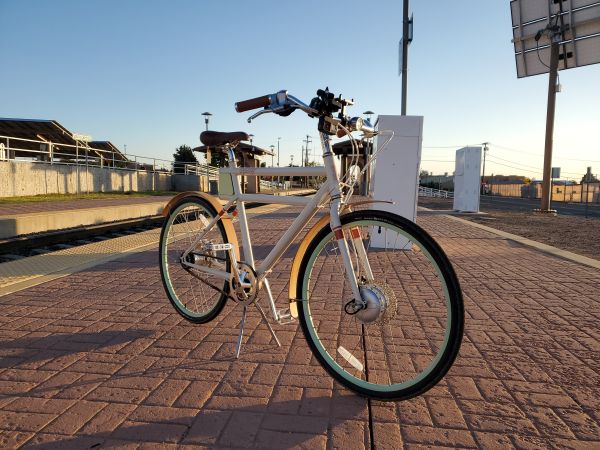
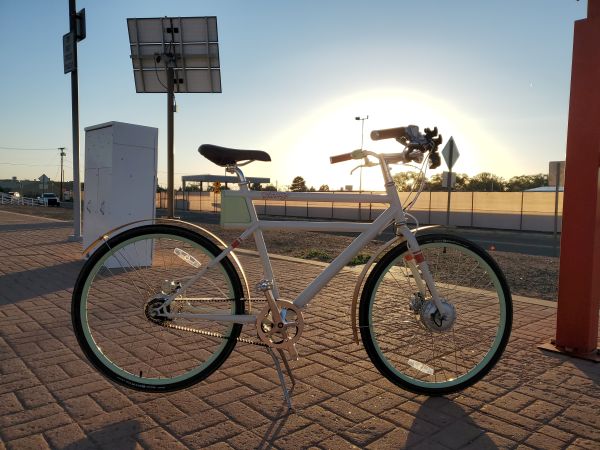
For the sake of curiosity, was there a nearby cycle that I could borrow from the craigslist? The craigslist bike was in the wonderful hills of Santa Fe, and by hills I really meant hills. It was listed as non-working but, with intimate knowledge of these bikes, I plotted to build an auxiliary pack for the ride back. The rear XLR connector was intended to support bicycle charging, and also, an auxiliary battery module, which was never released. I brought along a USB RS485 + Julet adapter, made purely from whatever I could get shipped to the hotel venue from Amazon. I did try to find some local venues, but the pickings were slim for such specific hardware. Making a temporary battery was going to be curious. I found a nearby Lowes hardware store across the highway from the conference center, and my hunt was simple: A power tool battery that was somewhere in the 10-13 series cell configuration. I did not need enormous capacity, but the hilly cycle ride back would be a lot easier with 200W of assistance. Lowes was, incredibly expensive. Power tool batteries were also quite hidden, as apparently they 'walk off' frequently. I was a bit defeated, on the way out I checked the e-waste recycling bin and lo, there was a familiar sight, a knockoff 40V greenworks pack. It looked like some of the packs from [insert link to skateboard project]. I had some travel-tools with me, so let's diagnose the failed greenworks pack, charge it and make an adapter to connect to the bike as an aux battery. The last part i needed was an XLR cable. I found the conference center IT person and convincingly asked for an XLR, after describing my plan. We now have the trifecta, let's wake up the greenworks pack and solder up some goofy adapter cables. We do not have a lot of hardware at our disposal, but we have enough to be dangerous. The power tool battery is assembled with torx, but fortunately a metric Allen key and pressure can be used to convince the pack to come apart. This knockoff pack was listed as '6ah', which was incredibly unlikely, as these were generally 10S 2P, which would require modern 3AH 18650 cells. These are generally pricey, let's open up the pack and find out why it was unhappy. Field repairs from a field kitI think a quick overview of the field kit is required. I wanted a small bag I could travel with that would function as a very basic debug / diagnostics kit. I centered around USB-PD for all the tools, as this would allow for a single high power supply that could feed individual tools. USB-C soldering irons have been around for a few years, and this one is a [XYXYX model number]. For a portable bench supply, I went with a homegrown approach, this is an amazon buck module, attached to a boost converter which takes a USB PD trigger's 20V and jumps it up to ~60V. This is then CC-CV controllable from 0-55V. Returning from the desertTrain ride back on the railrunnerAfter making it to the station, I removed the somewhat dubious auxiliary battery and got some fairly excellent sunset beauty shots. Concluding Remarks:
Have you noticed that there are no
advertisements or ridiculous pop ups?
|
Post your comments! |
|
Comment Box loading
|

