
Dane Kouttron
Project Started: 03/2023
Quick Project: "Lassy" 10 Tap Stand Repair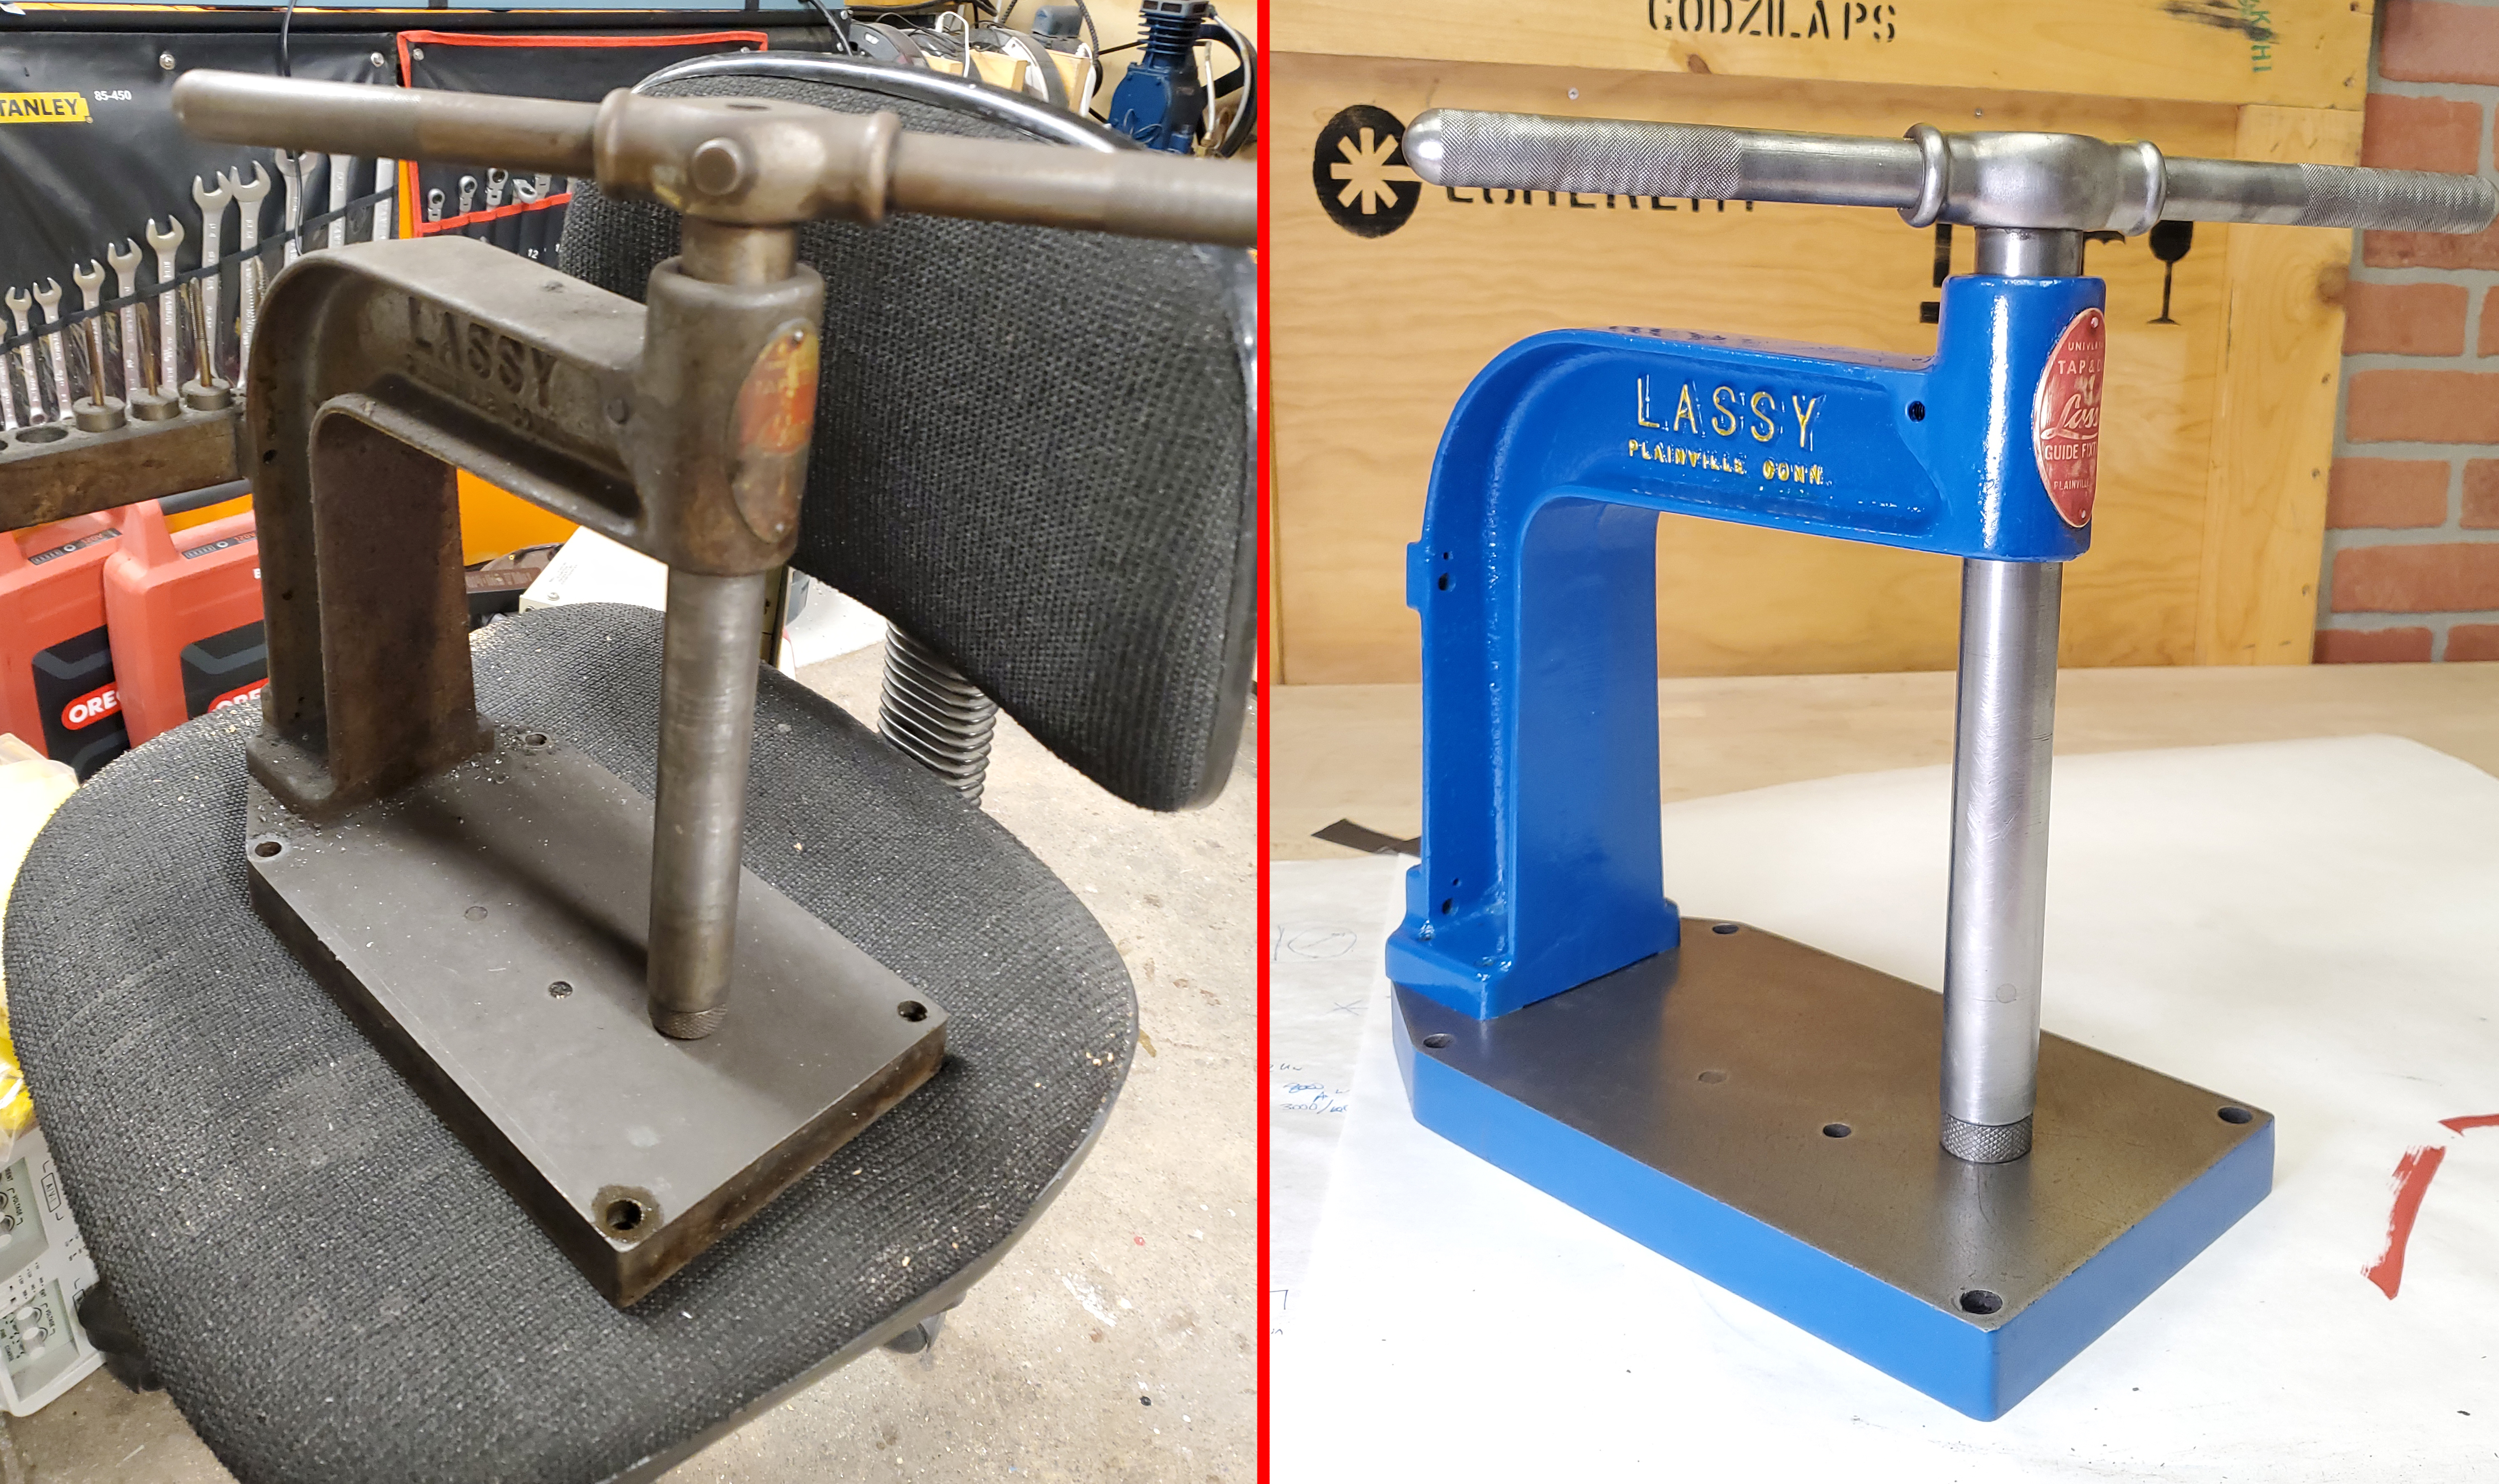
Manual tap-stands never seemed to appear on the surplus market. New ones are ~200-400 USD which is a bit too high for such an intermittently used tool. I finally found one recently for the correct price (free but needs work), so join in for a quick revitalization of a manual tap stand. |
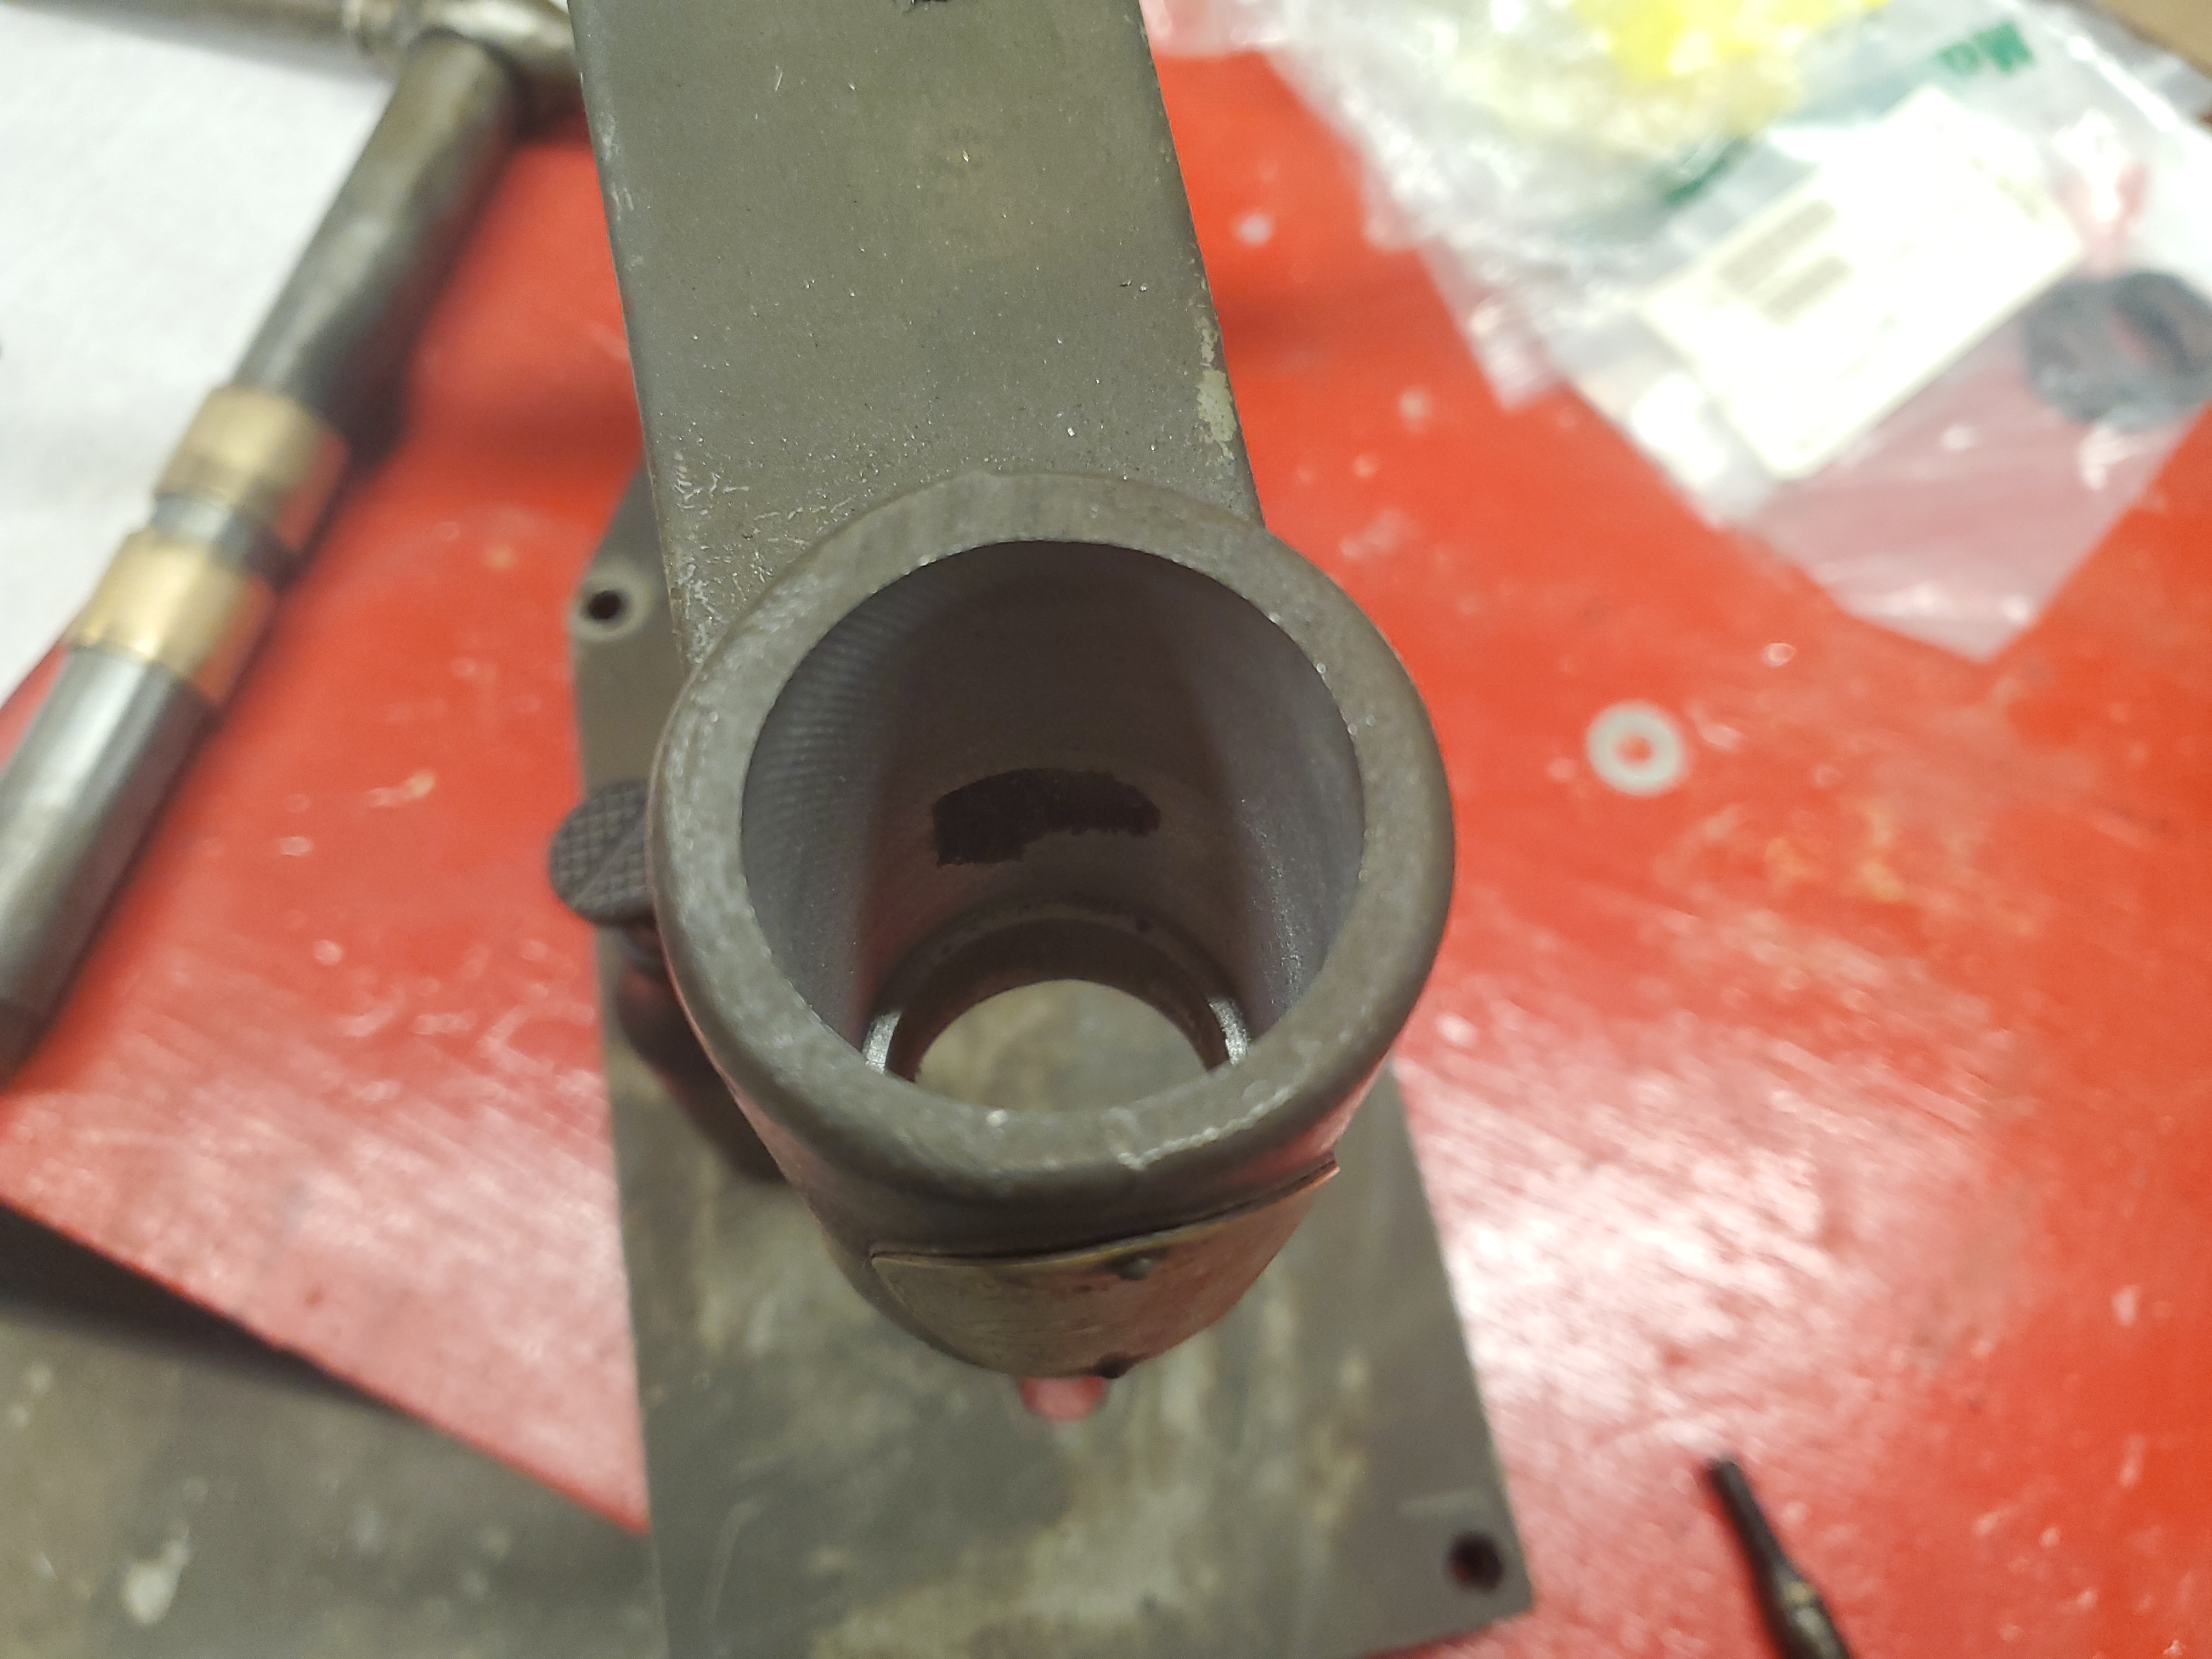
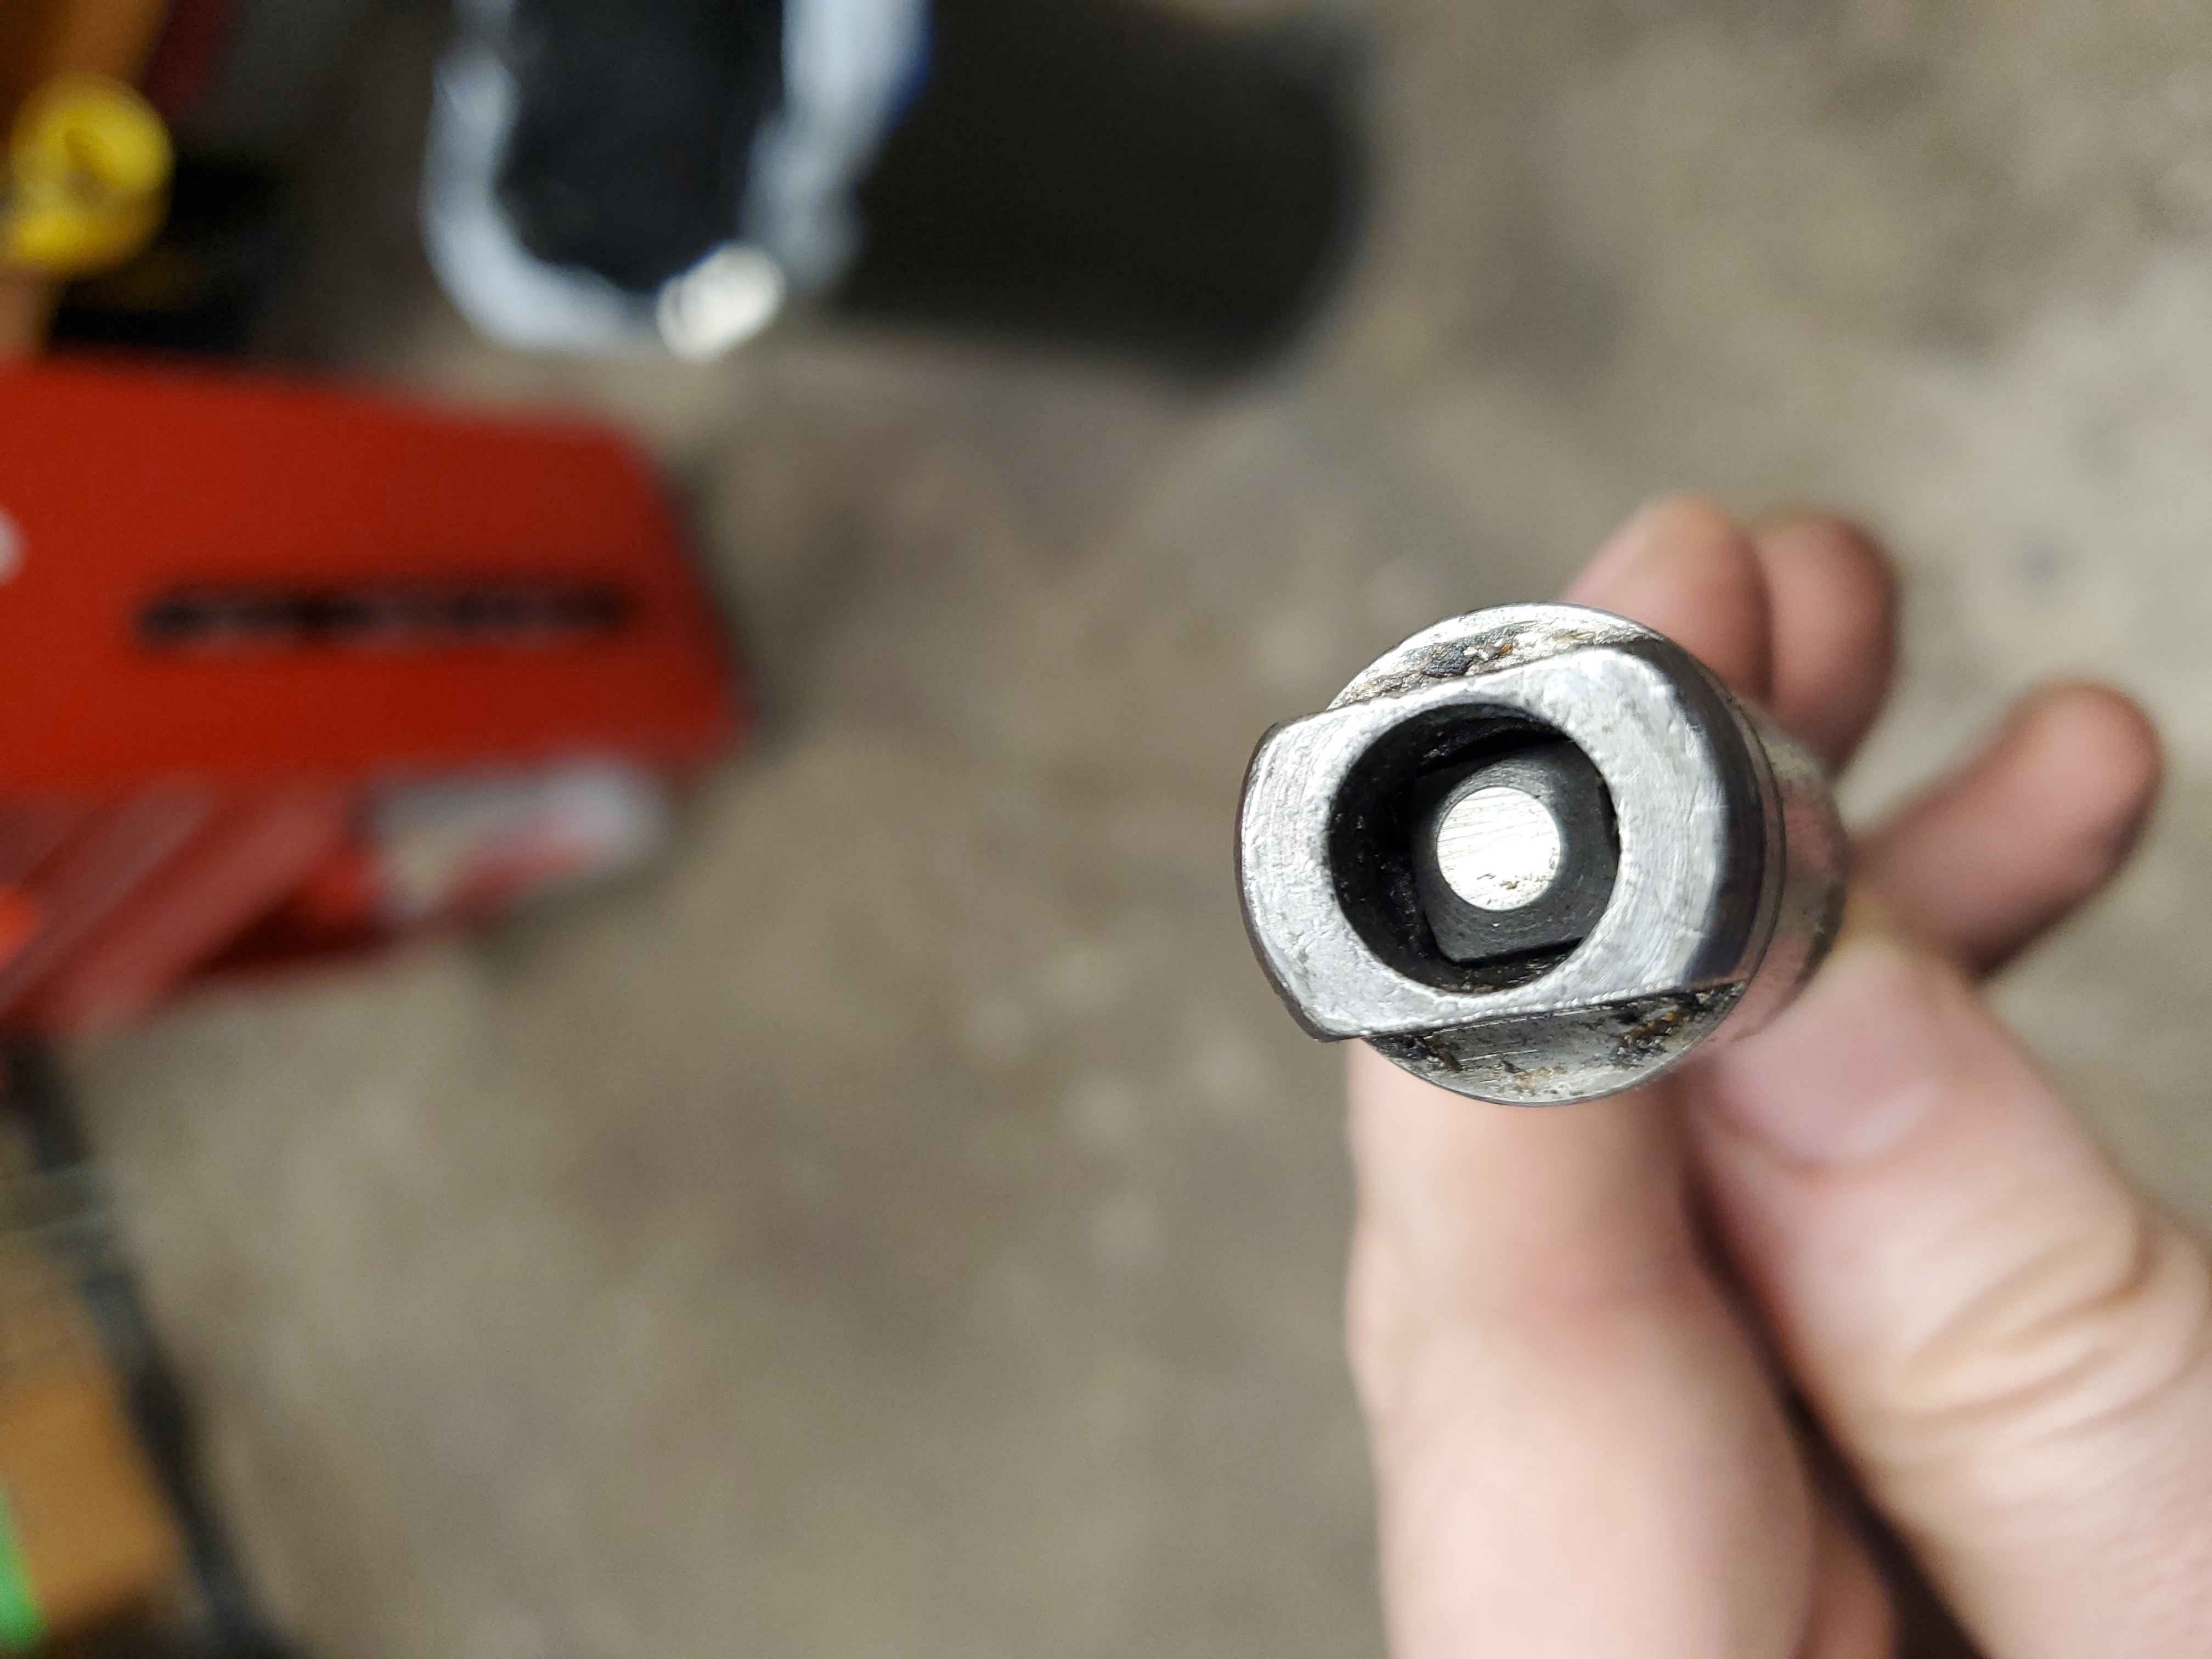
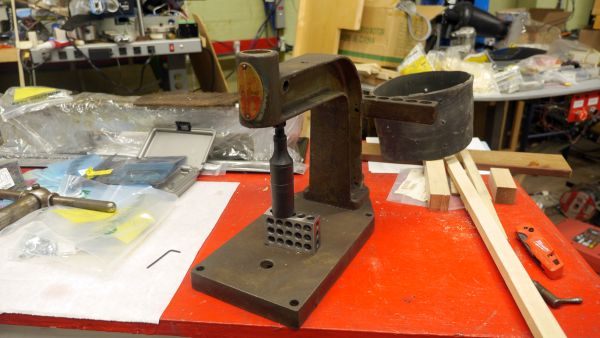
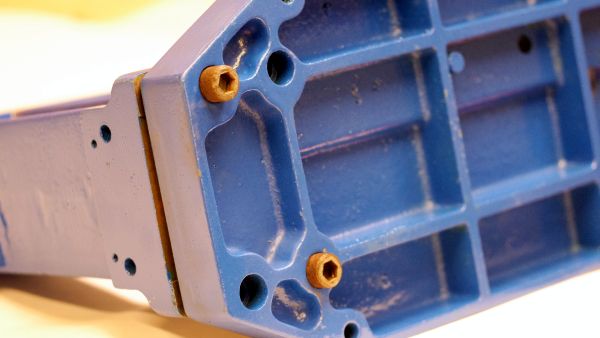
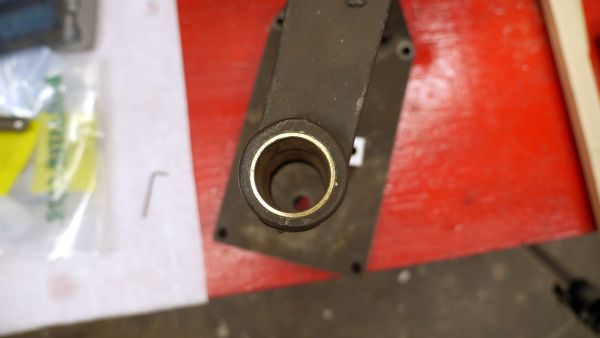
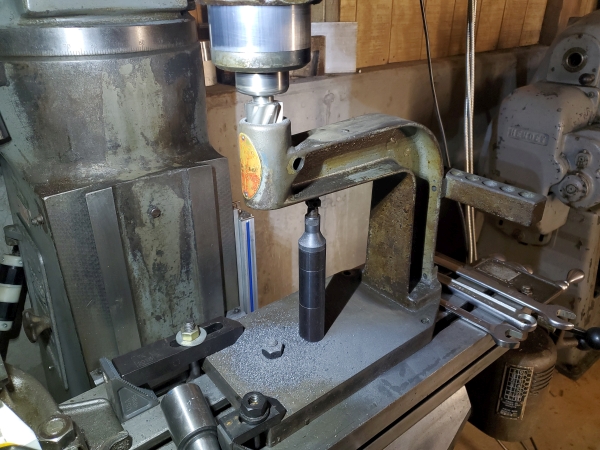
An old tap stand appearsThis is a heavily used tap stand from a tool and die machine shop outside of Boston. It's remarkably solid, and clearly at home in an actual shop. It even came with its associated quick-change tap holders, which are a bit odd design wise. It is dirty but that's not too hard to fix. The tap handle does wobble a lot, its a cast iron stand that mates with a steel tap handle so the cast iron wore out and ended up wearing in an oval-shape. Not too bad but something that can be fixed without too much fuss. When I found out how cheap bronze bushings were on mcmaster-carr [link], I plotted fixing the wiggle by just pressing in some bushings. To do this I would however either need a big boring bar or 'just the right size' end-mill. As the top of this is a casting, there aren't really good flat surfaces to grab. I debated making a jig, or mounting it in the tiny lathe and using the lathe to bore the hole but that would get somewhat ridiculous. I did not have the vertical space to do this assembled in the CNC, but I did have access to a big ol' Bridgeport and it made fairly quick work of it. Tap stand itself was clamped down to the Bridgeport bed and then a tiny machinist jack was used to support the underside of the tap stand to prevent it from snapping due to off-axis loads. One of the annoying parts about cast iron / cast whatever this is made of, is that its somewhat abrasive and slow to cut. A three inch long 1 + 7/16" end mill was used for boring this out, I was fortunate that the right size end-mill was available, thanks again Thomas! To make this more interesting instead of boring the whole way through we bored 'just-enough' to fit two bushings. This captures the bushings at the base, in case the press-fit was loose. You can see the step in the bored out overhead shot. You can also see the drilled-thru perpendicular spot for a locking clamp. This locks the tap stand in place both vertically and also rotationally. I have no idea why you would want this, its one thing if you're adding a stop at a fixed height but it also locks it rotationally. Technically I can drill out the bushing to add the lock back in but realistically I didn't understand why it was necessary in the first place and opted to not damage the bushing just to add a feature I didn't intend to use. 
Time to press-in the bushings. Again, this was somewhat awkward, given how giant this tap stand is. As there's two bushings I pressed in one at a time while watching out for any signs of the brass/bronze parts deforming. I didn't really have an easy way to force these to go in straight so this was very much a 'take it slow' activity. I did end up using a machinist jack to support the underside of the tap stand during the pressing operation. This diverted any force down onto the base. It was just the right depth and the bushings did not protrude at all one top Do the bushings really do anything?The fit is fantastic, and not only that the two stacked bushings give it so much lateral contact area that wiggle is significantly reduced. The bushings do however interact with some kind of rotation lock bolt that was installed. I'm not really sure why you would want to 'lock' the spindle of a tap stand and i cant really see myself using that. It would be fairly straightforward to drill out and modify the lock, but I didn't really understand why you would want that feature. 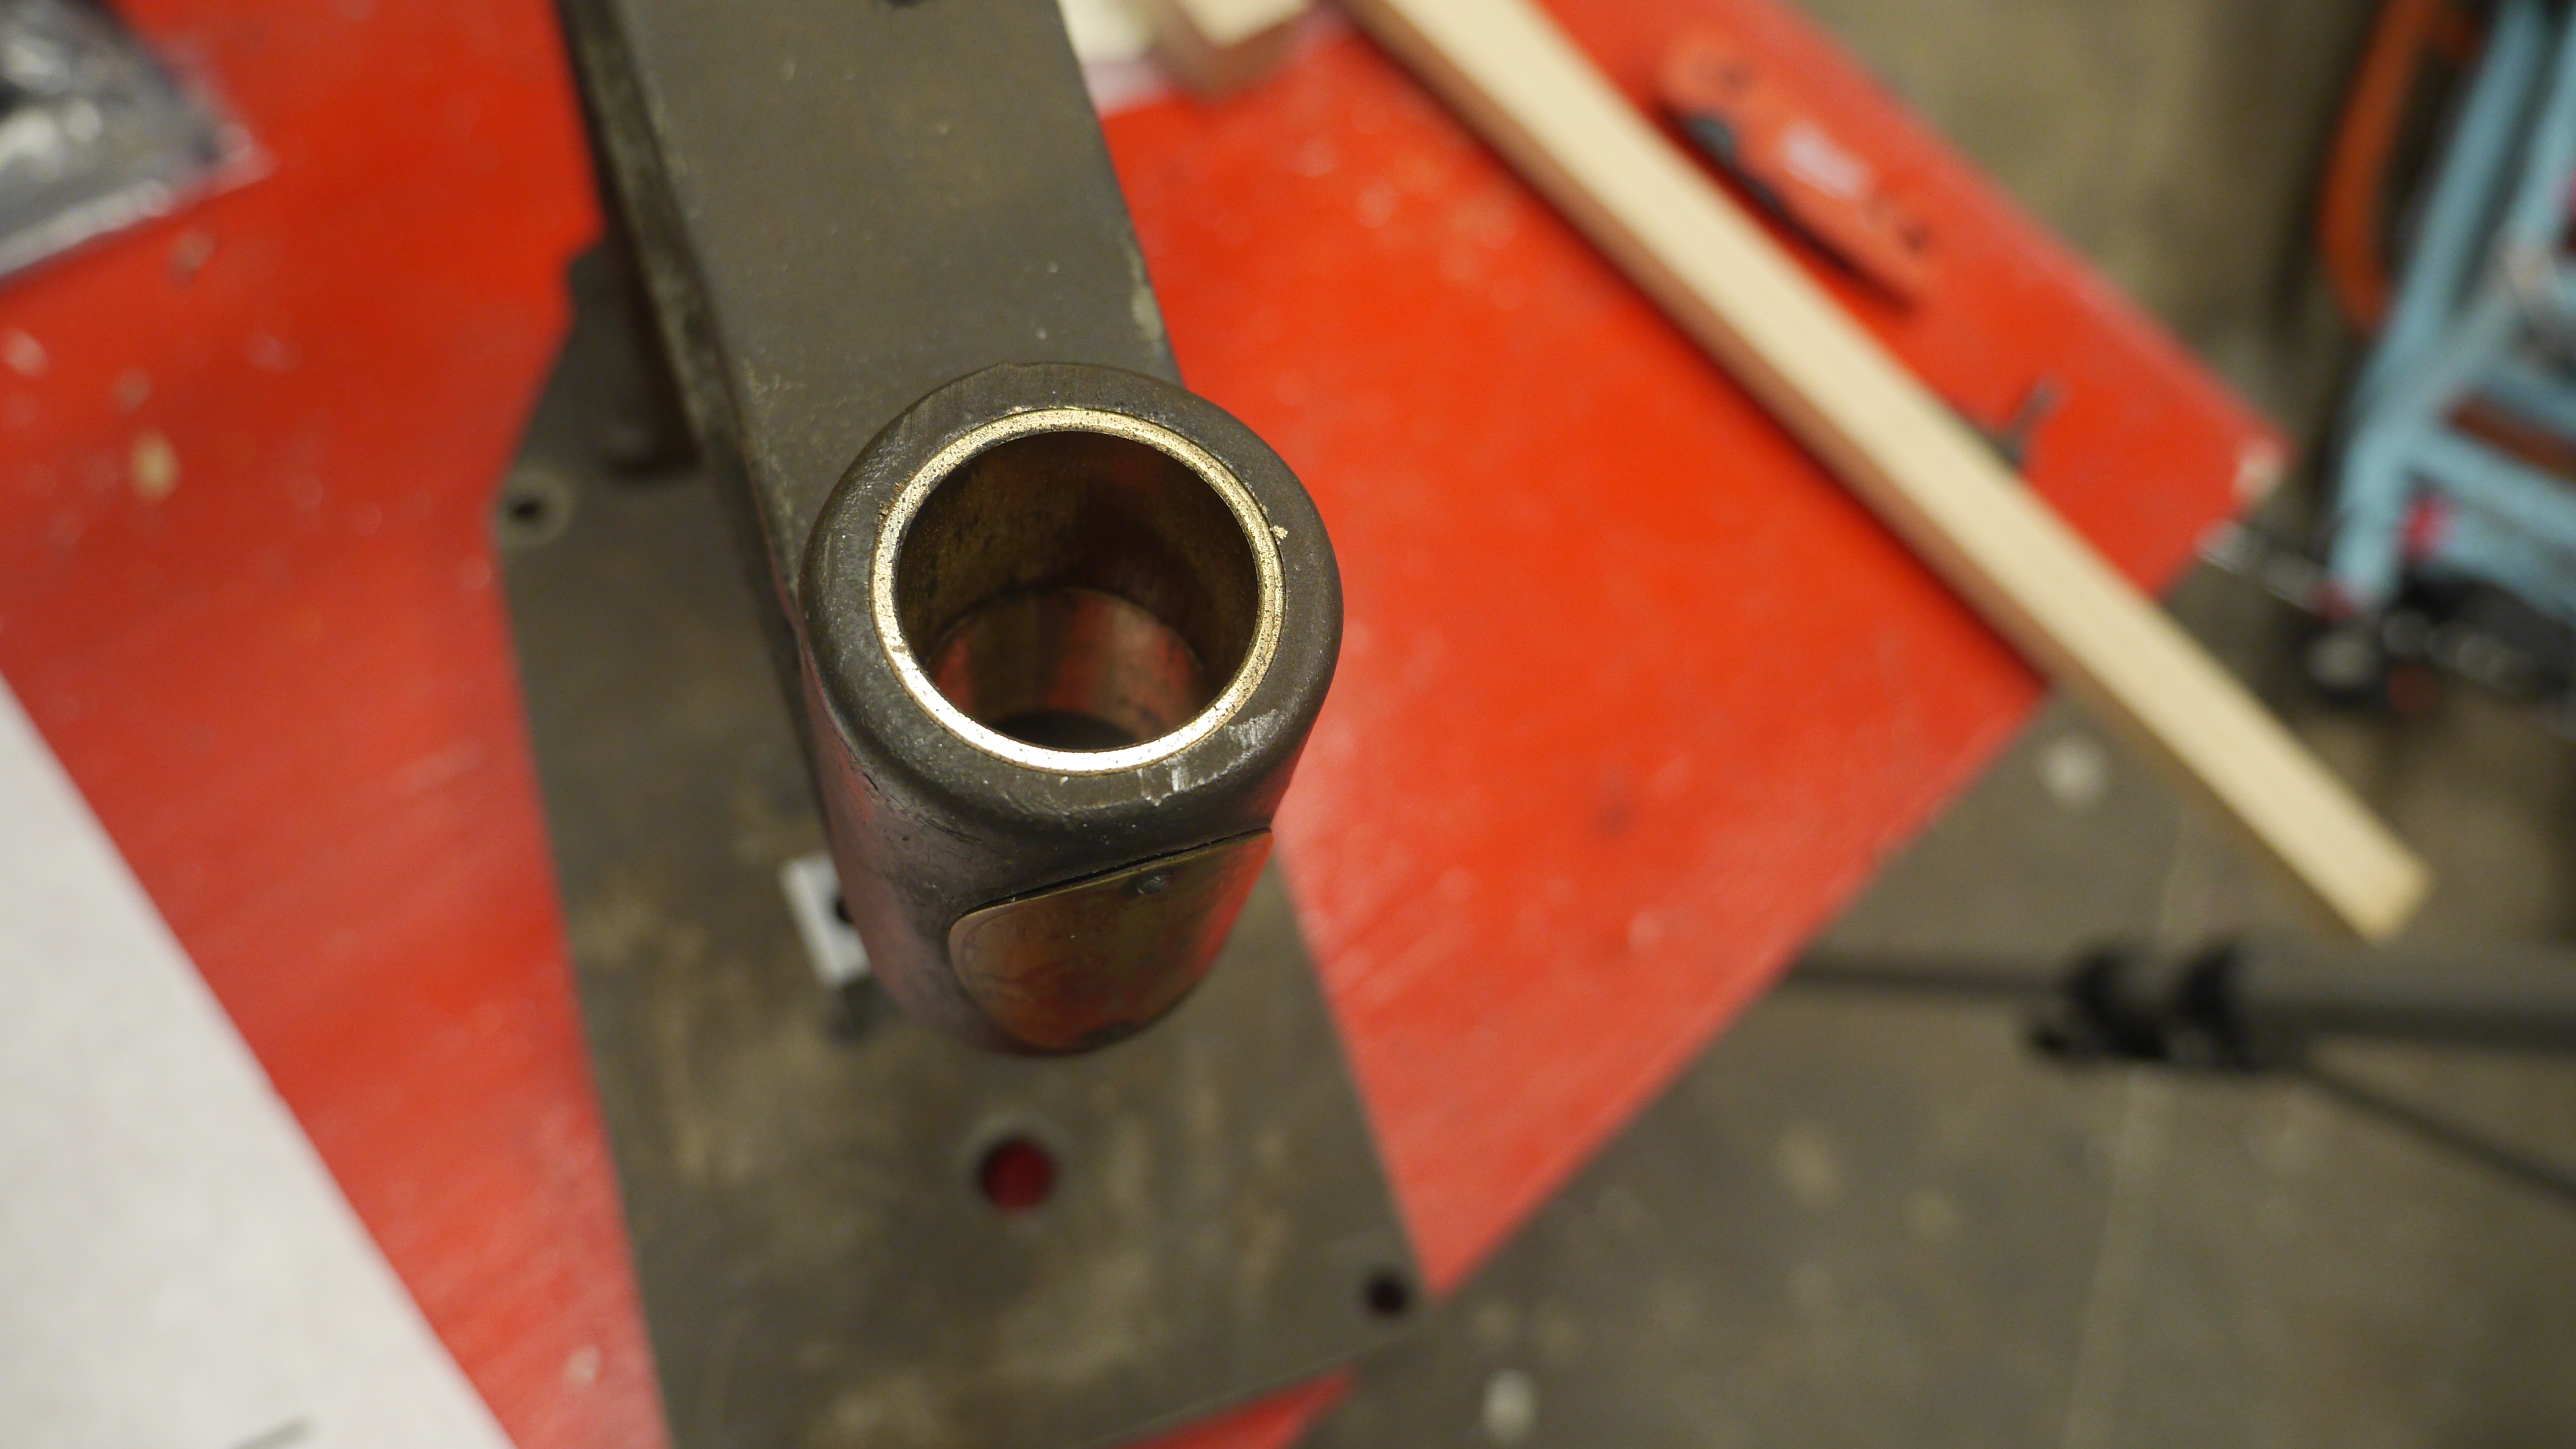
This is the tap handle with an old 1/4-20 tap installed, with the tap rubbing against the wooden table. That's a solid 20 seconds of spinning! I was really impressed by how well this actually worked out. Still plenty of work to do to clean this up but off to a good start. There is very little wiggle on the tap holder shaft, even at the full extension. Turns out those bushings really worked a treat! I debated stopping here and figuring out a modern alternative to the quick-change tap holders (to support metric taps, etc), but this kind of really yelled out for a fresh coat of paint. Its probably worth it and will definitely spruce things up. To prep for paint I started by removing the base and the wooden quick-change tap holder. This also makes it easier to do surface prep and strip off whatever grunge coat was last on this. The base came off with four Allen head socket screws that were really nestled into place. With the arm and the base separated it was going to be way easier to clean and paint. When i flipped this over i found out that it was likely gray, or at least the bottom was battleship-gray colored. I had initially tried acetone, but whatever this was painted with was fairly stubborn. I upgraded to spray on paint stripper in a ventilated space. This is not a terribly fast process but it eventually worked its way to removing the paint. This would have been way quicker in a sand / bead blasting cabinet but alas I don't have a big enough compressor or a blasting cabinet. In retrospect it would have probably been wise to shove a shop-towel in the bushing area so less of the paint stripper got to the bushing area. I added some hot melt glue and tape to cover the nameplate to help prevent it from fading but its not clear if the vapors from the paint stripper made their way through that layer. Even with strong paint stripper it did take a while. Shown below is a time-lapse of the stripper doing its thing. The paint did come off in gooey clumps, fortunately this stripper did not attack the surface so there was no excess pitting. I still couldn't tell what color this used to be, it was like a gray-green from some of the paint that stripped off. A small wire brush helped get the straggling pieces of paint off. What information is available about this relic?
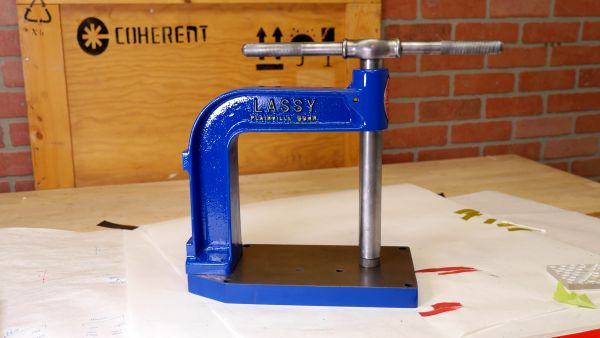
We know that the base of the unit is 'battleship gray-ish', which is fine but I may opt for something more attractive for the final color. Lets do some quick historical digging to verify it was actually gray. Moreover, what year is this gadget, where was it made? This could look cool in an enamel gray or even a really bright red. The first hit is Vintage Machinery [link] which has a possibly newer / more featured version. 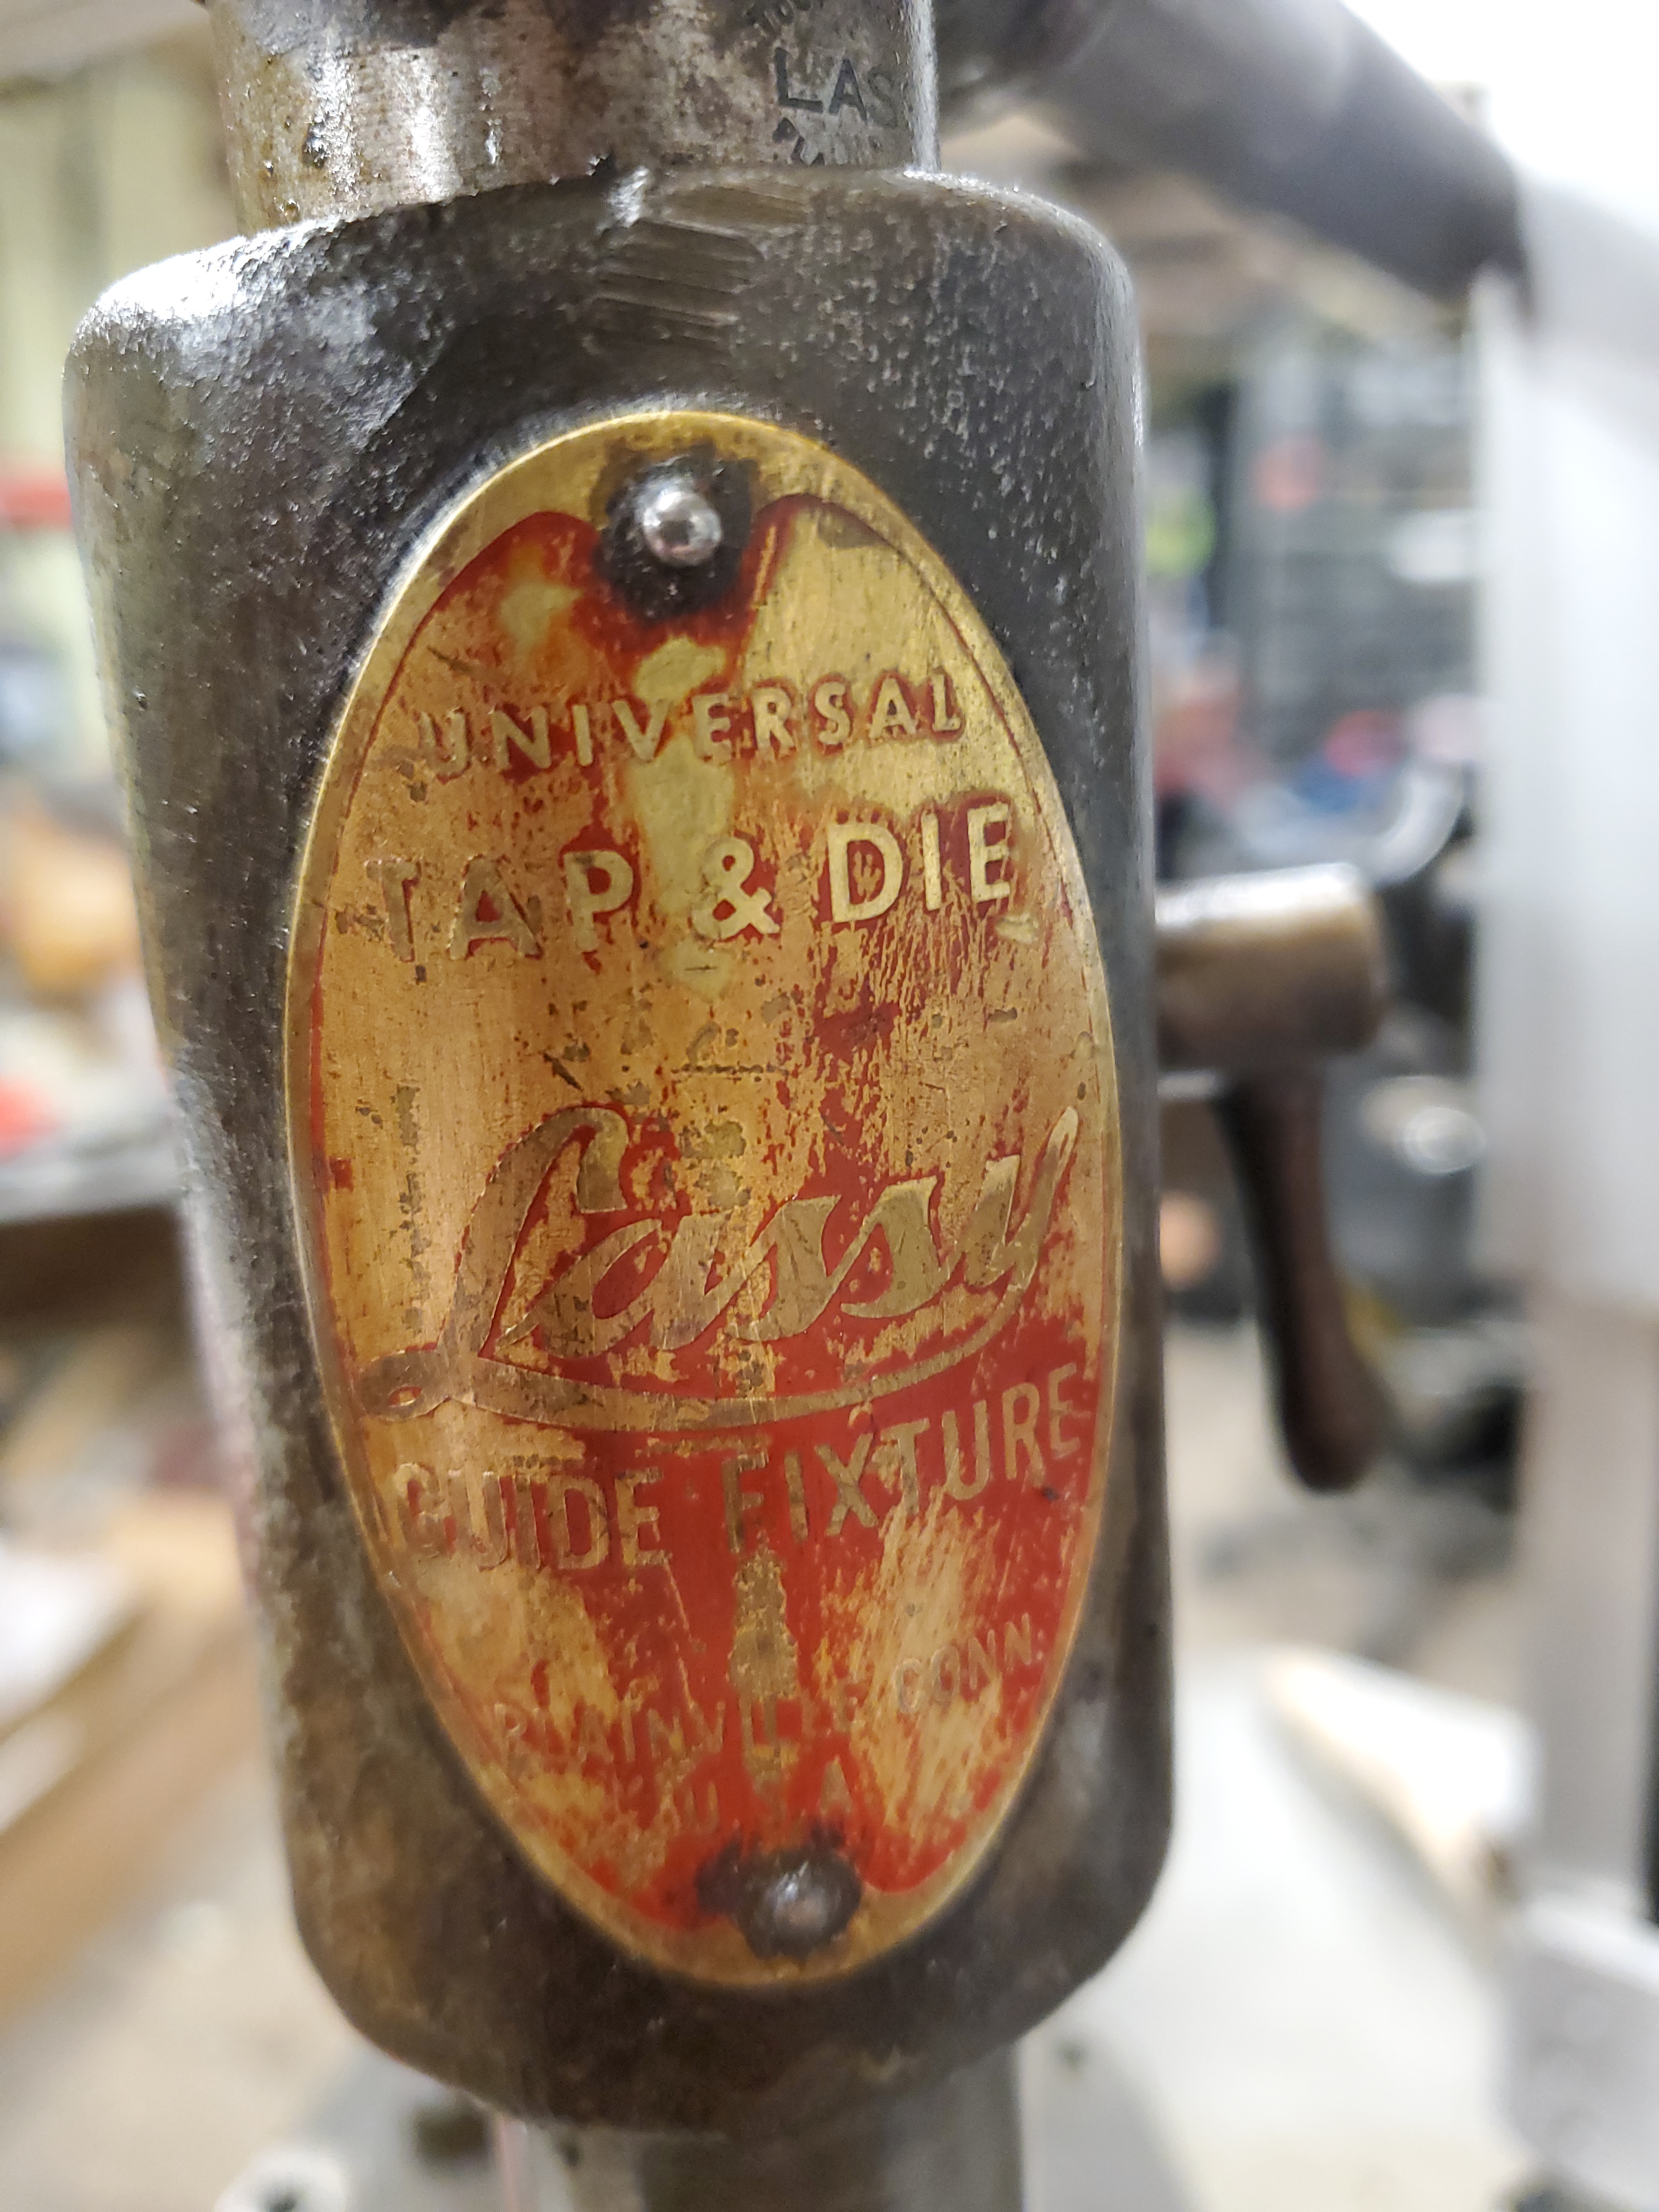
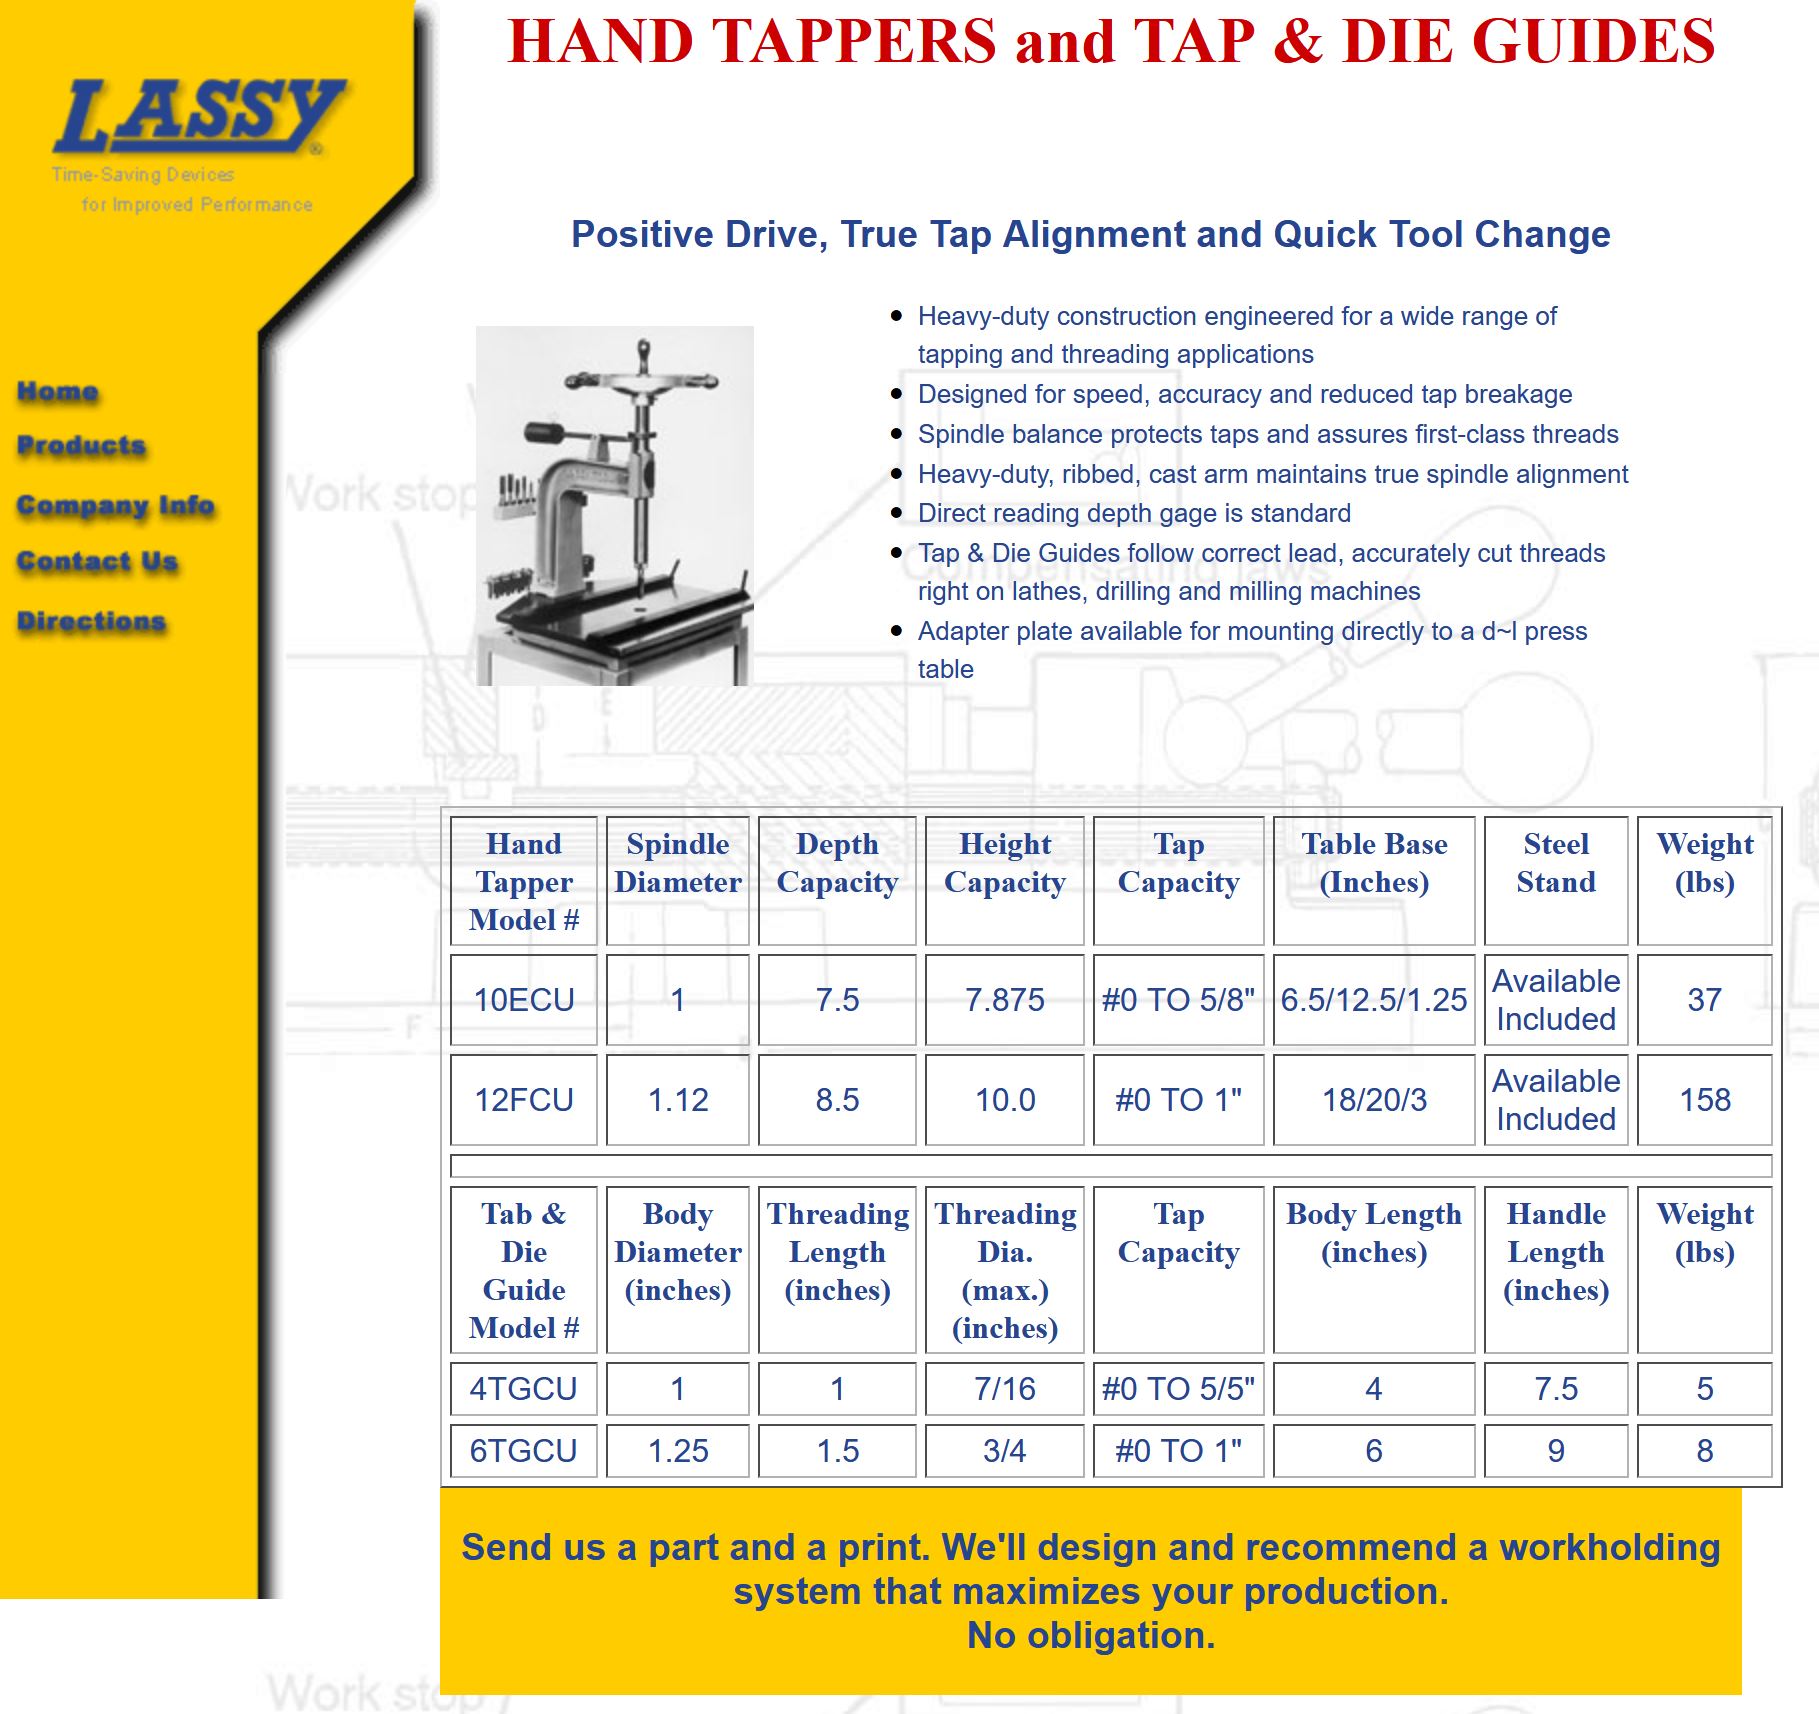
Wait, the Lassy company is still around? Their website even still works?!? Check out http://www.lassytools.com/ They even detail some of their old models! So maybe this is a Lassy 10 ECU. I reached out to them to see if they can confirm what it actually is, but have not heard back. May be worth giving them a call during the daytime. For the sake of curiosity I checked out what else is available in this form factor new. The Lassy is a 7.5" depth tap stand, so lets check out whats available in this footprint. McMaster-CarrMcMaster is not know for their low prices, but its a reasonable reference. Their nearly identical (7.5" depth) tap stand comes in at \$505 USD[link]. Part of how McMaster works is not showing the actual vendor so we don't really get a lot of details. It is mechanically very similar. 14" tall, same depth, similar size base. 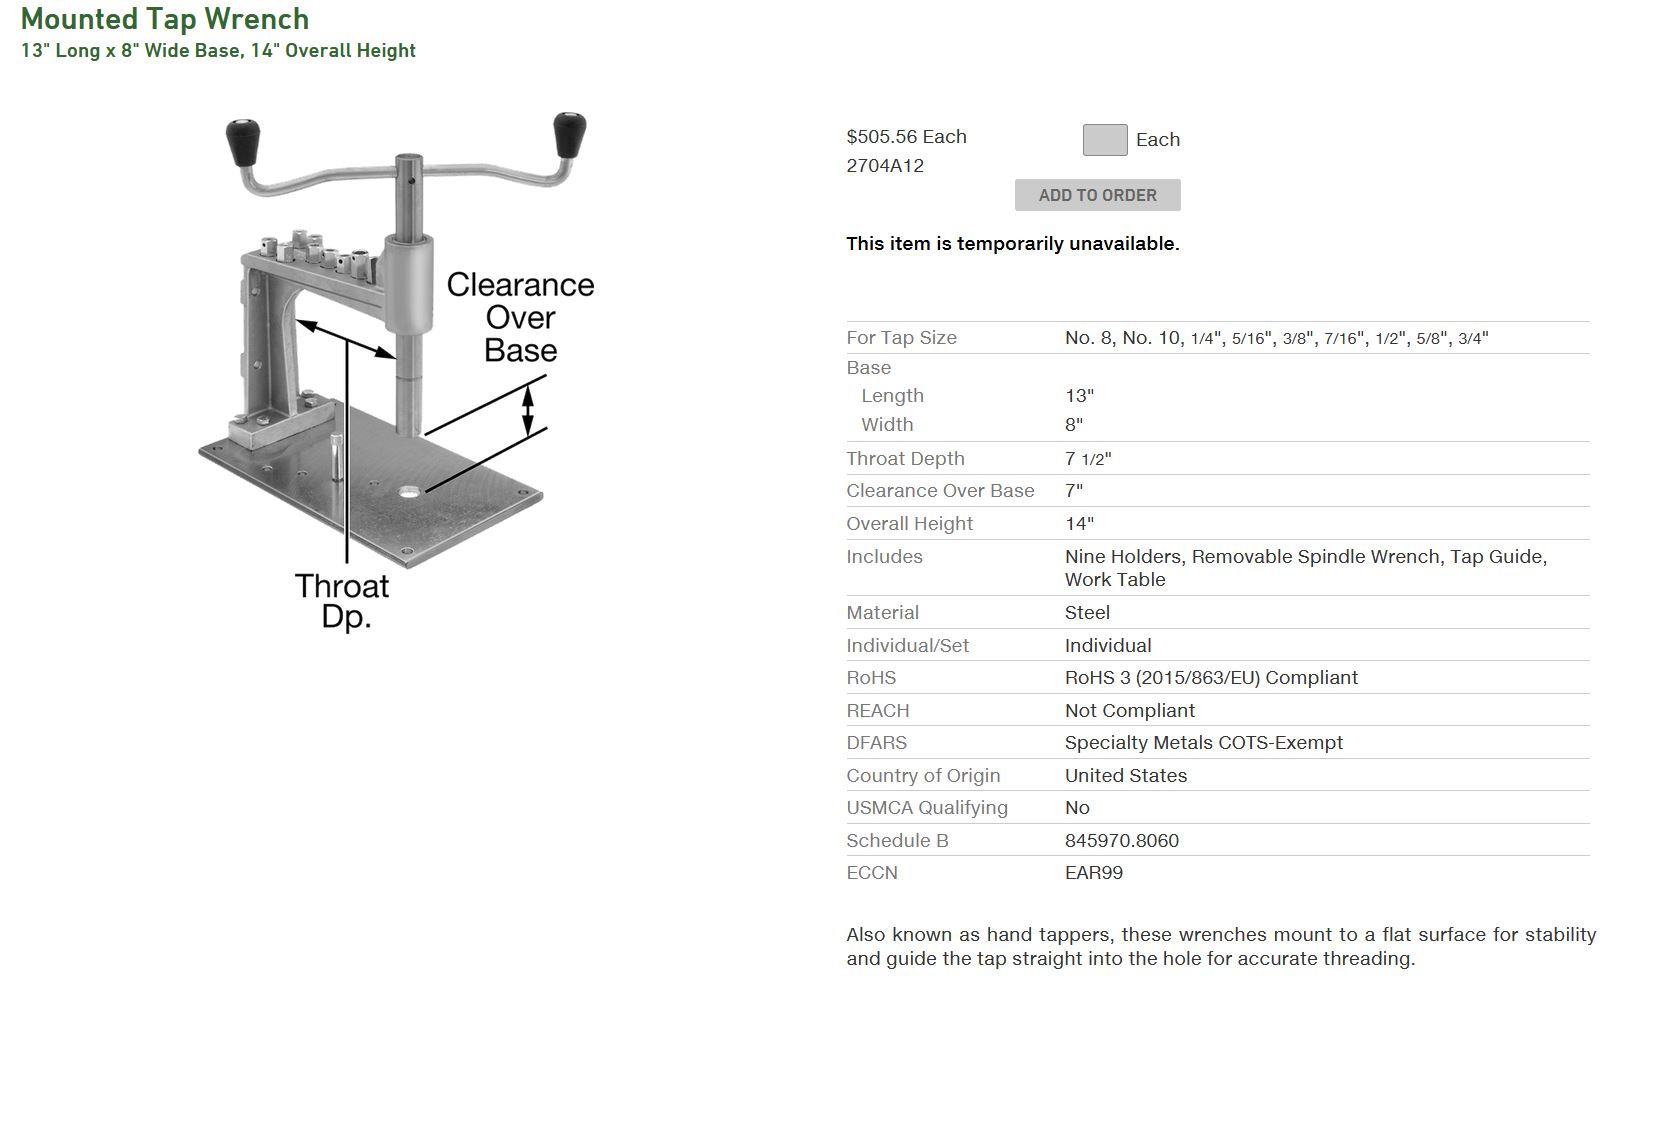
Little Machine ShopLittle Machine Shop has an offering that's kind of great, for \$200 USD Its also mechanically similar to the Lassy, and even includes a counterweight gadget. The base is narrower, but I would be willing to bet that the tap inserts are probably compatible! 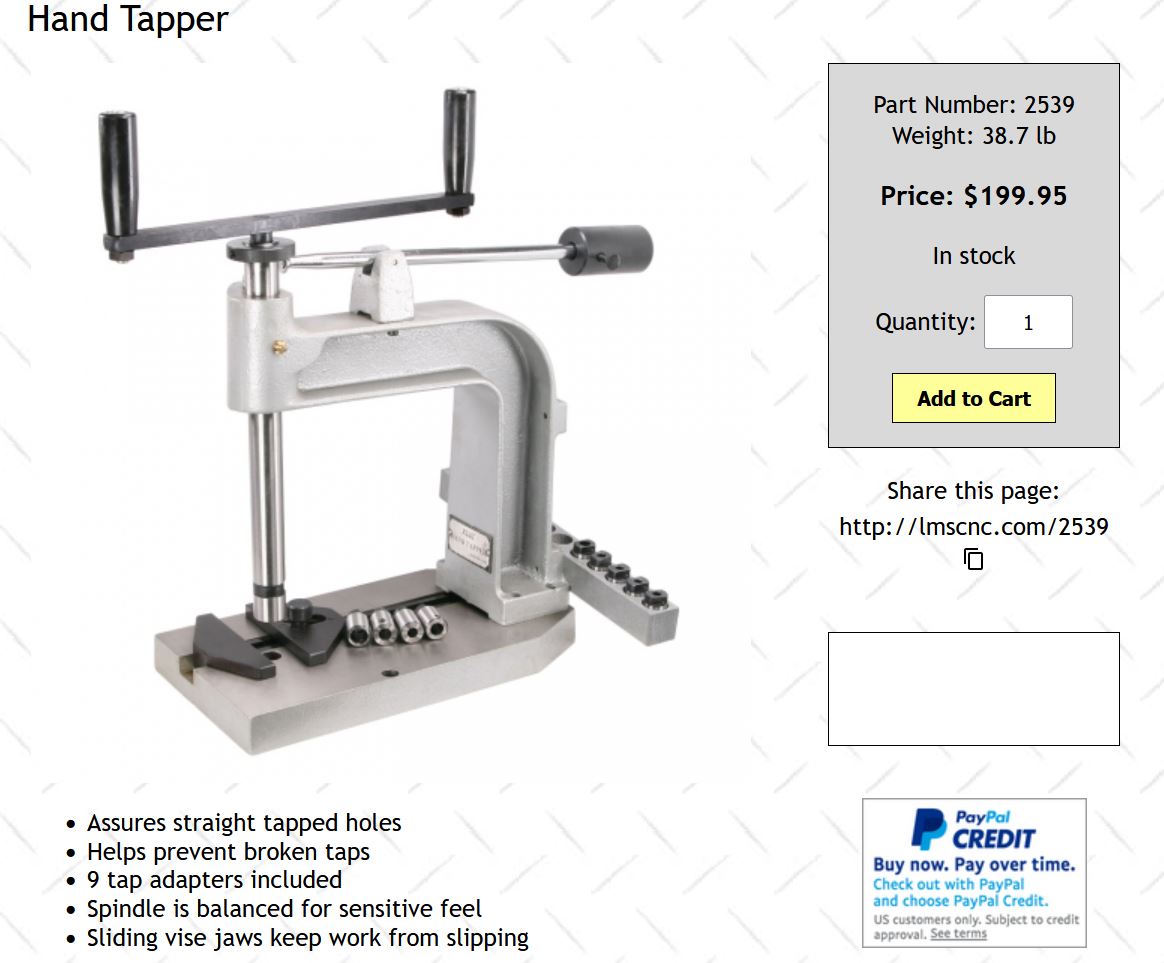
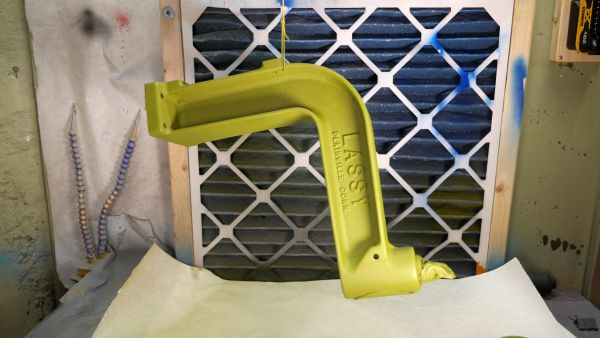
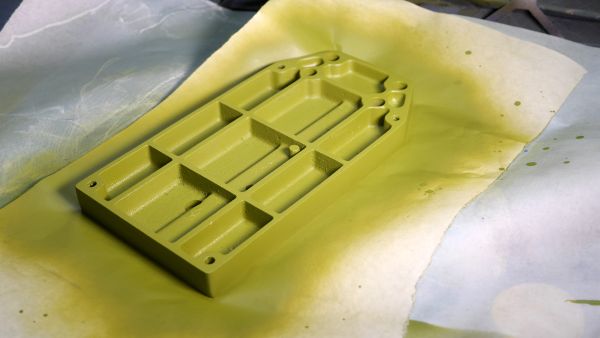
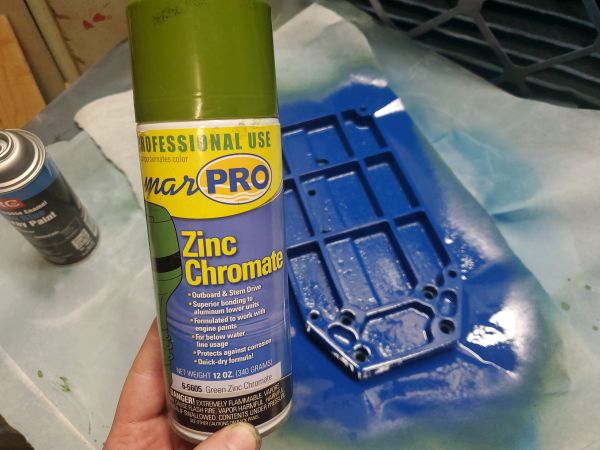
GrizzlyWow, I honestly did not realize Grizzly made one of these [link] and for a \$153 USD that's a pretty good deal all things considered. Grizzly (generally sold at harbor freight) is hit and miss, sometimes people love them and some times they are somewhat lacking. The Grizzly G8748 has mixed reviews on amazon, namely that the tap adapter fit is not great, but one review indicated "installed taps wobble", which is like the exact opposite of what this machine is supposed to do. Time for Primer and PaintI really like to use this acid-8 etching primer [link], but I couldn't find any nearby so I opted to use leftover marine spray primer. After sanding and scraping it was time for primer and paint. To make things somewhat easier I built a simple overhead gear-motor battery thing that slowly spins a hook. This works fairly well but the weight of this particular tap stand it was not particularly happy especially given that the easiest place to hang the part was not from the center of mass. Behind the part is a 2" x 2" box filter with a ducted blower providing negative pressure. This eats up a majority of the fumes / over spray. I opted for a couple light coats of primer spray. Somewhat annoyingly the green zinc primer has a very matte finish, which 'looks' very dry but may still be somewhat wet. I opted to wait a few hours and verified it was dry before the actual paint went on. I ended up using leftover bicycle paint and it went on fantastically. Just as advertised, its somewhat better to go for multiple light coats. Painters tape covered up any mating surfaces and some shop rag filled in the bushing. Cleaning up the labelThe paint stripper ended up removing any of the remaining red on the front label unfortunately. To clean it up I thought about either using red spray paint or a paint marker. A single paint marker was marginally cheaper than a spray-paint can so I went the marker route. I masked off the area around the label and used the paint pen to fill in everything. It dries really quickly, and within a few hours I was able to lightly sand off the protruding brass parts of the label. It came out pretty good, just not super glossy. I removed the tape and touched up areas around the label. Looks pretty schnazzy. Insert holder cleanupThe insert holder mounted to the back of the tap stand was a gray painted piece of hard wood. It was gray enough that I had thought it was metal on first glance. I wanted to clean this up and coat it, but preserve how the wood works, painted wood is a war-crime. There were a few coats of paint, but it was fairly quick to strip off with a vibratory sander. I started with 80 grit and jumped to 220 for a final pass. There was no reason to sand out the inside of the insert holder holes, they are already relatively sealed, and re-drilling could cause the part to split. 
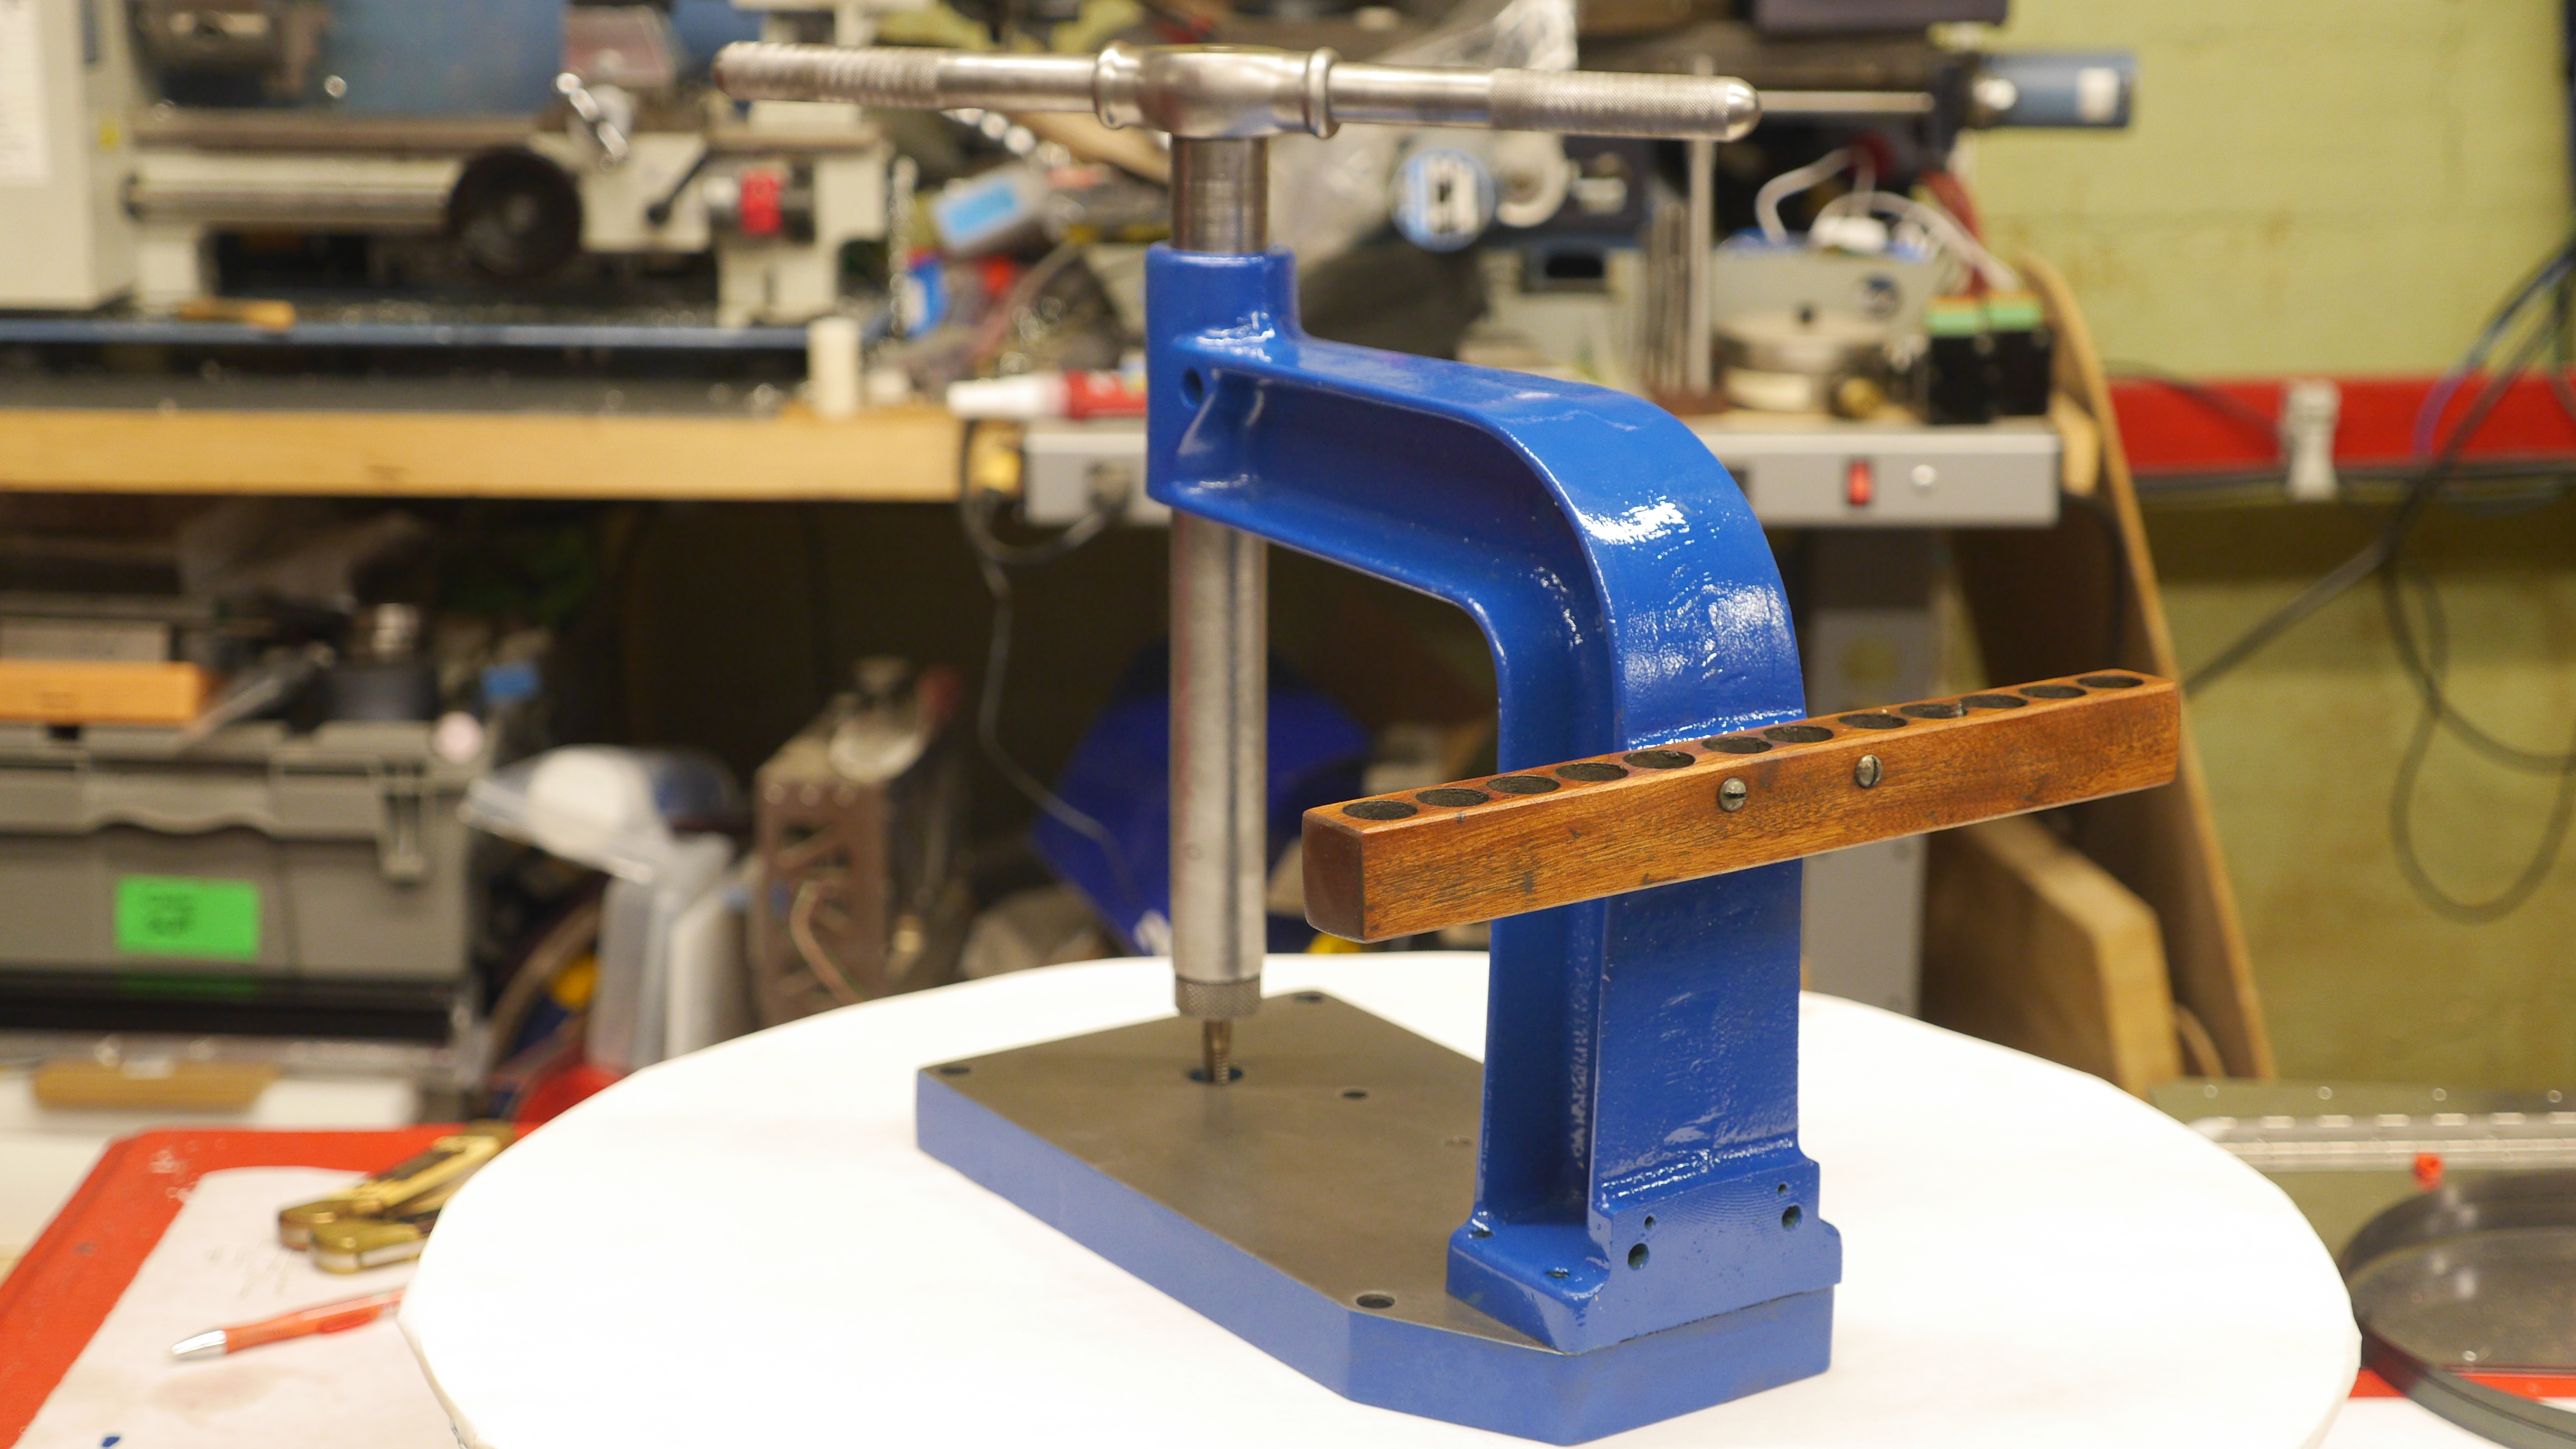
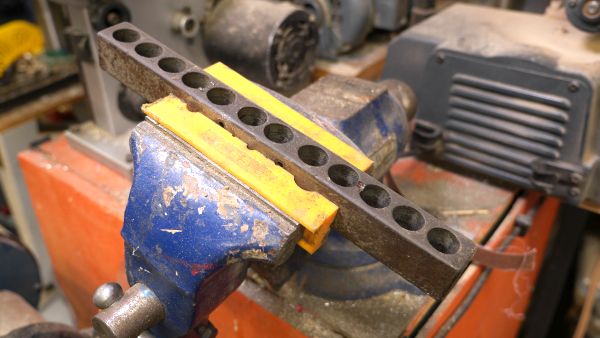
After sanding off the paint and cleaning up the surface, I opted for some mahogany stain and a few coats of polyurethane to prevent the surface from getting destroyed. I applied the stain with a foam brush and dabbed off excess with shop towel. Its remarkable how much this cleaned up, it looks significantly better than gray painted. The holder holes appear to be oversized so the extra polyurethane didn't really have any effect on the insert fitment. The only real remaining parts were cleaning up the actual handle, it had generic oil residue and just hand corrosion. A wire wheel made quick work of it. The tap-handle actually separates into three parts which made it way easier to cleanup the knurled handle parts. Pretty straightforward process, but like anything wire-wheels are great at two things, throwing debris at your face and catching the part, so its fairly important to stay focused during the cleanup process. Making an adjustable tap adapterThe inserts are kind of weird, I expected some kind of tapered thing, but realistically this is a 'snug' fit for the round surface and the flat key that transfers force into the tap. The inside of the holder is a broached square that mates to the tap for torque transfer. Its parallel to the outer flat surface, so to make an adapter that fits this but allows for an adjustable endpoint, I only need to match the shaft diameter, turn down the perimeter around where it steps down and machine two flats for the mechanism to transfer torque to. 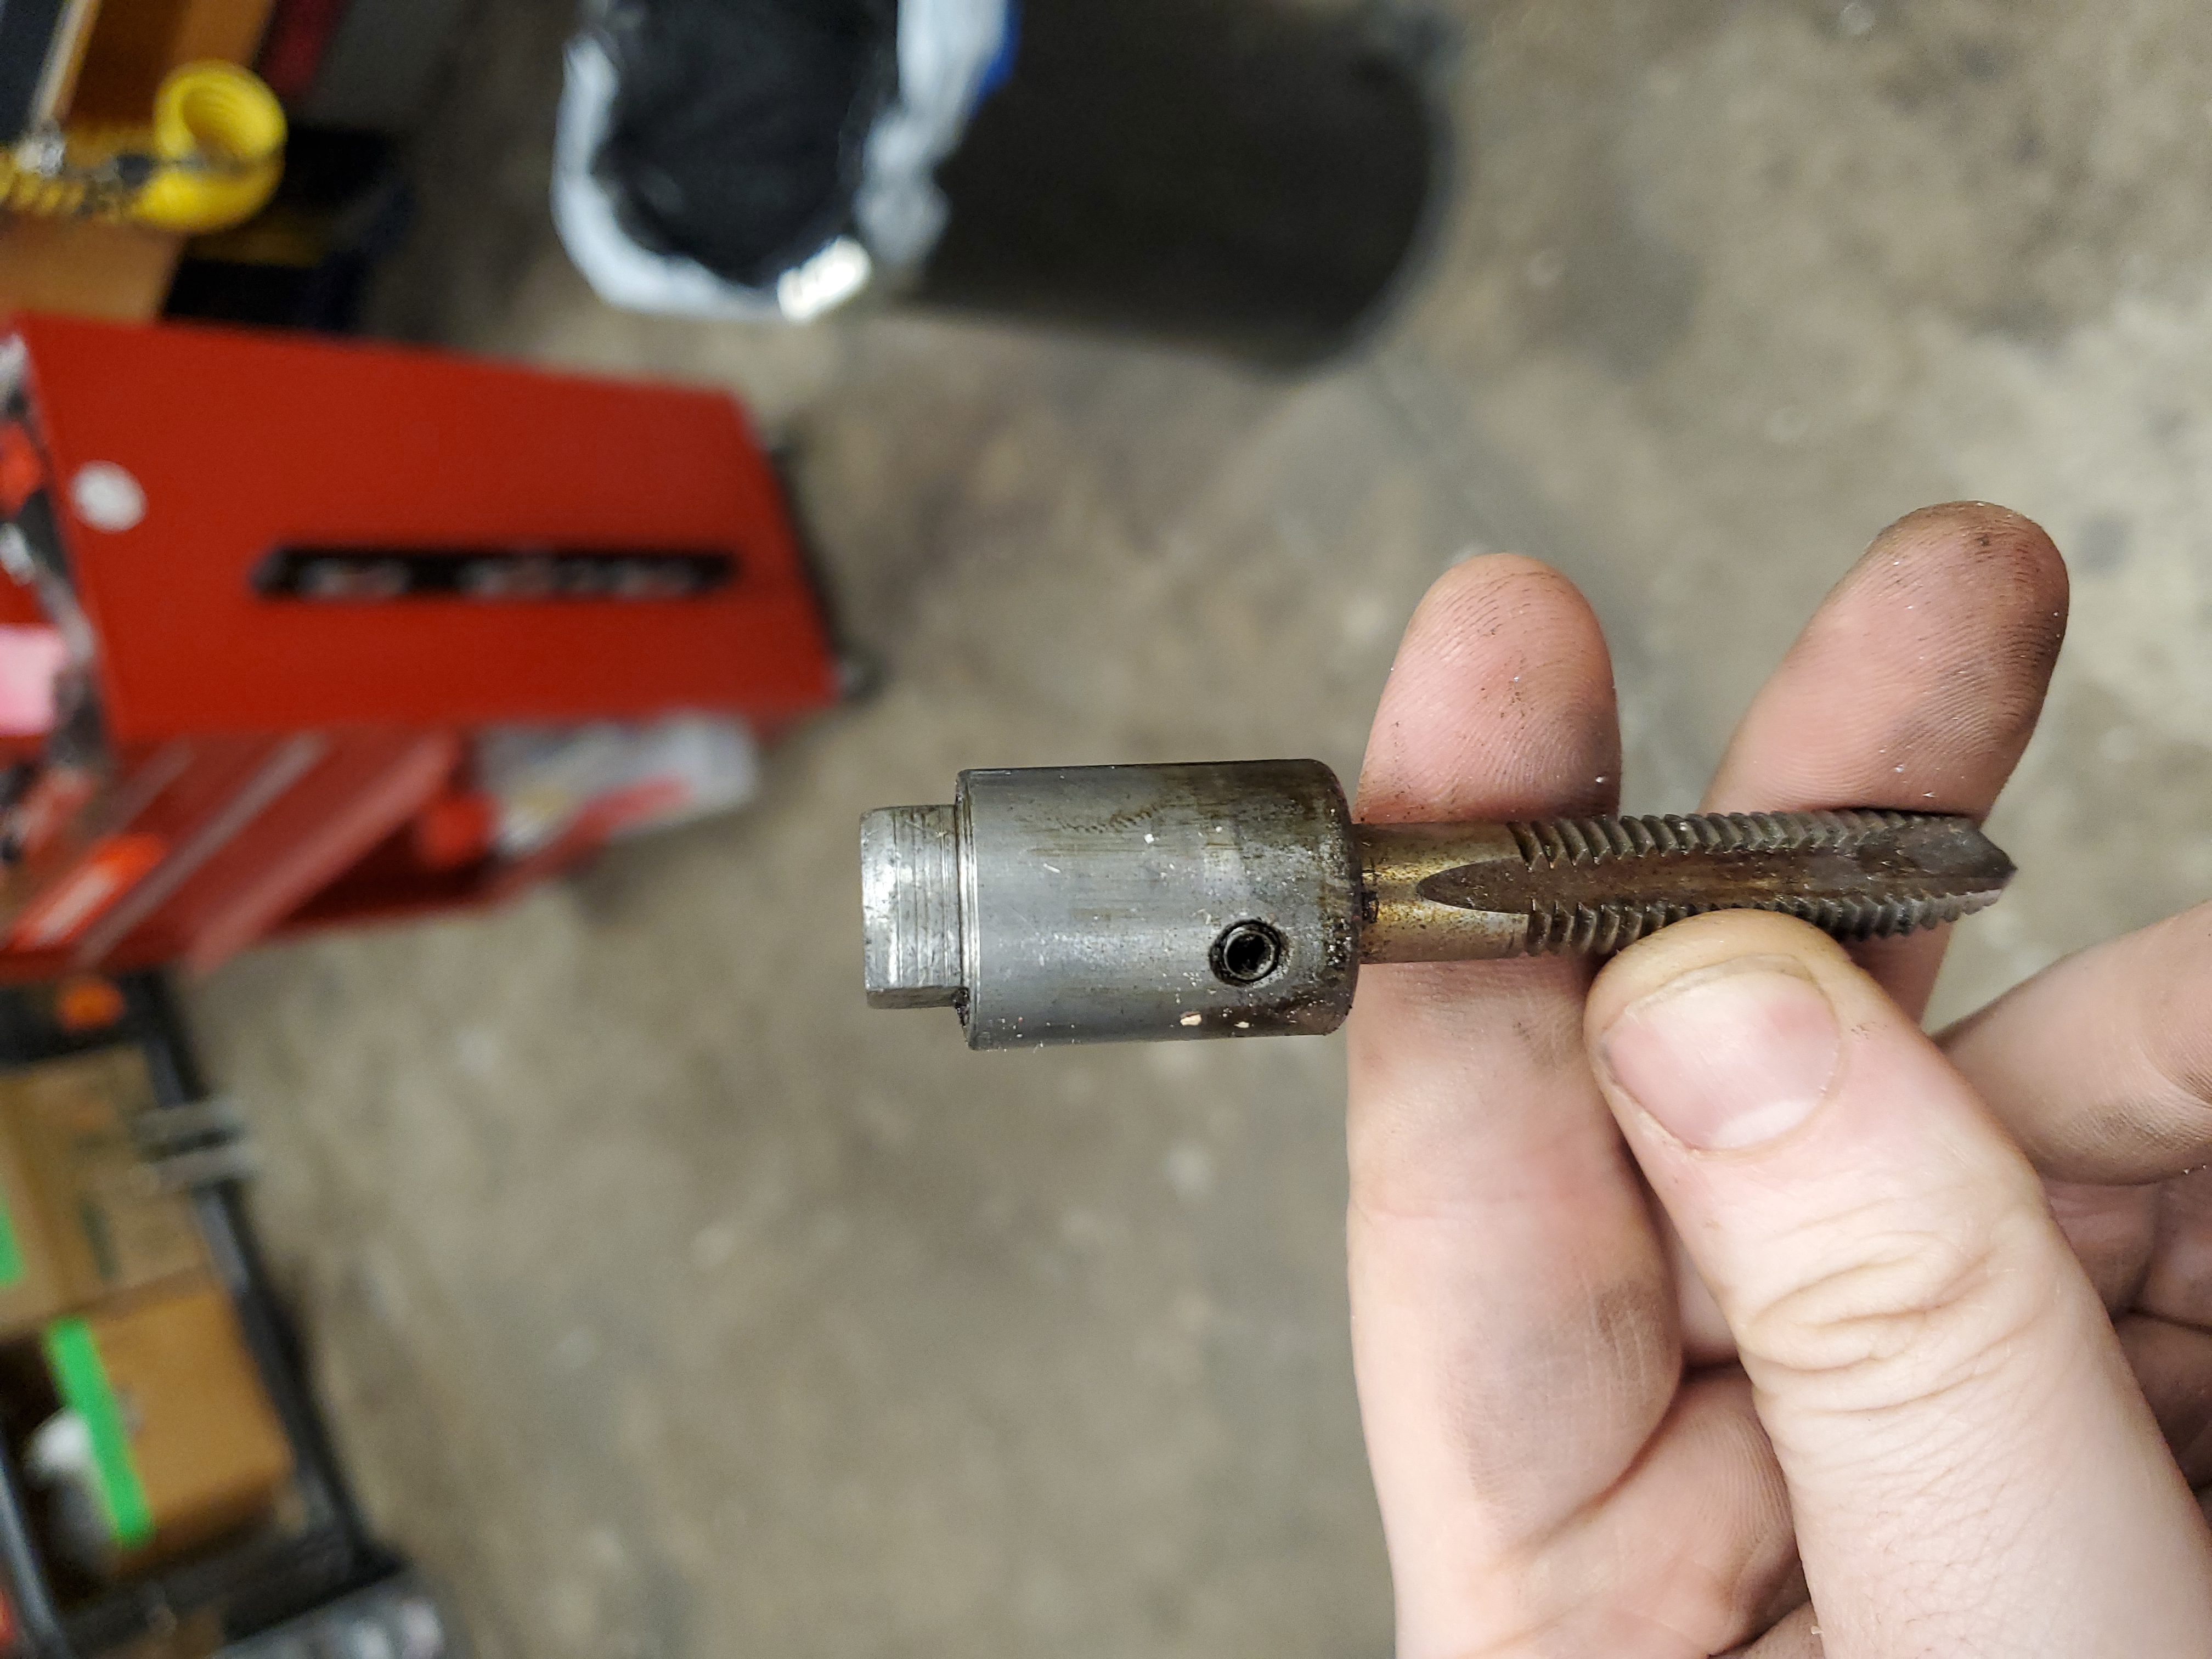
Grainger carries a lot of 'westward' devices, they make two complementary ratcheting / adjustable tap wrenches, one that can take 1/16" to 1/4" [link] and another that goes from 7/32" to 1/2" [link]. These are budget hardware, which means making a mistake is not terribly expensive, and while I'd love to modify a Starrett tap wrench, hacking apart the westward ones are a much lower barrier to entry / error. Annoyingly these budget tools have *no documentation* or diagram. Westward doesn't even have a website that i can find. Annoying. Checking mcmaster-carr for something similar brings up something interesting "machine mount wrenches" OK you have my attention. We find a 1/16" to 1/4" [link] and a 1/4" to 1/2" [link], but this time with a cad model. We no longer have a brand-name to match these with, but its possible the packaging may have details. From McMaster we find out that these have different diameter t-handle shafts, both of which are smaller than the quick change insert. shown below is the small (left) and large (right) tap handles. Realistically some rod stock could be hollowed out and these pressed in to make them quick-change compatible. 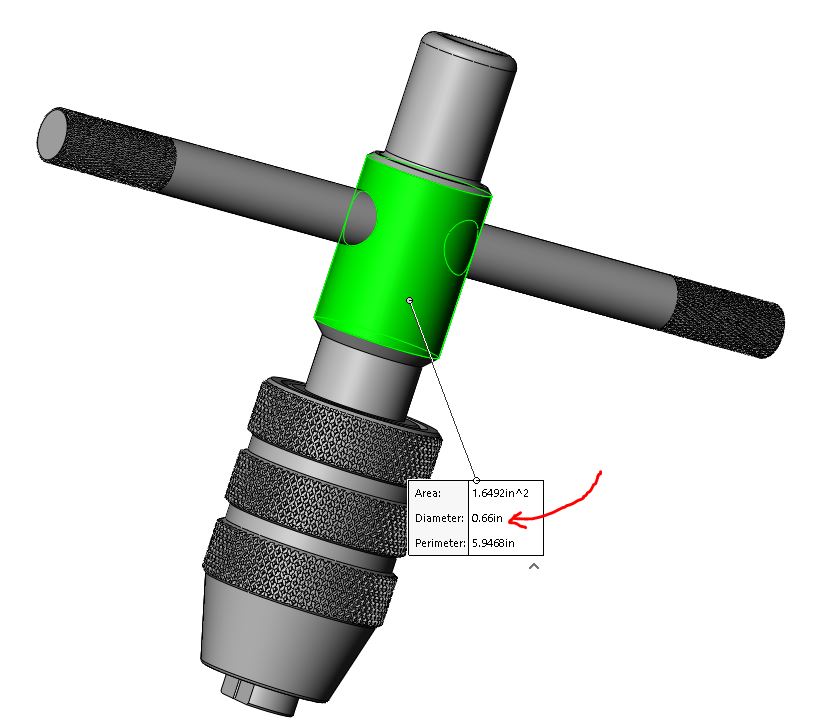
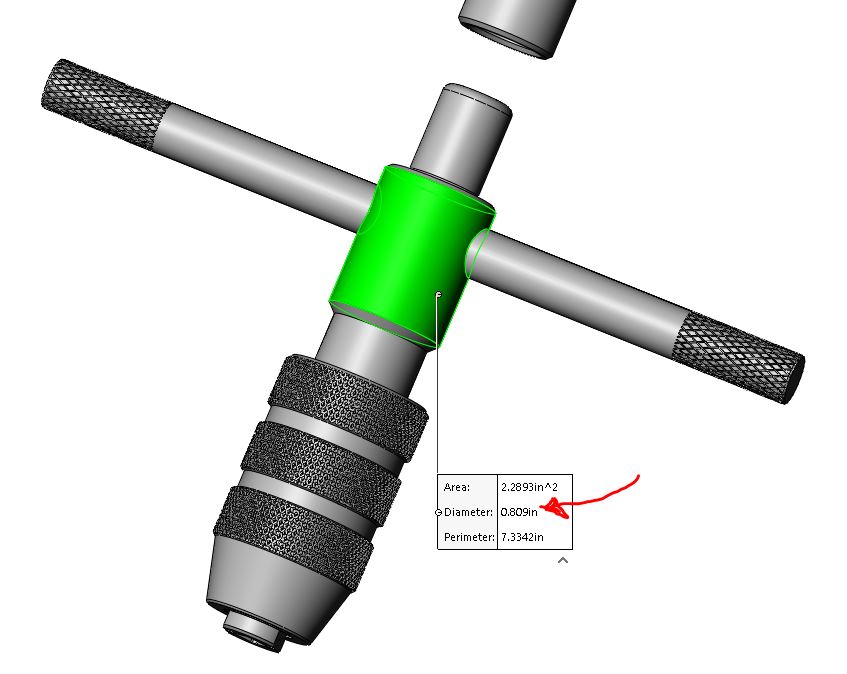
For the smaller one we can probably get away with press-fitting into a 21/32 (0.656") bored out part, while for the larger one we could probably use something more exotic (51/64) and clean things up with a boring bar. One of the advantages of press-fit is that it should maintain concentricity, but its likely the whole vice jaw assembly will need to come out to be able to press against it. Time to make an engineering drawing and sort out how terrible this will be to machine. I purchased the smaller tap handle to check how well the mystery McMaster economy tap handle was in terms of concentricity, when chucked up in the tiny lathe, if these have a comical run-out its not worth making a quick change adapter for them. It would be interesting comparing to a new Starret one of equivalent size. Lettering HighlightsI wanted to try out paint pens for coloring in the lettering. I used this gold colored wide paint pen from mcmaster-carr and it worked really well. Like anything the paint would tend to drip a bit, so if i was going to repeat this I would probably try and do this up I wanted to try out paint pens for coloring in the lettering. I used this gold colored wide paint pen from mcmaster-carr and it worked really well. Like anything the paint would tend to drip a bit, so if i was going to repeat this I would probably try and do this upside-down. Having the lettering hanging down from a tabletop and painting from underneath would keep the recessed contiguous areas (center of letter O, middle of letter A) from pooling up with excess paint-pen paint. It did take a lot of effort to prime the pen, I had thought i was doing something wrong, but you do end up pressing it in 3-4 dozen times to prime the tip. Overall worked great, but I likely need to find more things to color in gold before the paint in the pen drys out. I used a q-tip to clean up any of the areas with excess paint, which worked fairly well. All cleaned upI'm really happy with how this came out, the gloss enamel paint looks great, the wood back looks way better when its not painted gray. The real question is how well this will hold up in a shop environment. The next thing I want to tackle is an adjustable tap holder insert. The easiest way to do this is modify a budget ratcheting tap holder to fit the somewhat weird insert system this thing uses. I have six of the tap insert holders, so not quite enough for a full set of anything, but its possible this that the inserts could be machined out of some rod stock. I'd likely try and cheat, using ground rod that's the right diameter instead of trying to hit exactly the right size. 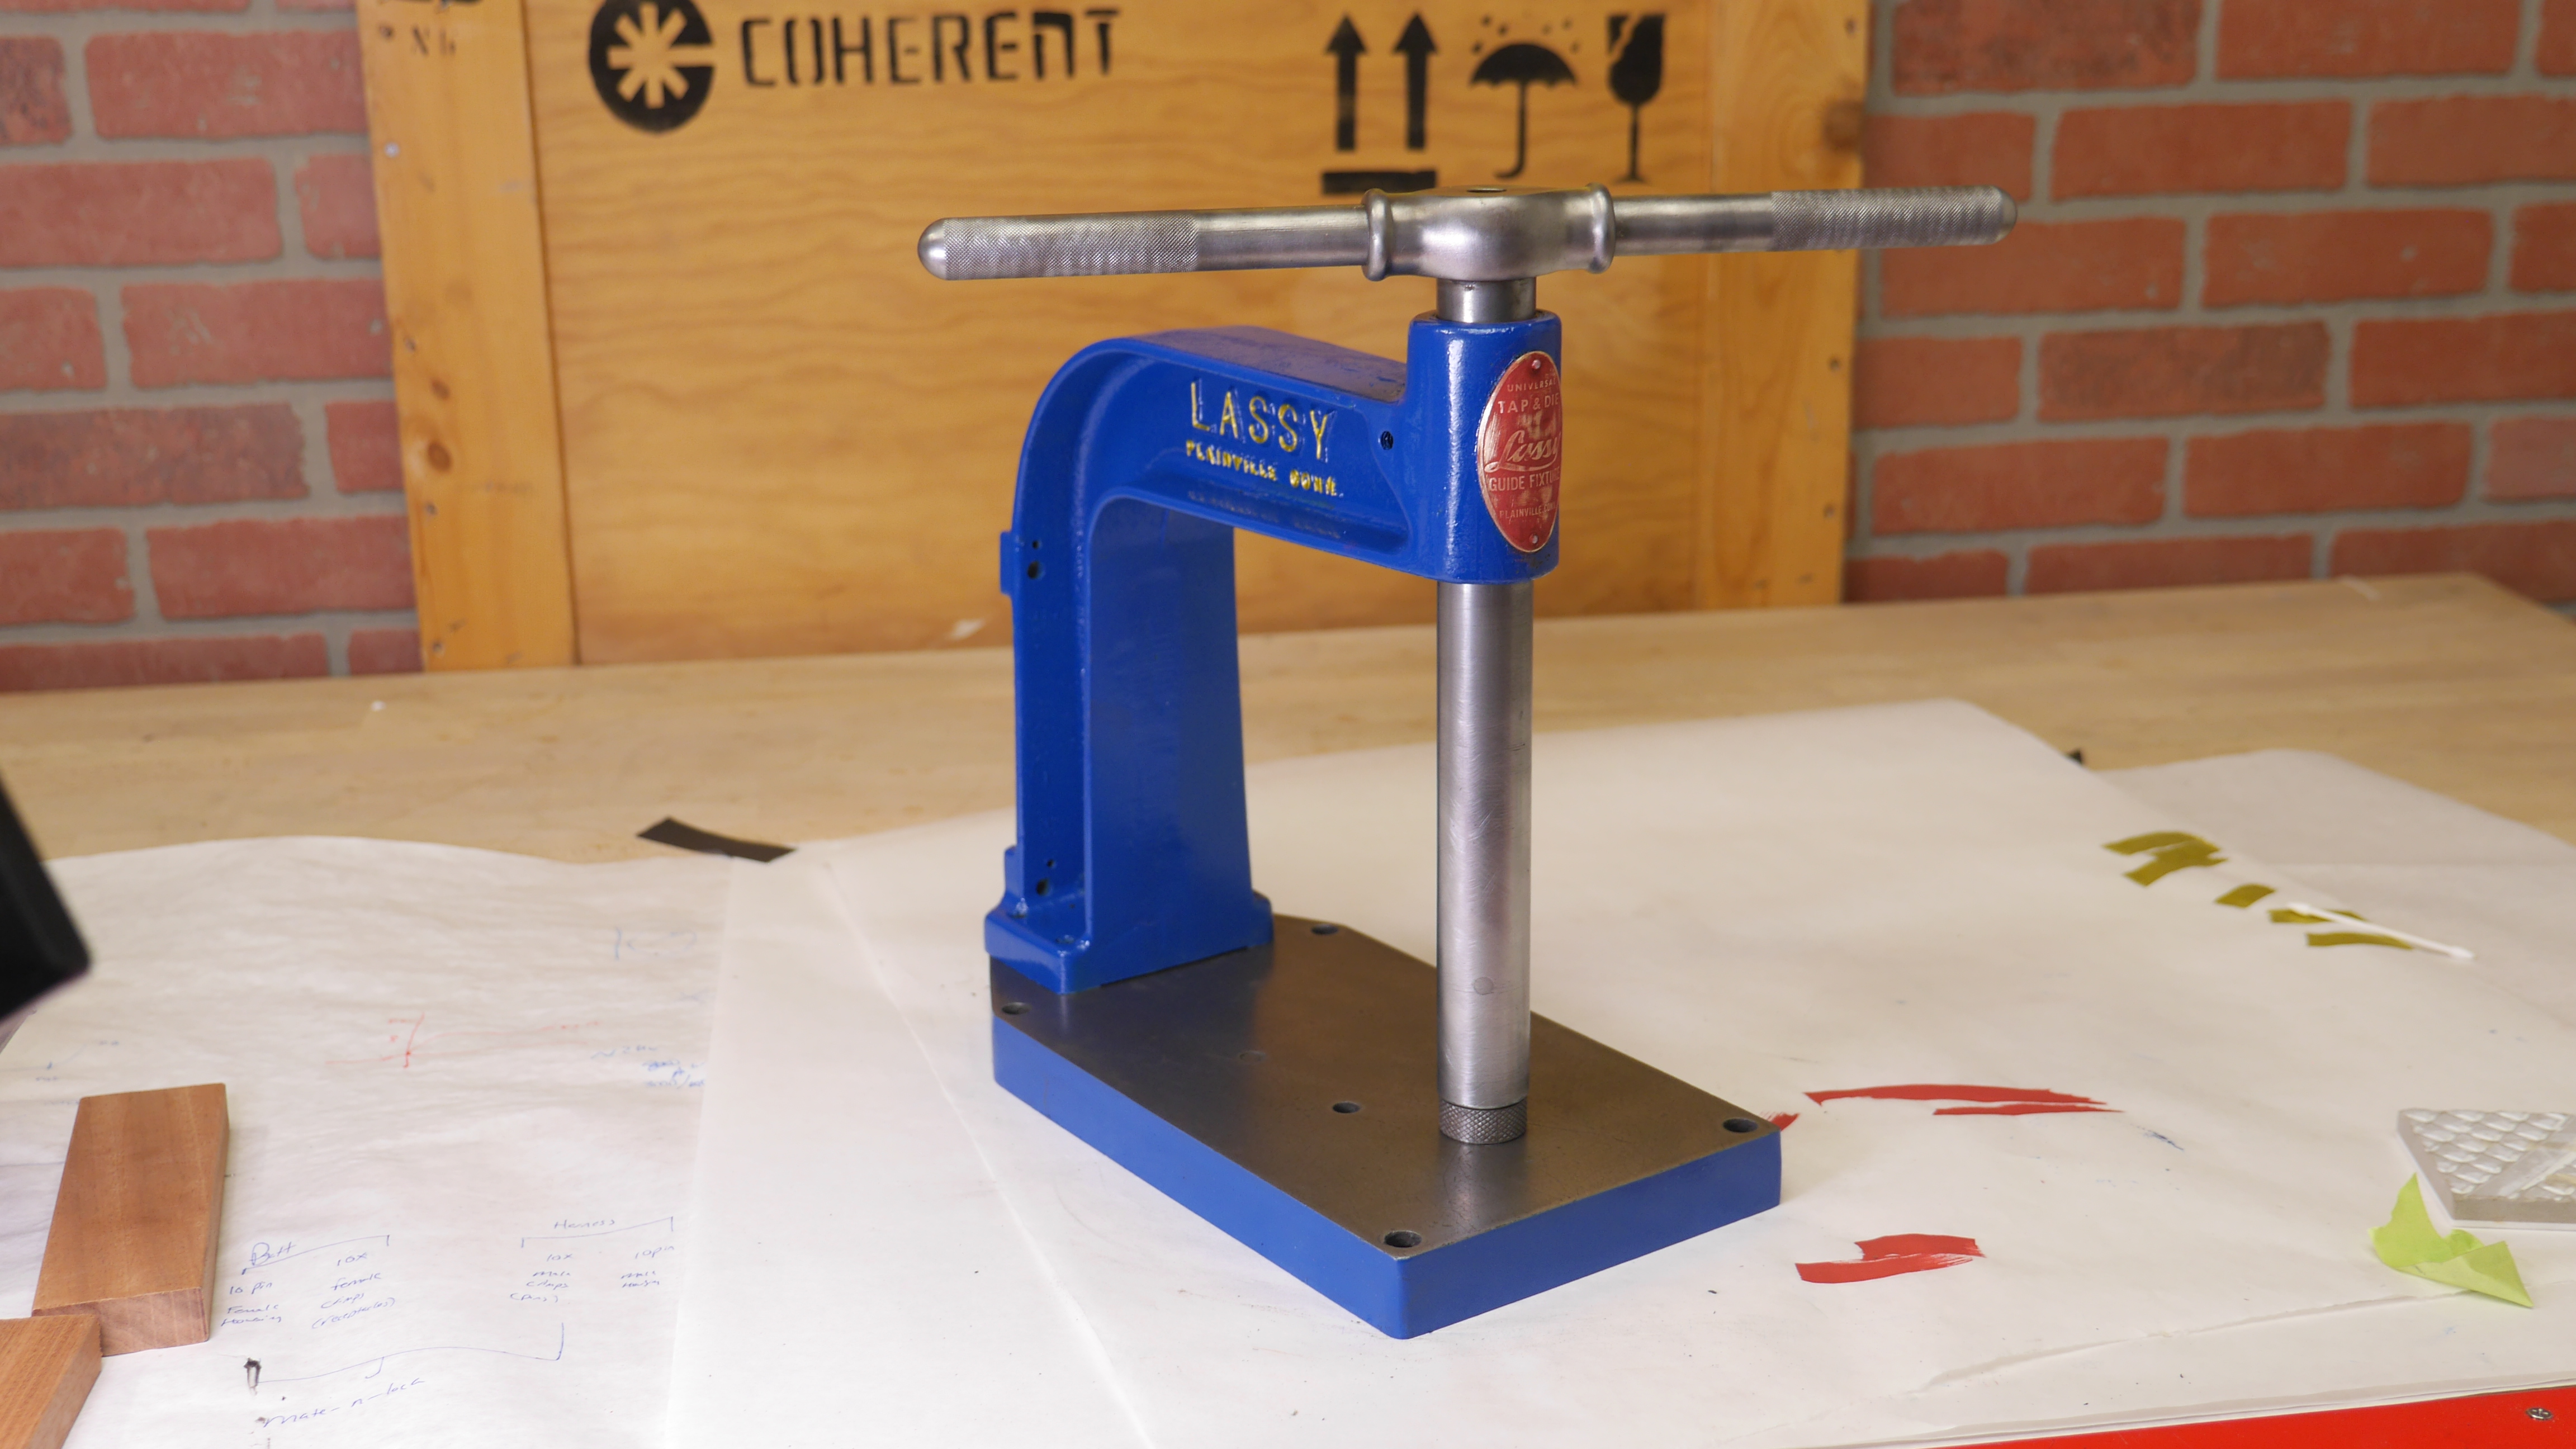
Concluding RemarksDane, what is with all these short video clips?I'm trying something new as part of an effort to make things more mobile-device friendly. Its fairly clear that detailed build logs can be complimented with short video clips, however hosting short animated clips only really became viable recently, as the web finally adopted embedded mp4's. Its an uphill battle as every advertising company seems to exploit embedded video clips to make the web experience worse, so what works right now may just stop working when apple decides to update how their devices view the world. It's an interesting problem, making something view-able on a small vertical phone screen as well as a large horizontal desktop display, and I think I came up with a reasonable compromise. Are the clips distracting or helpful? Post a message and let me know! Now I need a project that has a lot of holes that need tapping. It was really common to end up having to tap a pile of water-jet holes for robots, especially combat robots, clearly its time to go back to Motorama. |
Have you noticed that there are no advertisements or ridiculous pop ups?
No cookie banner or newsletter?
I'm trying to make a better web, feel free to support it.
Want More?
Here's a behind the scenes look at my work space and some of the images that did not make the cut to be included in the write-up:
If you have questions or comments, ask below or send an email
Heavily Used Tap Stand
Bushings
Historical Searching
Primer and Paint
Brass Label
Insert holder cleanup
Custom tap adapter
Lettering Highlights
Beauty Shots
Concluding Remarks
Post your comments! |
|
Comment Box loading
|