
Dane Kouttron
Project Started: 02/2023
Reviving a Broken 4K Monitor: Lenovo ThinkVision Pro 2840m
A quick trip to MIT's Stata loading docks on a Friday afternoon turned up this thing A 4K ~2012 Lenovo ThinkVision Pro 2840m monitor. Here's the spec sheet for this monster [link]. It's an early 4K 60FPS [3840x2160] panel with 10 bit color. It also had an "I AM BROKEN" post-it note adhered to the front. The following is attempts at reviving it, a how-to and some anecdotes about not previously having a 4K capable machine. |
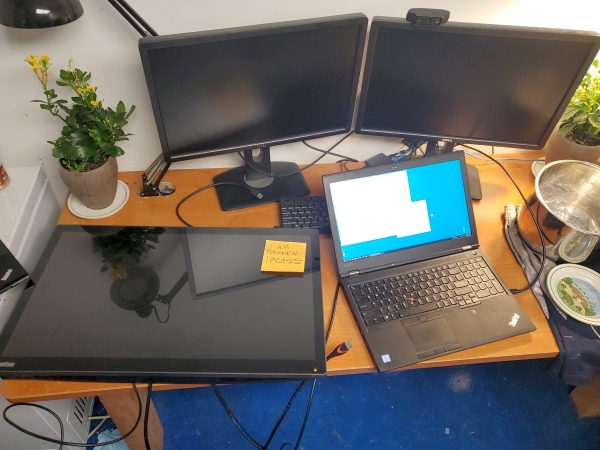
Dane Finally Gets a 4K MonitorSo this monster was lying there, and most importantly the screen was not shattered. I dug out an IEC power cable and connected it, and lo the Lenovo logo appeared. A cursory look with a phone-light did not show any glaring issues, so I grabbed it and brought it home with me. There was no stand anywhere nearby, but this monster had a normal-looking VESA mount, and for the time being I could drop it up on a chair. The note on the monitor was very interesting: it shuts down after an hour and a half. That's oddly specific. It could be a power supply but something thermal may also be afoot here. A quick test with an IEC power cord at the loading docks showed that the monitor did indeed wake up, it wasn't cracked to pieces either. To whoever left a note on this, thank you. Let's run a test and see if the failure mode is duplicatable. 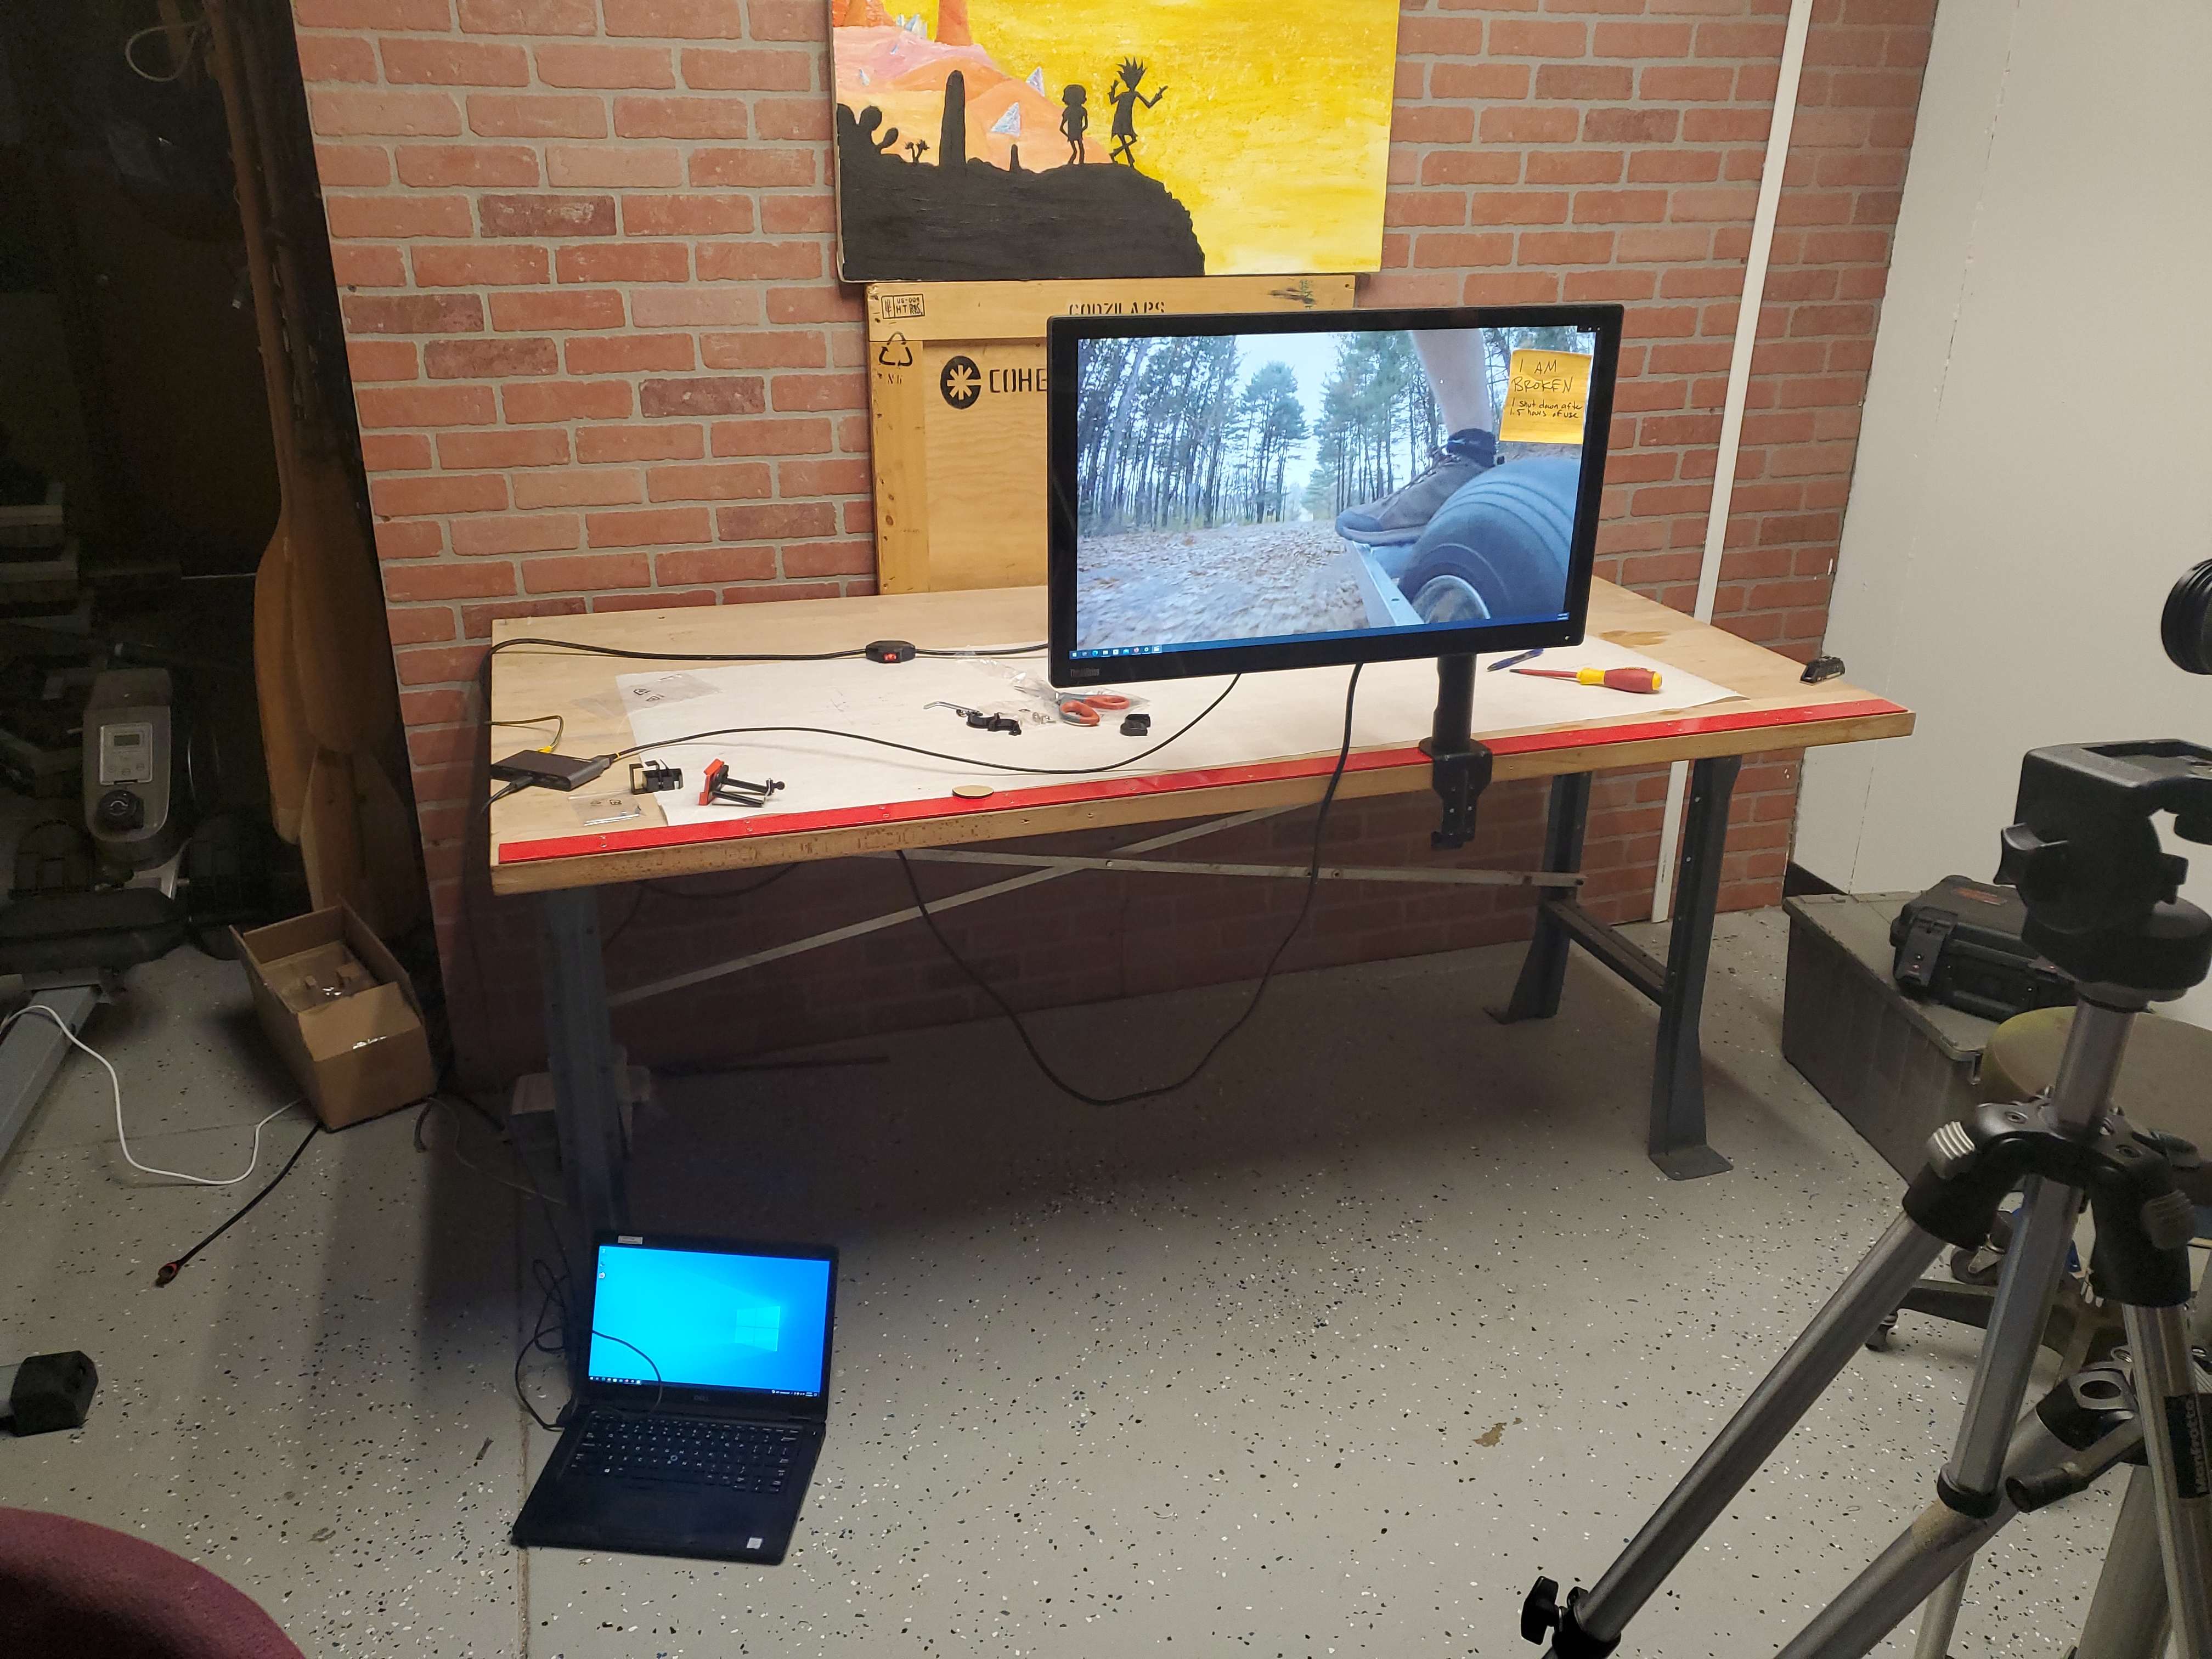
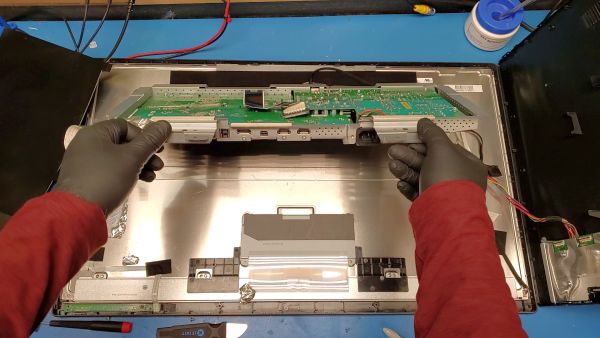
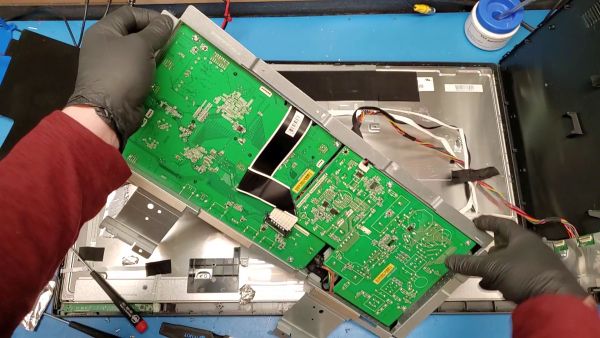
To test this out, I used a USB-C HDMI adapter connected to a 'test laptop', a ~2019 era Dell lightweight that was also rescued from recycling. This has HDMI and USB-C, both of which were 'capable' of pumping out 4K imagery. Testing a static screen wouldn't be indicative of a full workload so I looped a video clip of my skateboard and time-lapsed how long it would take to shutdown. After testing, I opted to get a budget single monitor arm [link], which made testing much easier. Initially I was using a chair but that got somewhat dicey. It looks like I'm not the only one with this issue, check out this forum post on eevblog: [link] Taking Things ApartOpening up the monitor requires removing the four VESA screws and then otherwise using an iFixit Jimmy 'spudger' [link] to pry out the many tabs that surround the perimeter of the monitor. This actually required an embarrassing amount of fiddling. Once the clamshell disconnects it's important to make sure that the small flat flex ribbon cables get disconnected, as the front-panel display is connected and so is the side/back of monitor USB hub. After getting the back clamshell off I was able to flip over and remove the power supply PCB. The power supply itself is mains to 12V, 3.3V and 5V rails. The backlight is LED driven so there is no HV inverter for CFLs. There's actually a lot of space on the power supply PCB taken up by the mains filter. My first thought was 'it's probably the internal power supply', while the electrolytic caps checked out there could just be a lot of supply ripple or a device overheating and measuring both rail voltages and heat sink temperatures should give me a hint as to what is going on. This particular monitor really does not lend itself to functioning with the power supply flipped to be accessible, so the operation here was nominally to grab two voltage test points and grab two heat sink temperatures, mount it back to the monitor assembly and then observe how things change over a time lapse. 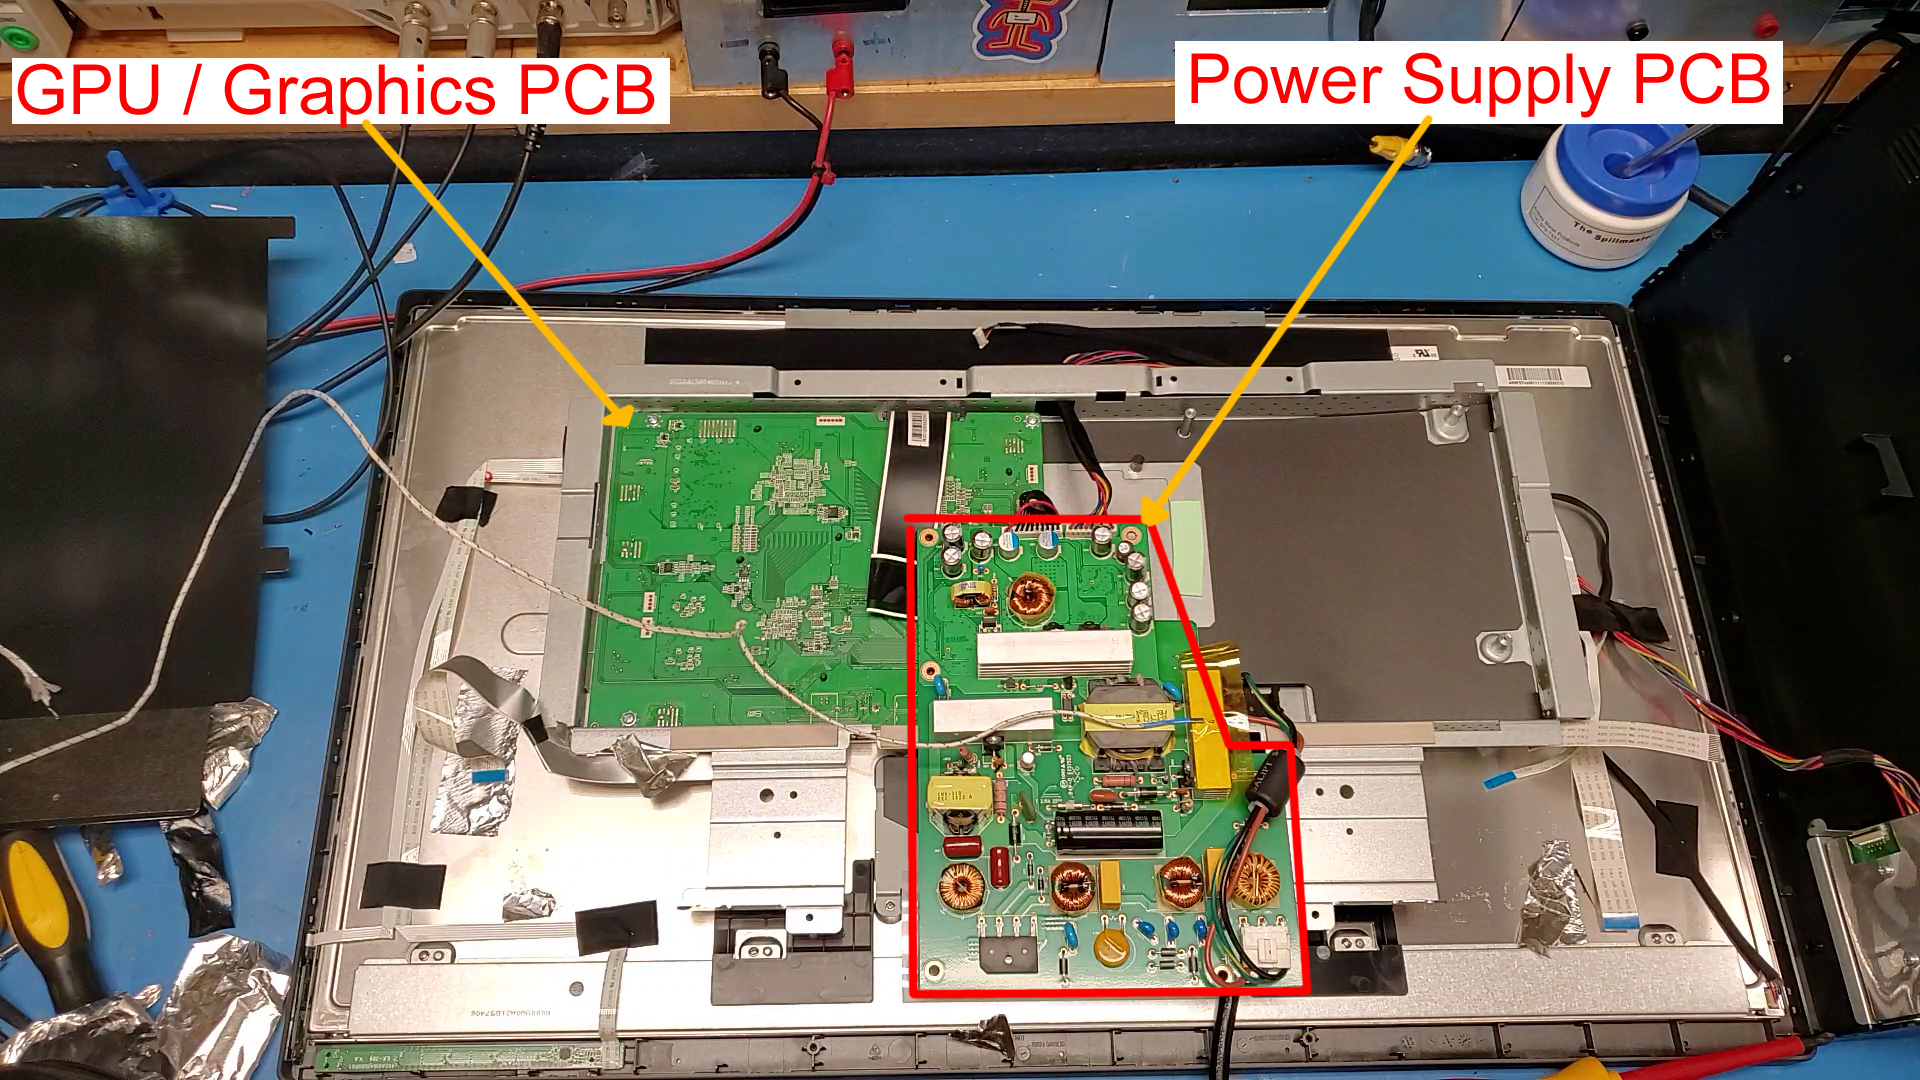

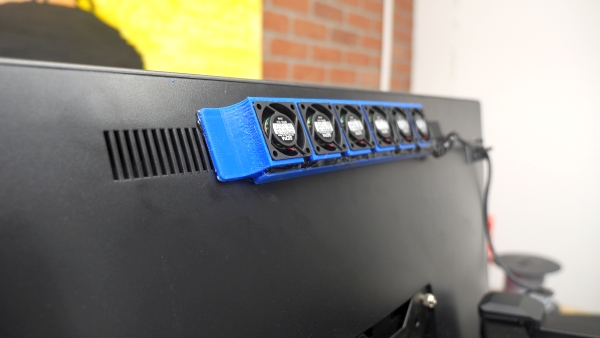
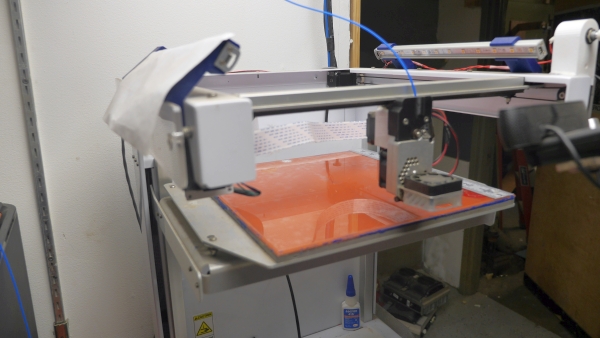
Watching the Thermal FlowWe're going to go at this project a little bit backwards. If you were on the fence regarding if just adding fans was going to work, the video below should really sell you on this. This was filmed through the back plastic of the monitor, so temperatures are not shown, however the thermal differential is very visible. It's fun to watch the hot patch on the far right sweep out the small 5V fans. Using the previous model I generated for the old Dell 3007 WFP monitor, I adjusted the model to fit 6 fans, fired up my 3D printer and here's the result: I don't say it enough but I really love my Type-A Machines printer, it's old but it does a great job. It's always nice when parts 'just fit' in 3D prints. It's kind of funny that these are the exact same fans from the exact same box from 8 years ago. The one change in this design is a better route for wires exiting each fan and into a main channel. While these fans, model [MFB30A-05] from Nippon [link] have fairly long leads, they are not long enough to make it to the far end of the case. We do learn from the datasheet that each fan pulls 150mA, so 6 of these in parallel should average out at 900mA, well within the USB 1A spec, and given how often that is ignored for 2A, we are doing great. To wire up the fans I debated making some elaborate wiring harness but I ended up just opting to wire each subsequent fan return leg to the next one and persist the wiring all the way to the end. Realistically the model needs more space for the wiring, but things worked out. Now with a 5V bus we're good to spool things up and make sure the current draw is well within the USB port's output. These fans are so satisfying and adorable. I did a quick power up test to doublecheck that everything was working well before attaching to the monitor. Note that the fan mounting holes are still present for installing tiny metal fan covers. I did end up installing these, but finding the right size self tapping screw was surprisingly not trivial. Gluing It InI really like high-temp black hot melt glue, I'm fairly certain it's an HDPE-ABS blend and it seems to attach really well to ABS surfaces. One of the key ways to get this to work well is to clean the surface and wait for the hot-melt glue gun to get fully to temperature. The black hot-melt glue does have a drawback, if you switch back to clear hot glue it will be hazy until the remaining glue clears out of the glue gun. I ended up opting for a lab-surplus 45W Surebonder hot glue gun specifically labeled for black hot glue. The attachment worked phenomenally, I tried tugging it off and it really is stuck in place. If I was going to do this again I might have tried to find a way to ensure that the fans did not get any glue-remnants. Fortunately I didn't have that problem but I could see that becoming an issue. One thing I included in this model as an improvement is a small array of indented holes to increase the surface area that the hot glue can attach to. 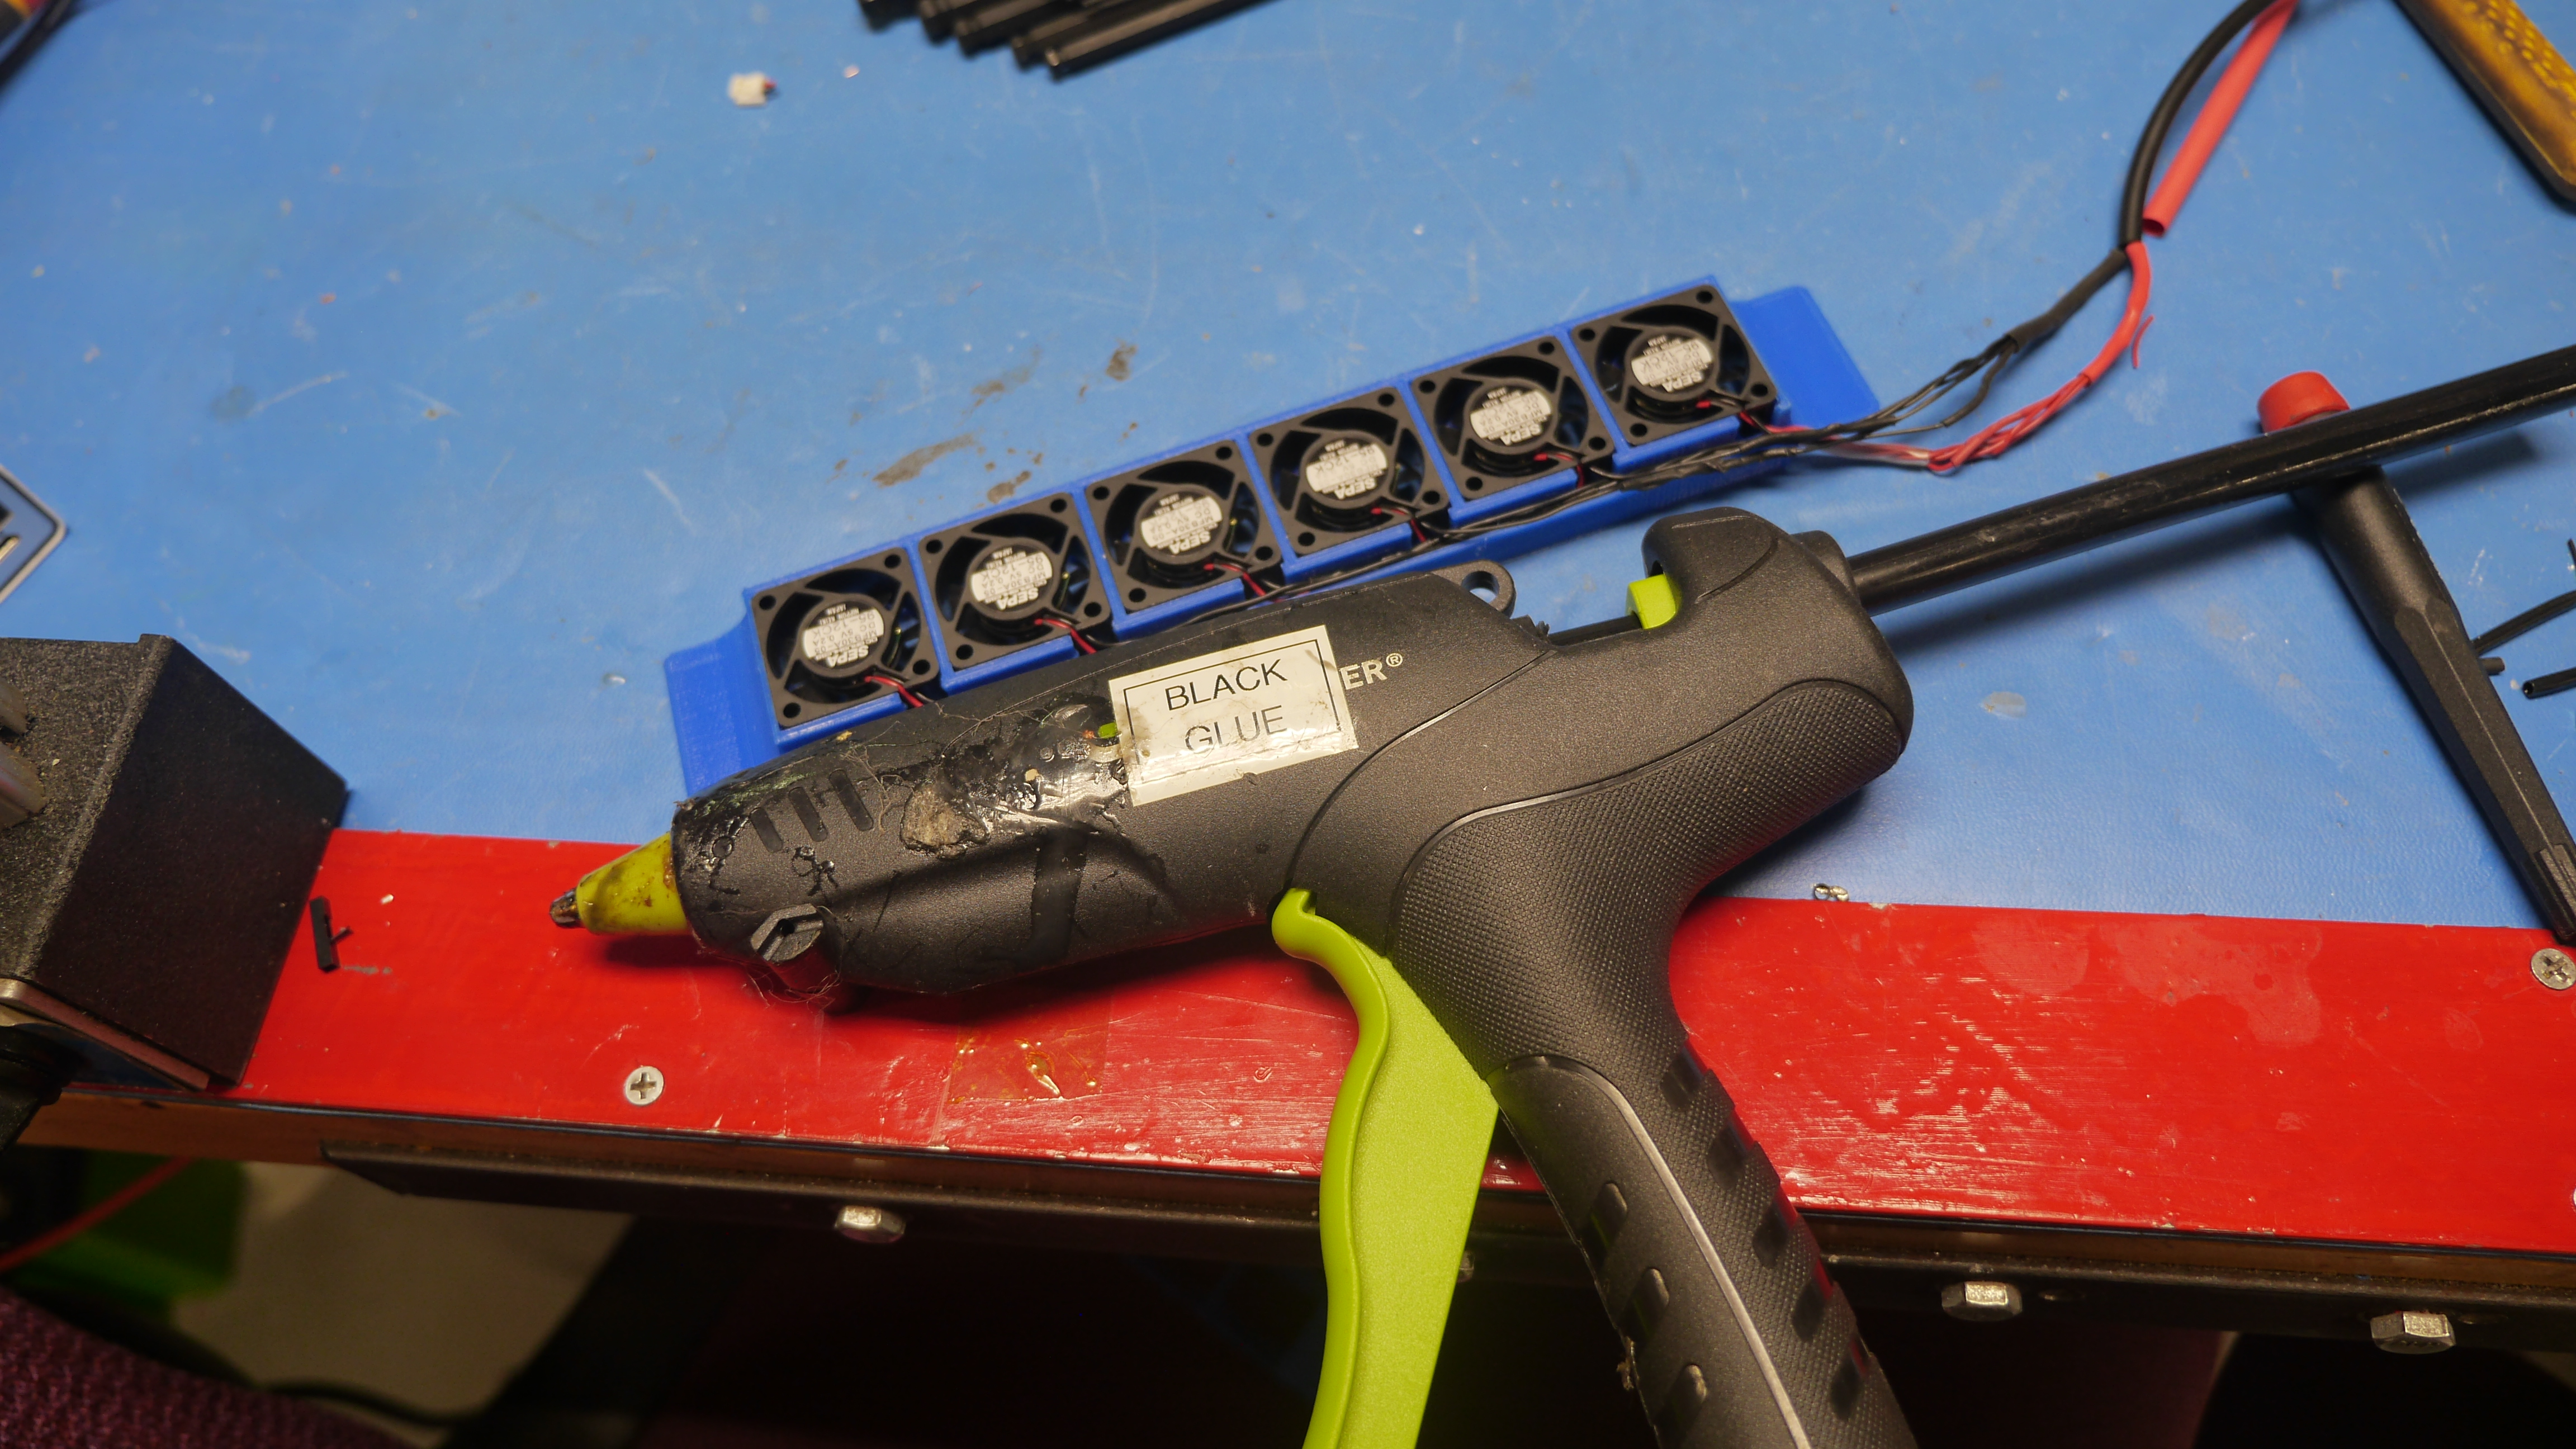
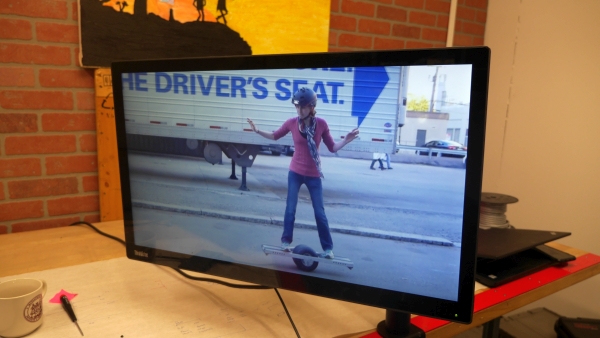
This is where things get a little tricky, the monitor back is slightly curved, while the print is inherently flat. With the hot melt adhesive in place there was enough flexibility to conform the fan assembly to the back of the monitor without any issue. With the fans fitted on, a short USB cable run to the side of the monitor, we were good to go for a power-on-test. This is from a cold-start with an active video source (DVI) fed from a USB-C DVI dock. The monitor clocks in at ~14 seconds from wake up to image display. The fan noise is not terribly noticeable, until you power off the monitors and they also power off. There's something interesting about there being an acoustic 'spool up' to a monitor-wake-up sequence. Everything is working! Video footage plays back flawlessly it just works. It passes the run-time test and honestly just works. Some slight cleaning up of the wiring and using it at my desk and we're off to the races. After cleaning up the wiring, attaching the USB-C dock and running cables we have a really awesome video editing monitor. The dock mounts over USB with a webcam and *just works* at 4K 60FPS. The future is amazing. 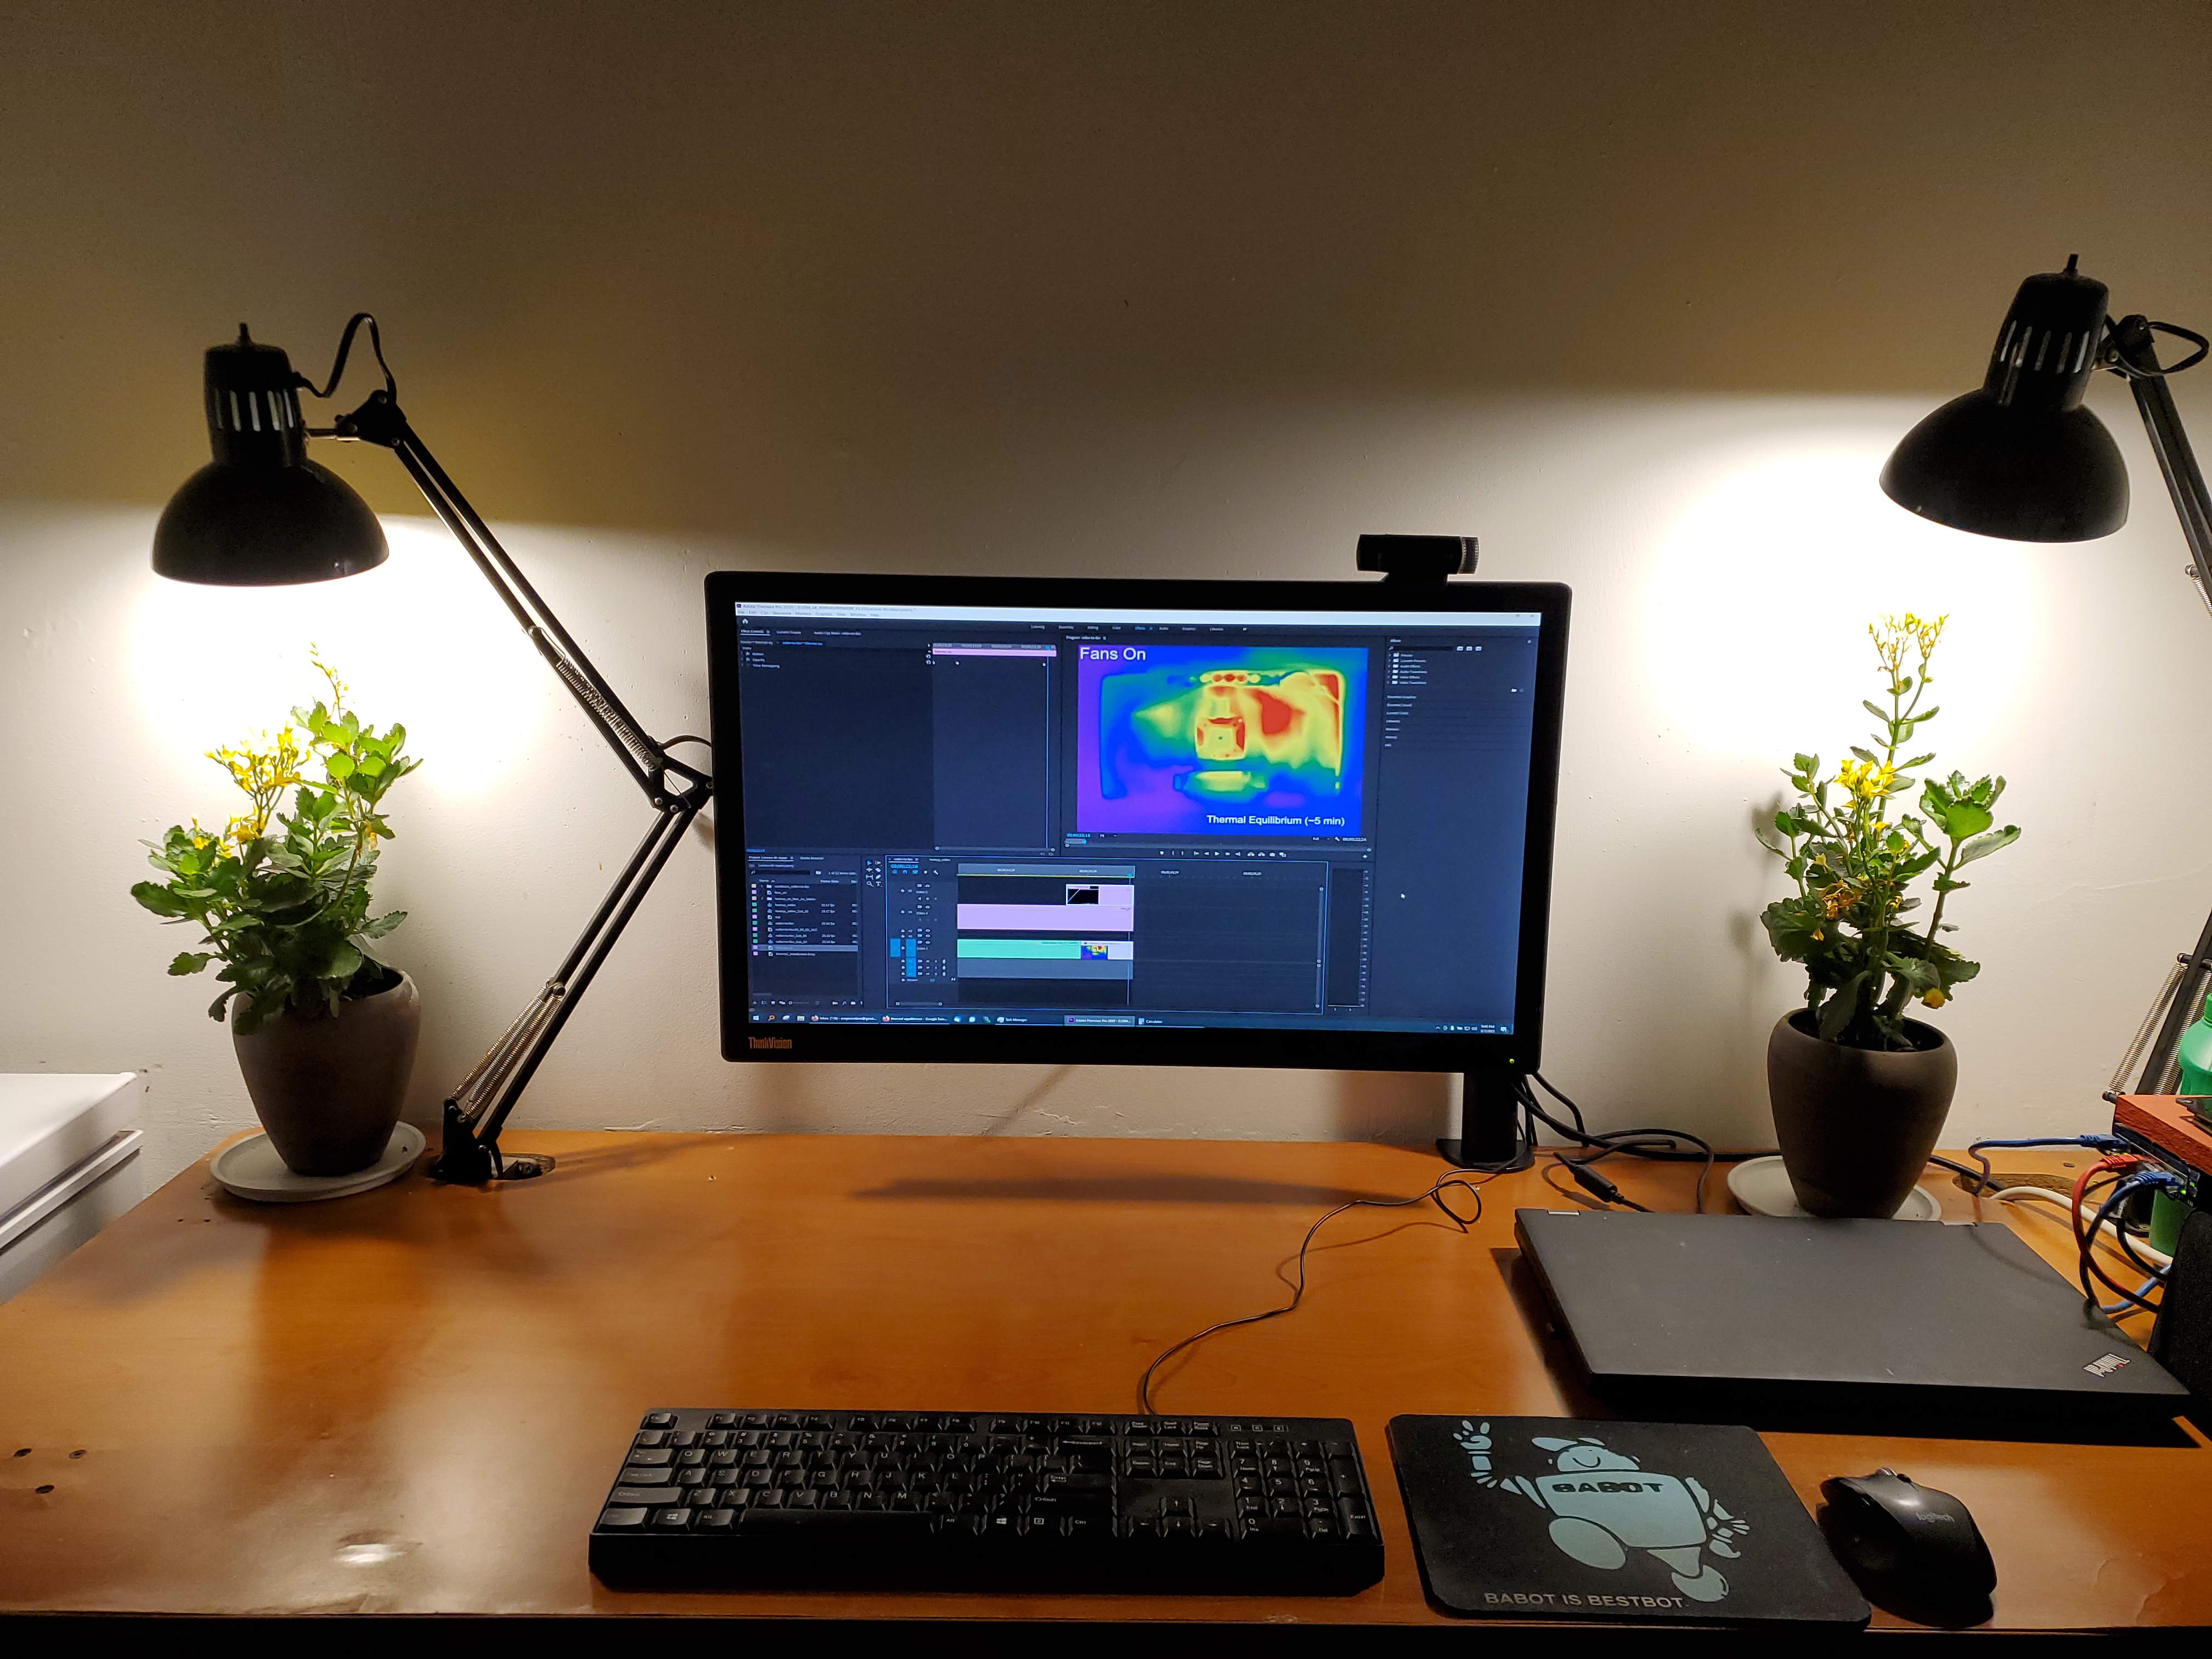
Bill of Materials3D Printed CAD Files
STL [Link] 5V DC Fan 30 mmThe surplus fans I used [30 mm x 30mm x 12mm] [Link] Equivalent part from Digikey [Link] Right Angle USB CableAmazon [Link] Concluding RemarksThis is a beautiful monitor, it's heavy and somewhat awkward but the glass surface really looks good. The display is clear and reasonable, especially given its vintage (literally a decade old). It does consume a lot of power when compared to something more modern, I benchmarked this at 80W at full brightness with the 1.5W of fans running. I think modern displays are closer to like 25W. This project turned out to be a great learning experience about thermal management and monitor repair. The simplicity of adding cooling fans to solve what seemed like a complex failure mode is a good reminder that sometimes the basics work best. |
Have you noticed that there are no advertisements or ridiculous pop ups?
No cookie banner or newsletter?
I'm trying to make a better web, feel free to support it.
Want More?
Here's a behind the scenes look at my work space and some of the images that did not make the cut to be included in the write-up:
If you have questions or comments, ask below or send an email
Finally: A 4K Monitor
Taking Things Apart
Watching the Thermals
Gluing It In
Bill of Materials
Concluding Remarks
Post your comments! |
|
Comment Box loading
|