
Dane Kouttron
Project Started: 09/2017
EVER WANTED TO ELECTRIC MOUNTAIN BOARD in another country?ANNOYED that your board is too long for bringing aboard an airplane?FEAR NOT COMRADES, a plane-safe electric mountain tri-board with a reasonable power output is IN YOUR GRASP follow along the build log and CAD files if you wish to build your own. |
Collapsible electric mountain board
This project started with an upcoming overseas trip. I wanted contraption that I could bring aboard a plane, legally, and ride about a reasonable distance. I was limited to what the FAA allowed, the size constraints of a normal checked bag and what would reasonably pass thru the TSA into / out of the states. To achieve this I used mega-drawer-slides a hub motor and off the shelf Lithium lawn maintenance battery packs. 
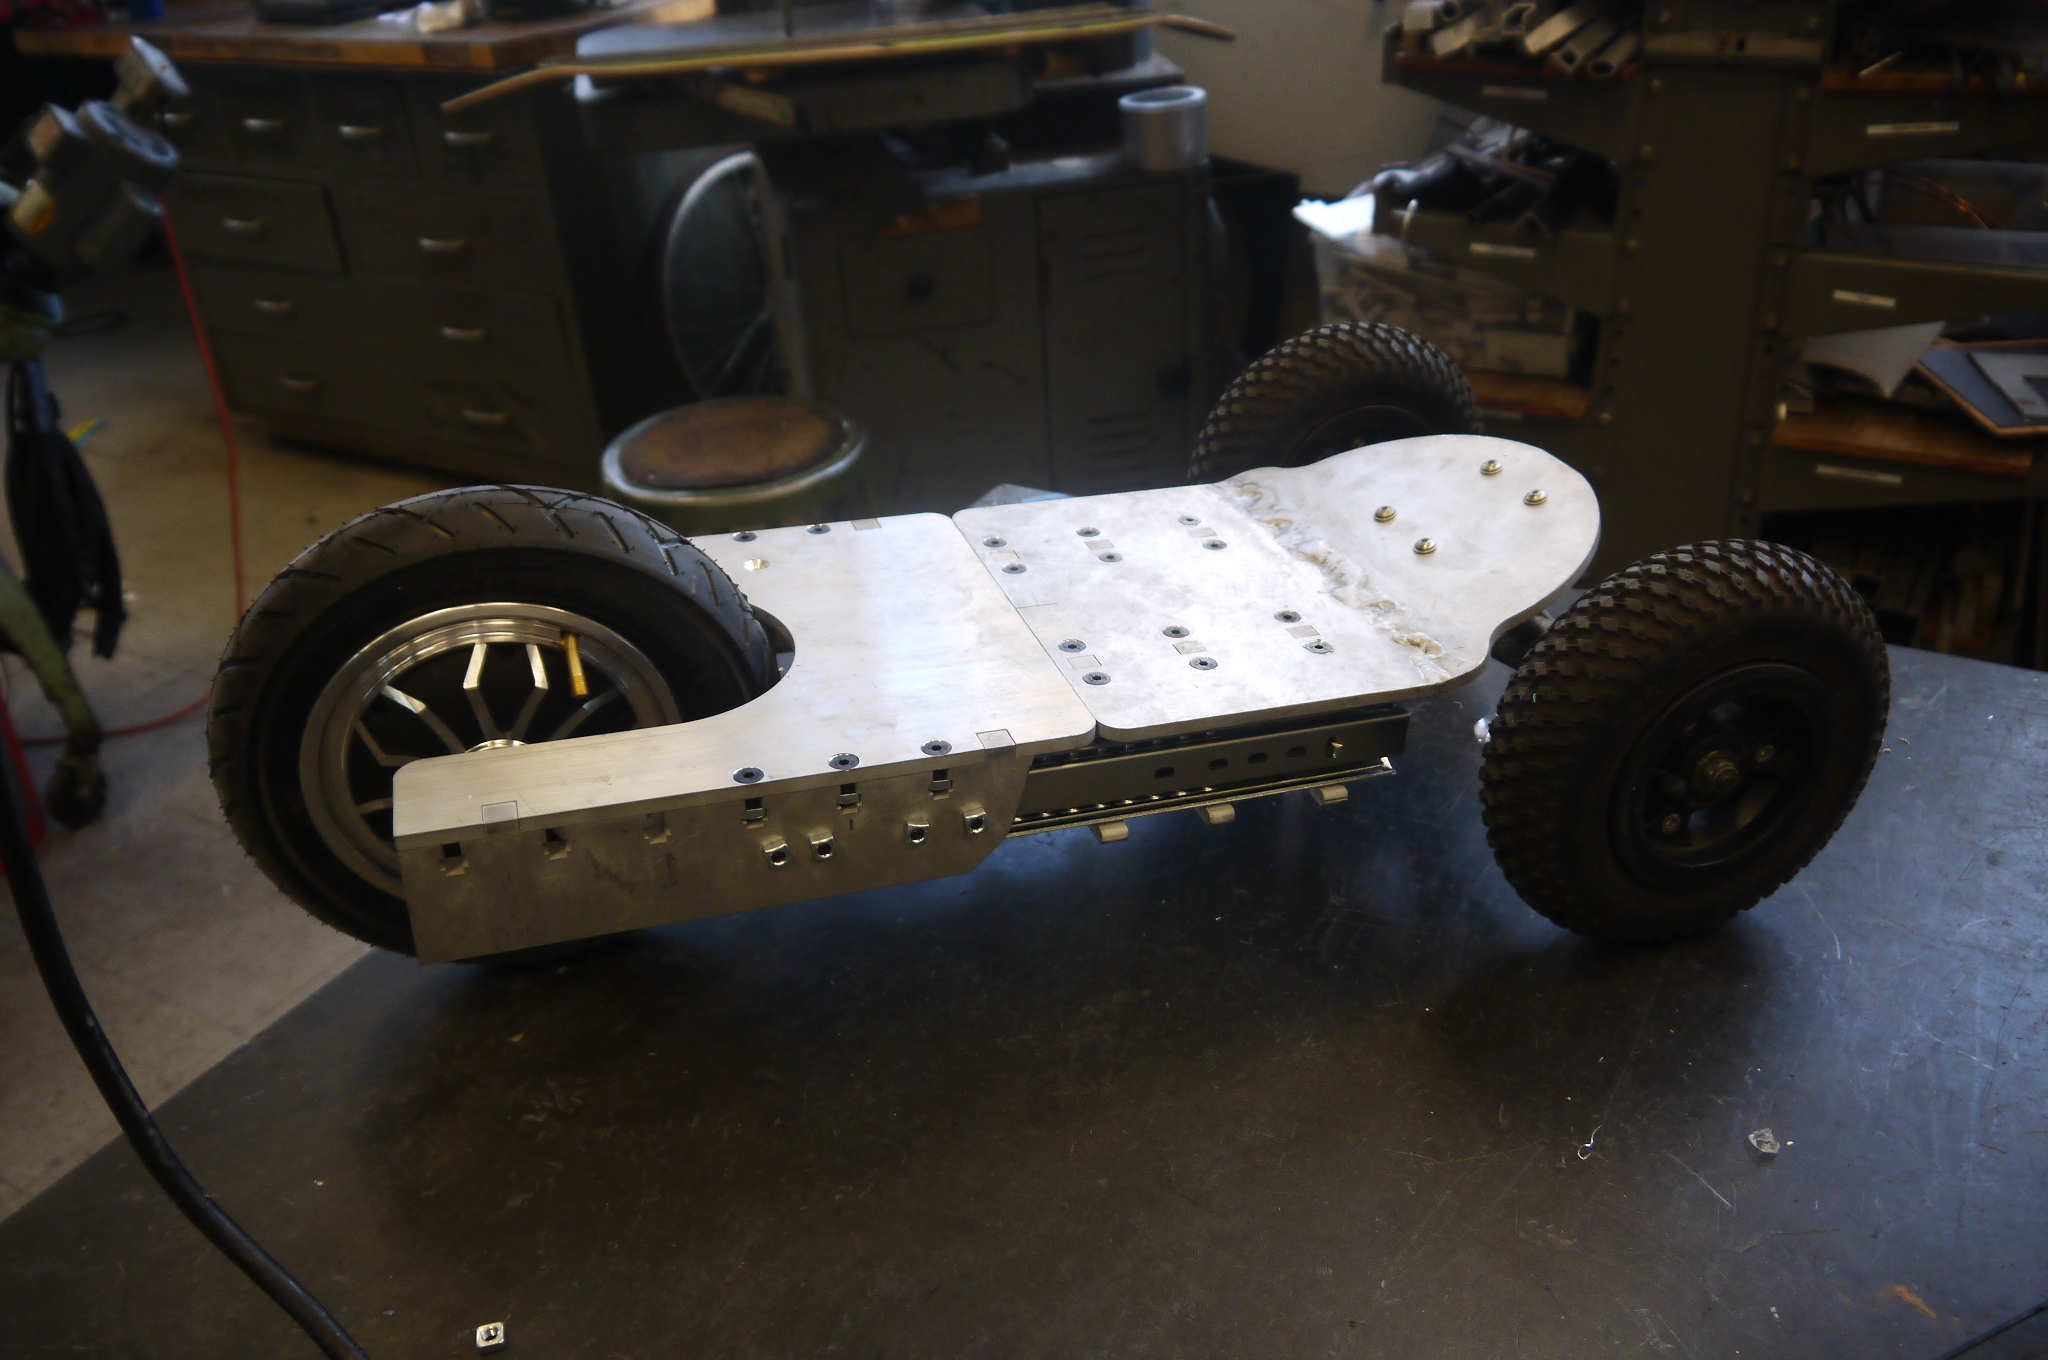
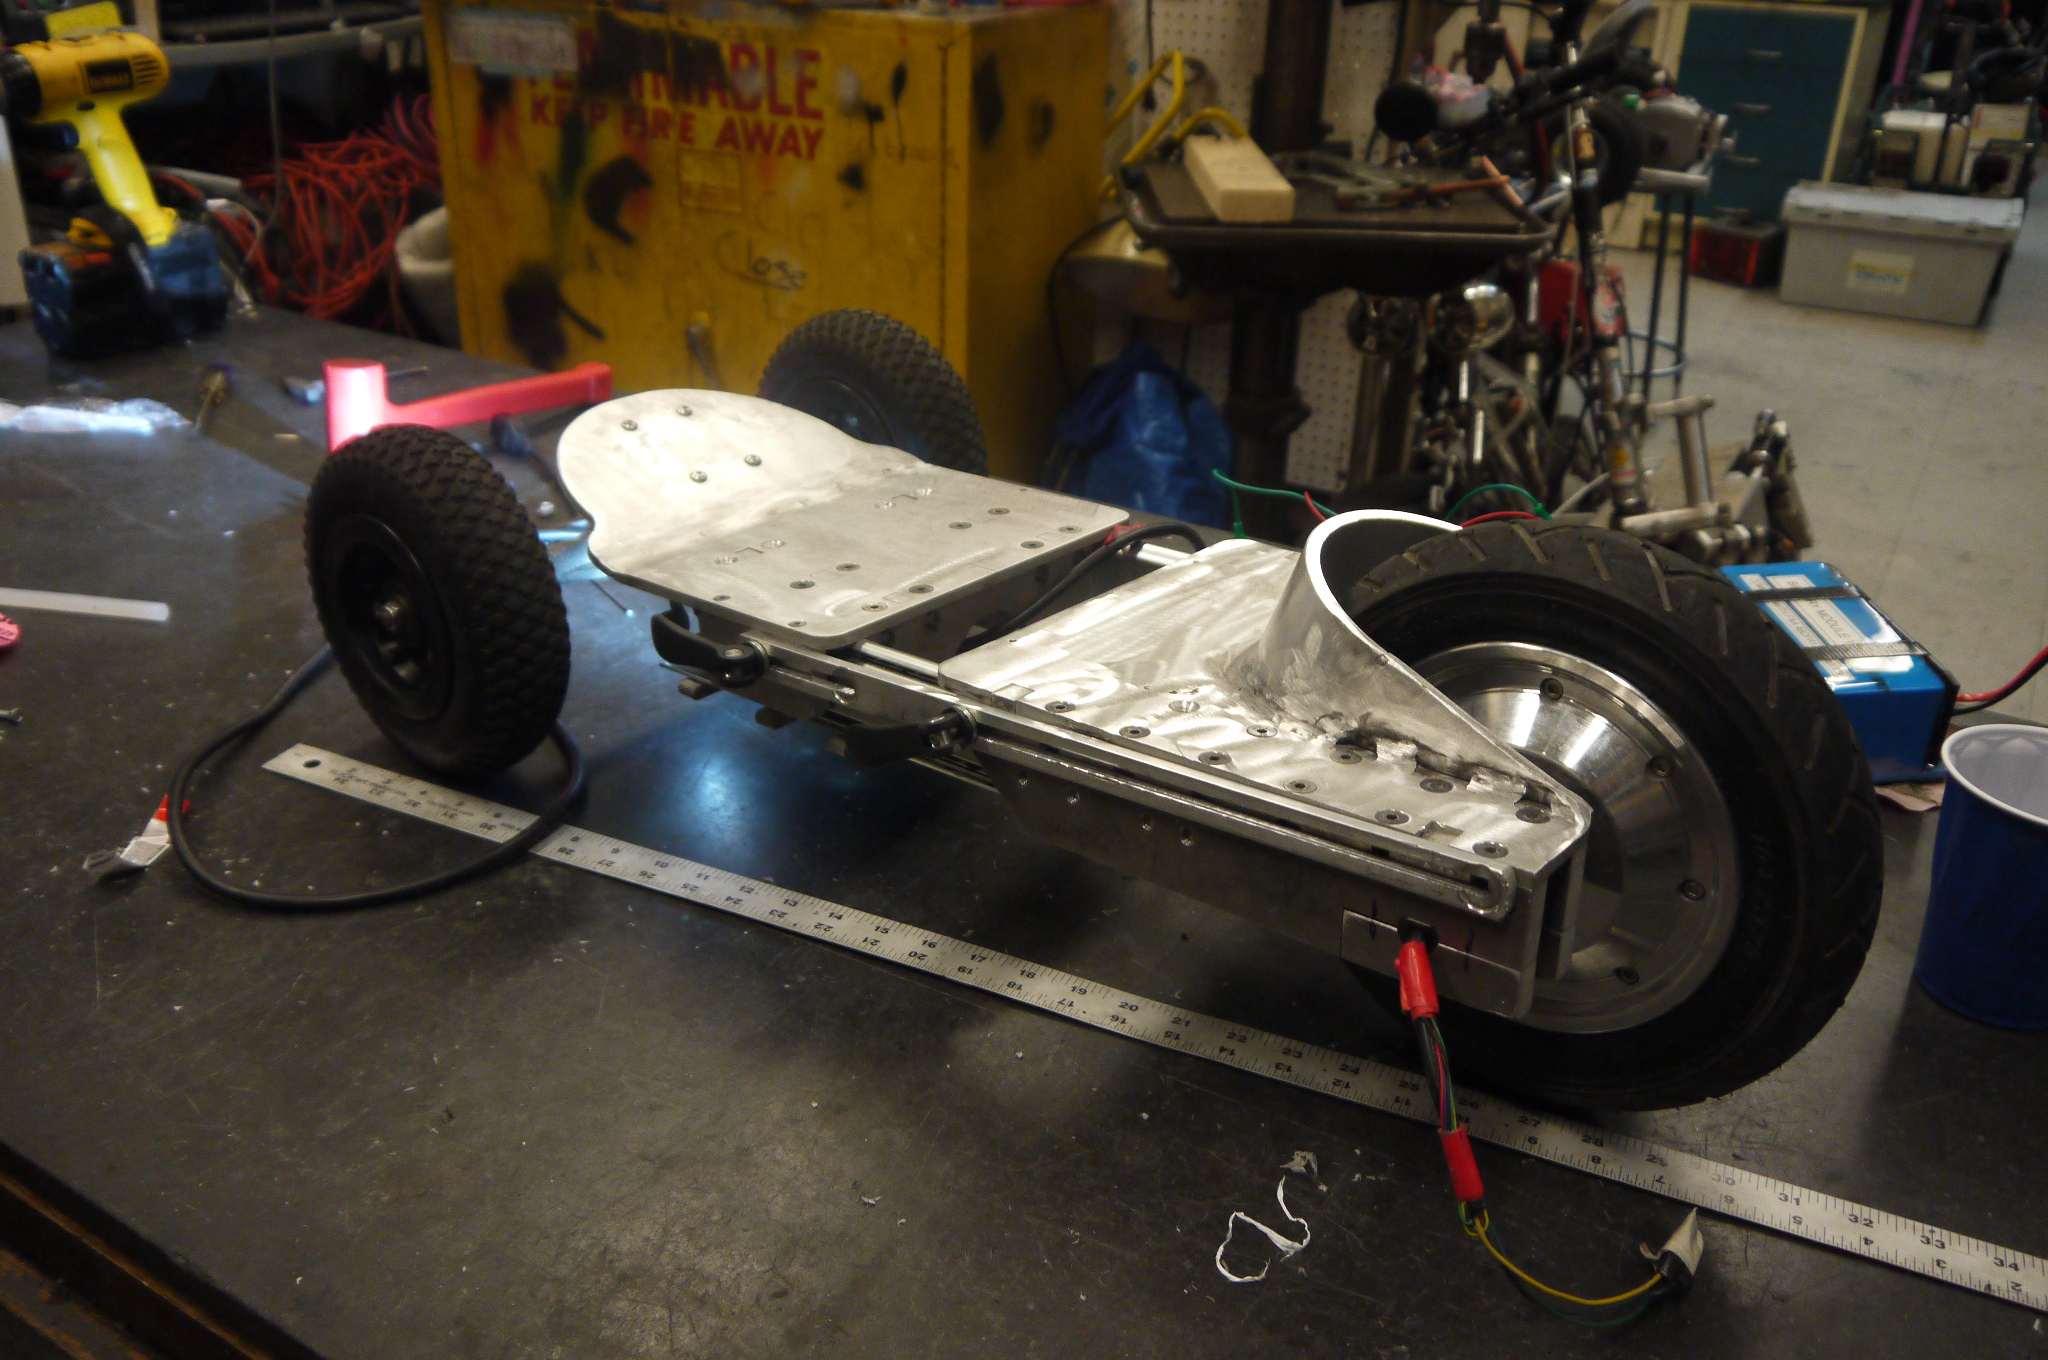
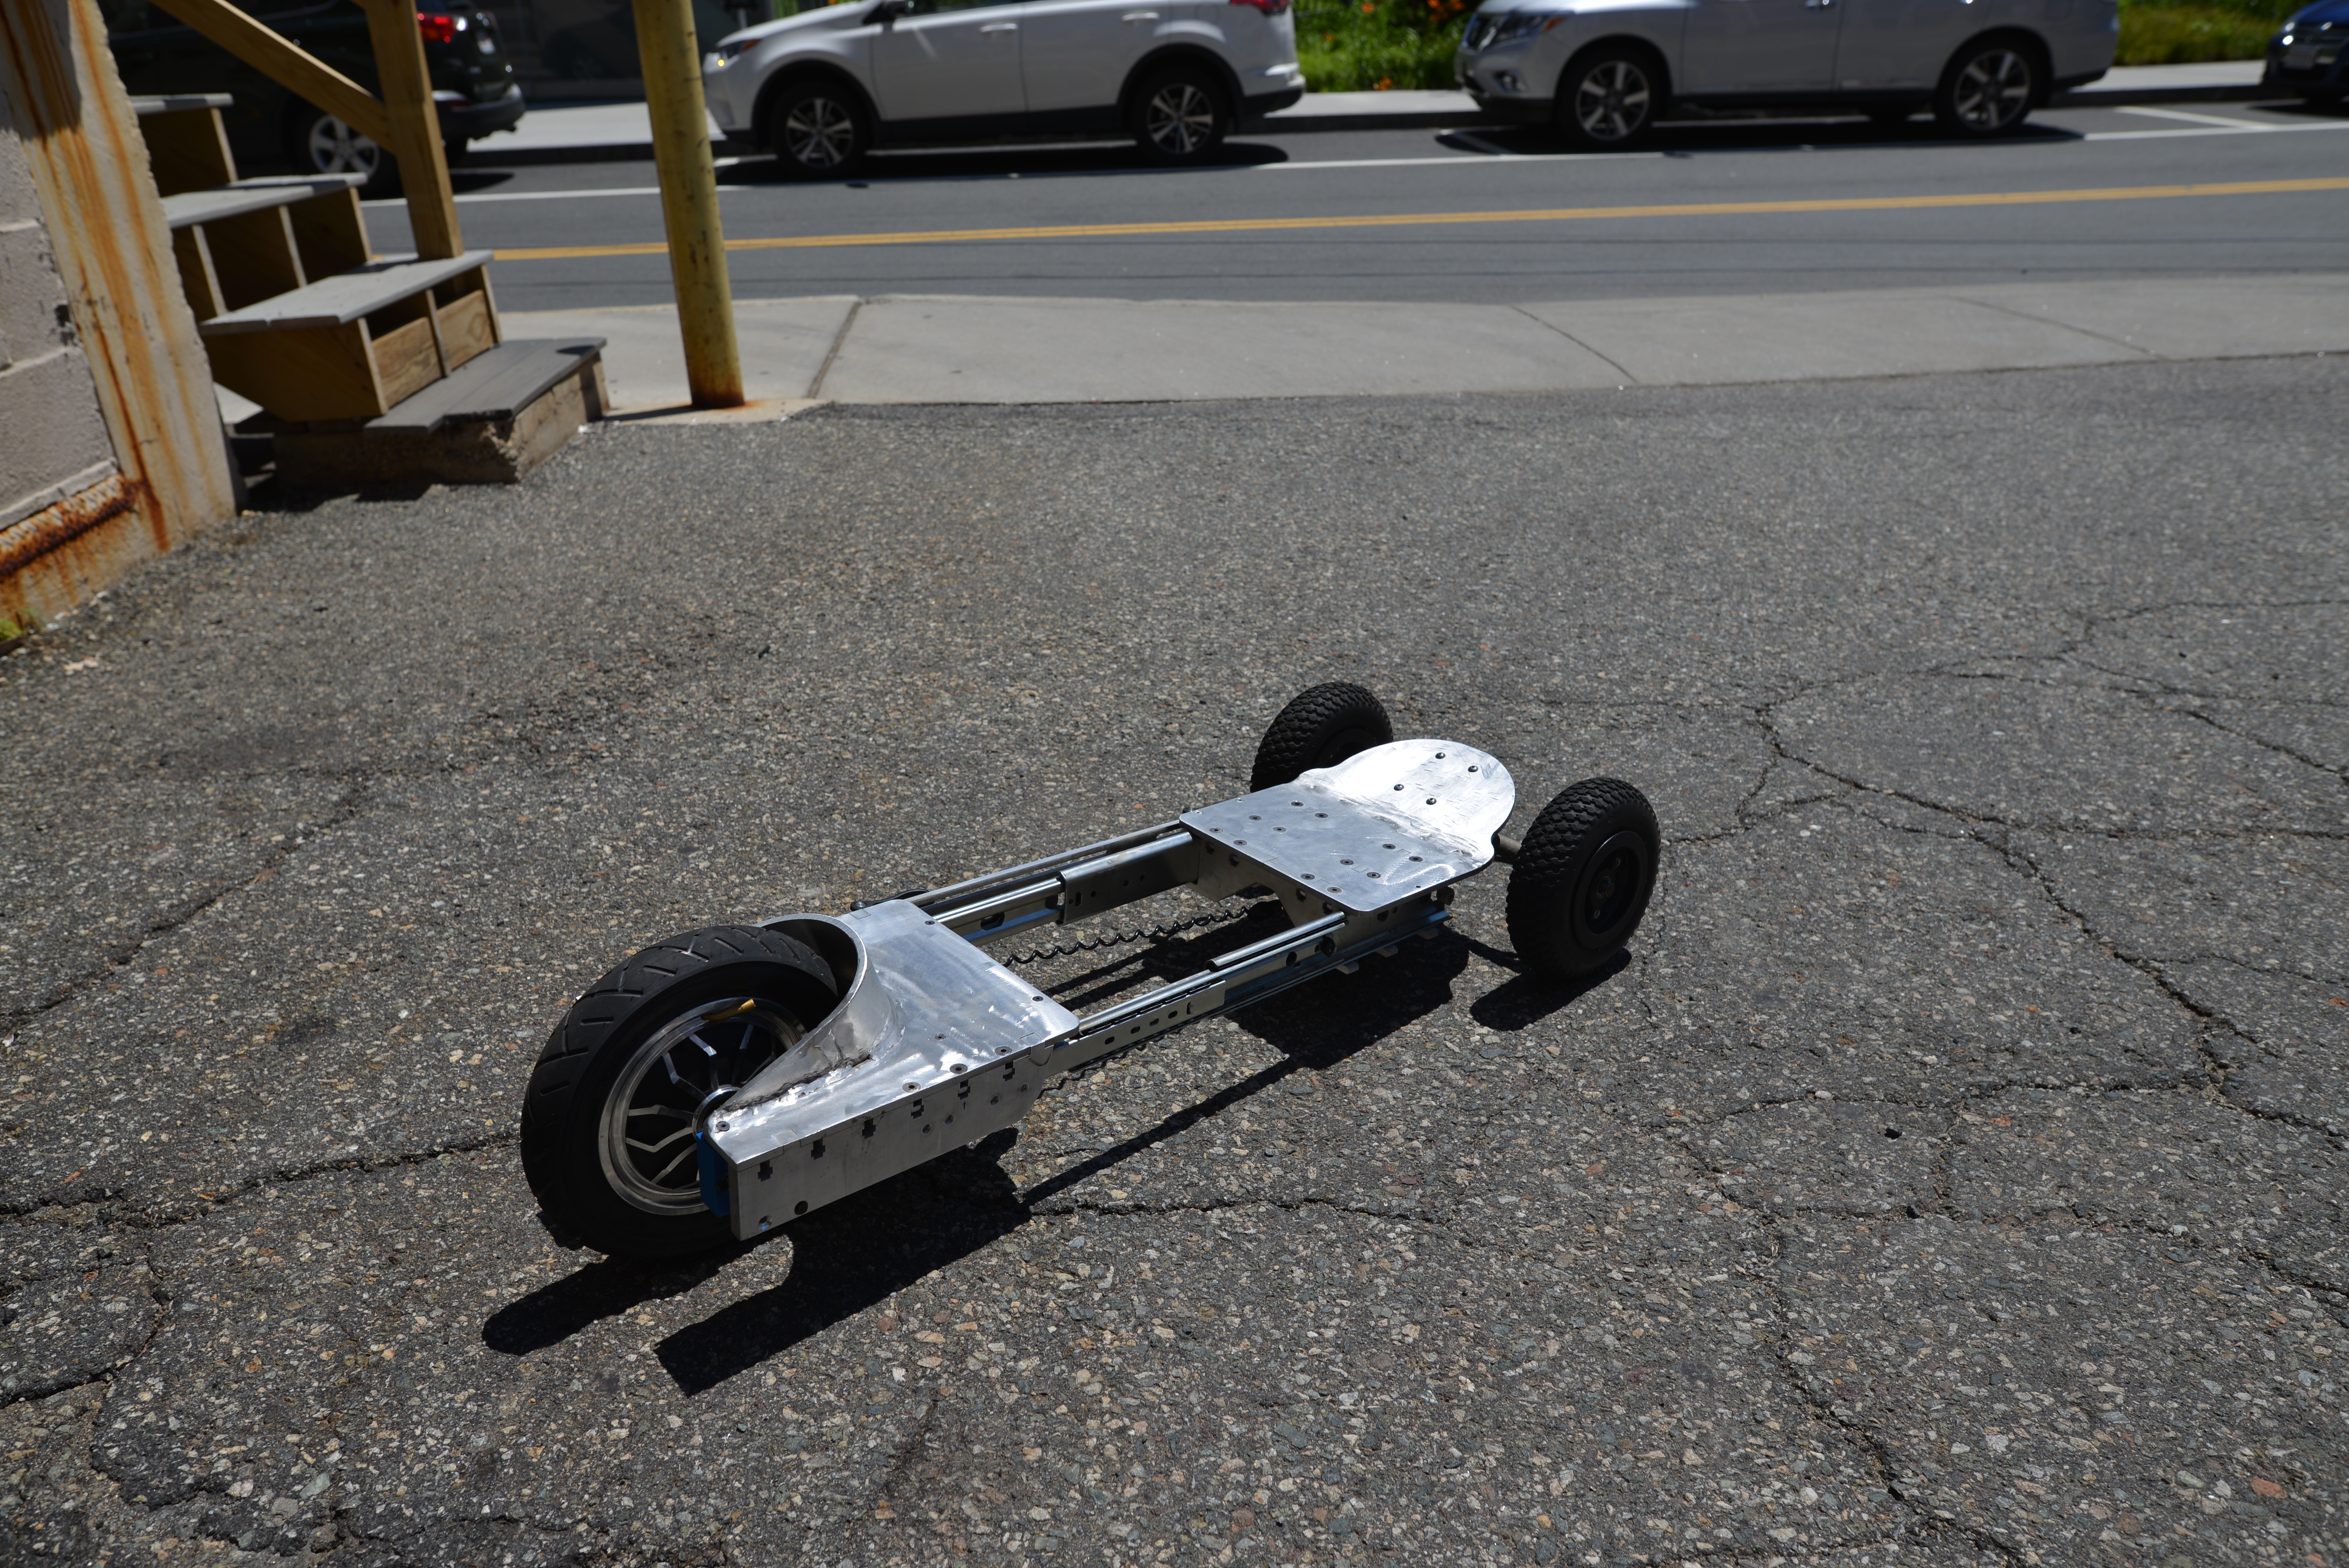
Shown below are the two states of the planned skateboard, collapsed and at full extension. CAM-actuated levers are used to lock the setup into place. 
The video above is a clip of running through Cambridge MA on an electric collapse-able mountain board. Shown is rough asphalt (Normal, poorly maintained Massachusetts roads and sidewalks) along with some gravel and dirt paths alongside an MBTA line. It holds up quite well. The VESC is set to 30A max and the pack is 40V nominal (10S Lithium Ion).
Video shot on a GO PRO Hero 2 CAD and PlottingThe host mountain board was a well used board with a flat tire. Mountain boards are really curious, they are intended for downhill or even more wild: being powered by kites. Using leg propulsion with a pneumatic tired board was fairly slow-going, the tires really absorb a lot of leg momentum. More curiously there are foot grabs but no external brake assembly. 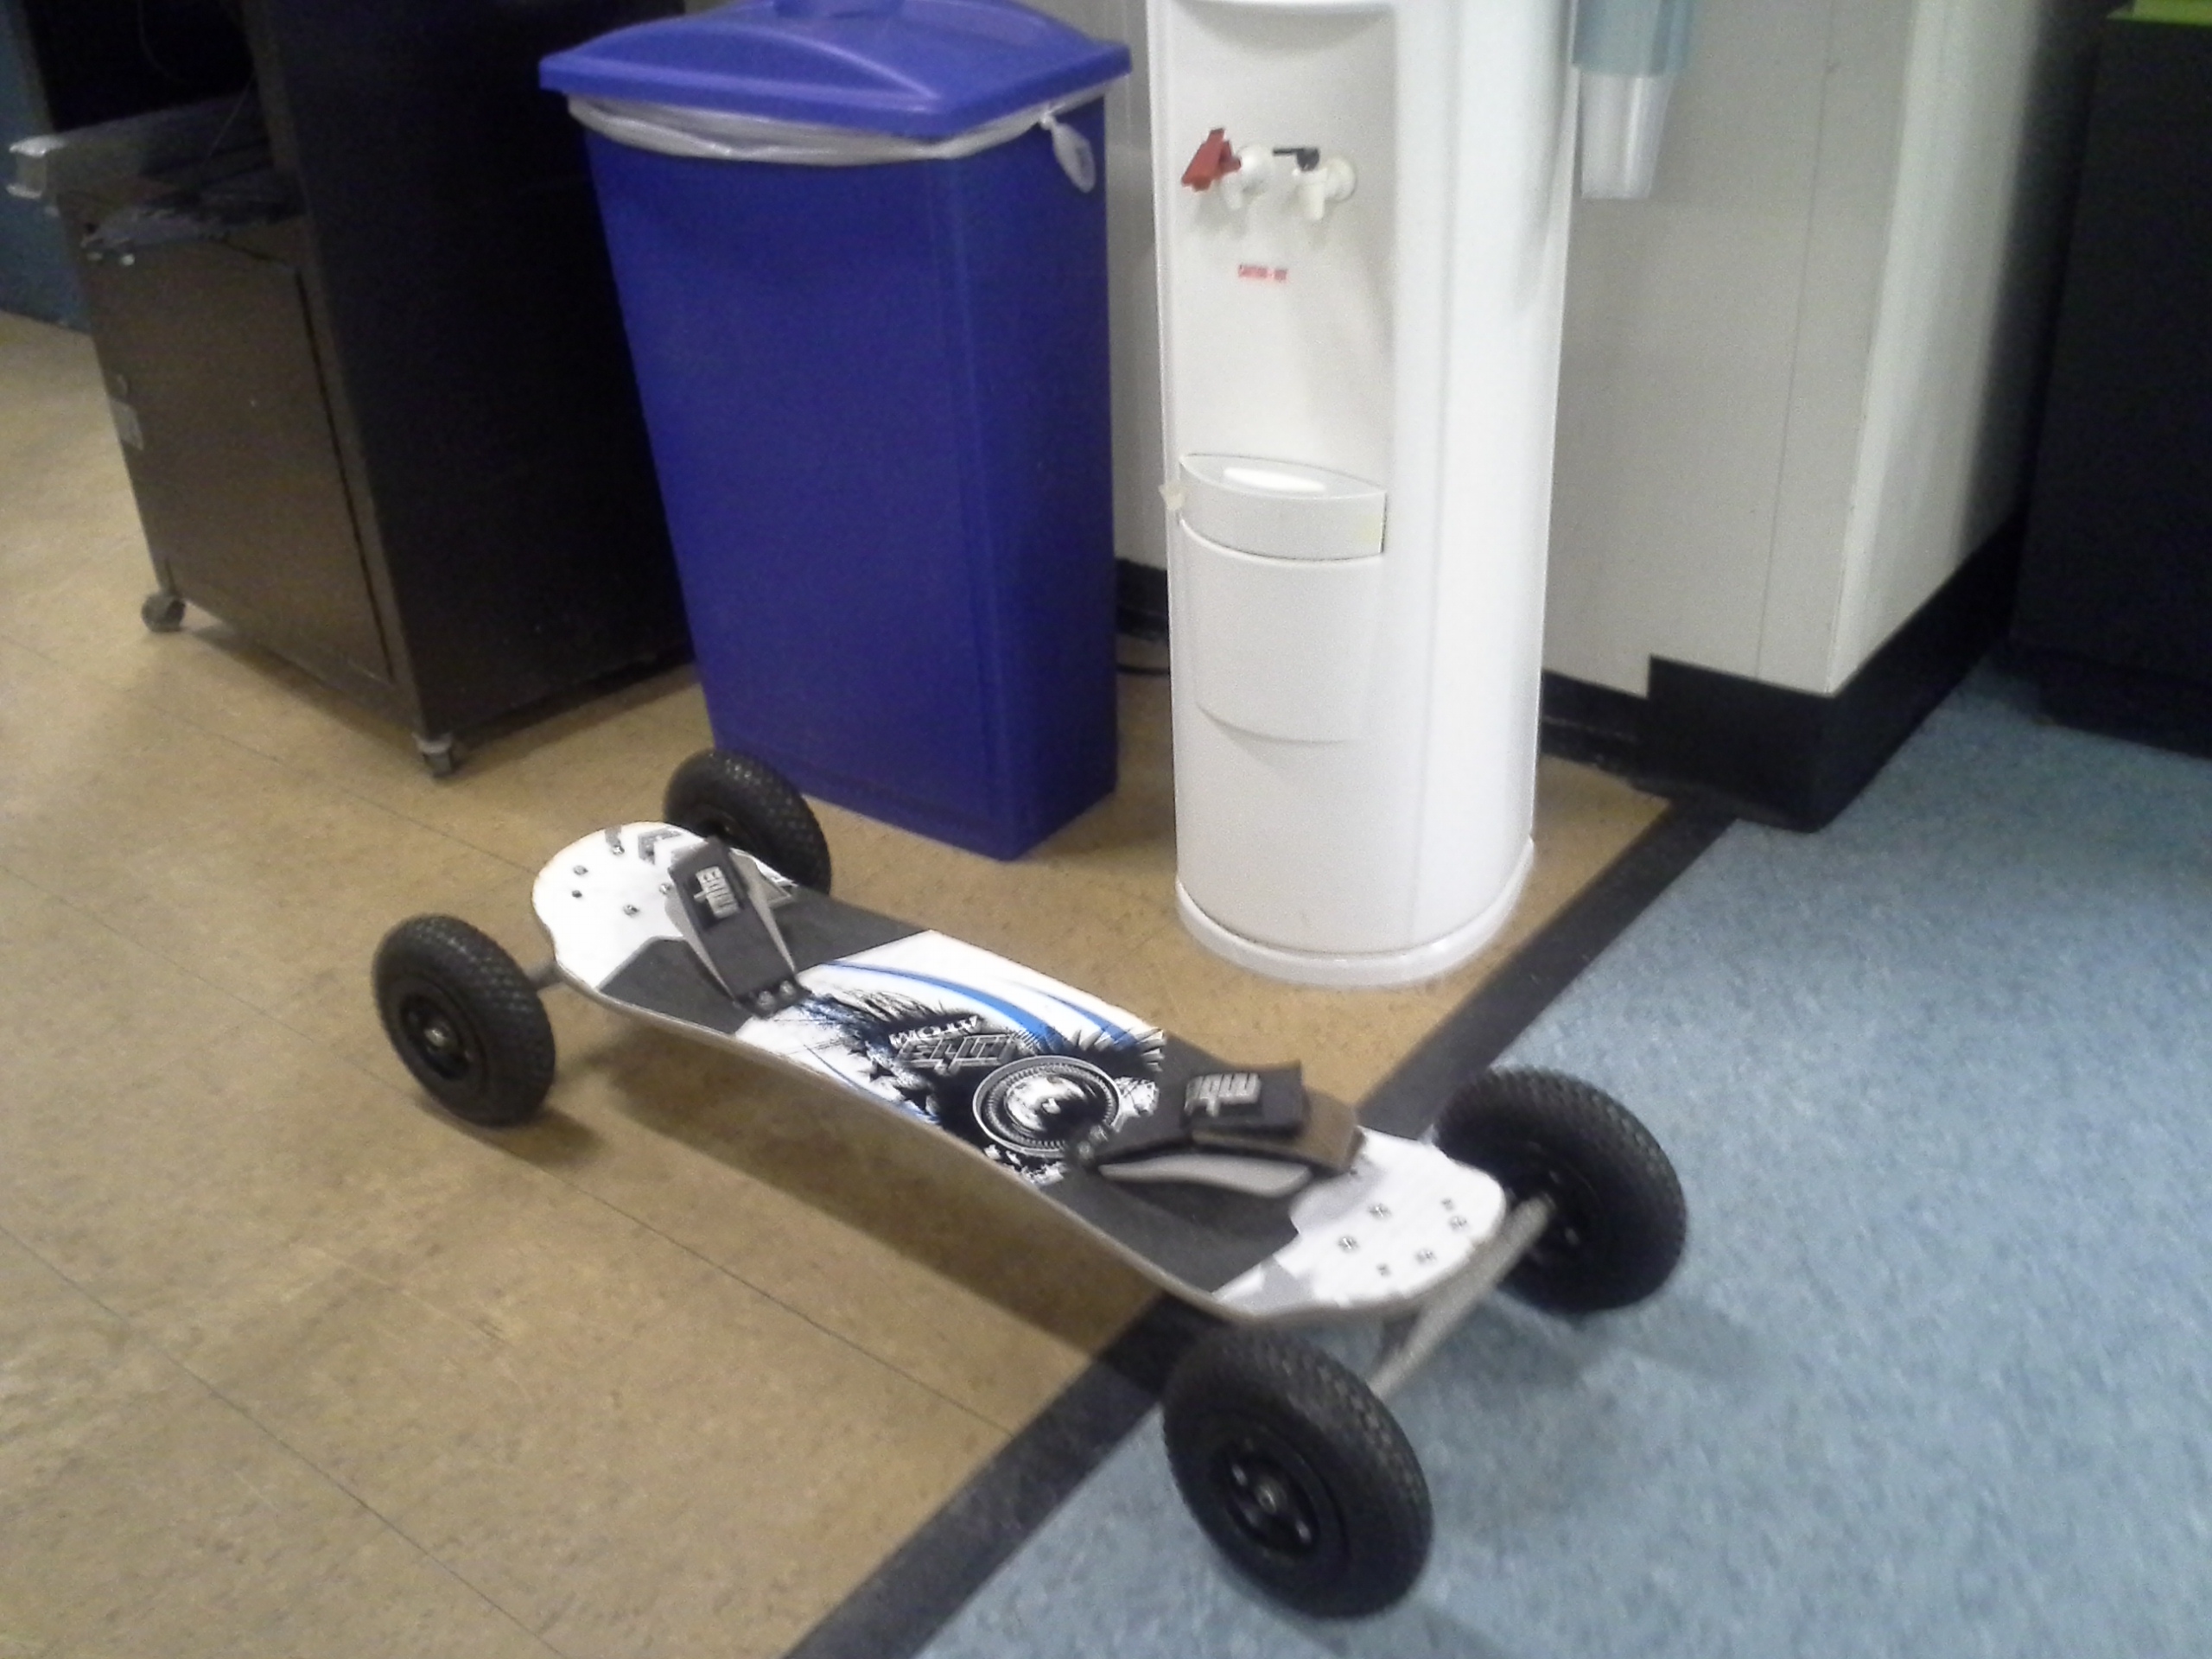
First Draft CADThe powered-fold-able skateboard plottings begin. My over-arching goal was to fit this thing in a normal checked bag, and be able to carry the whole thing on a plane. This model includes the front trucks from the host mountain board and a rough model of the hoverboard 10" hub-motor. 

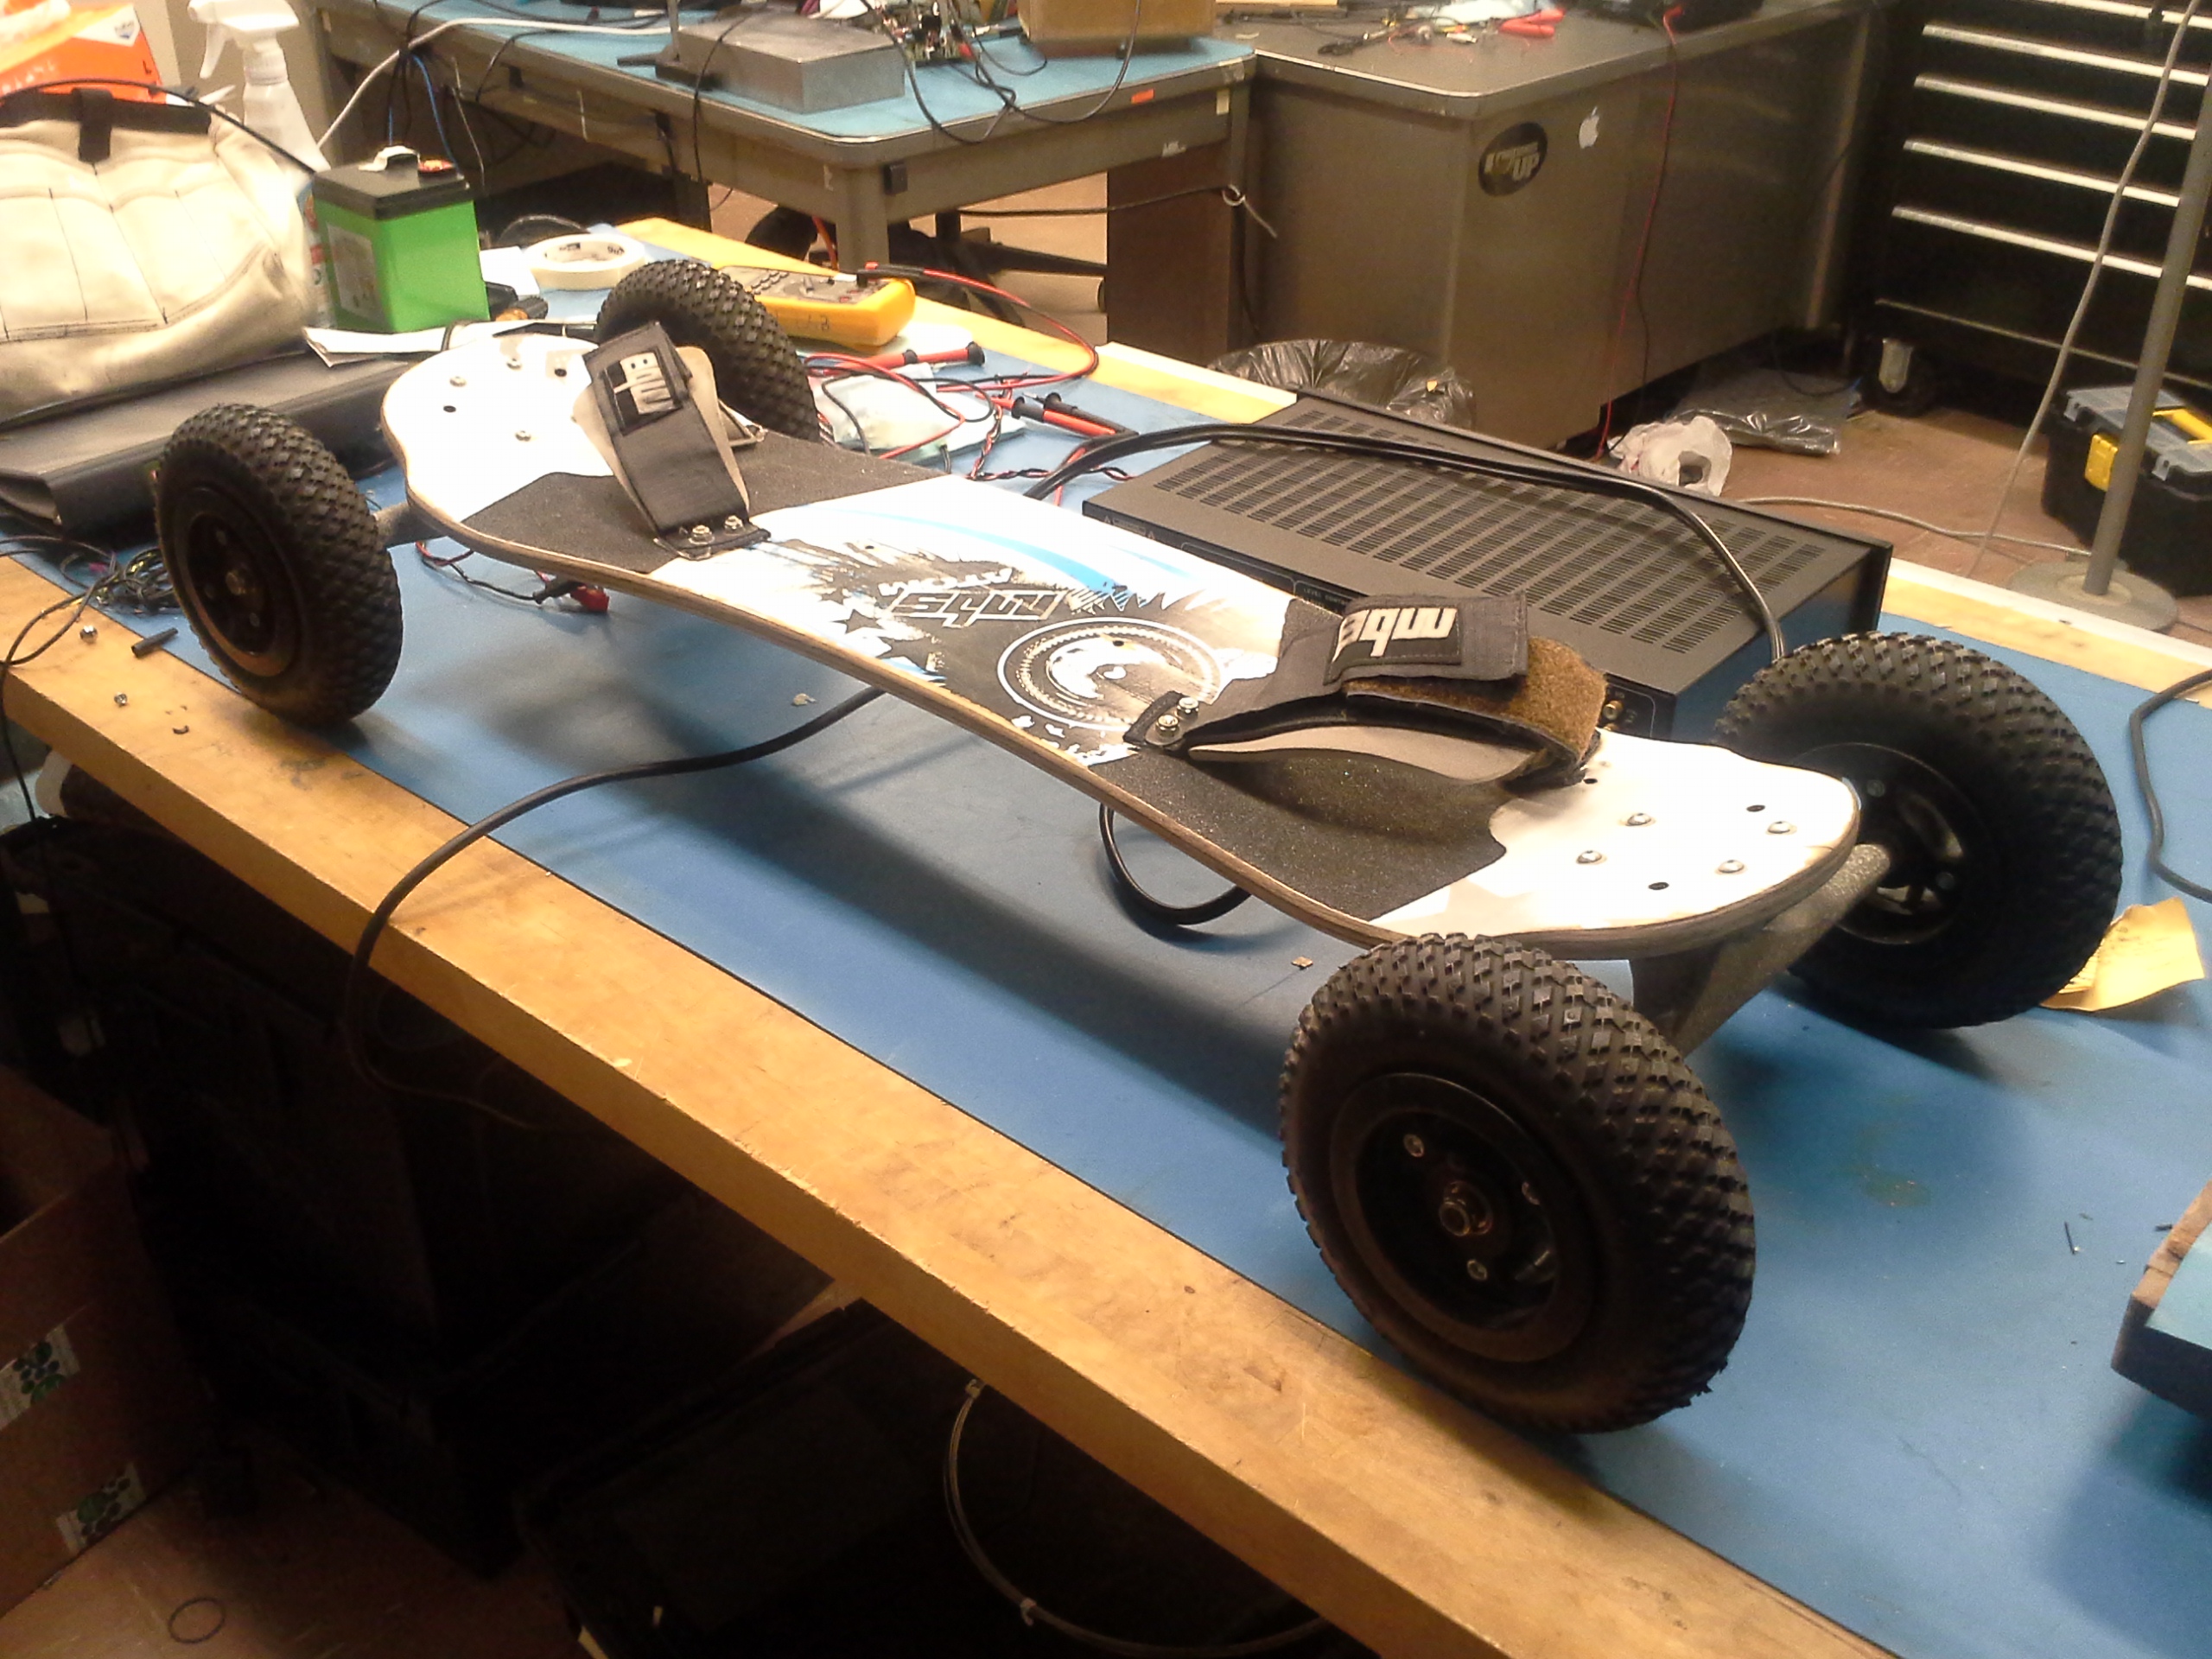
CompressedShown is the skateboard shrunk down into the 'travel' state. Almost all of the electronics are housed inside the rear portion of the board, including the battery module, the motor controller the receiver and the on-board 48v to 12v dc/dc converter. The only electrical bit outside the back was the headlight, connected by a coiled expansion cable. CAD files available at the end of the writeup. 

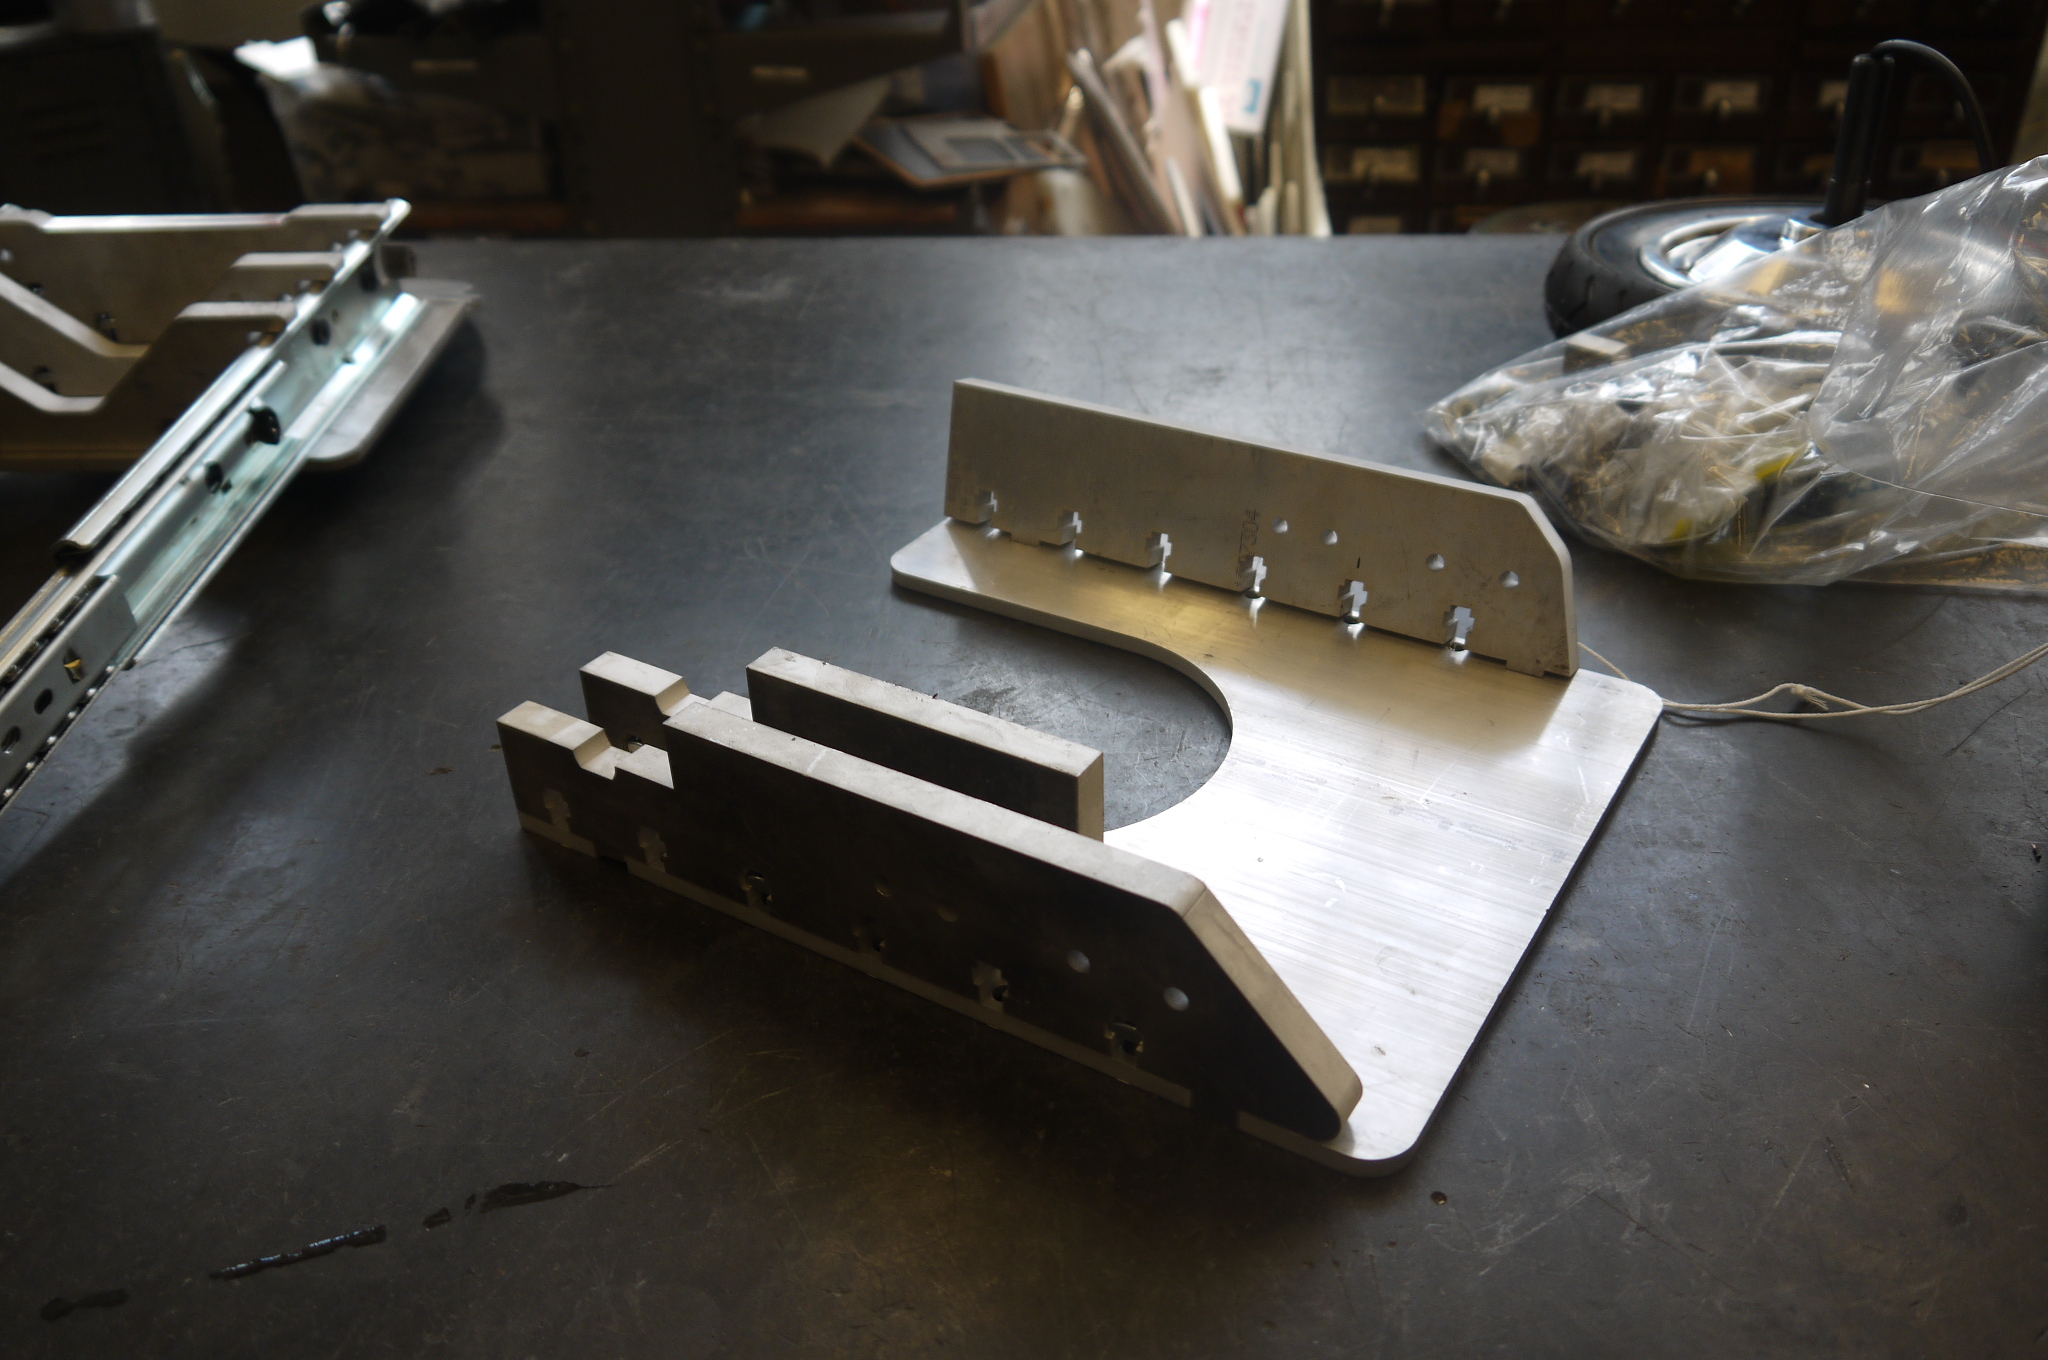
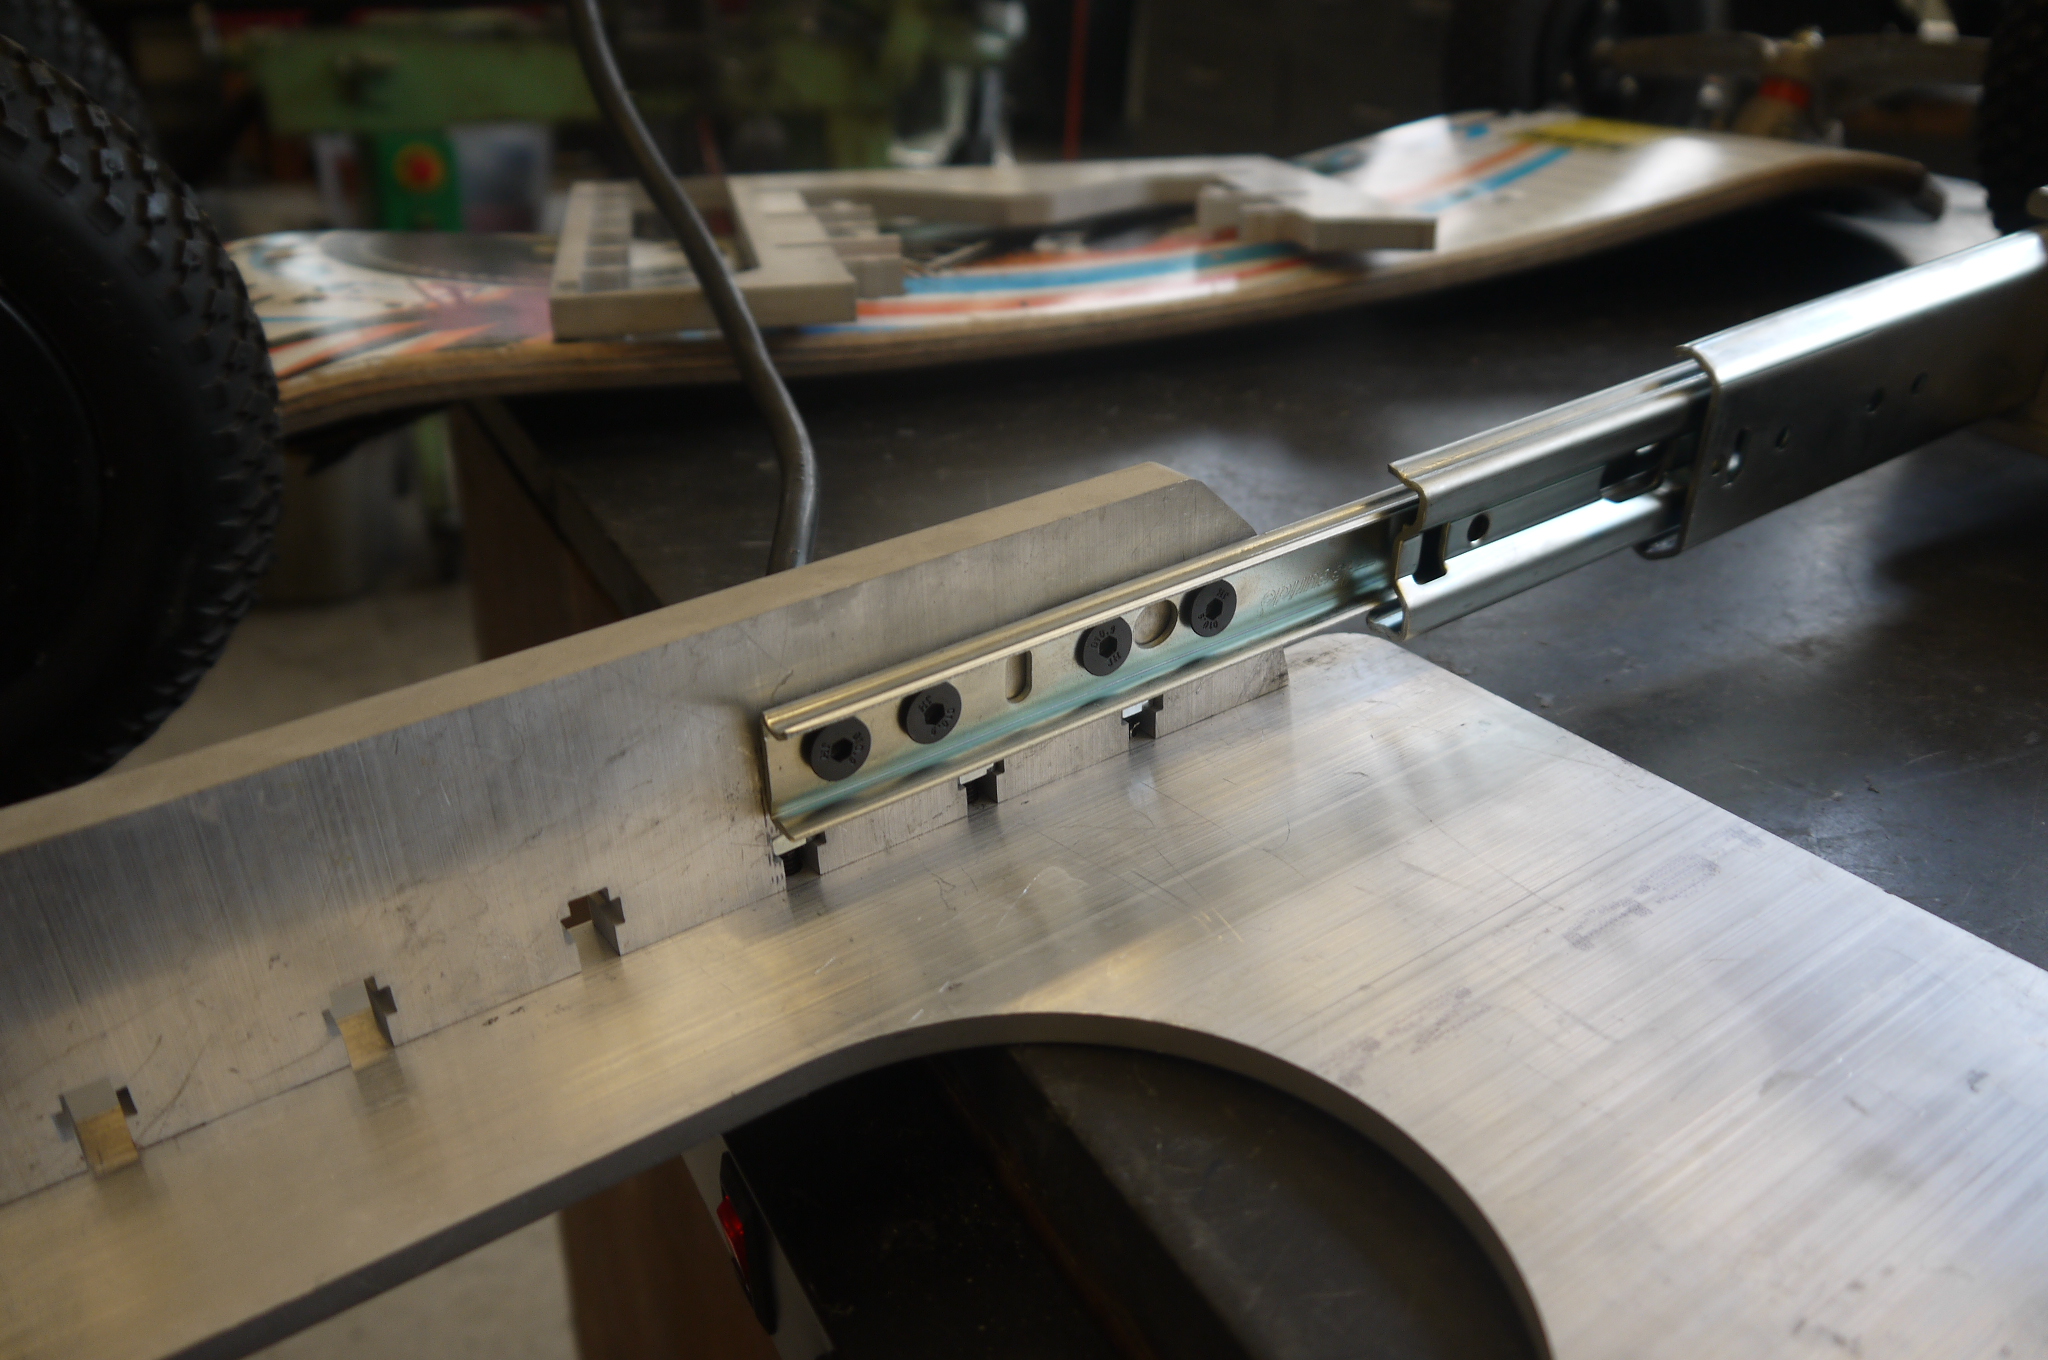
As the trip was coming quickly (1.5 weeks away), I opted for a quick-fabrication topology of a waterjet. Moreover, instead of having to tap and drill multiple holes, a captured-square nut topology was used. On the front half of the drawer-sliders, three braces keep the larger portion of the drawer-sliders perpendicular to the foot plates. The front wheels require mounting at an angle. Instead of press-bending the aluminum, i opted for a simpler interleaving fingers welded in place. 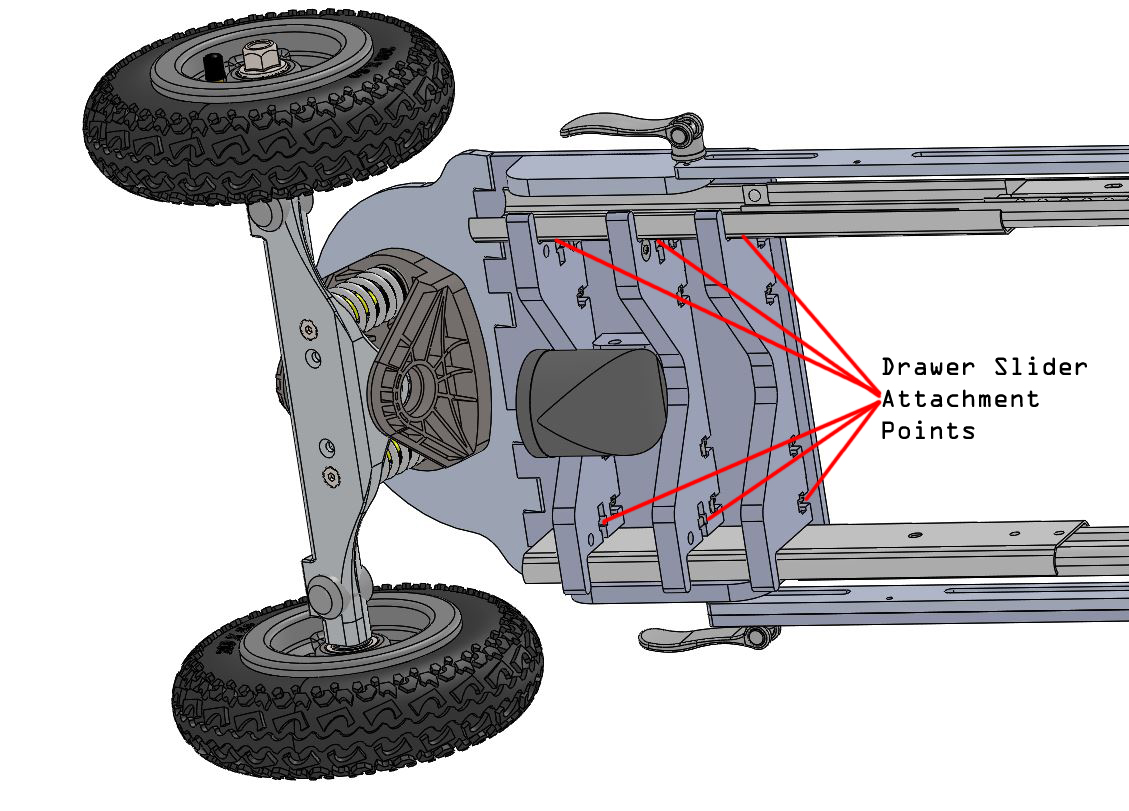

On the far side of the skateboard was the rear hub motor mount. As the hub motor is single supported (from a balance-board) two mounting points clamp it in place and couple the load into the rear foot plate. 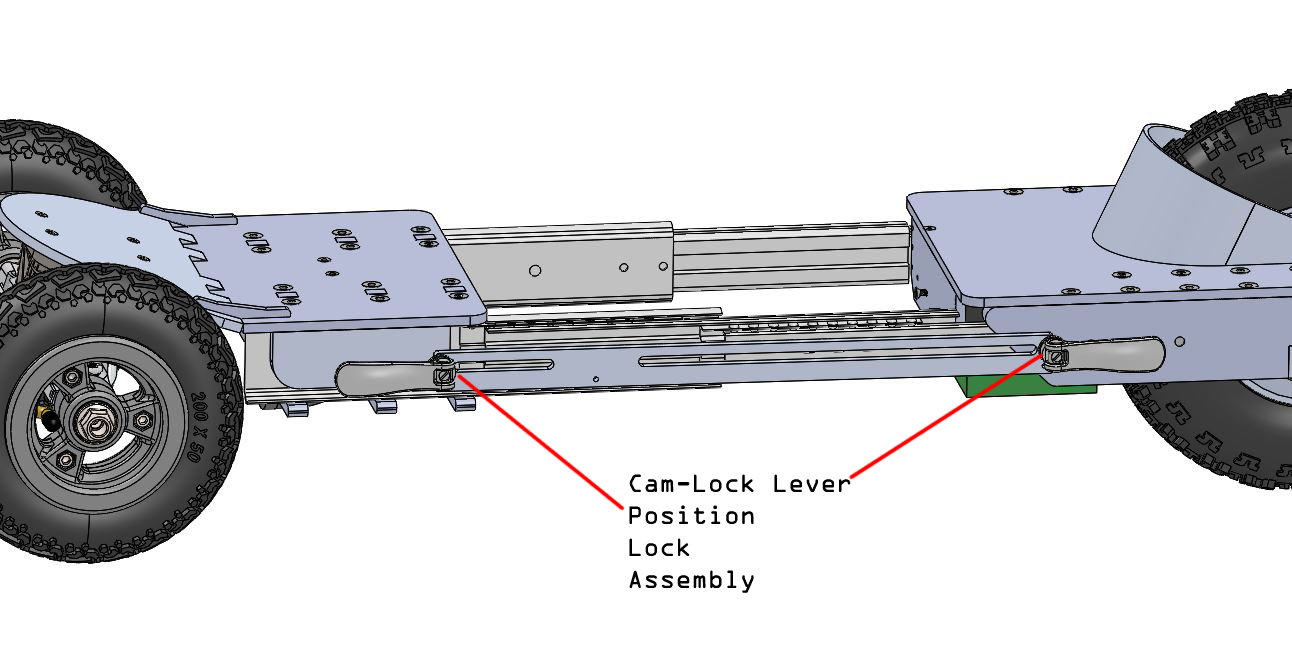
To prevent the whole assembly from collapsing into itself a slotted assembly was used with latches to hold it in place. Initially I used hand-tightening screws but they are fairly horrible in a vibration environment. Ben mentioned cam-locks and lo, they did the trick quite well! 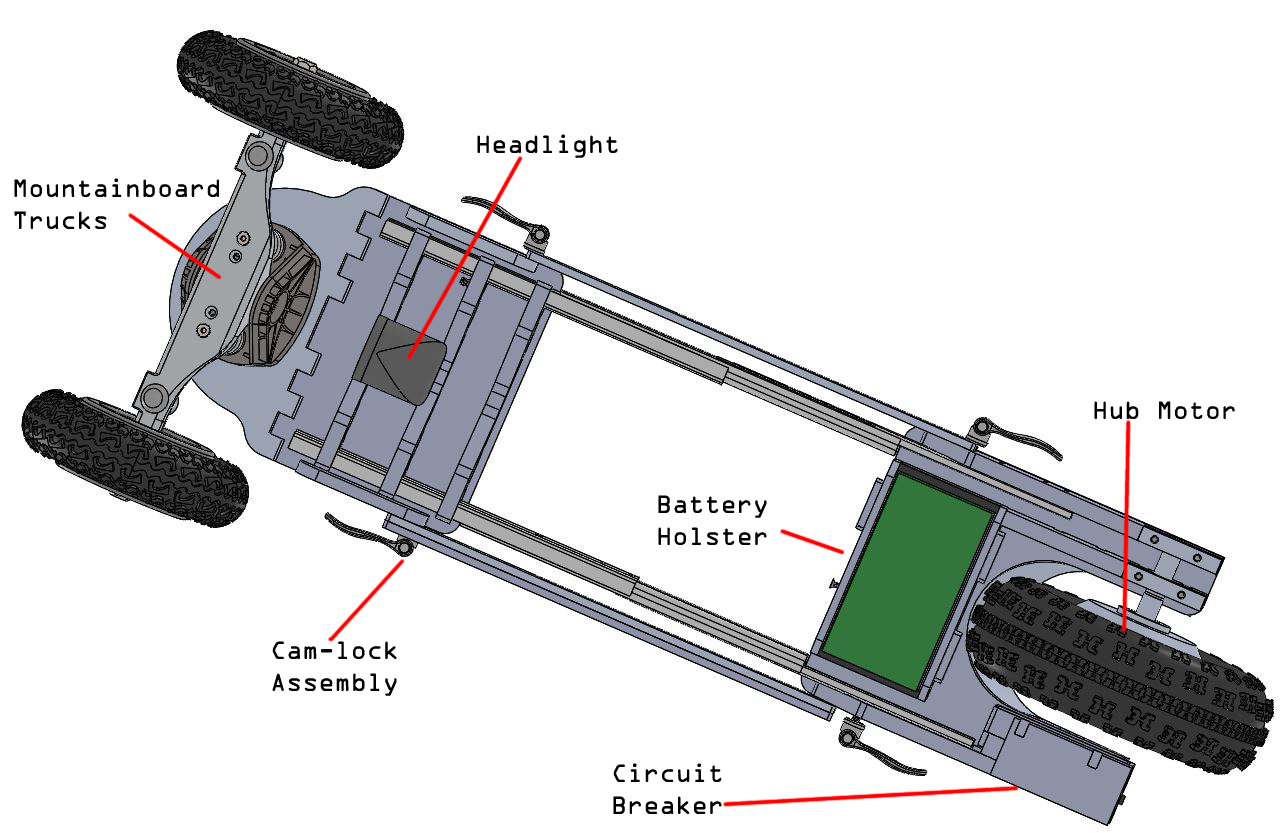
So overall the mountain board consists of 3 parts, the front steering pod including the headlight, the rear hub-motor motor controller assembly and finally the drawer-slides and position locks. Given that the front module requires power, a small coiled expansion wire (similar to a phone cable) is used. Electronics OverviewThe skateboard hardware platform was intentionally basic. A battery pack connects through a vibration capable circuit breaker into a motor controller (VESC) along with a 12v DC/DC converter for headlight operation. A 2.8 GHZ receiver mates to the VESC for throttle PPM and finally the VESC pumps out 3 phase AC per the position feedback from the hall effect sensors. A huge power zener (well above the minimum trigger voltage of the battery pack) is included here to prevent an over voltage condition. If the Circuit breaker trips under load, I didnt want regenerative current from the motor to ramp up and destroy the VESC. 
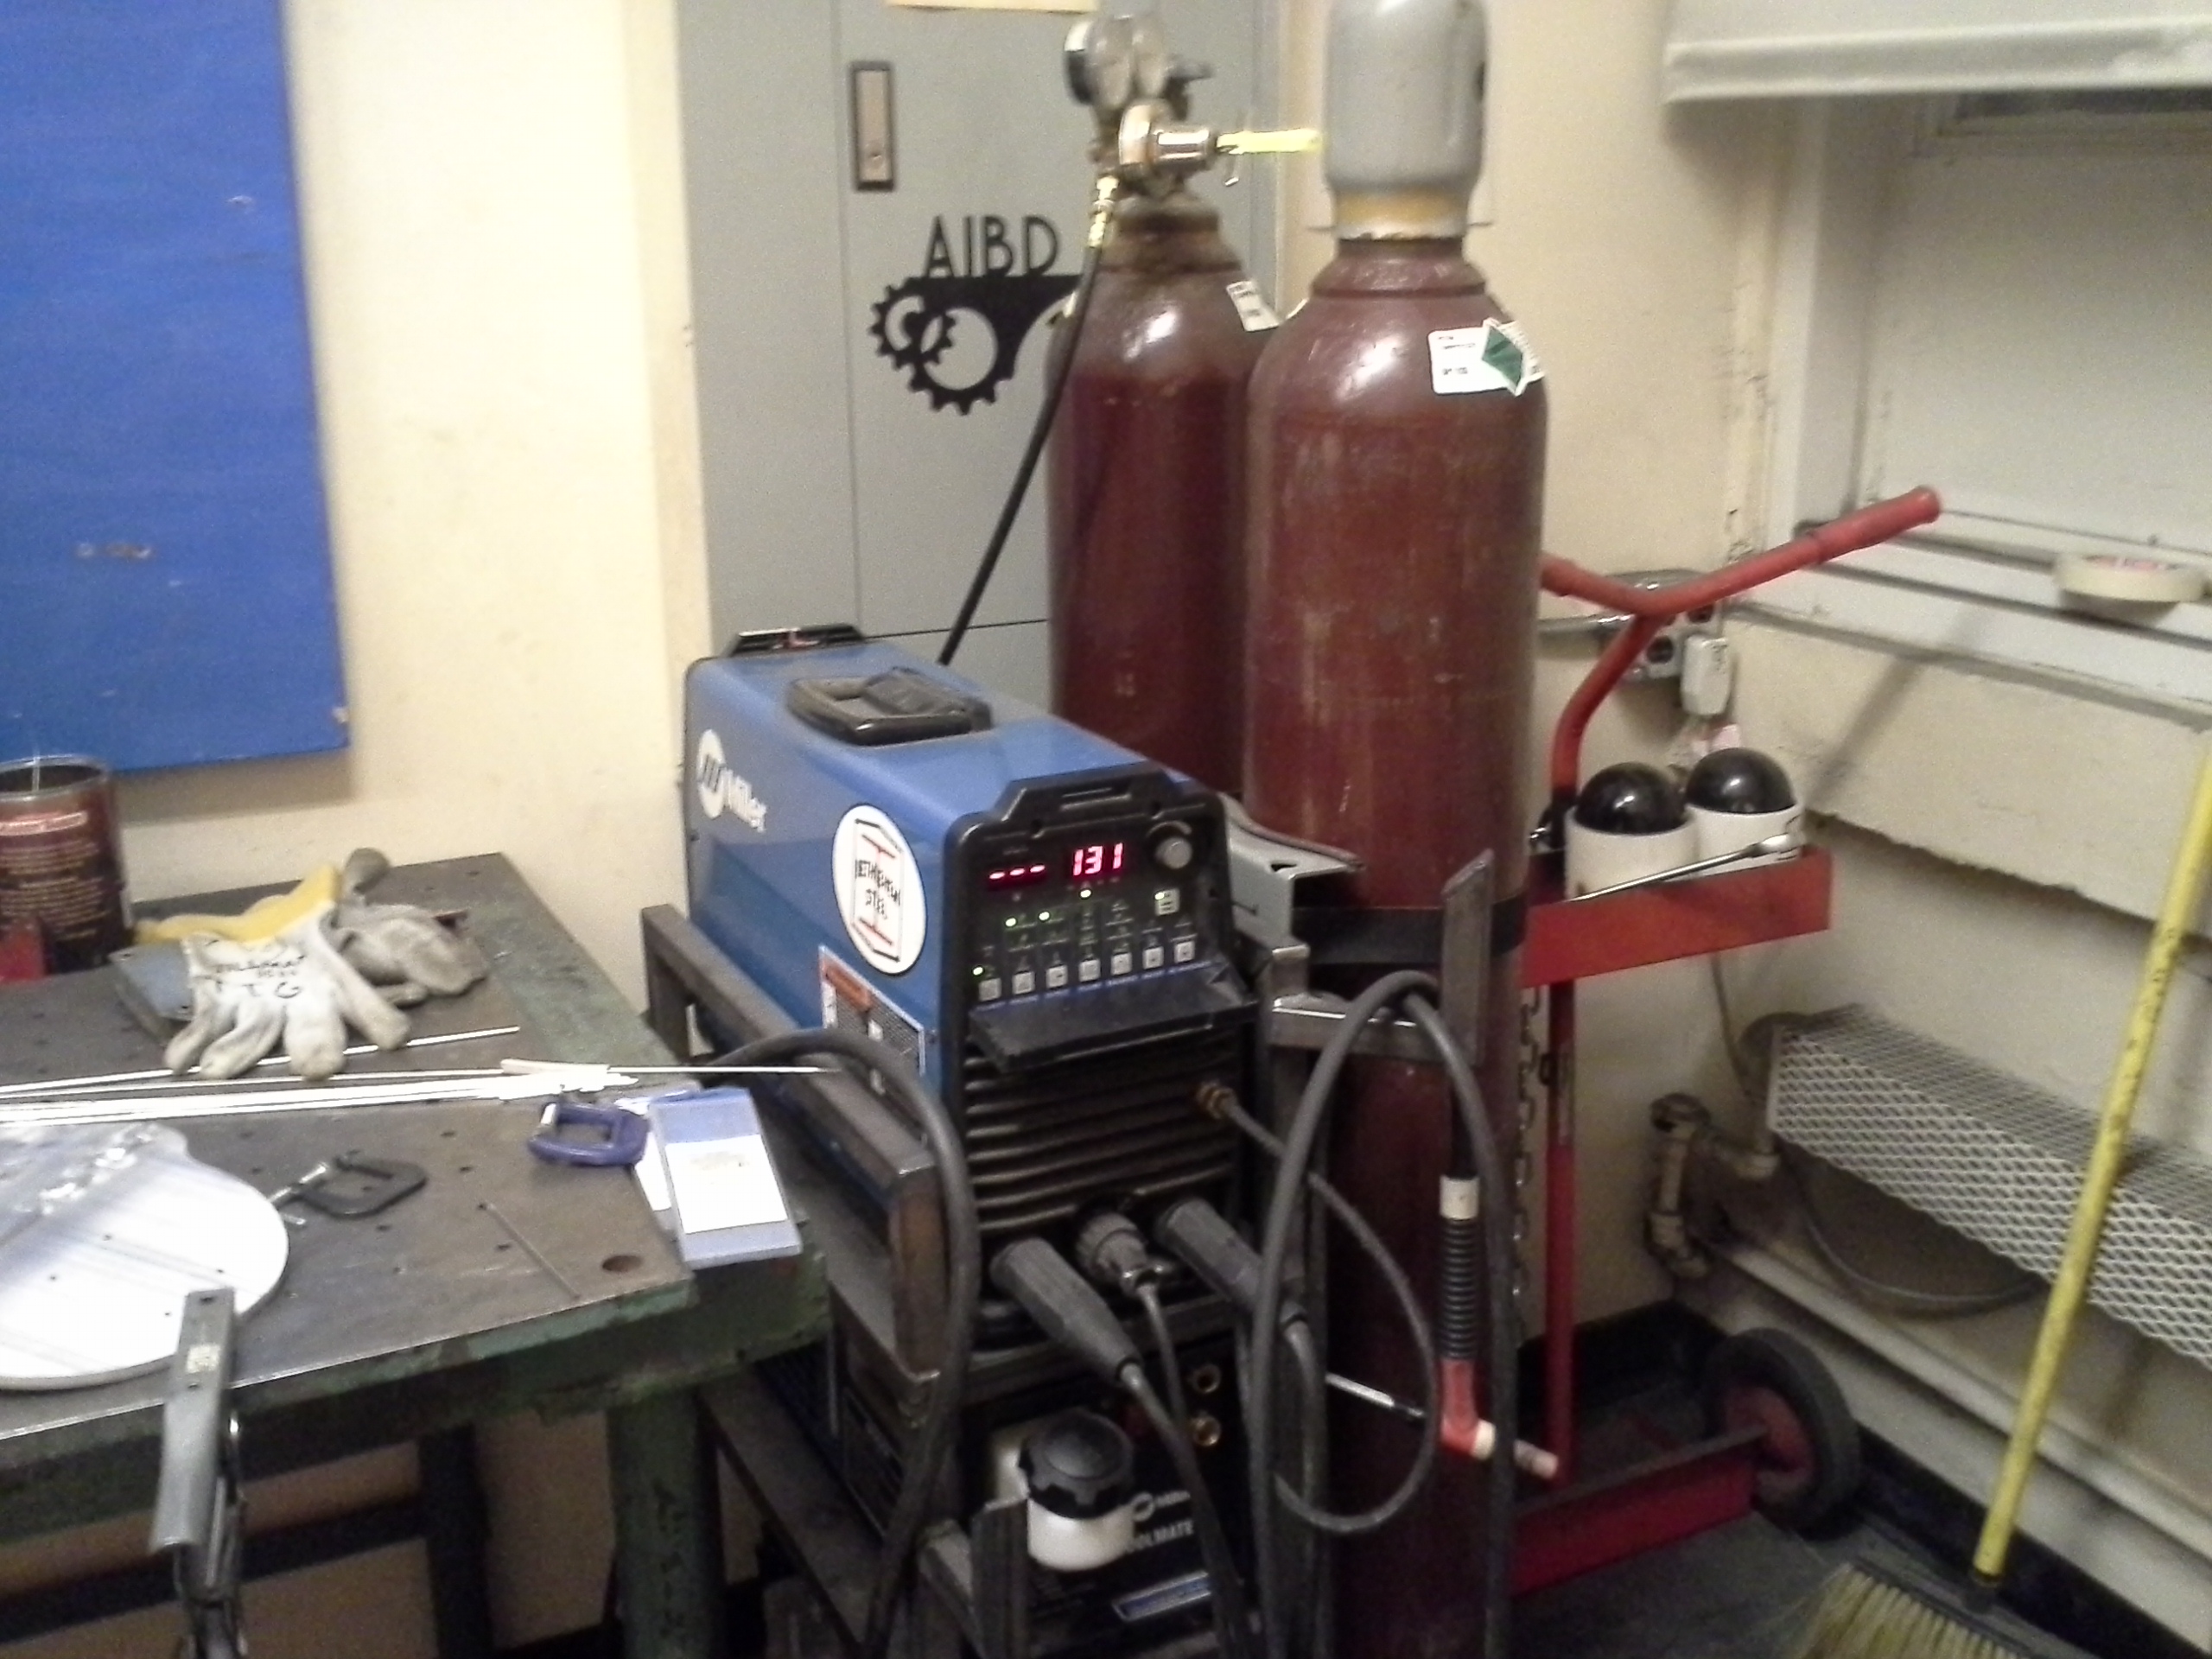
Assembly BeginsThe first weldment is the angle for the front truck mount. This is 6061 aluminum, 0.25" thick. DLAB tig to the rescue. I made small brackets to allow the clamped part to sit at a fixed angle. Tiny clamps were used to keep the small angle brackets in place. 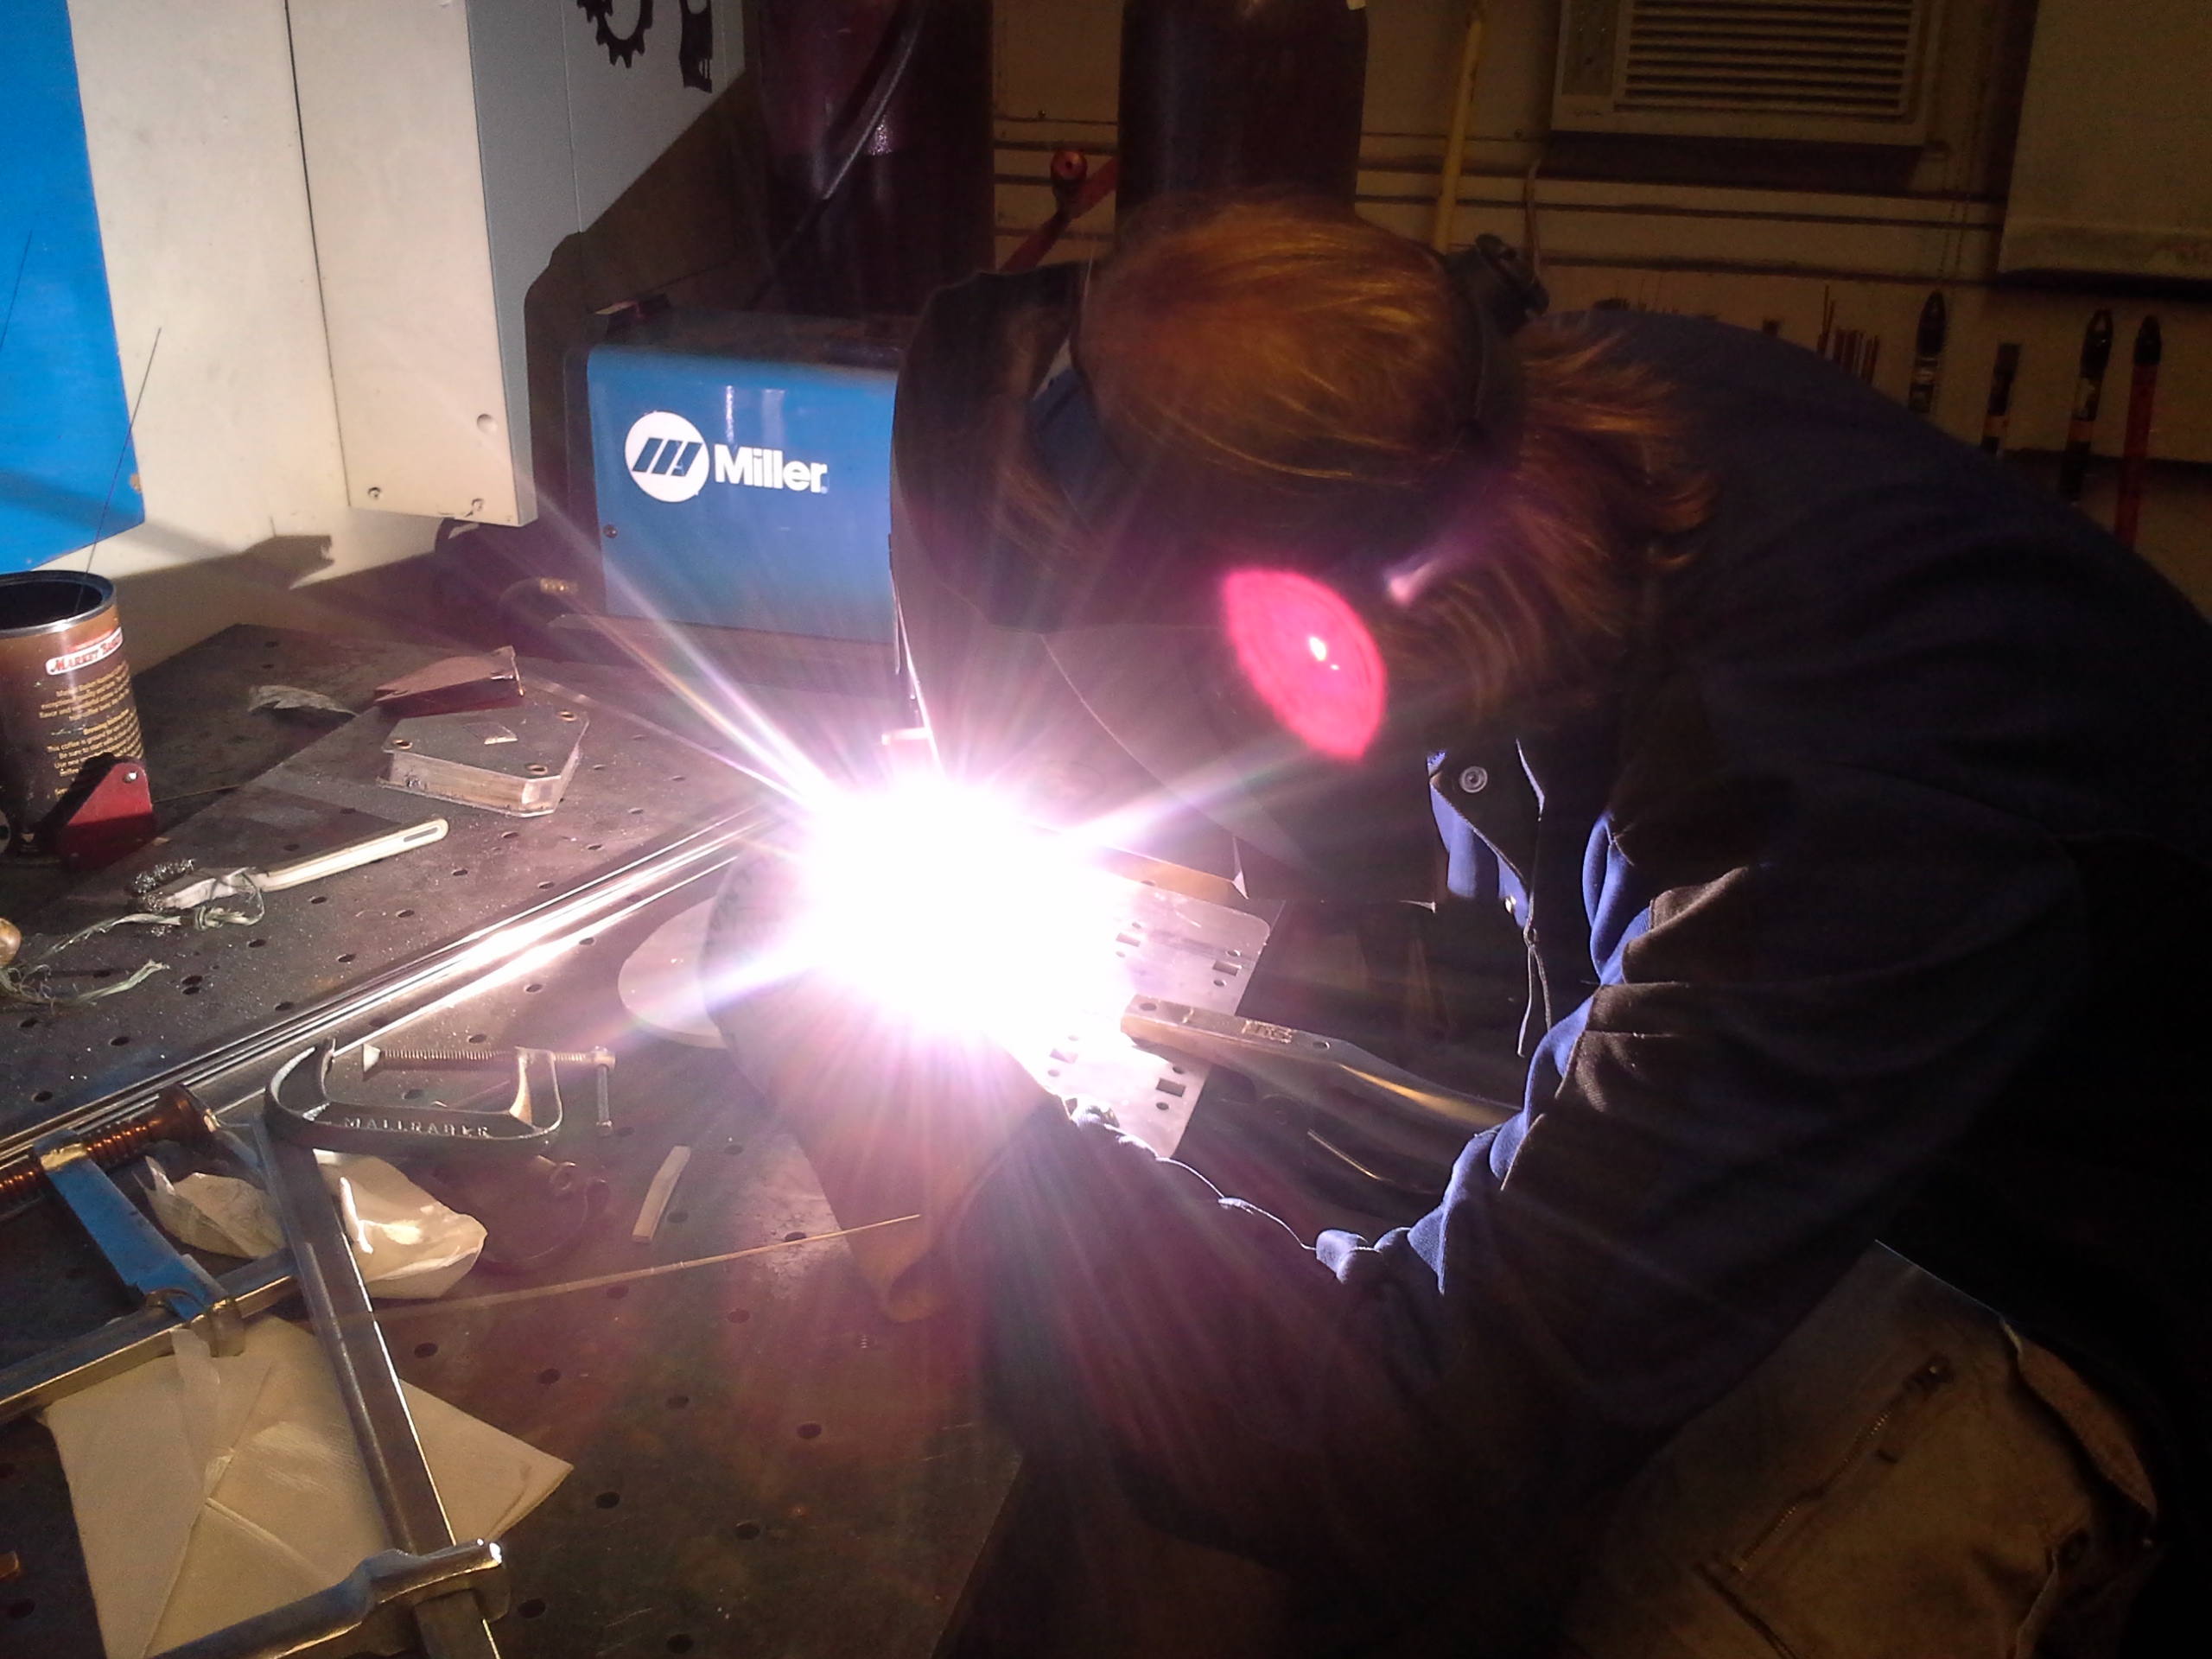
The same FRED that brought you mass destruction, joined in for welder party. After the welding was complete, I used a flap-disc to sand the weldment surface into a more reasonable state. 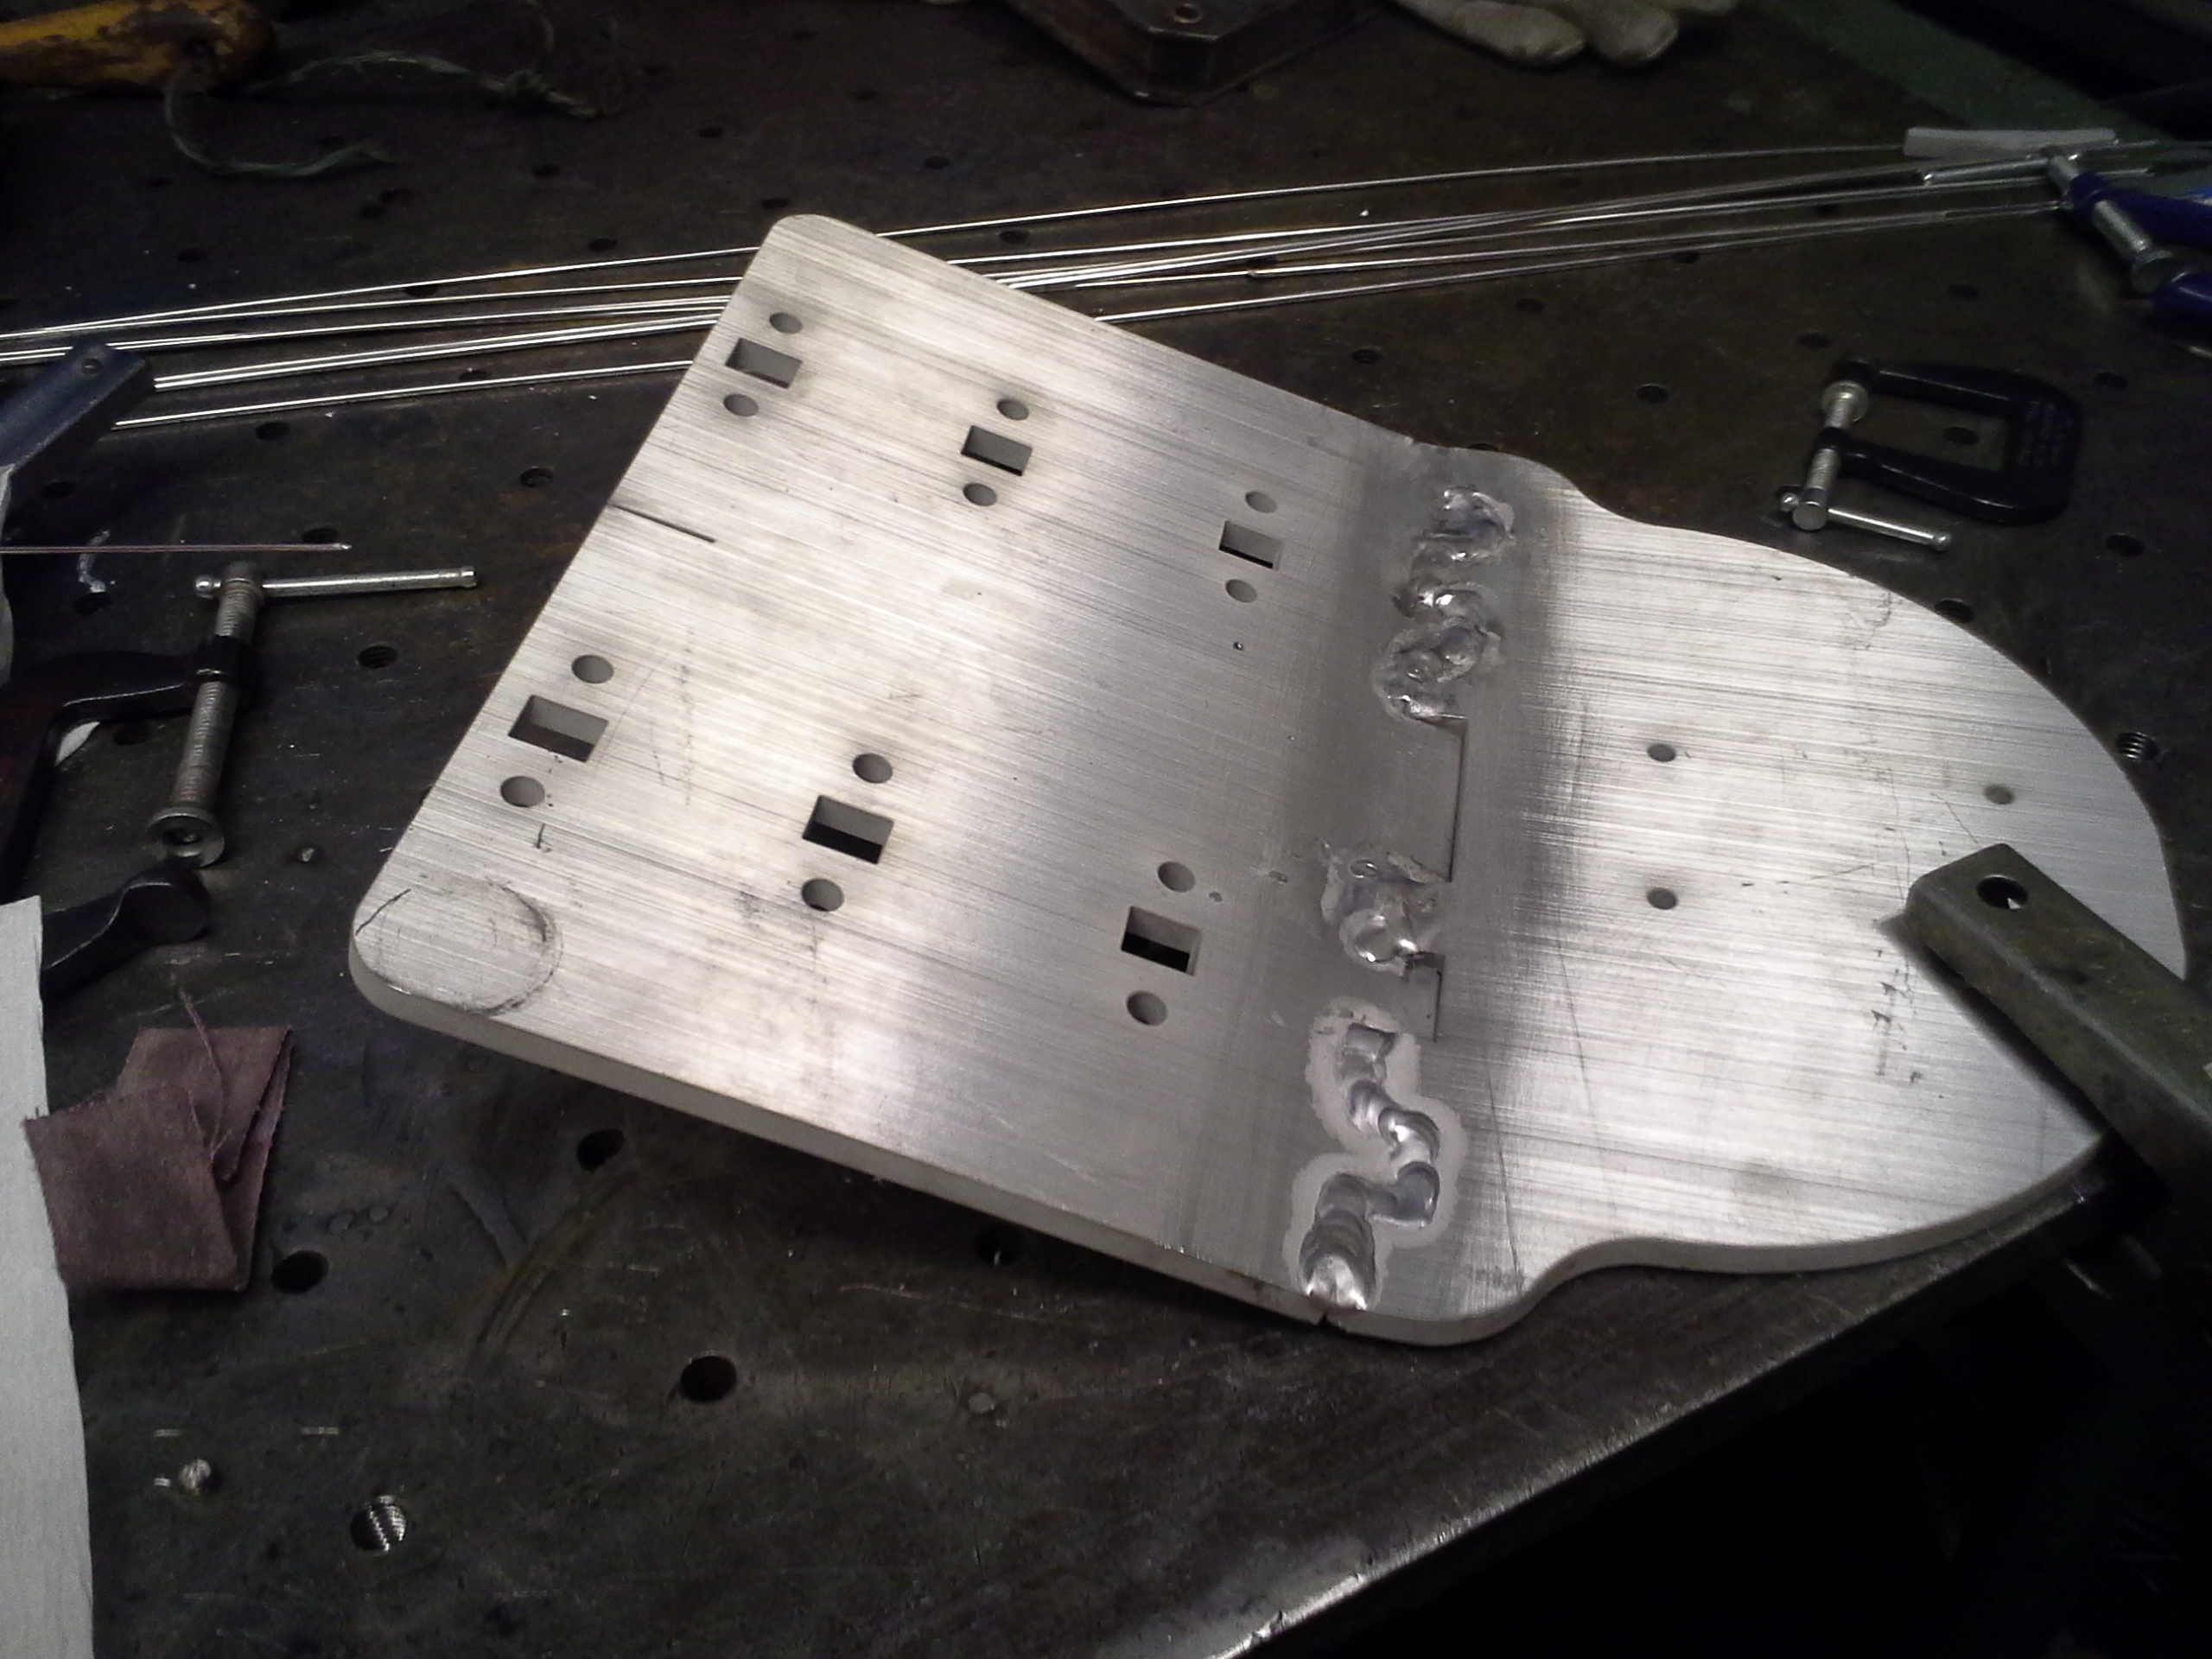
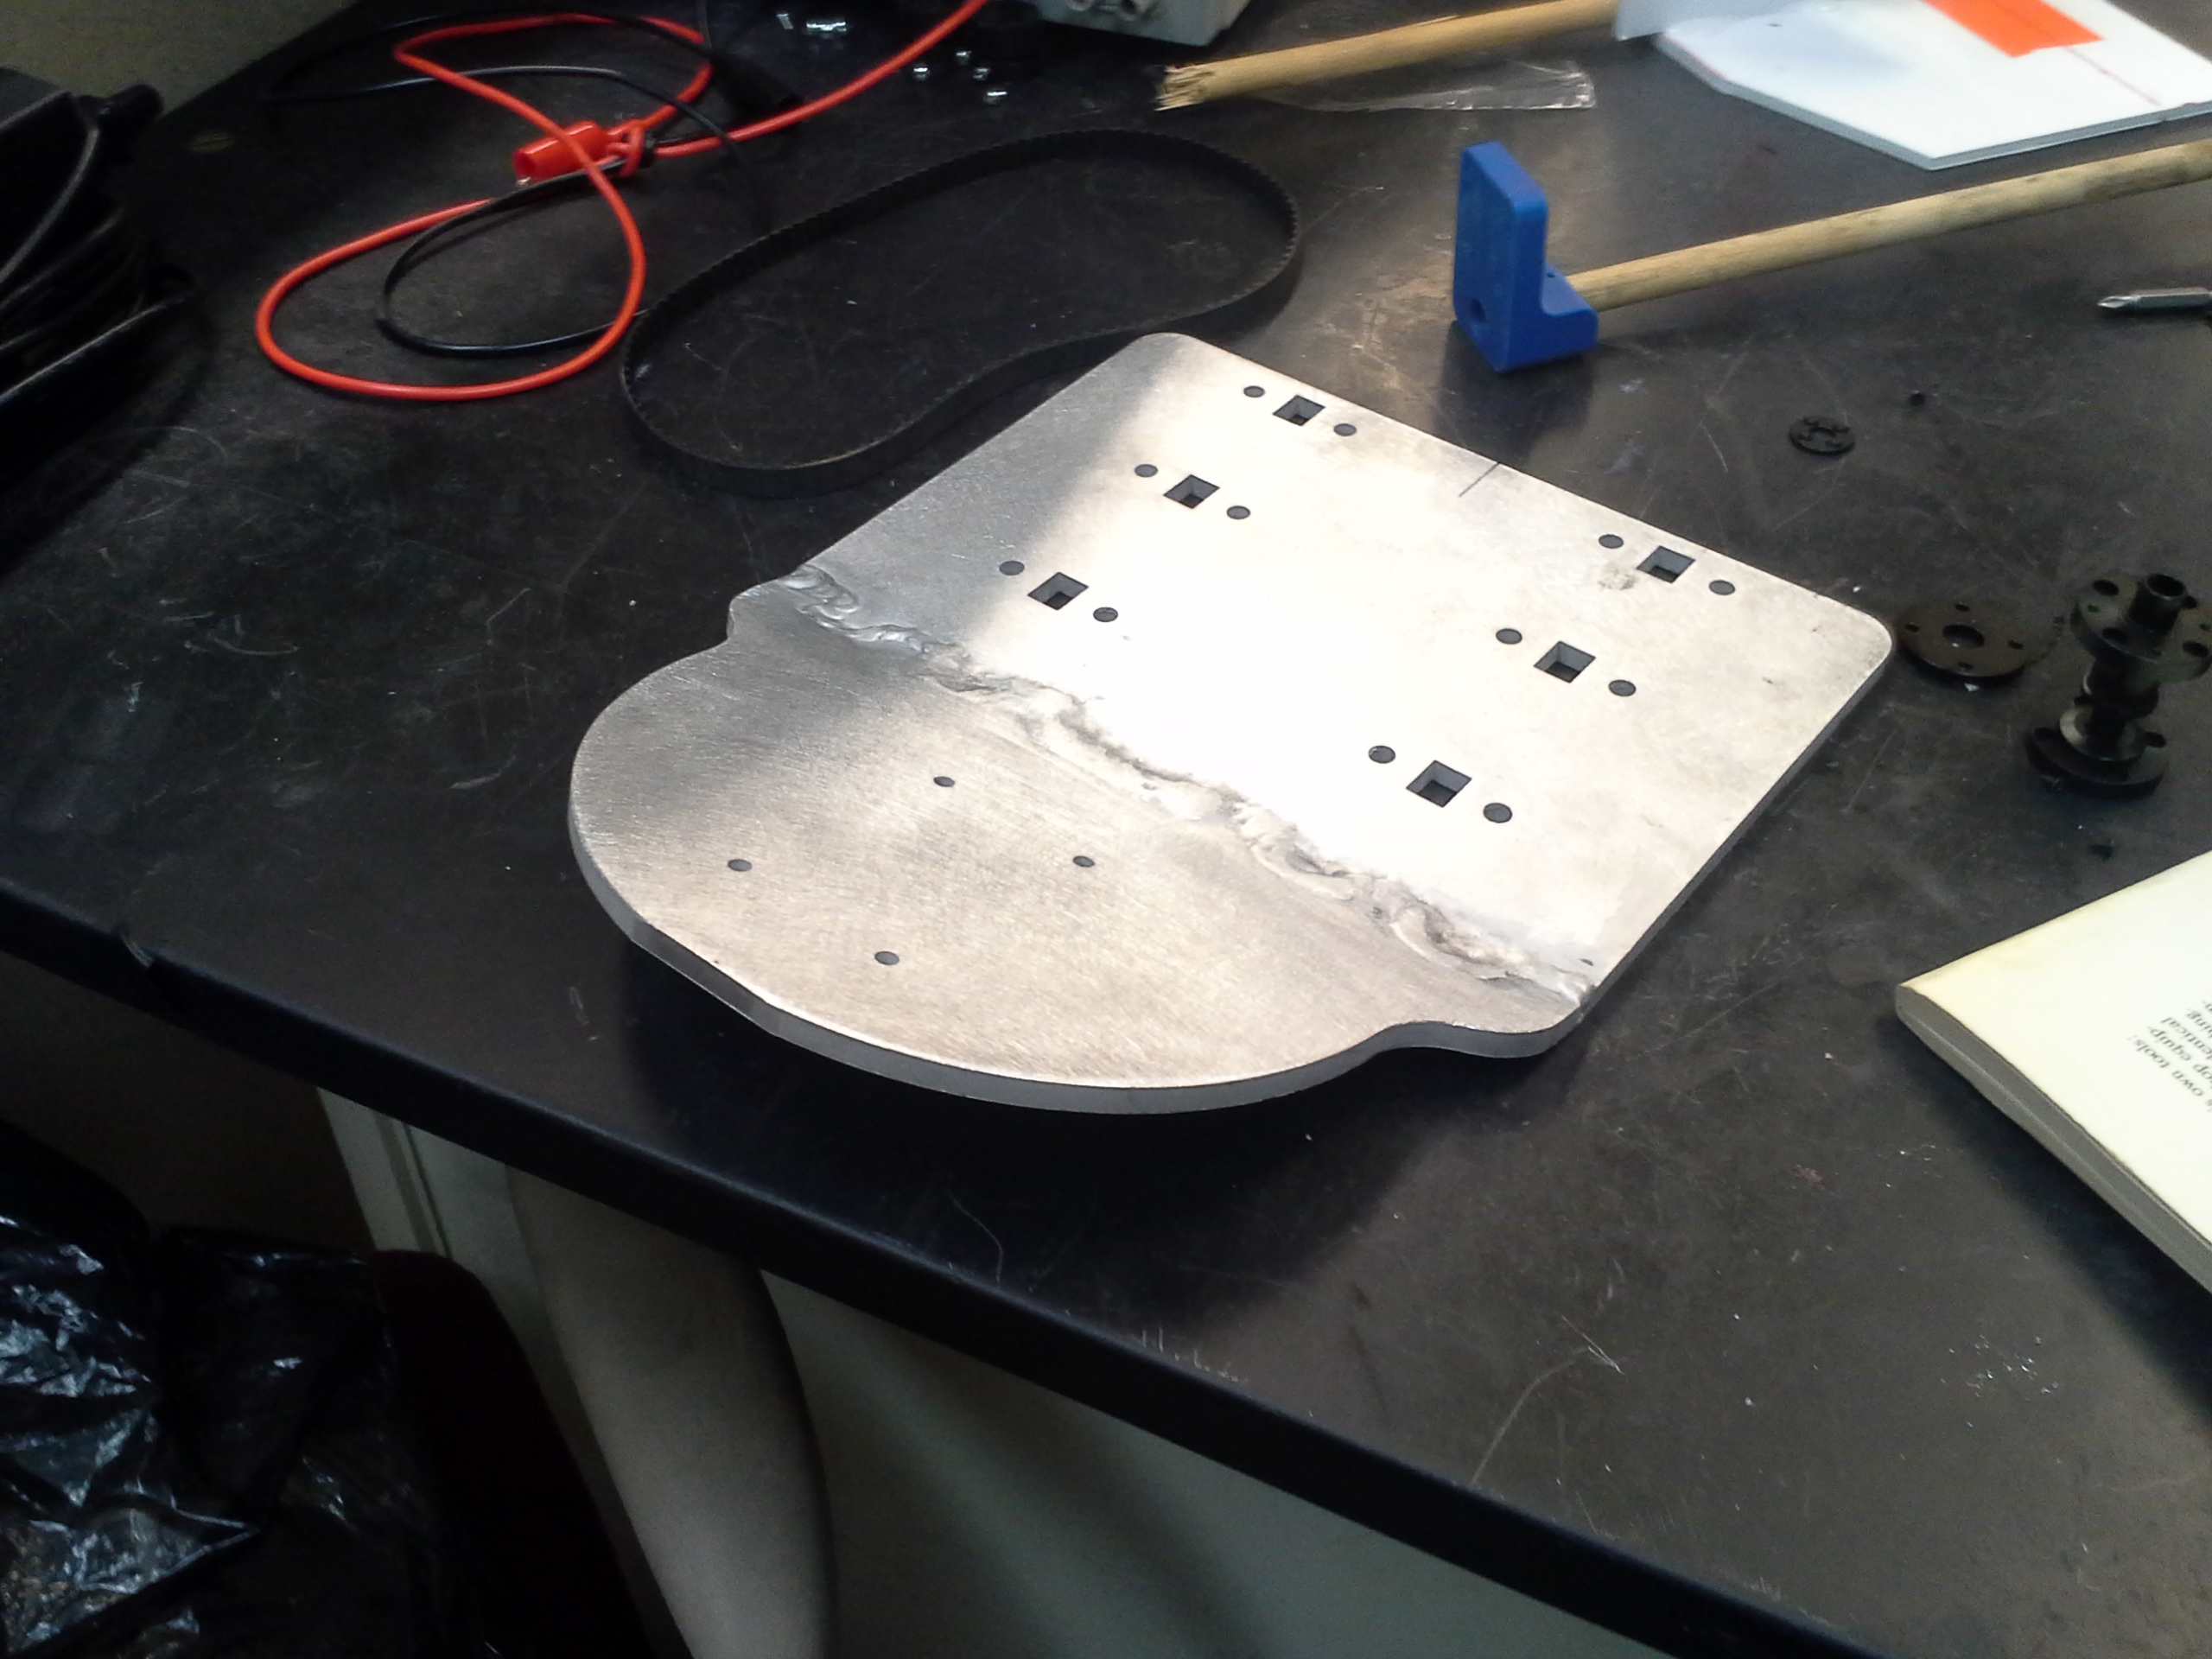
Attaching the drawer-slide holstersShown is a loose fit for the drawer-slide holsters, these are just held in place by the cut-out notches for a rough fit. The bottom of the weld surface zig-zag is visible, there is a lot of weld contact area. 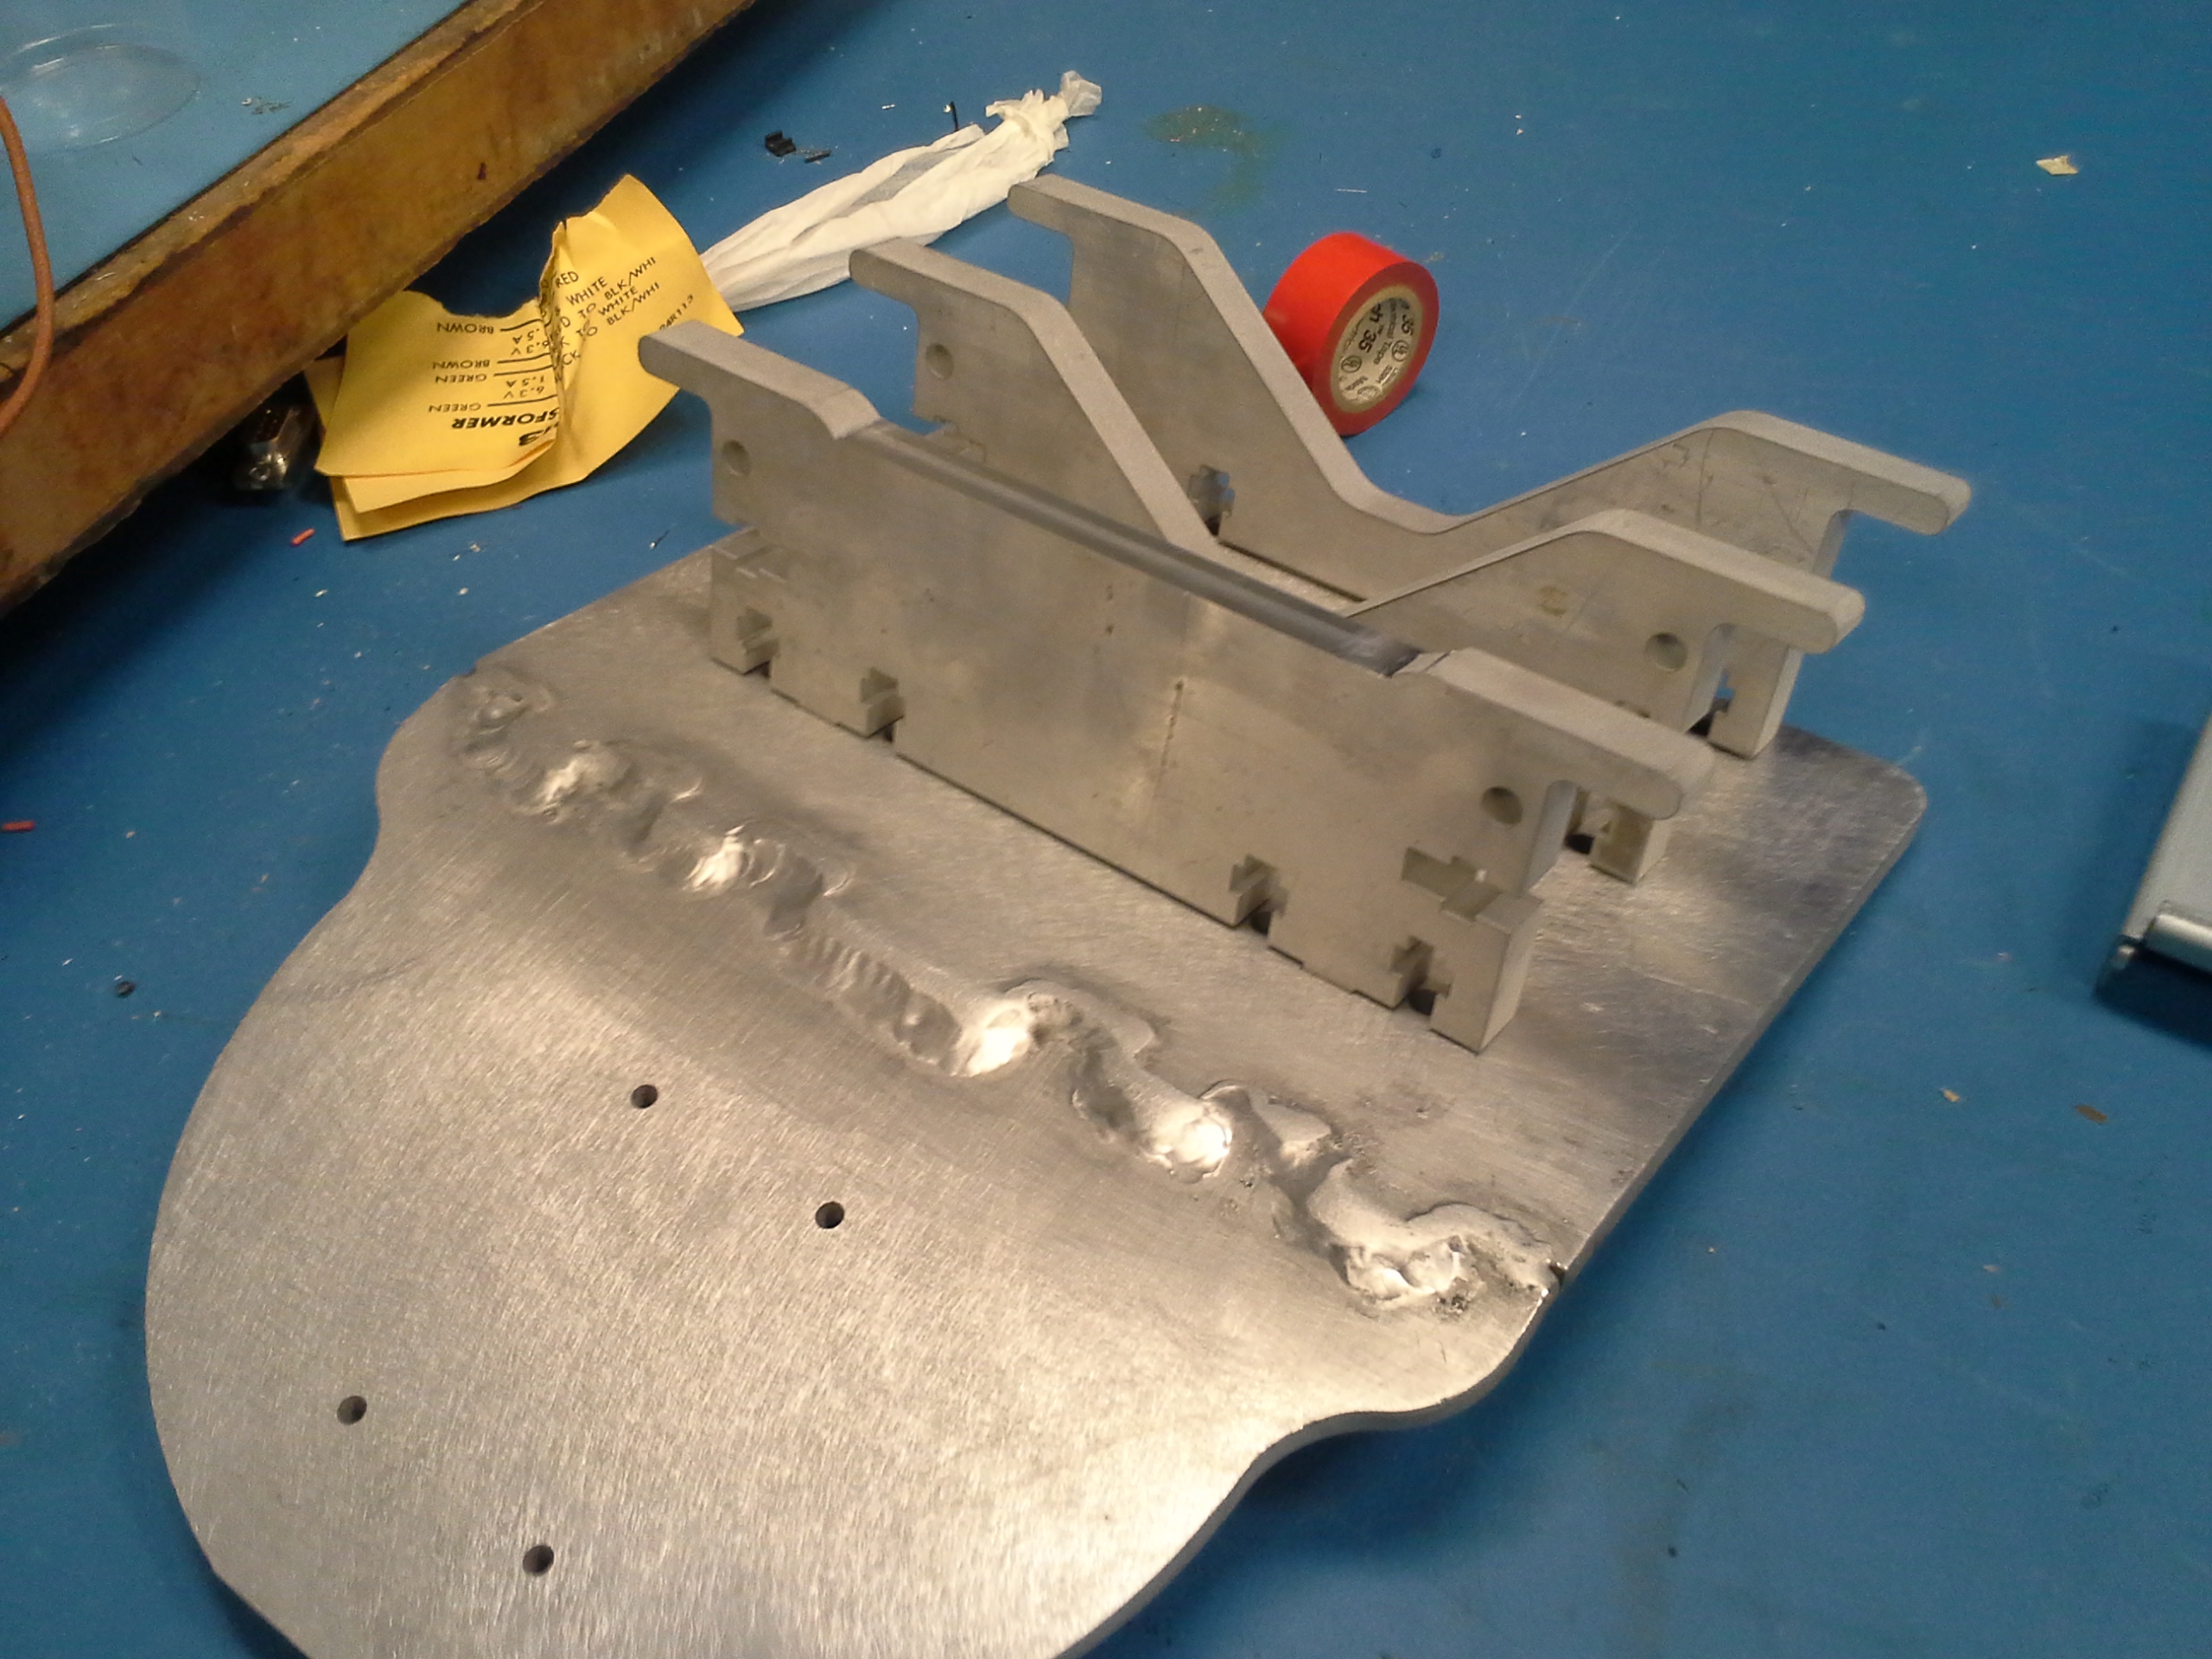
While still verifying 'everything fit', here's the rear portion of the skateboard, A countersinking bit (90 deg) was used to keep the flathead screws recessed. 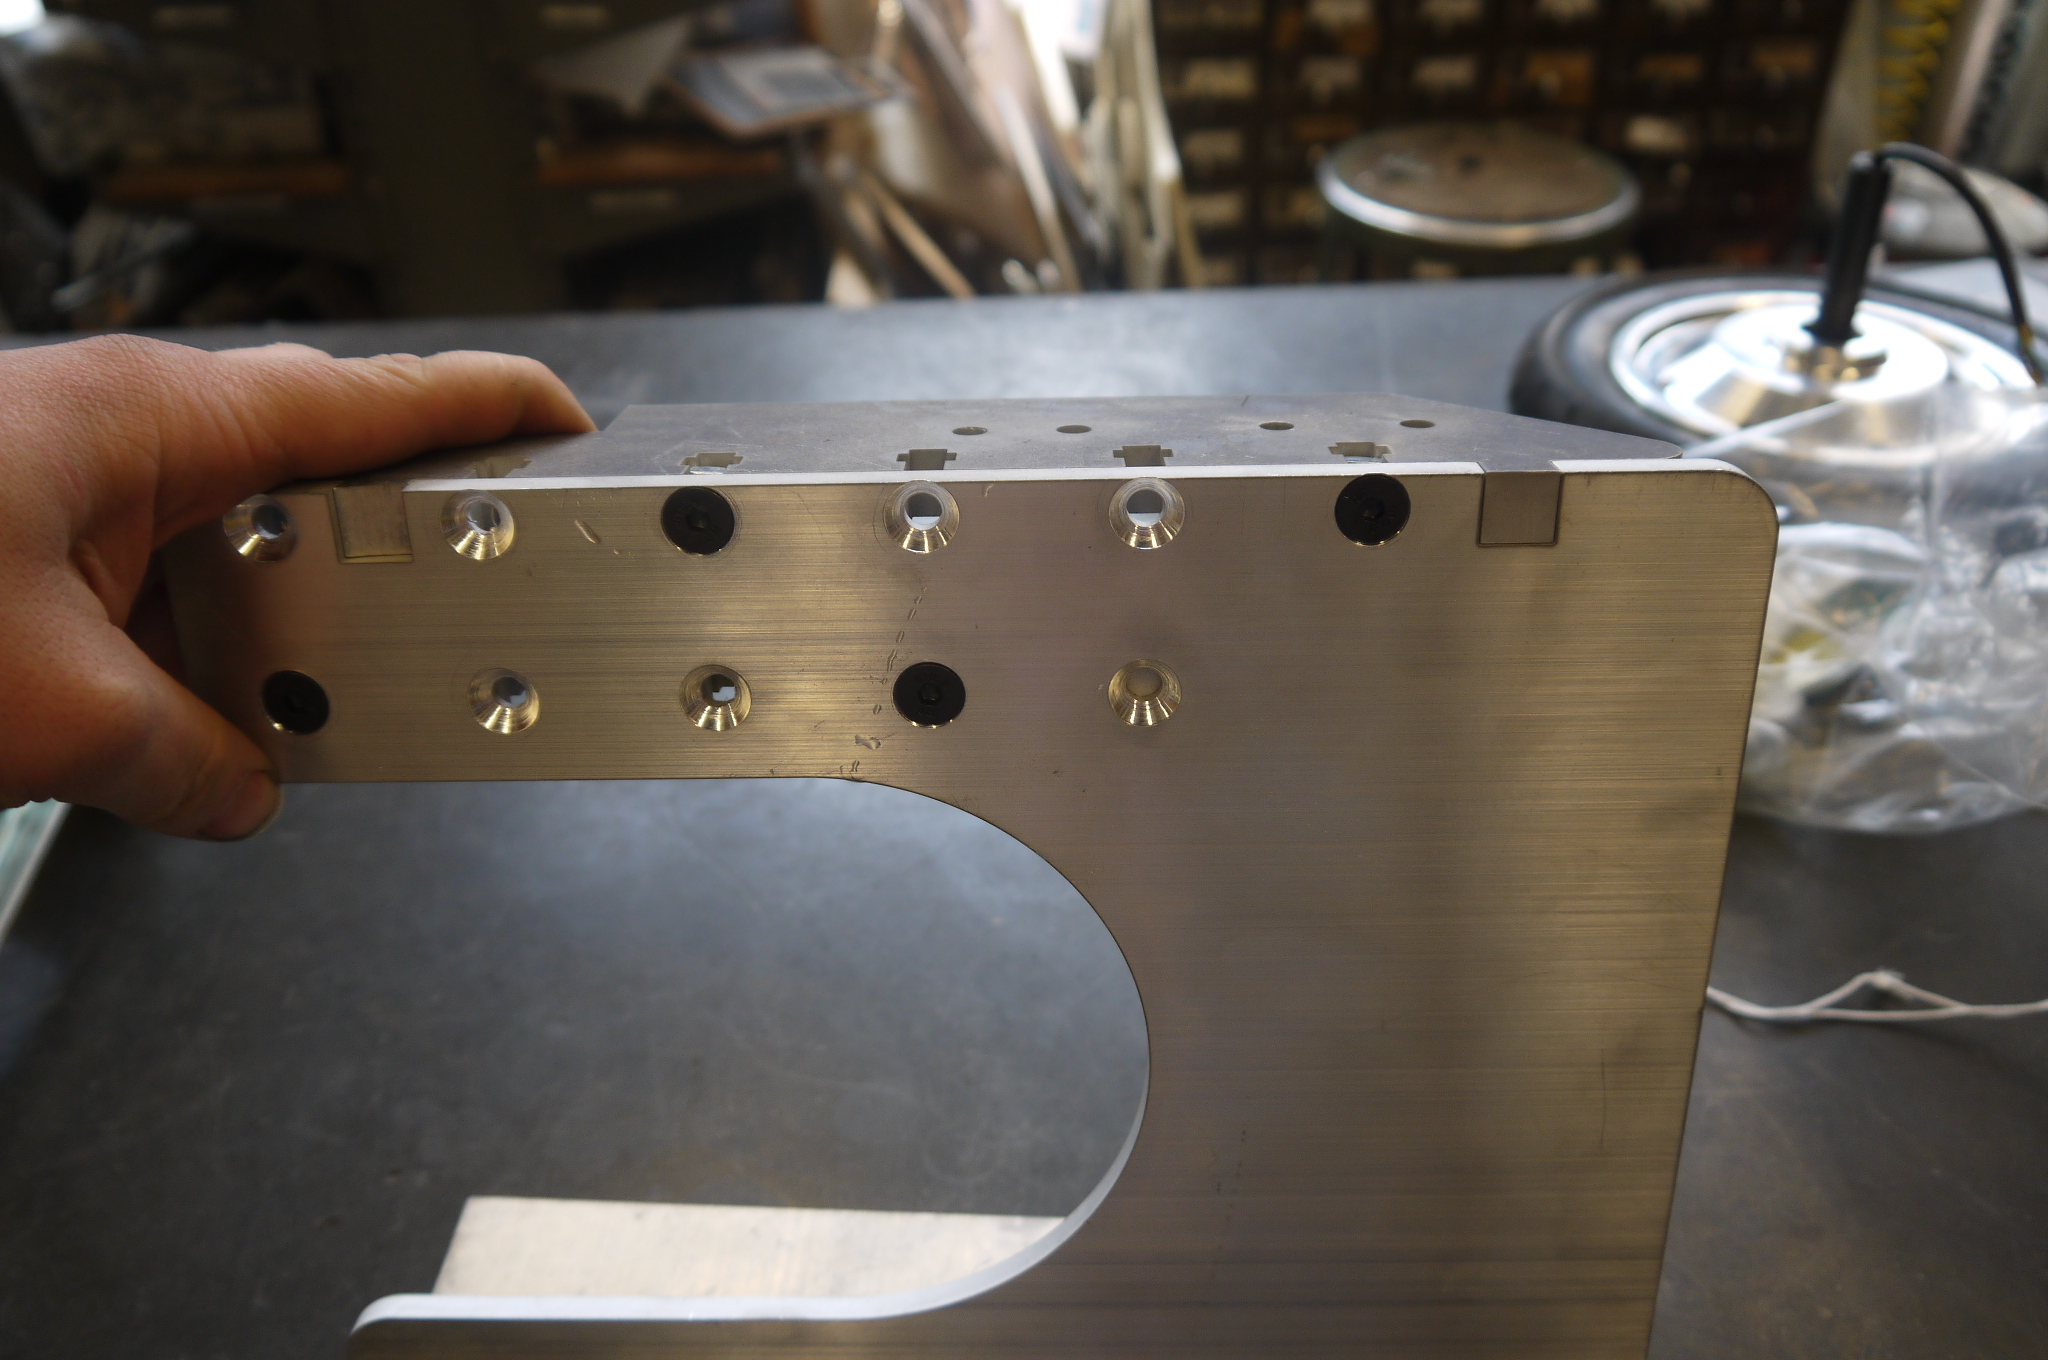
Mounting the drawer-slidesThe flat head screws tied to the drawer-slides protruded out a bit too much and needed a bit of a countersinking. A portable drill with countersink bit was used to adjust the hole openings. 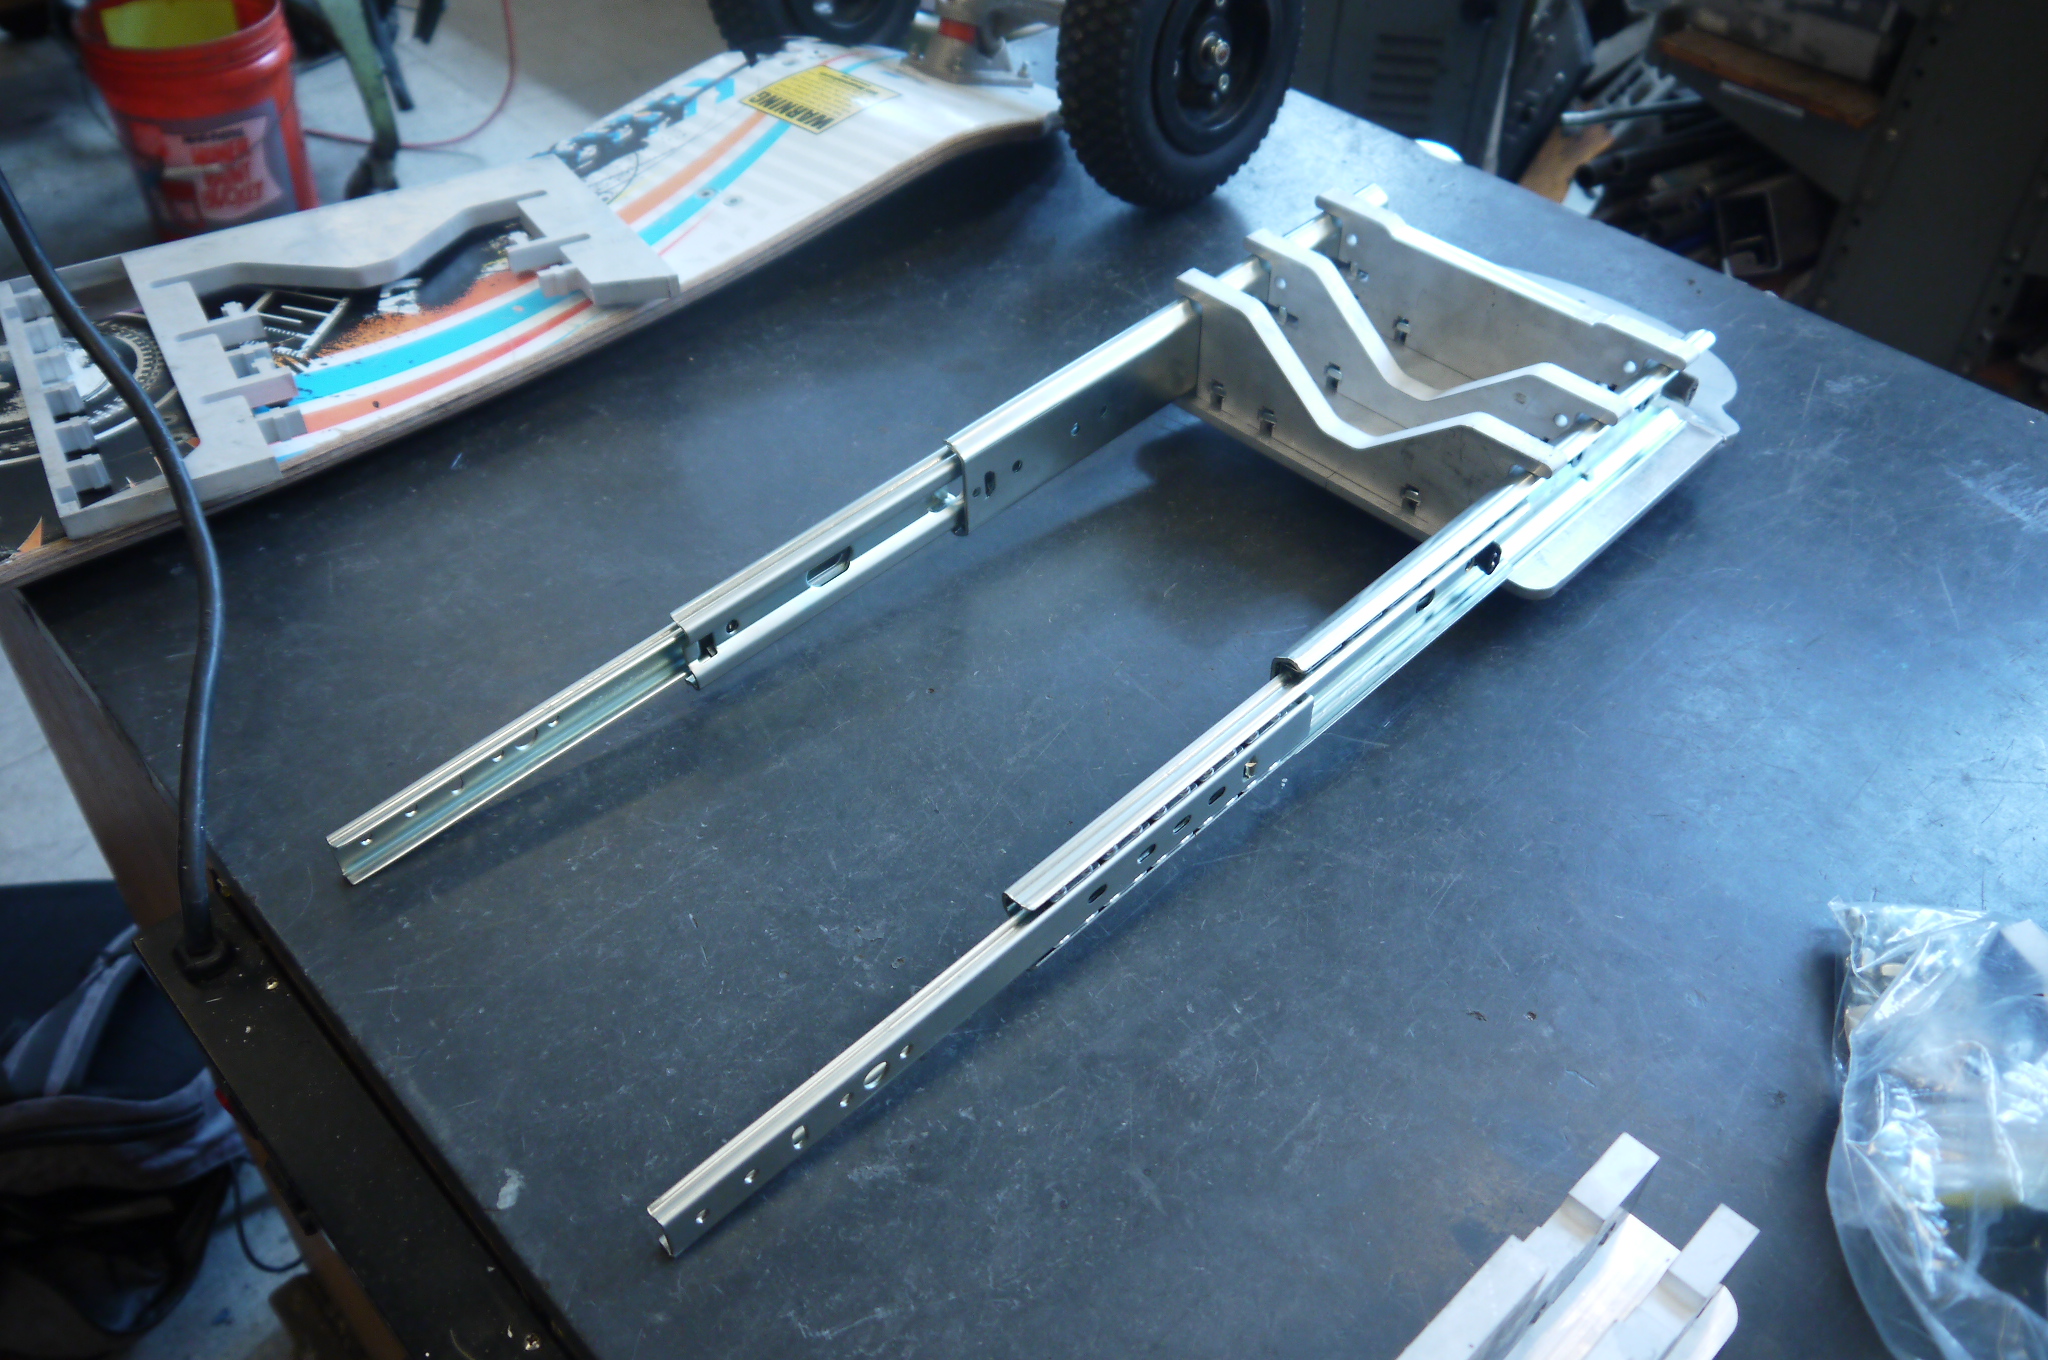
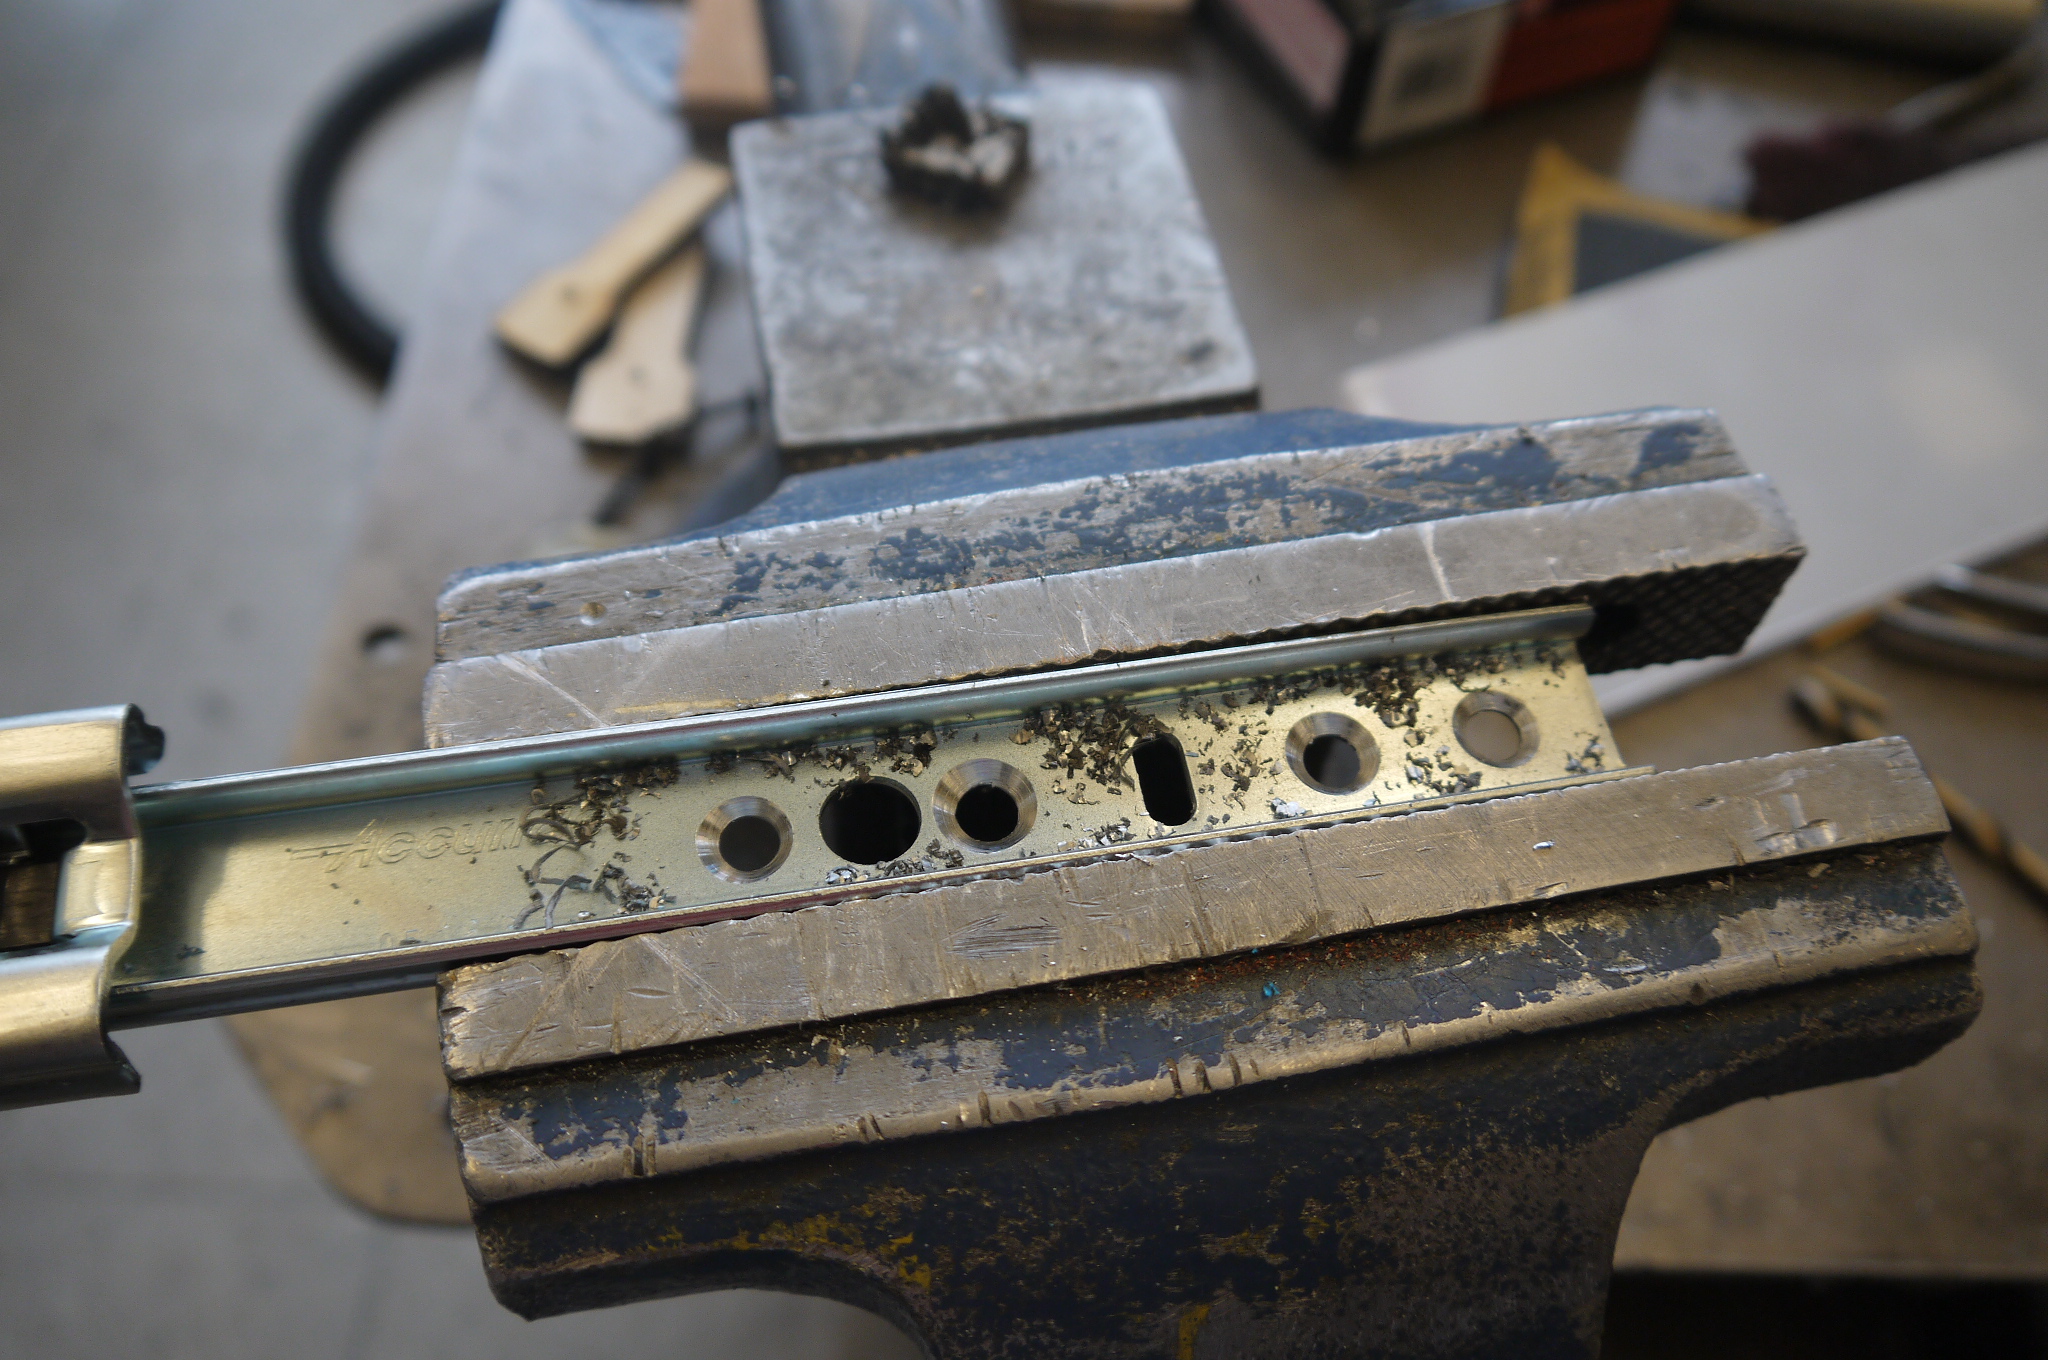
Shown are the four M6 screws holding the opposing side of the drawer slide to the back portion of the skateboard. 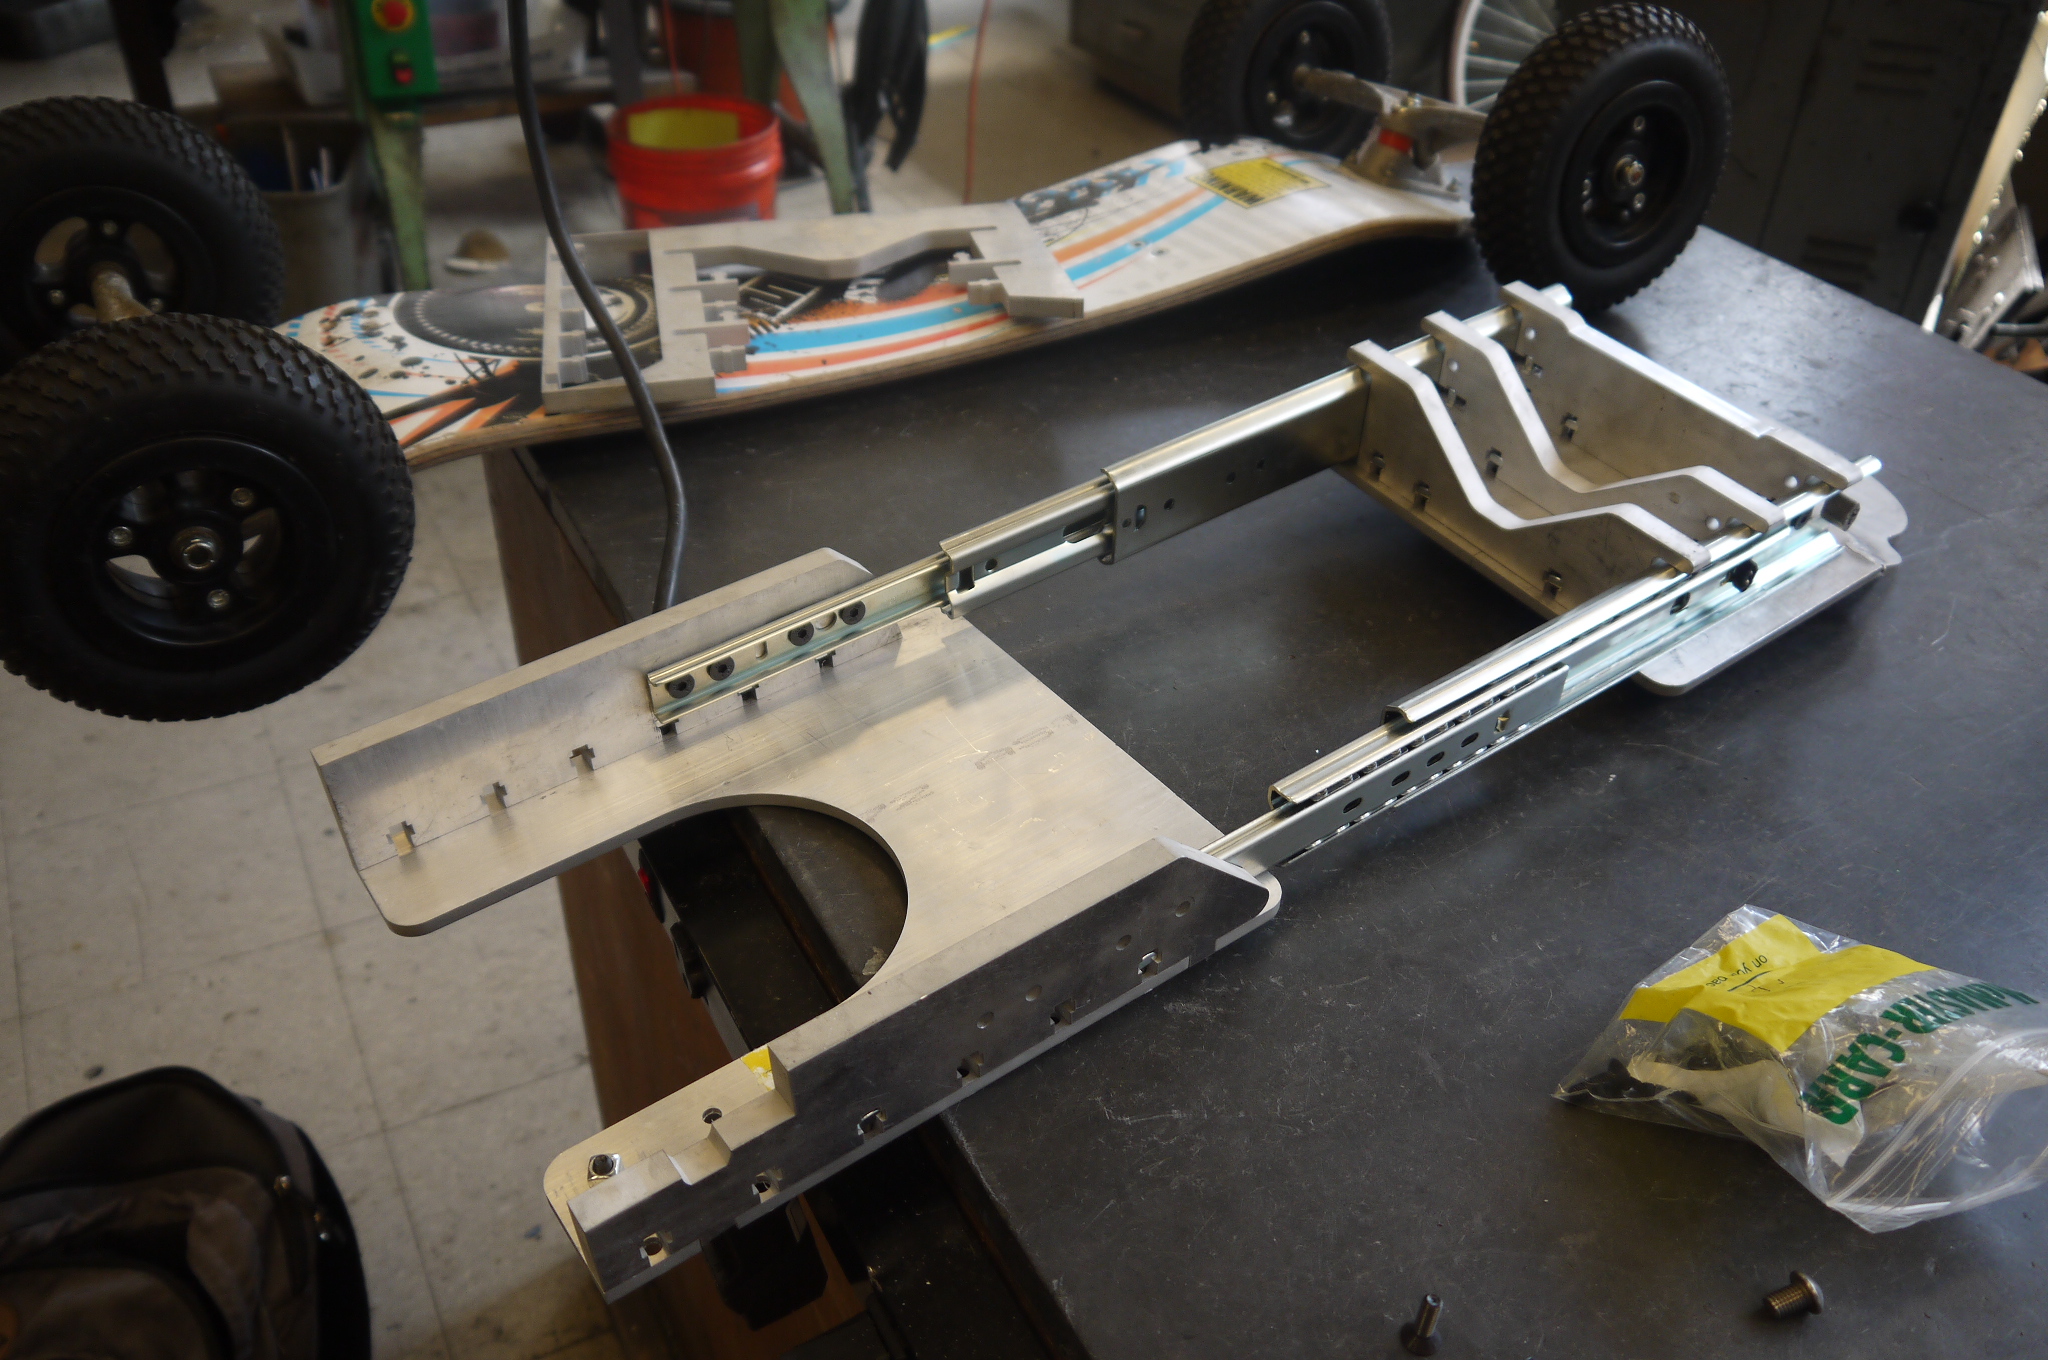
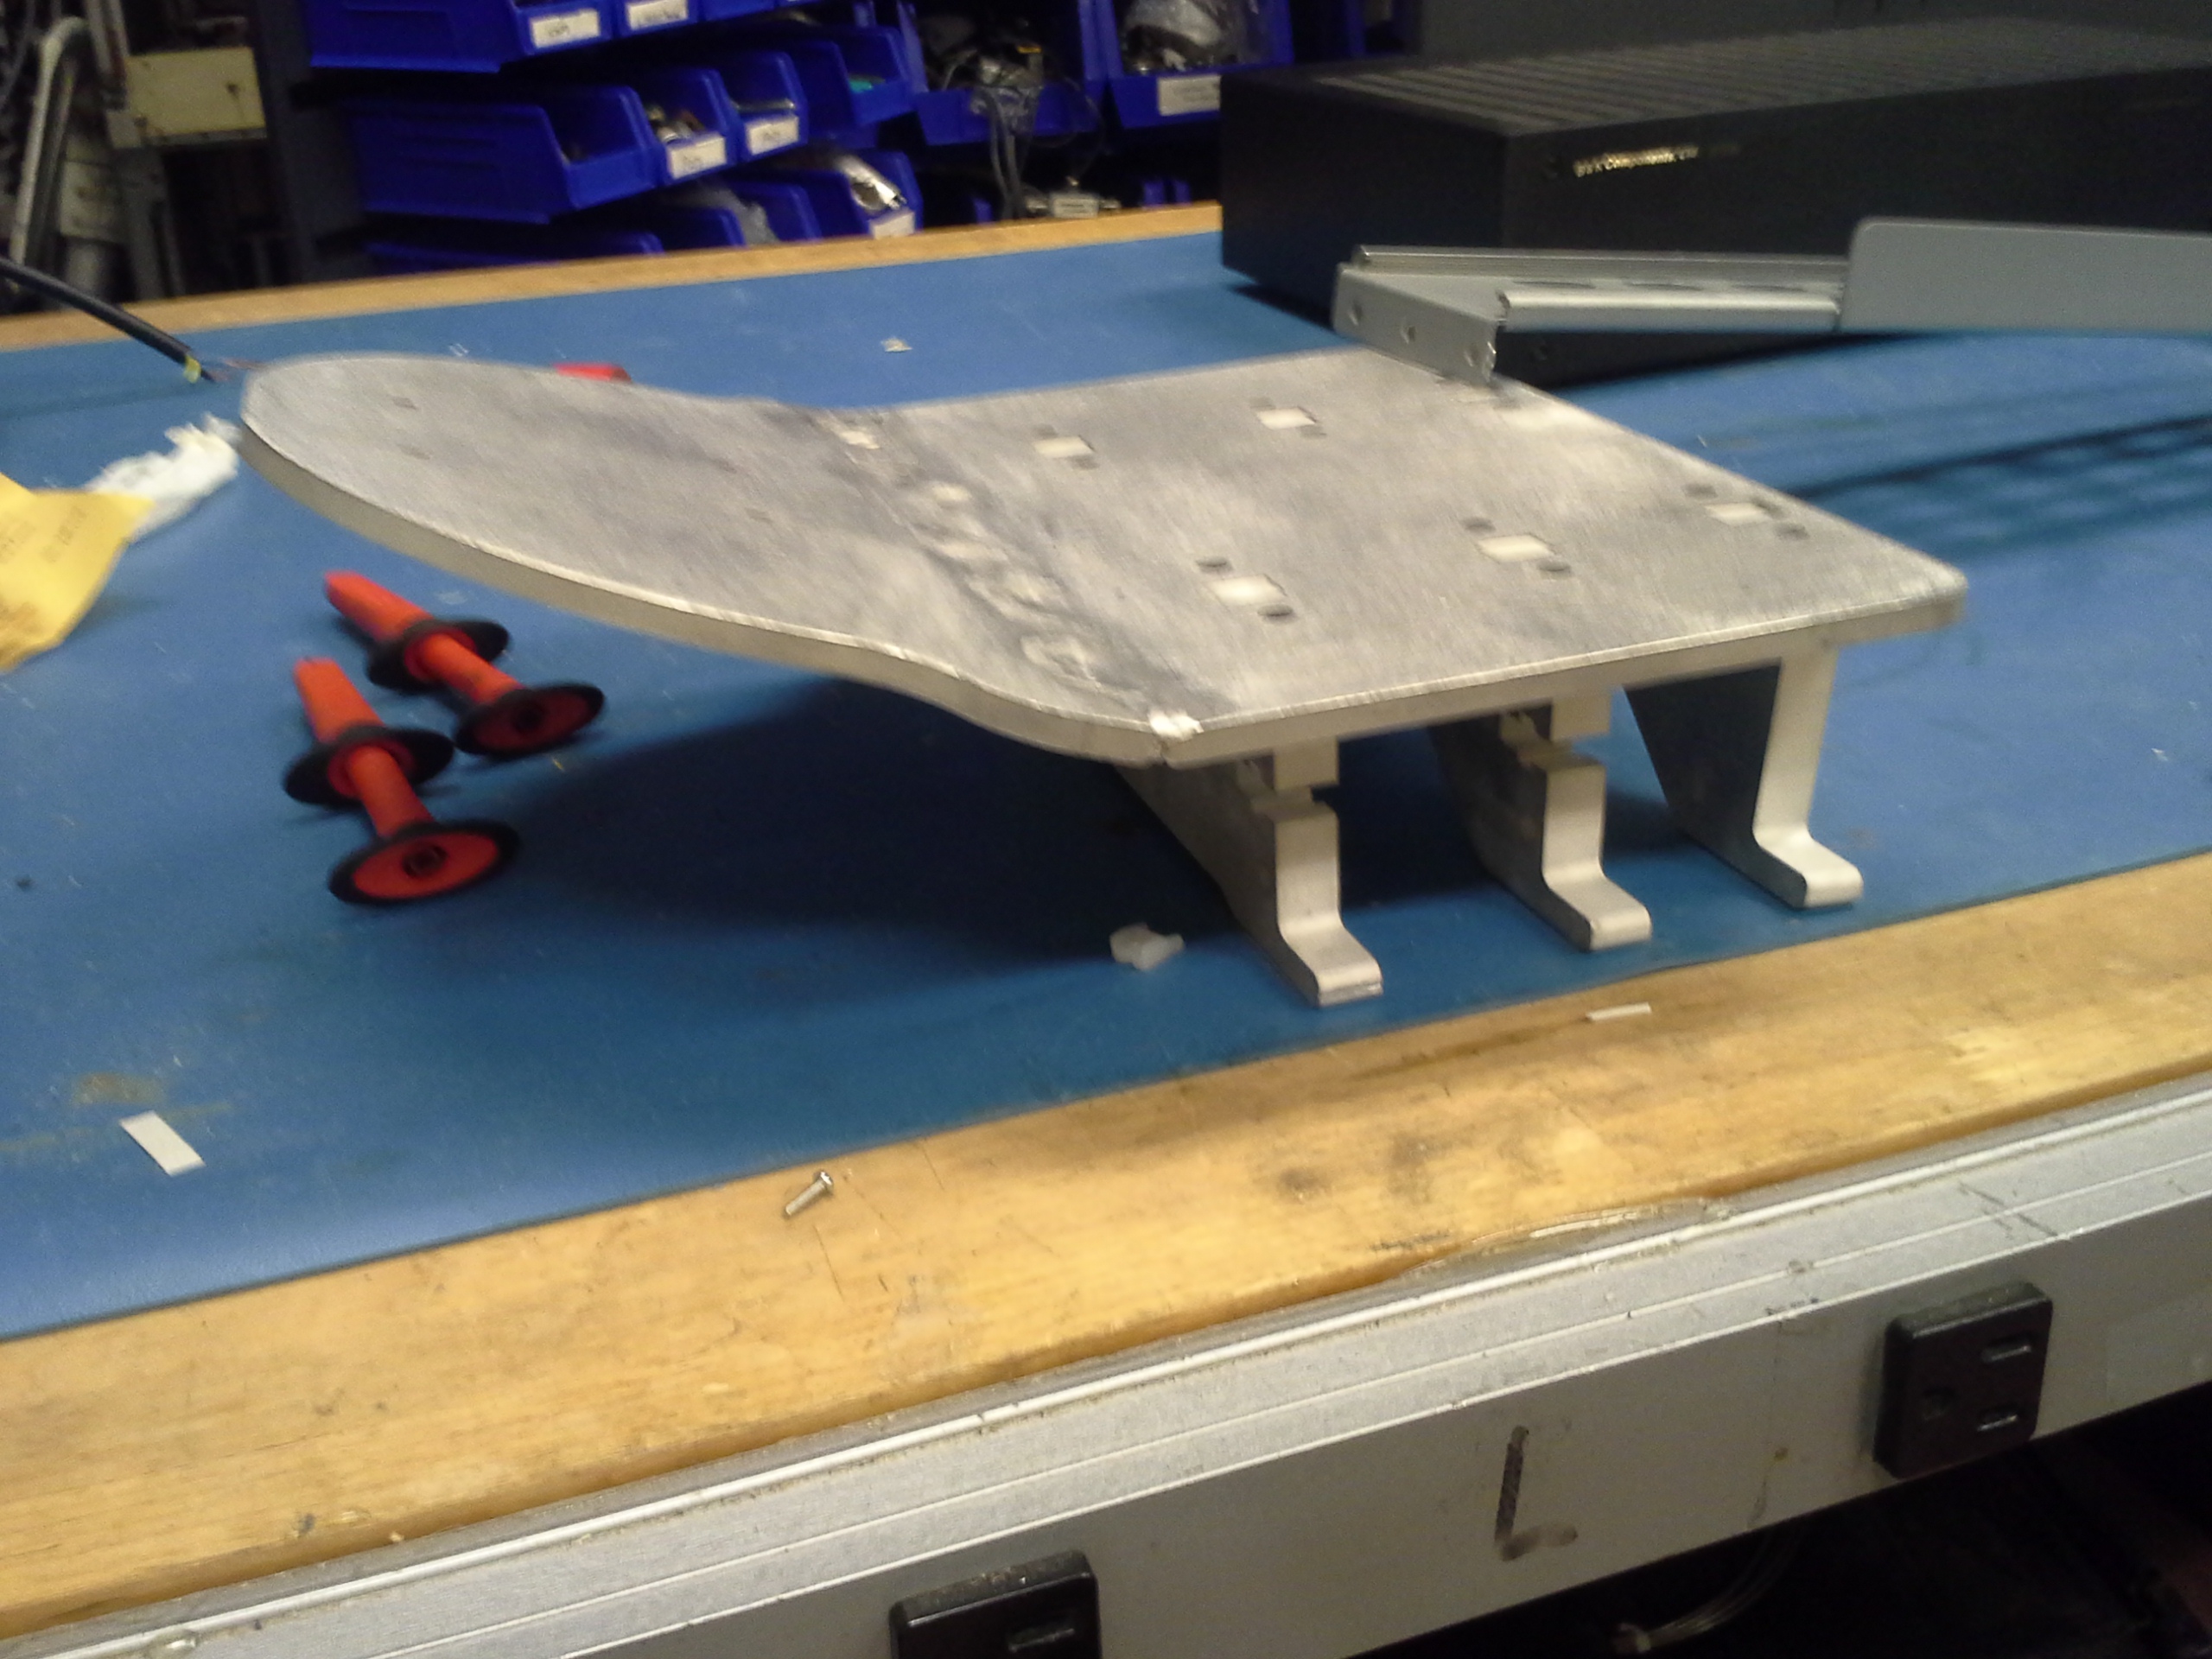
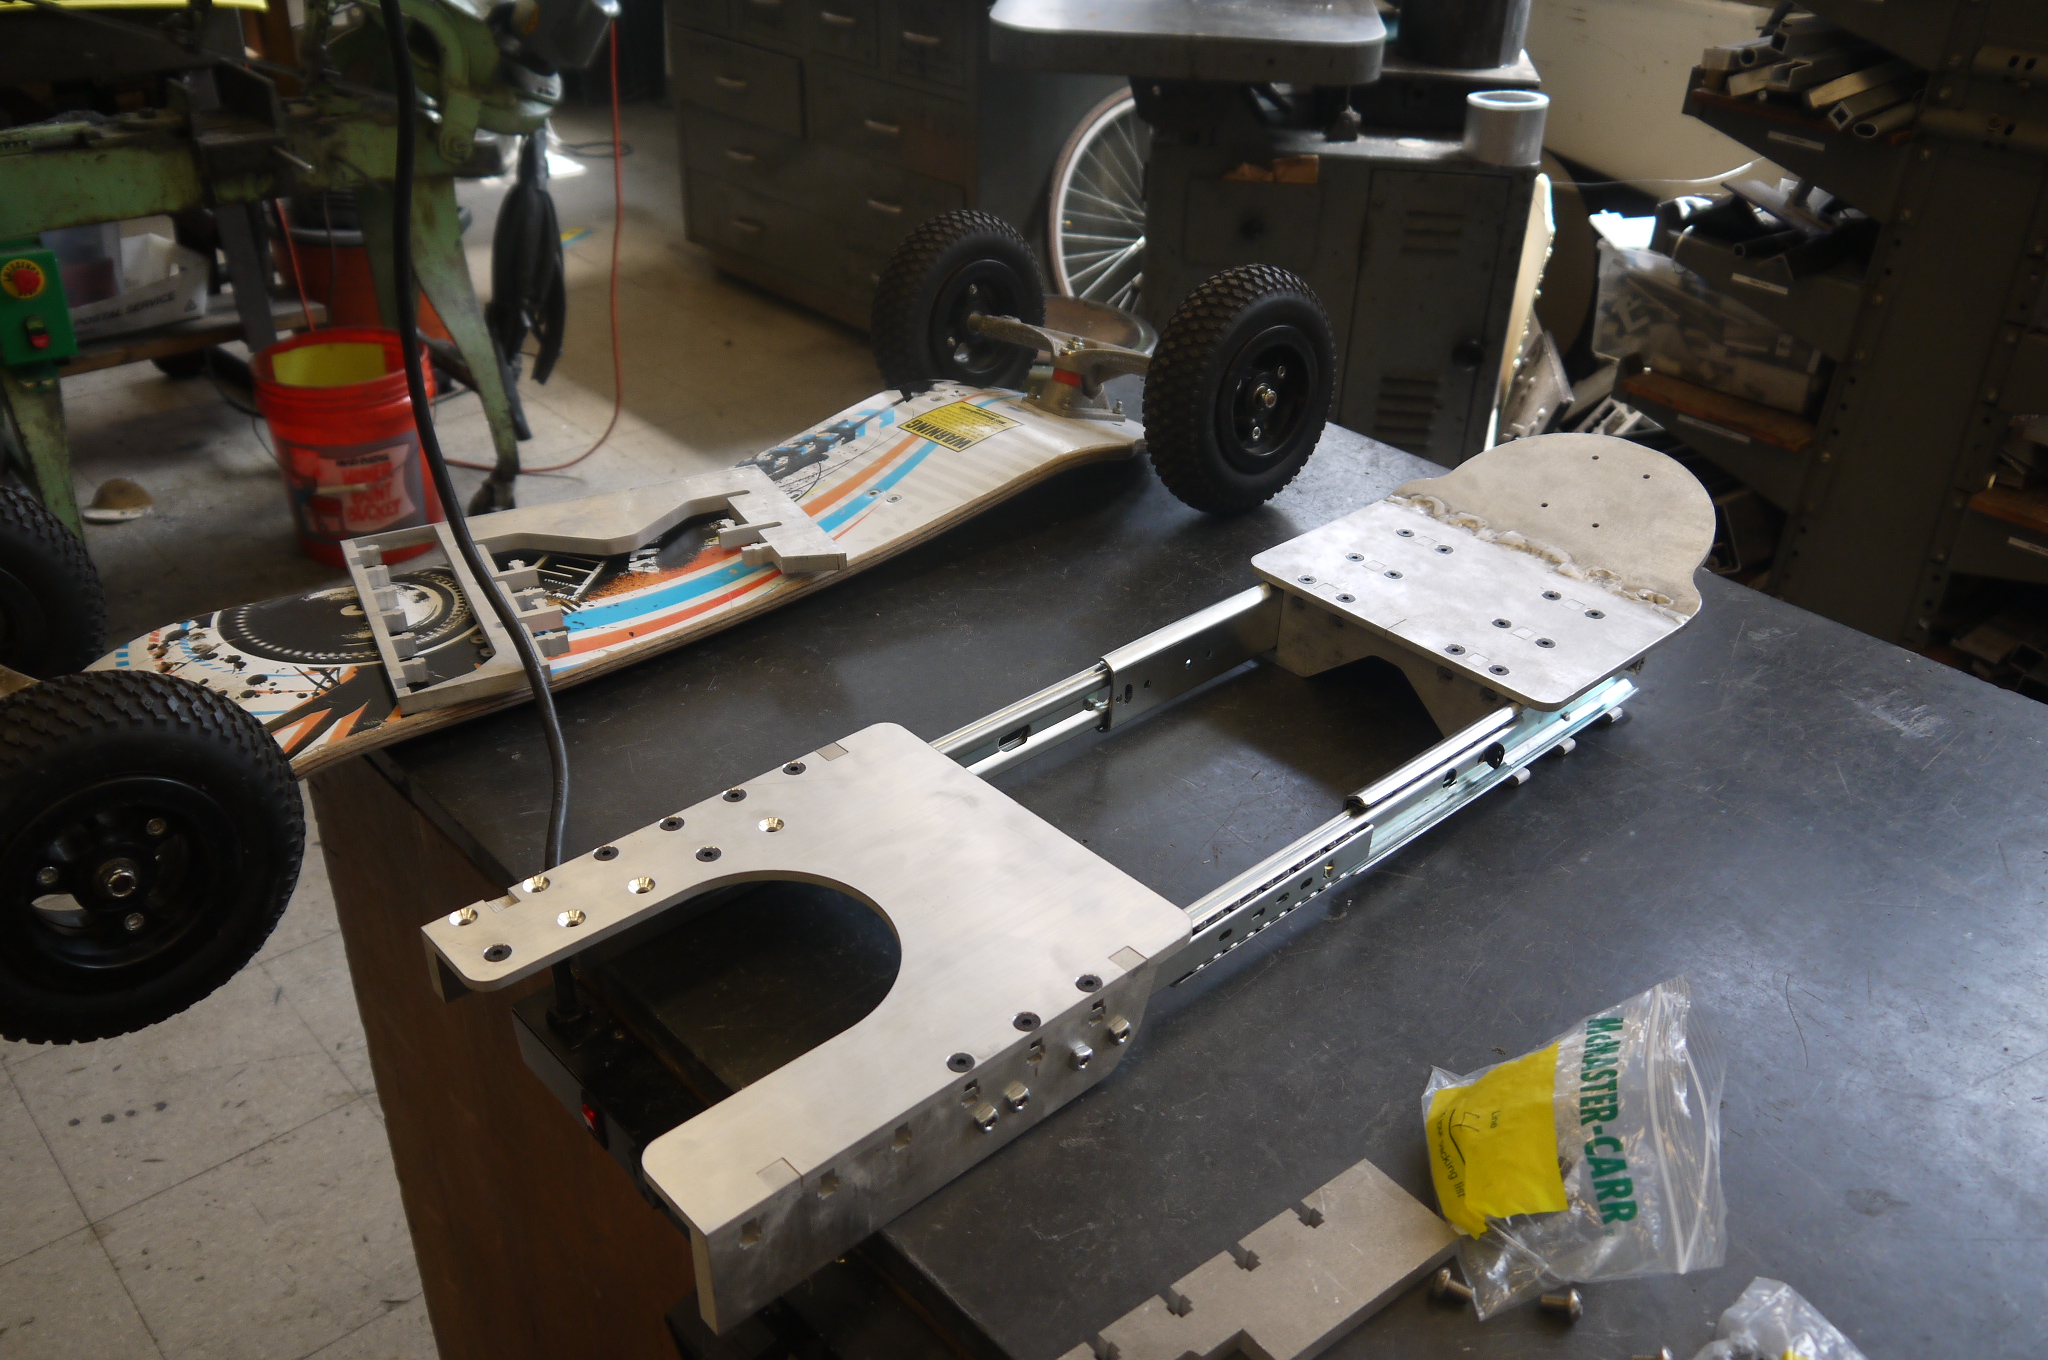
The skateboard starts coming togetherWith the front truck mounted, the whole thing started taking shape, It looks like the cad wasn't too far off. I missed the tap size of the M6 screws for the drawer-slide, so external nuts were temporarially used. 
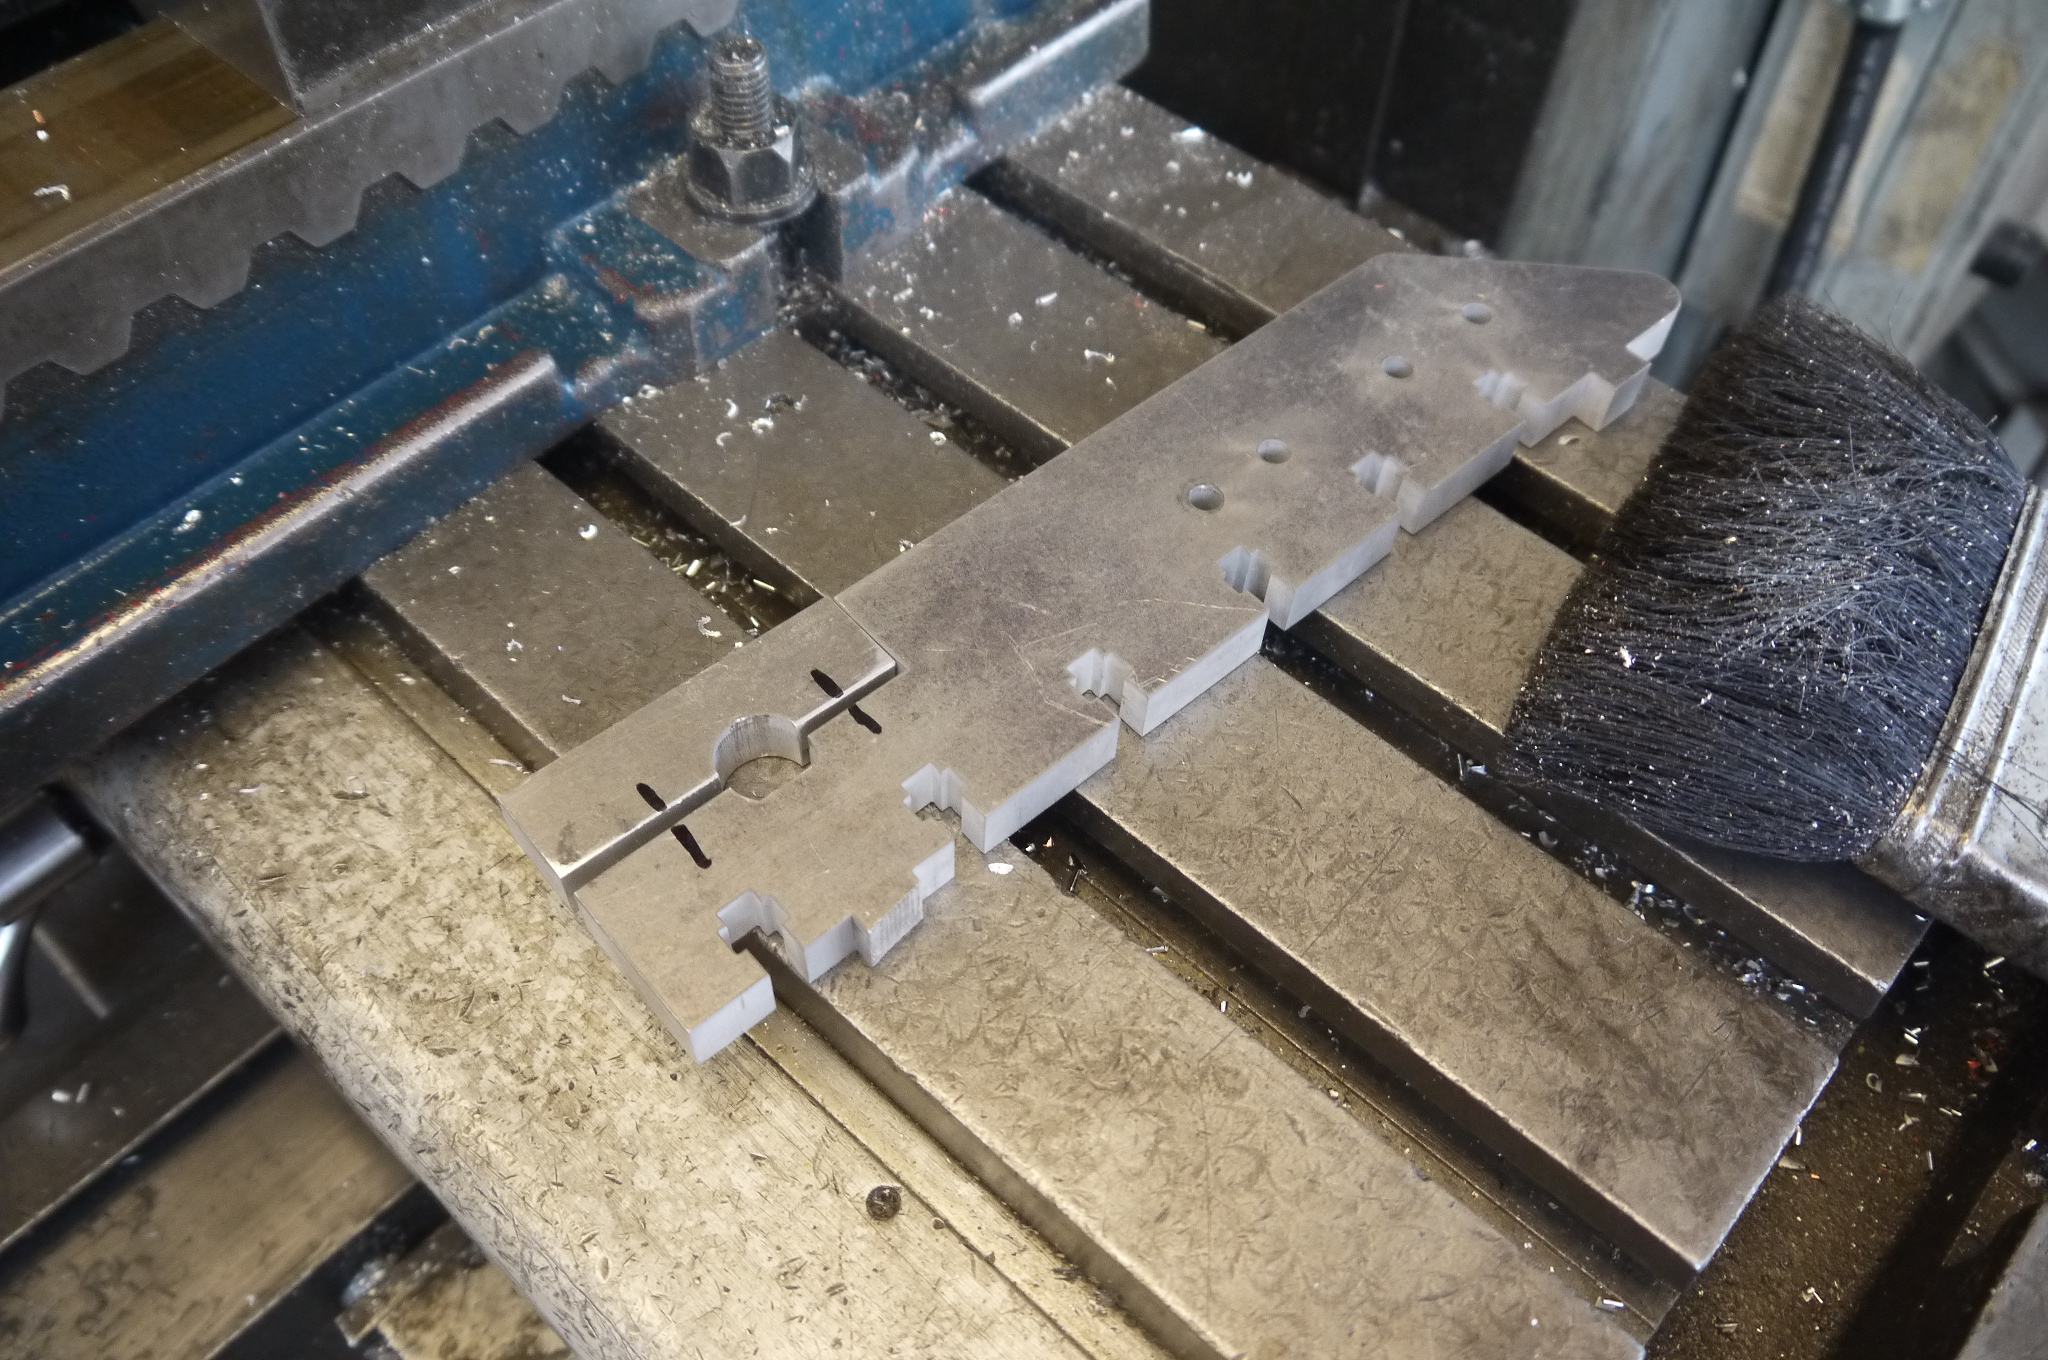
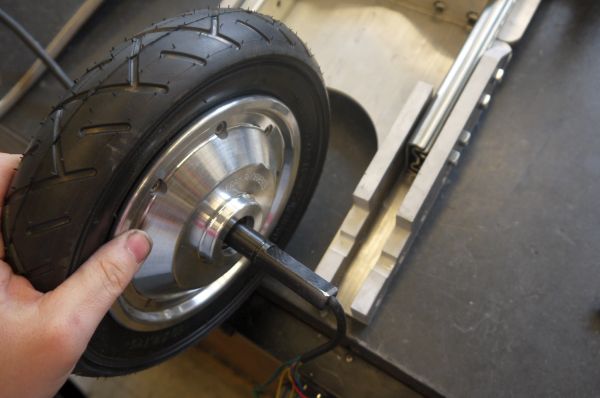
Time for the rear wheelThe single-supported 'seg-thing' wheel is peculiar, I've got one mount point for the whole motor-tire assembly. The water jet part file contains an indent for the slotted bit of the wheel, and two parts that will bolt in from the top to torque down on the wheel assembly to keep it constrained to the board. 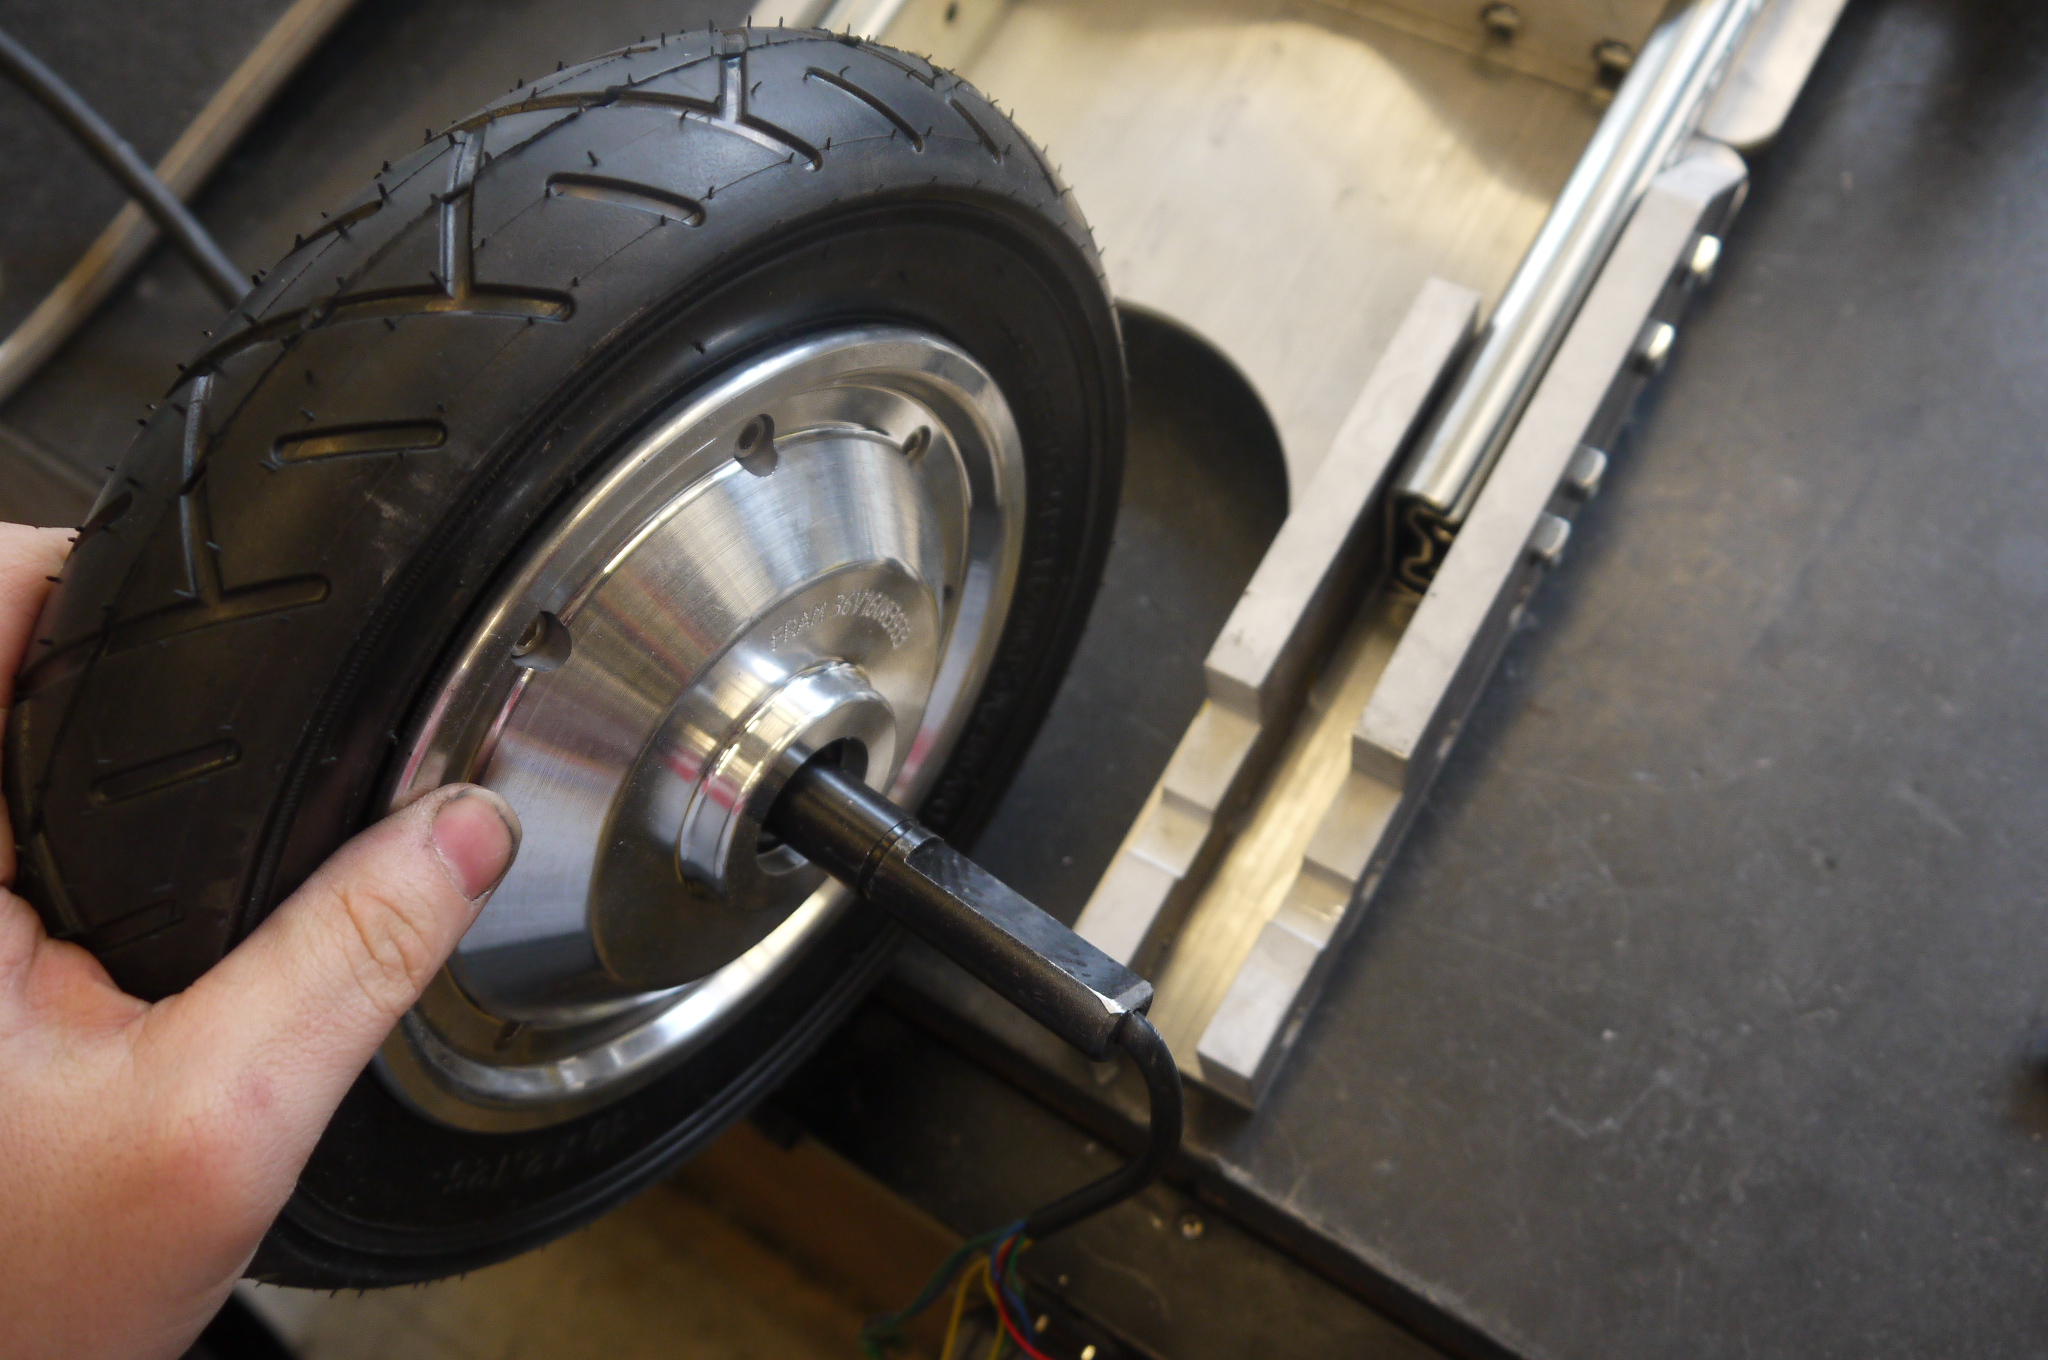
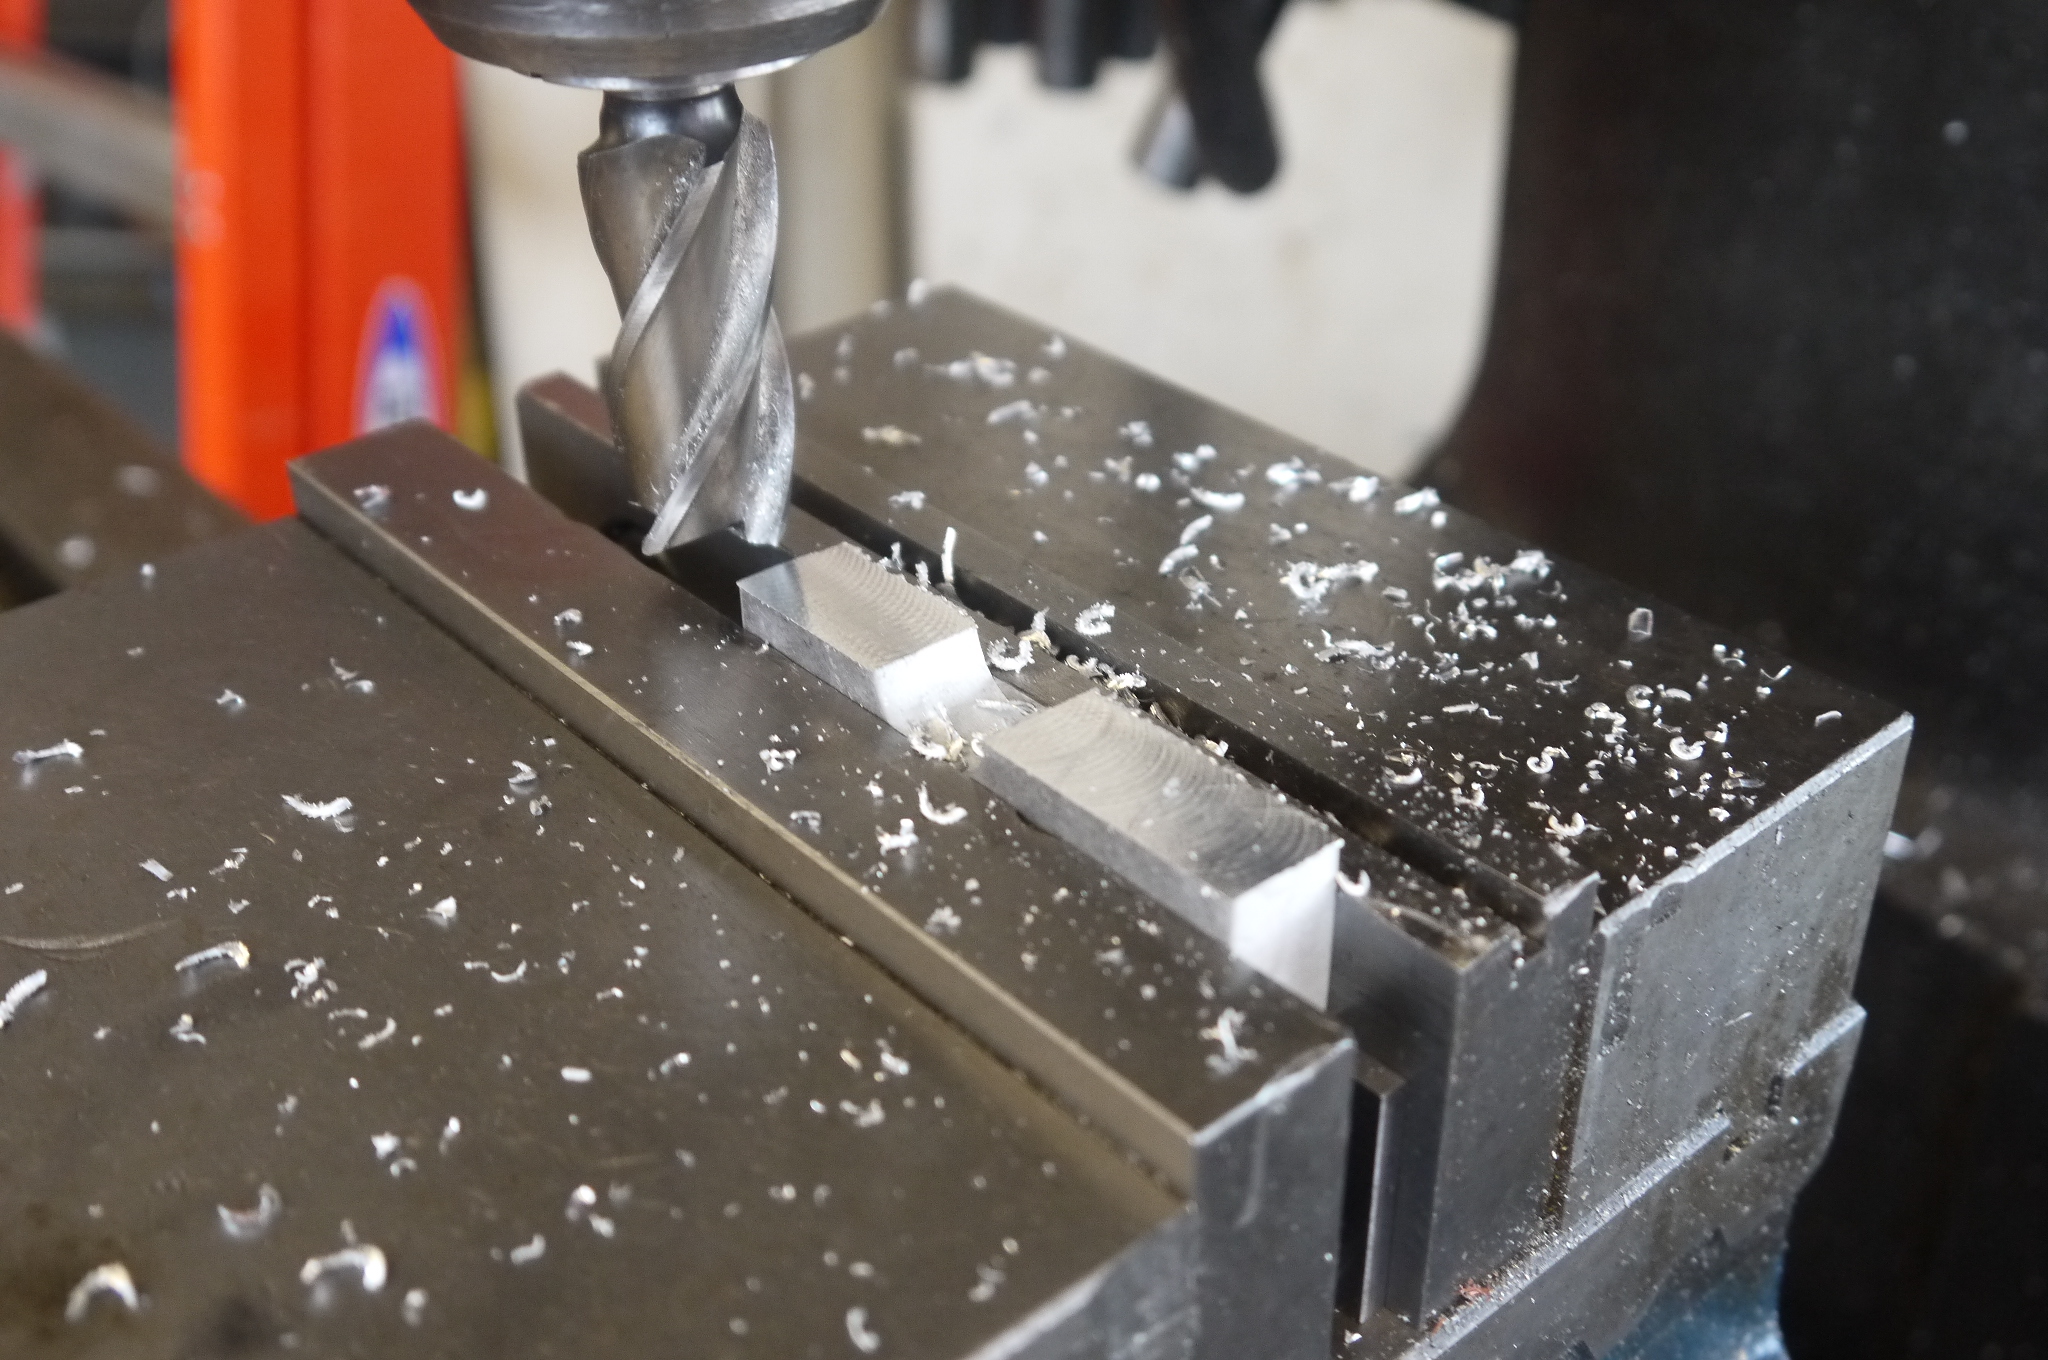
Cleaning up the surfaceThe two parts intended to clamp down on the motor-wheel assembly needed a bit of touch up, there is some taper left over from the waterjet process, a quick pass on the milling machine removes the taper. 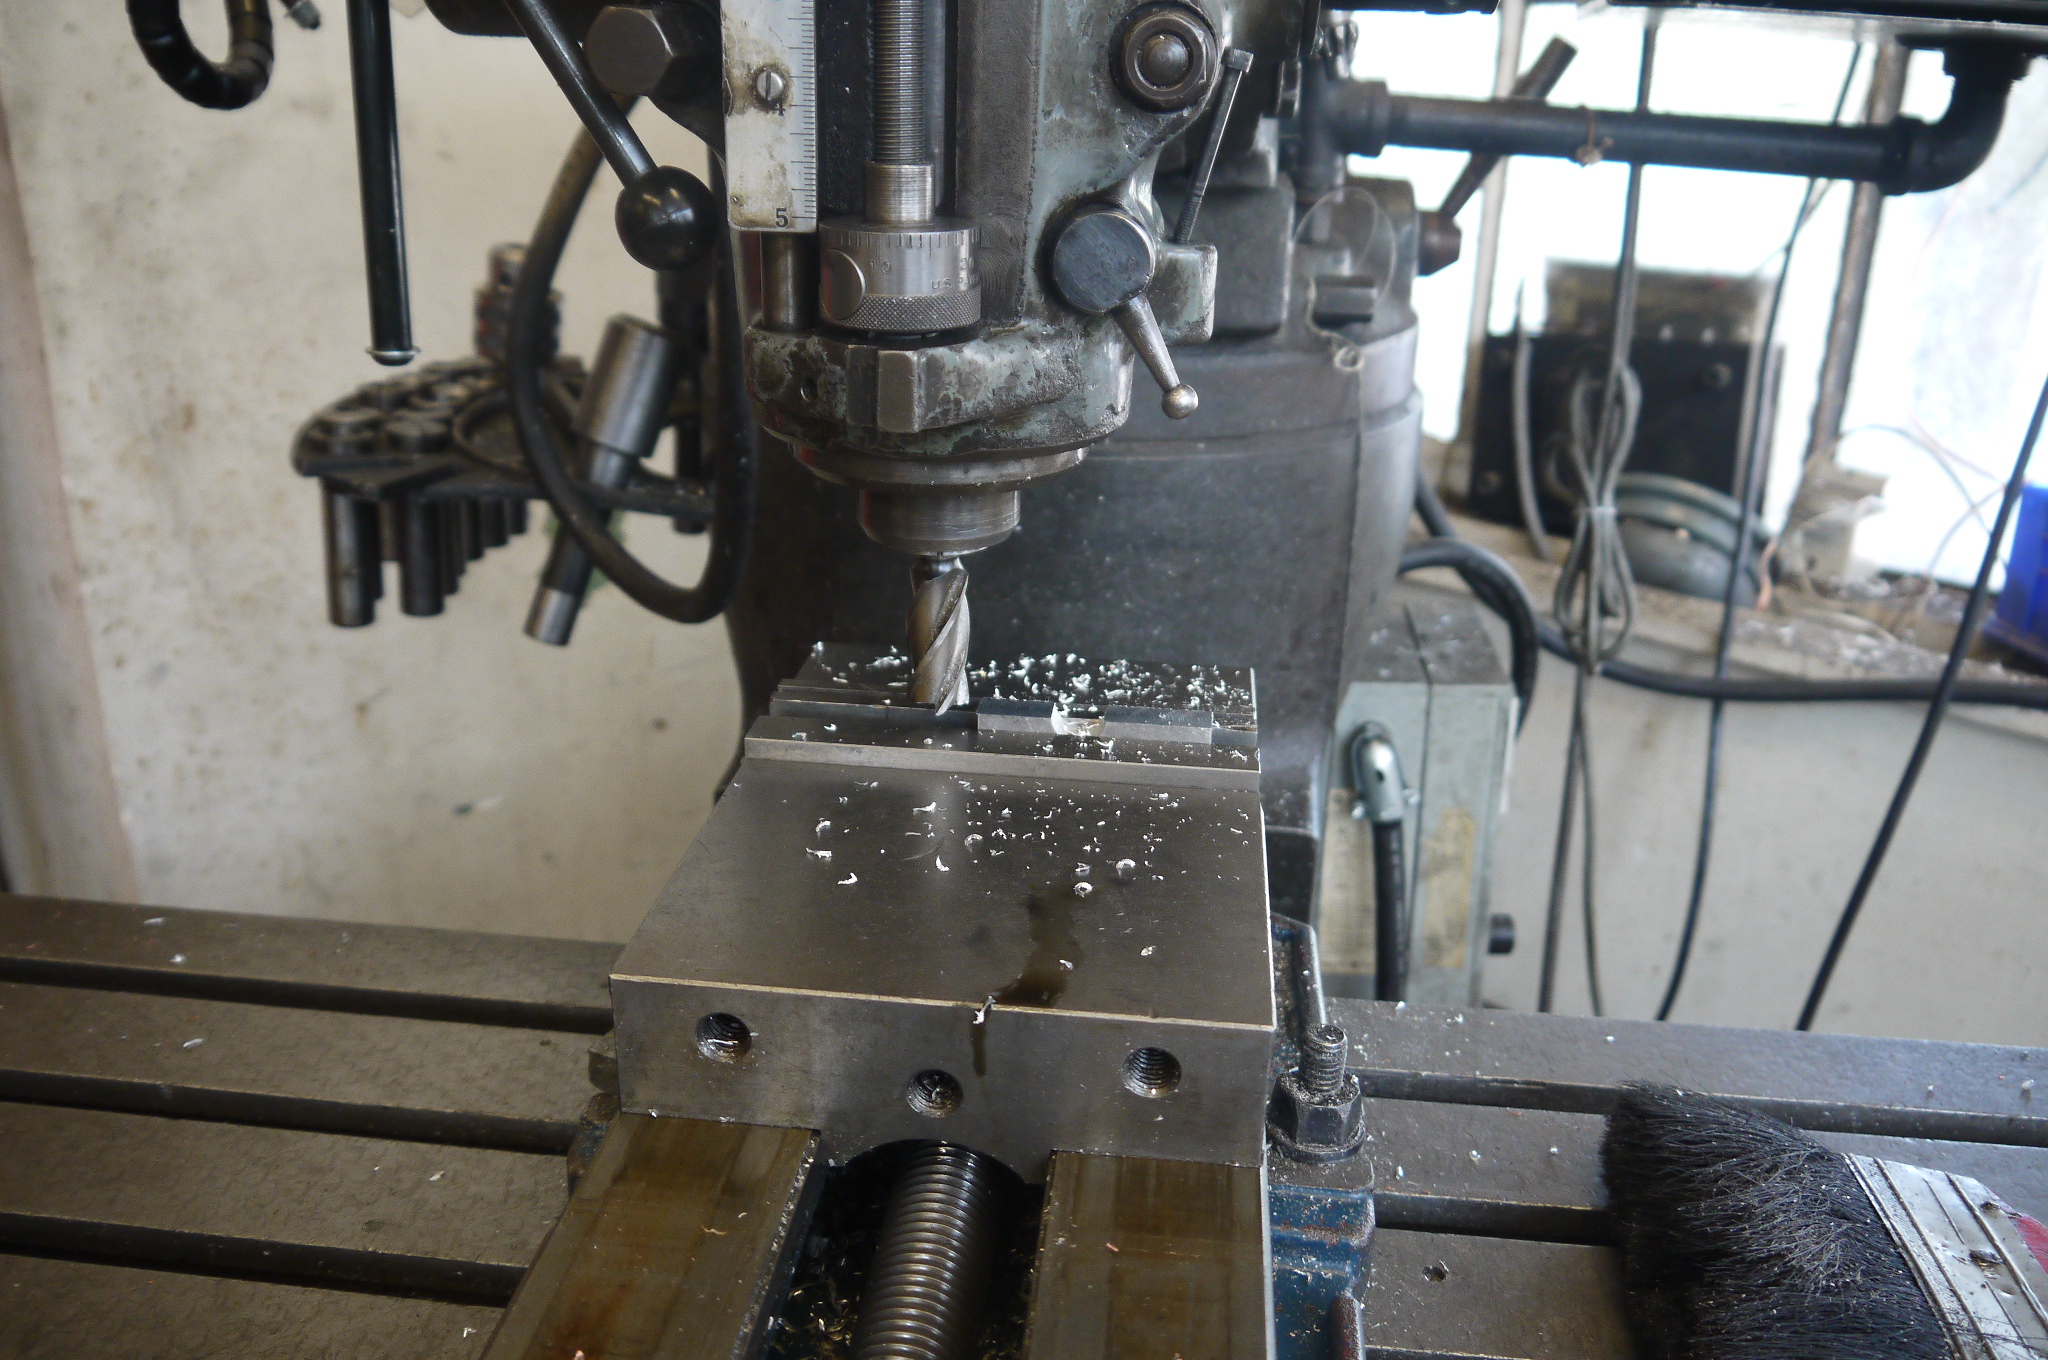
Using a couple c-clamps to test fitting, it started to look more and more like an actual skateboard. 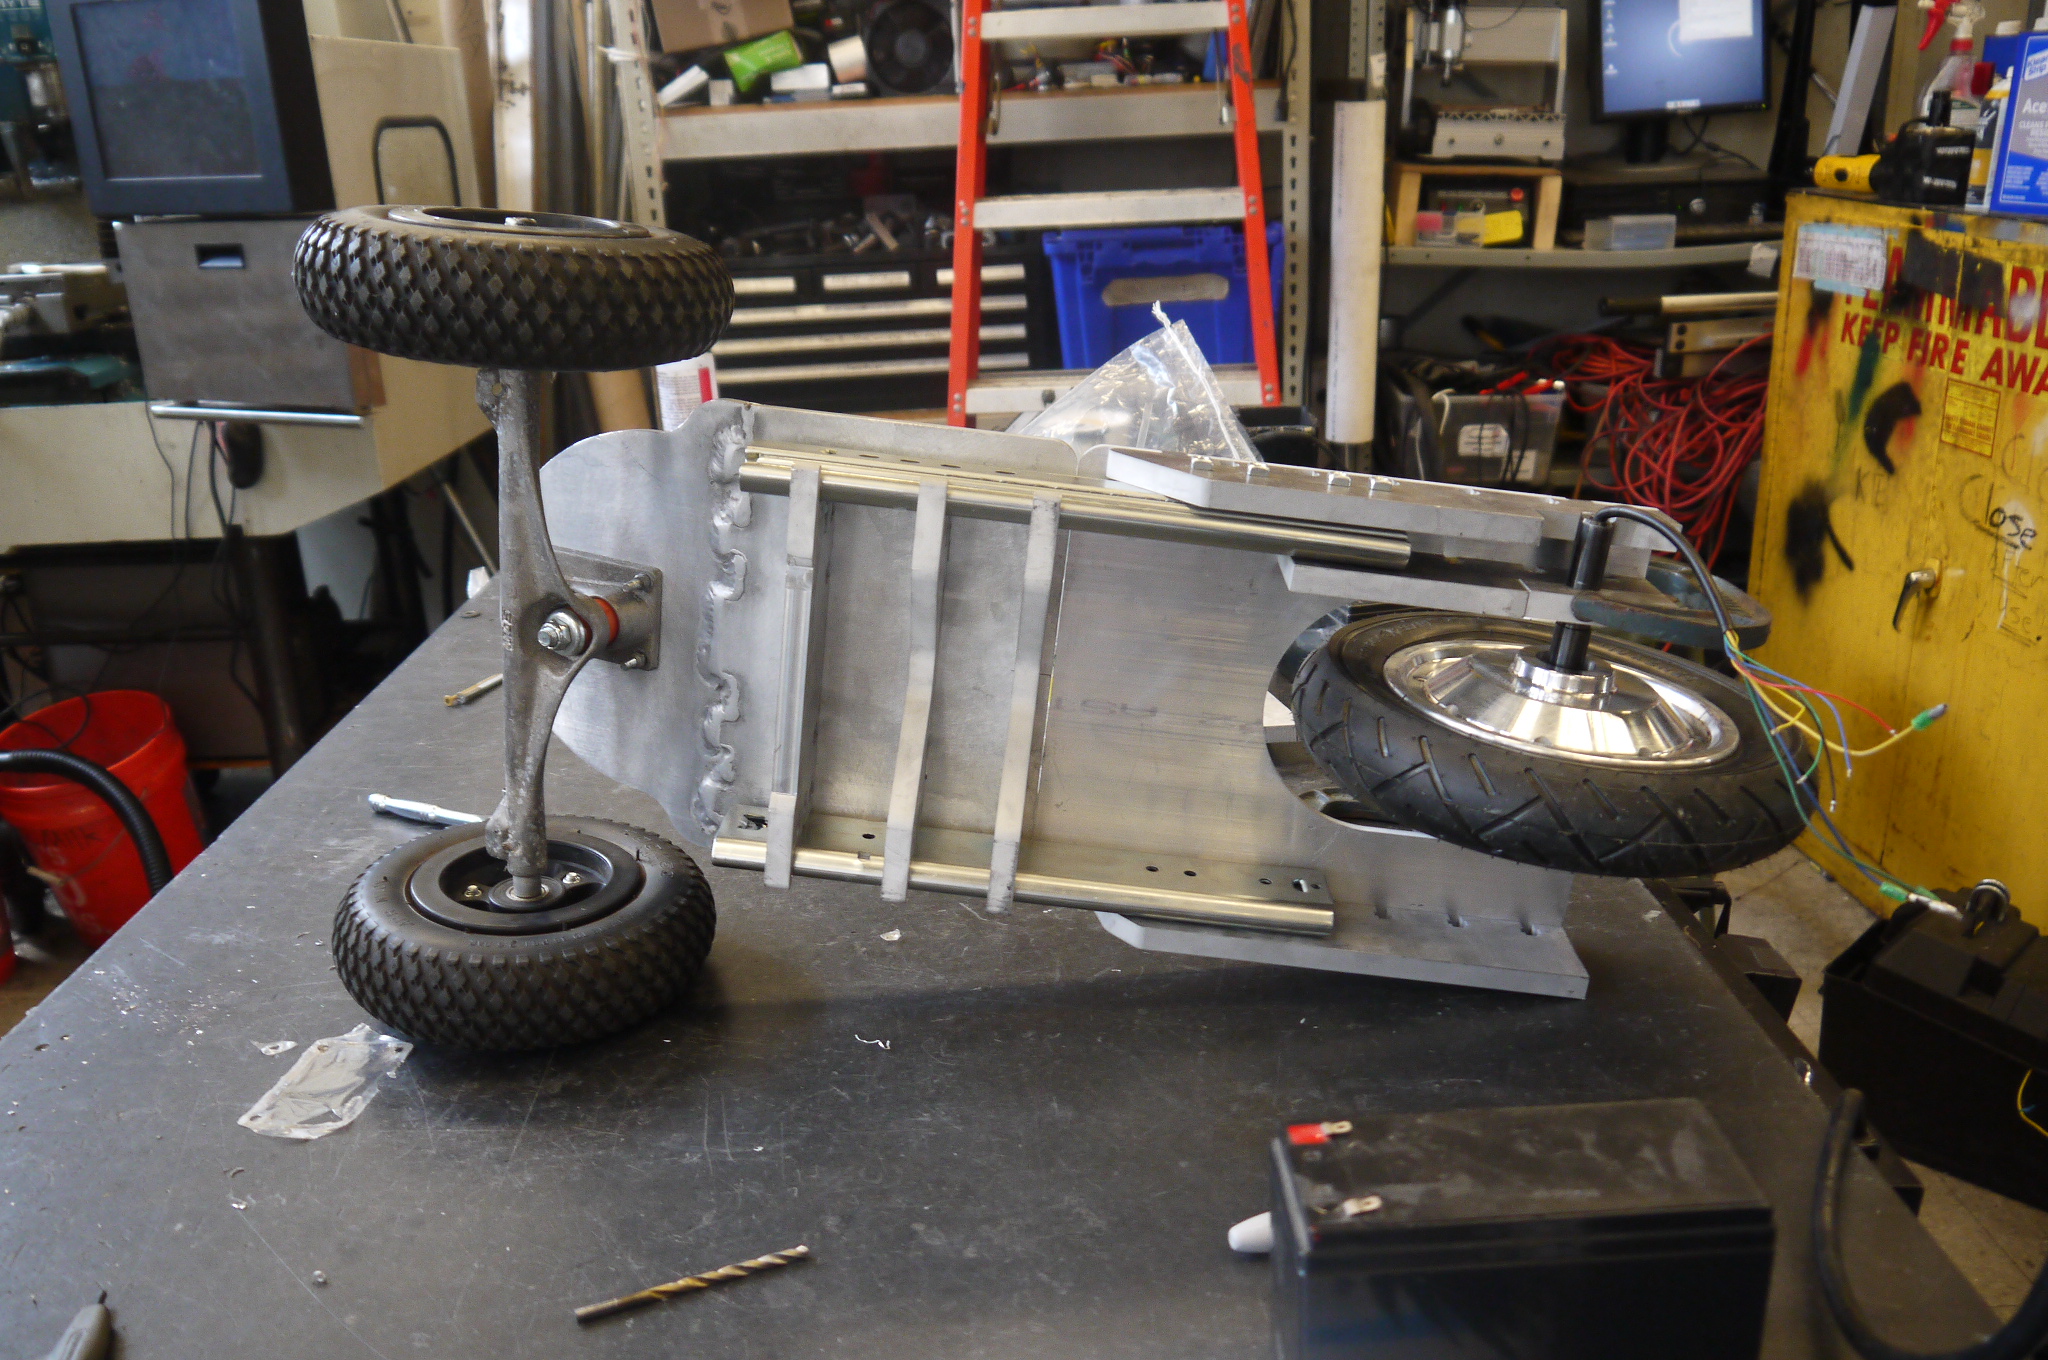
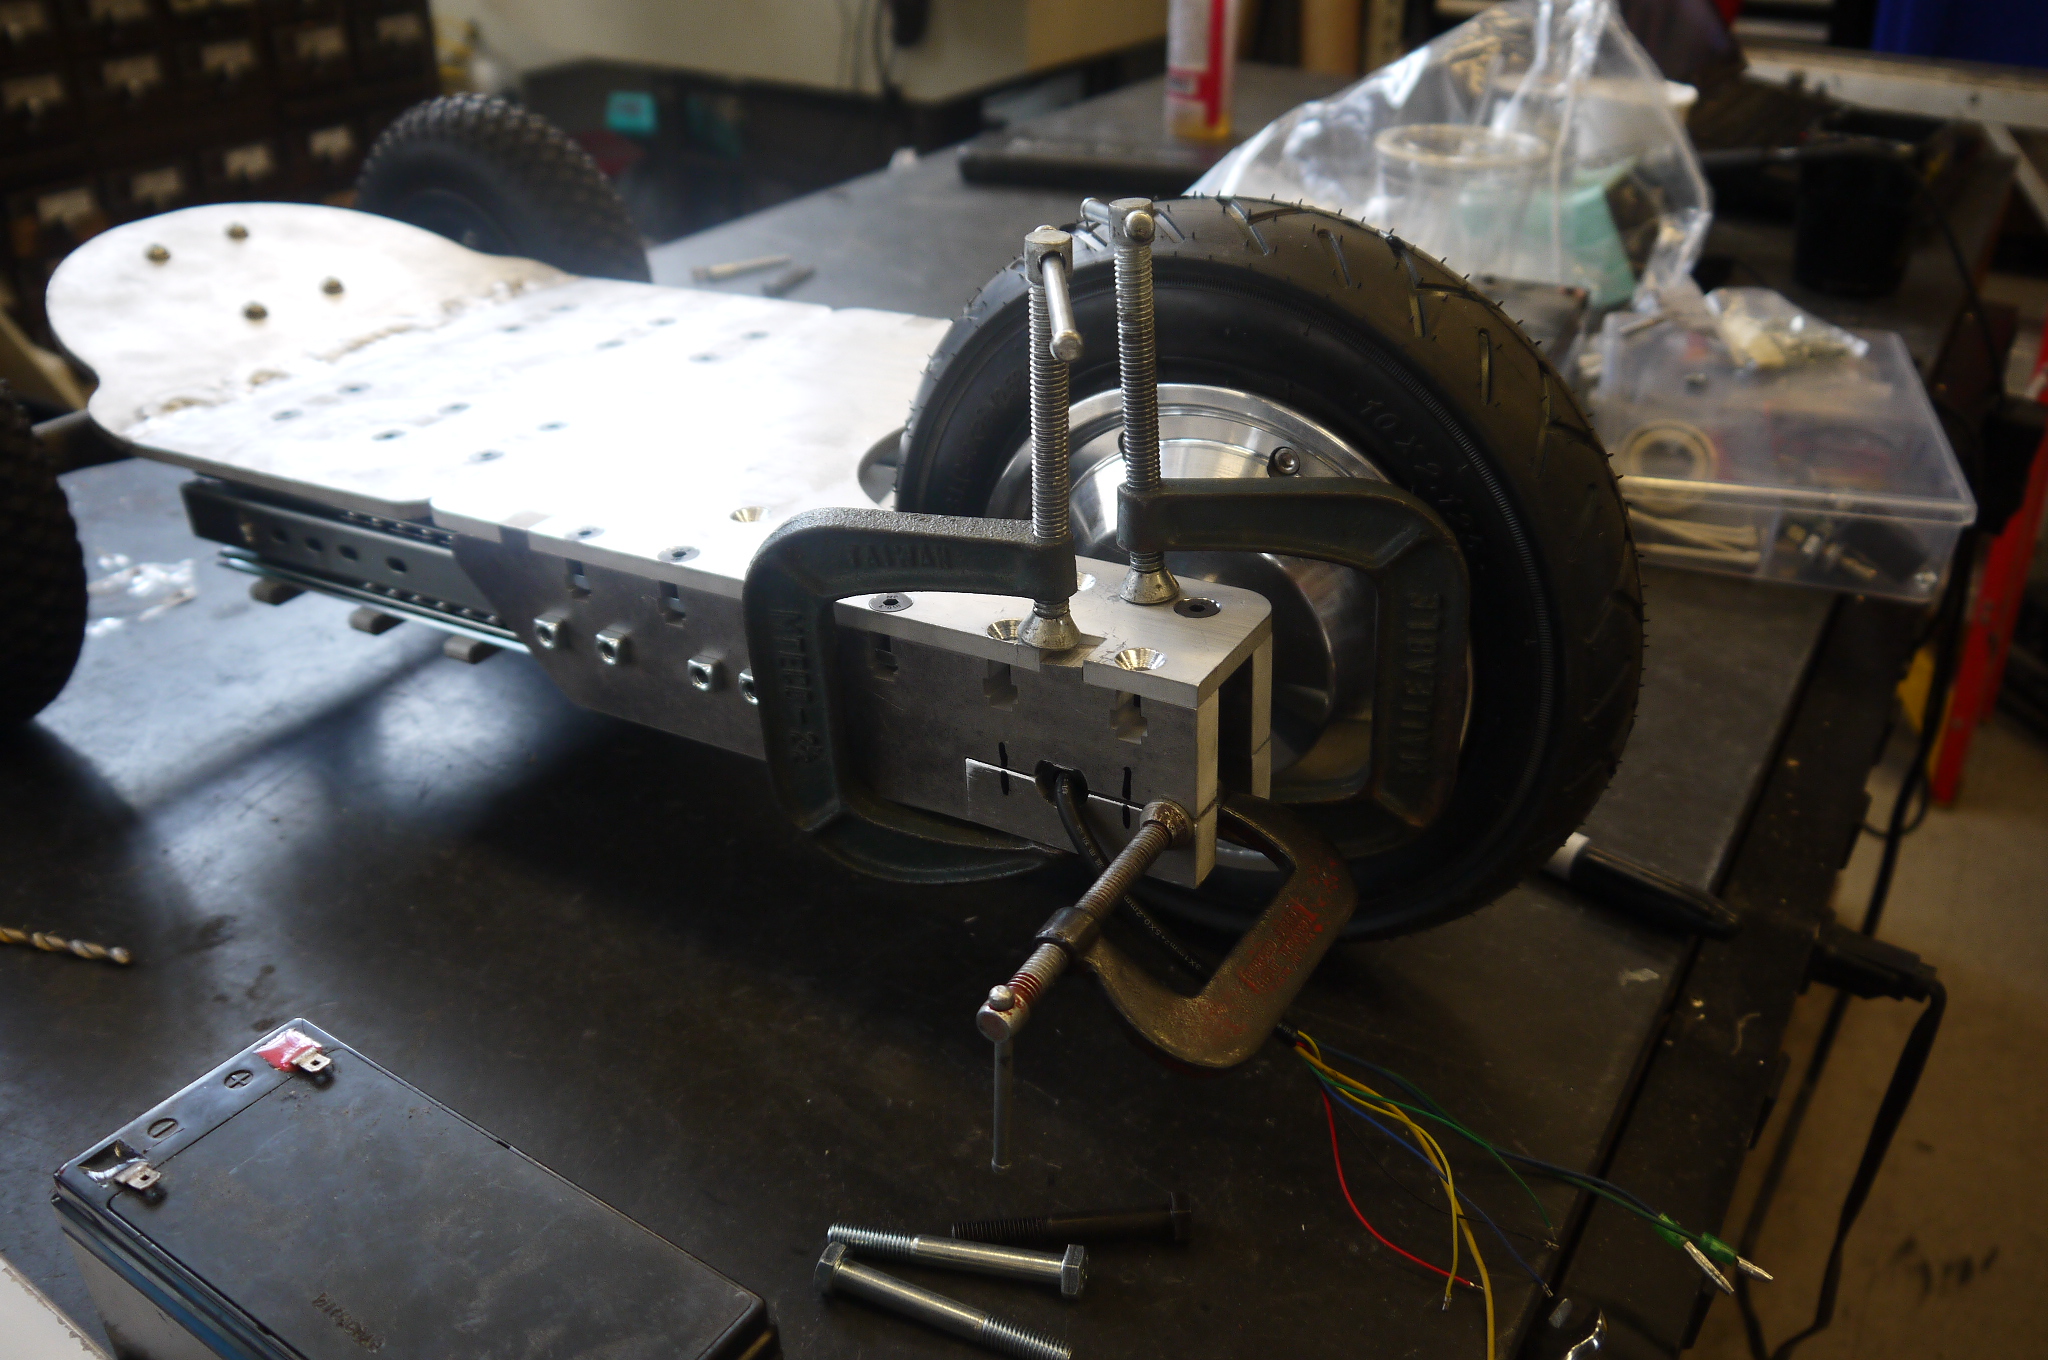
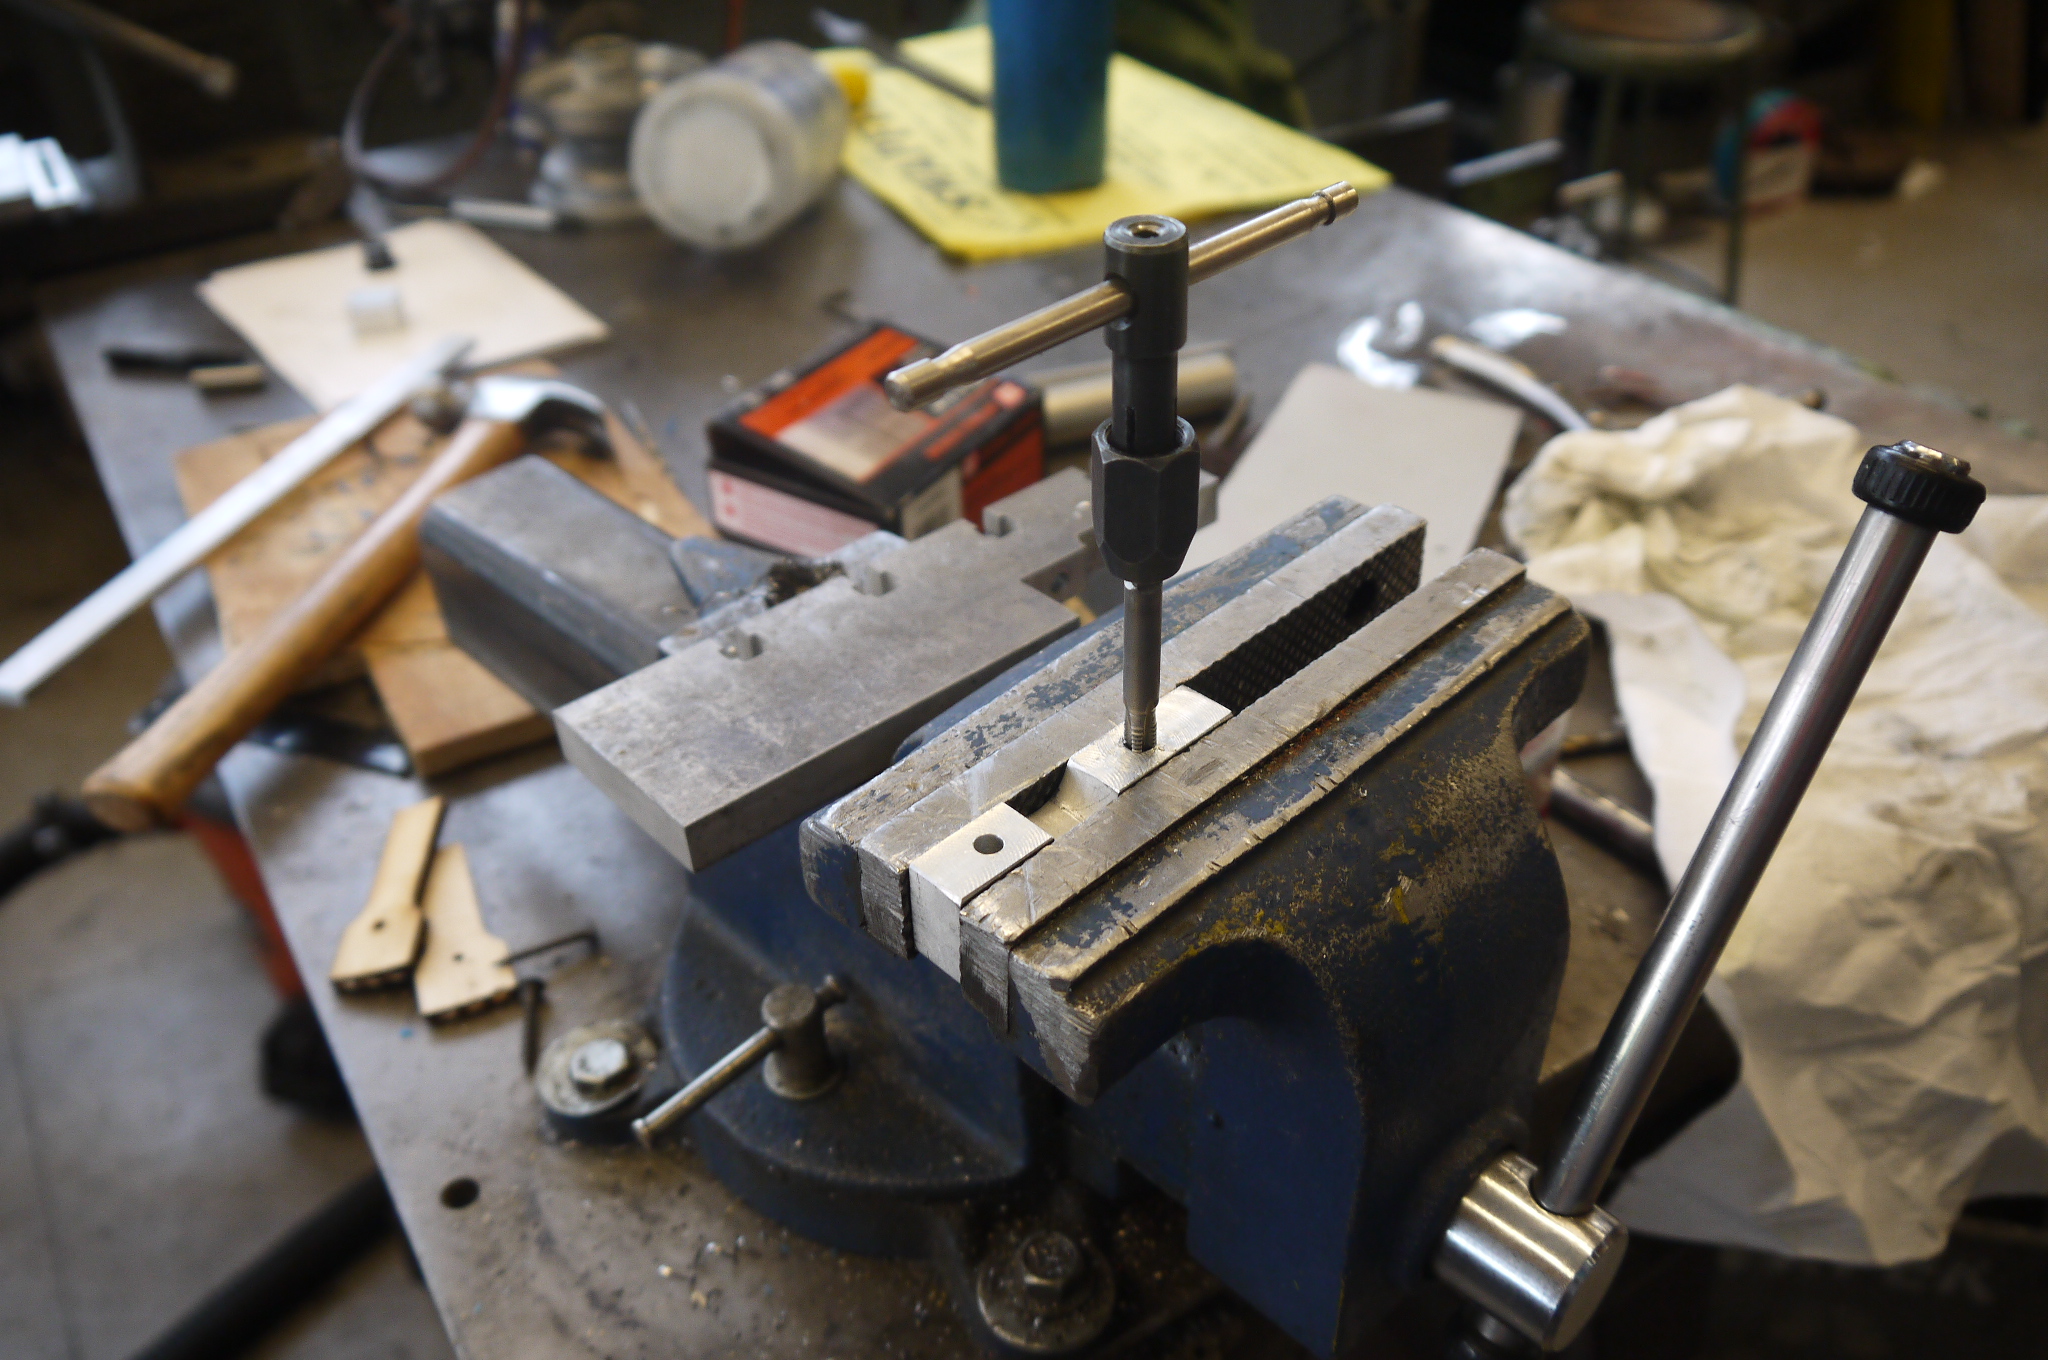
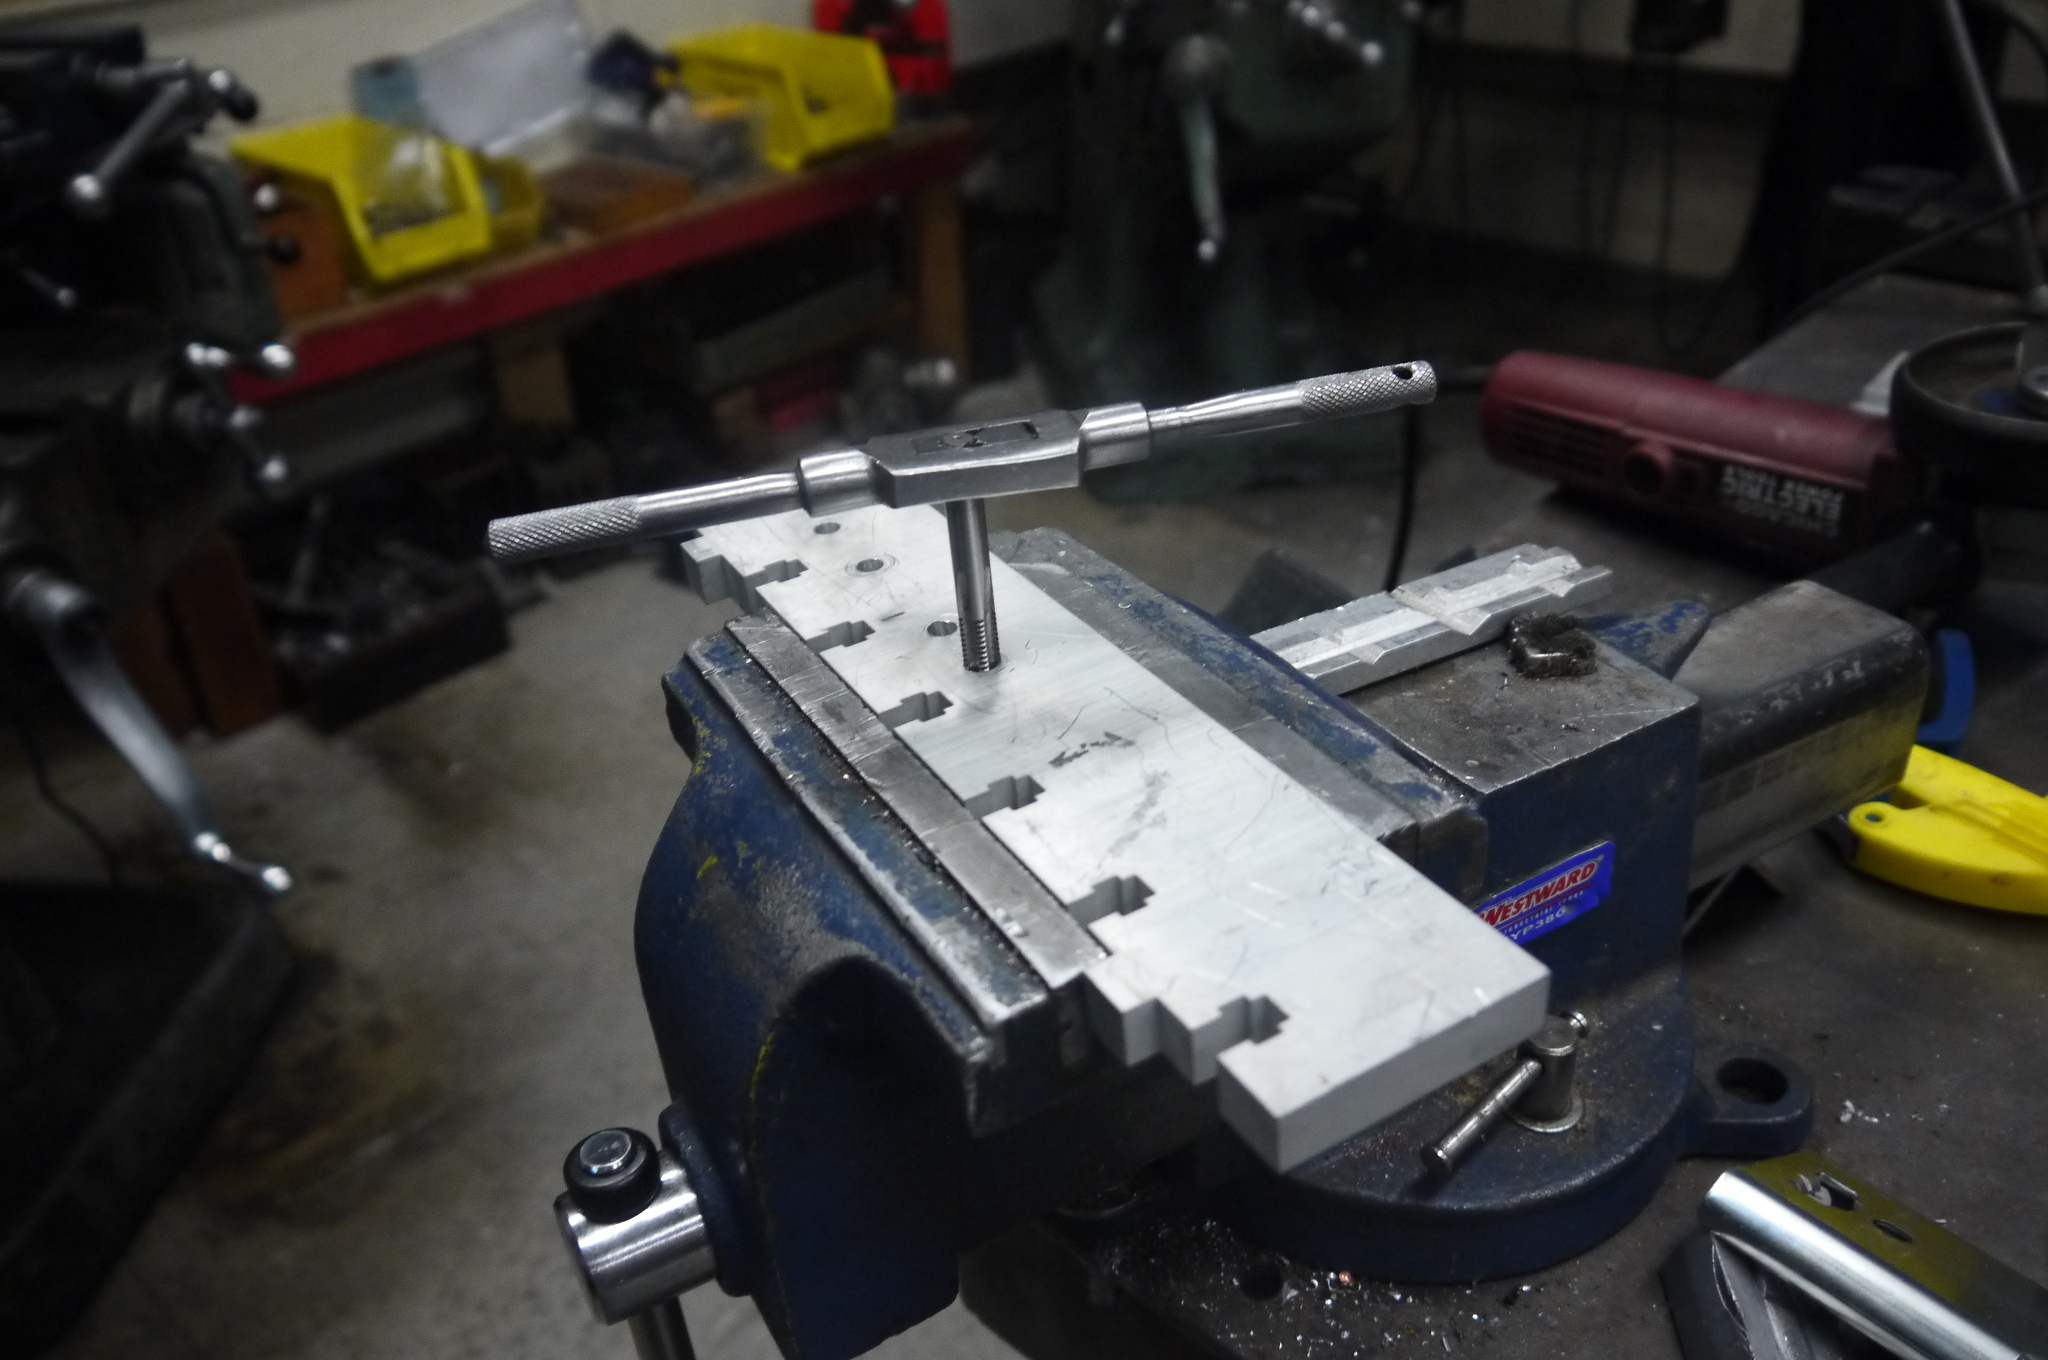
Test Fit TimeI marked the front facing side just for simplicity on the mill and then used a center drill, indicated off of the waterjet notches. This allowed for easy center positioning. I then used a tap-drill for an M6 to bore all the way through both parts while they were heavily clamped in the vice. A clearance drill was then used seperatley on the non-clamping part of the rear wheel holder assembly. 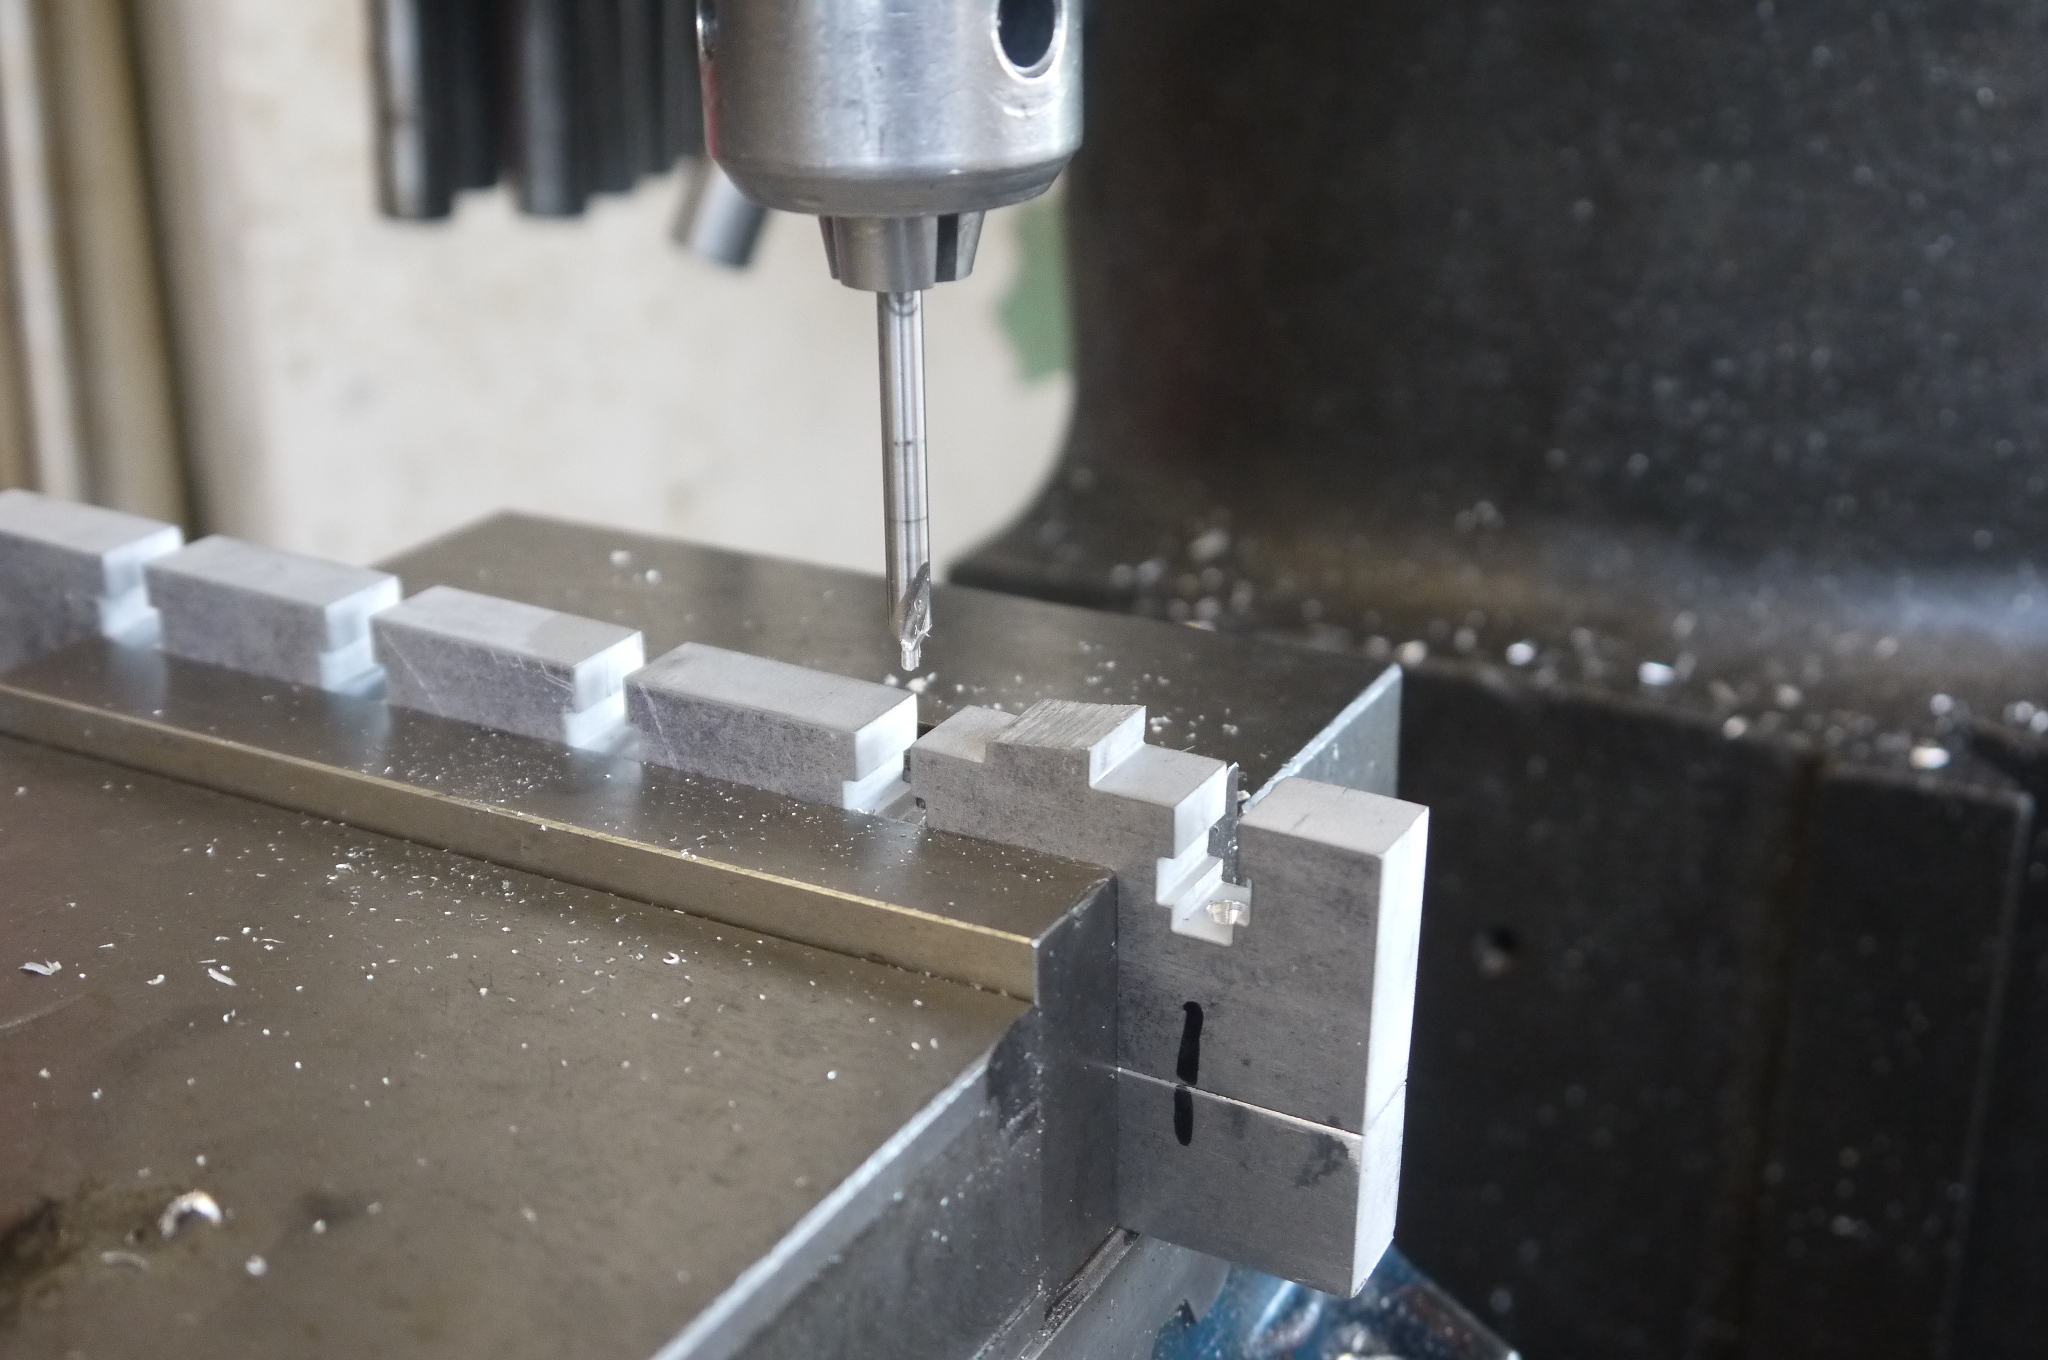
An M6 Tap was used on the lower clamping portion of the wheel holster assembly. During the design phase I left in an M6 Square nut holster in the case that the rear assembly needed a different mounting. The change here actually worked out quite well, the two M6 Screws are tightened from the top of the skateboard without extra hardware. 
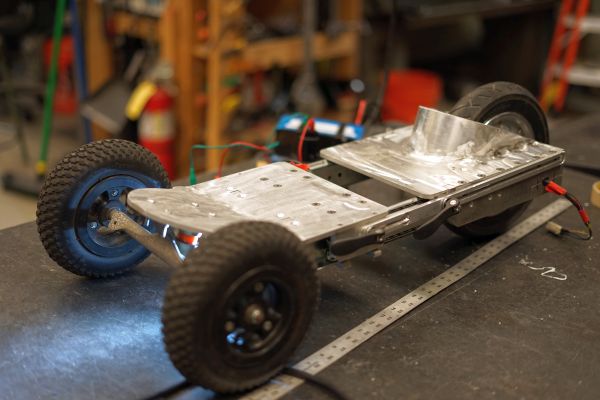
ITS BECOMING A REAL BOARDWith minimal machining a skateboard appears! Shown is the collapsed and extended state. Note the four square nuts shown on the back are a temporary setup, The tap holes for those screws were over sized and not suitable for tapping, later in the build they get upgraded to M8 screws tapped directly into the sub frame. 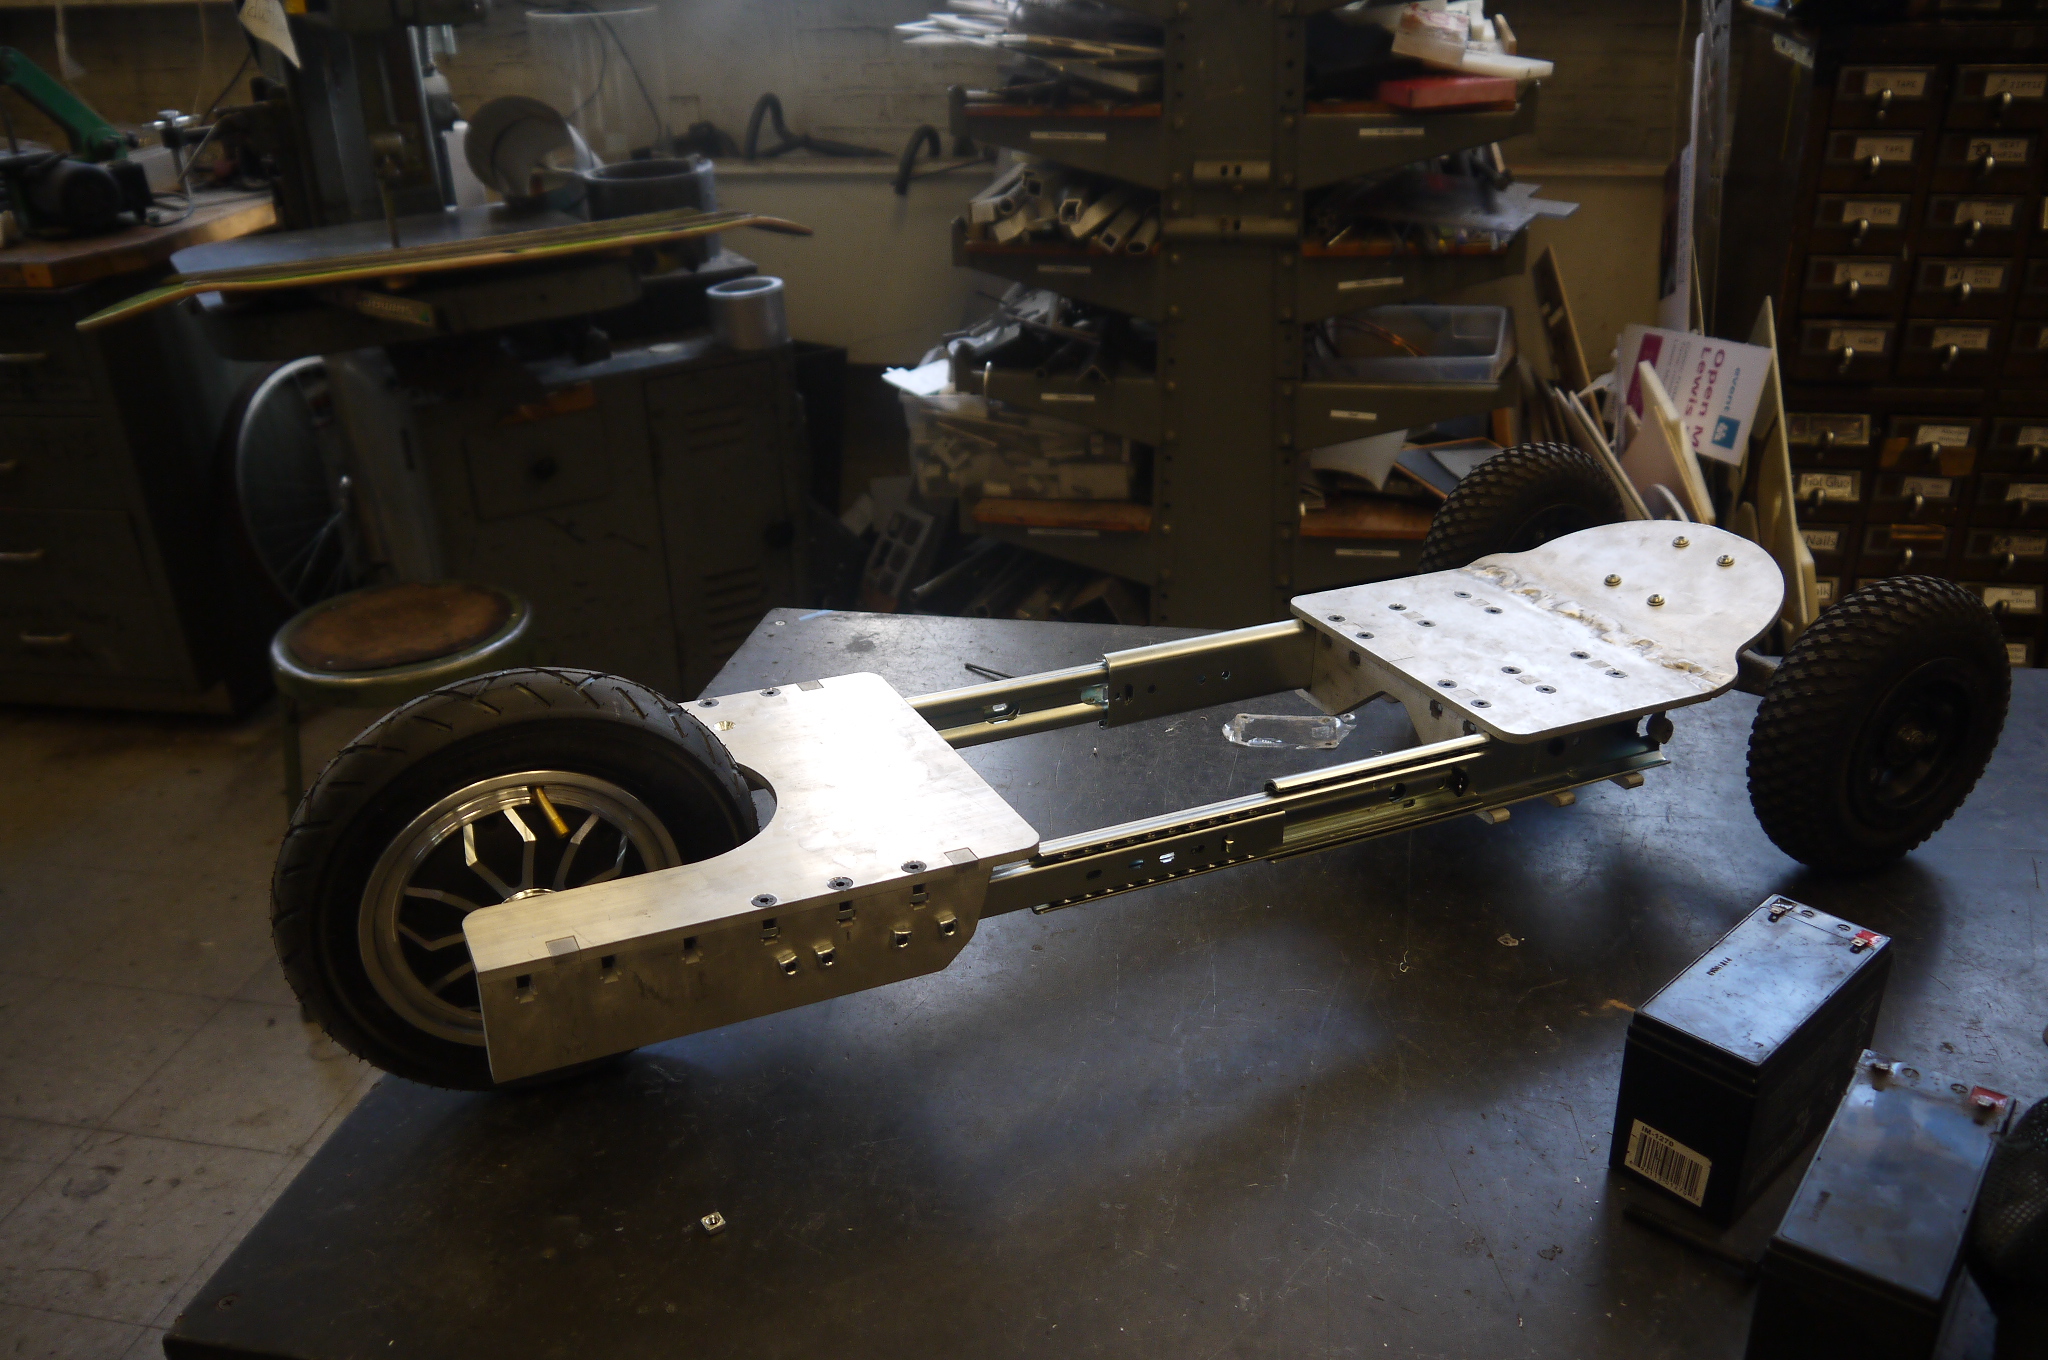
M8 UpgradeTo get rid of the external M6 hardware shown, I purchased some M8 flathead screws. Shown is the side mount for one of the drawer slides, re-drilled out, with an M8 tap. A bit of loctite was used to keep the screws in place after verifying the positioning was correct. 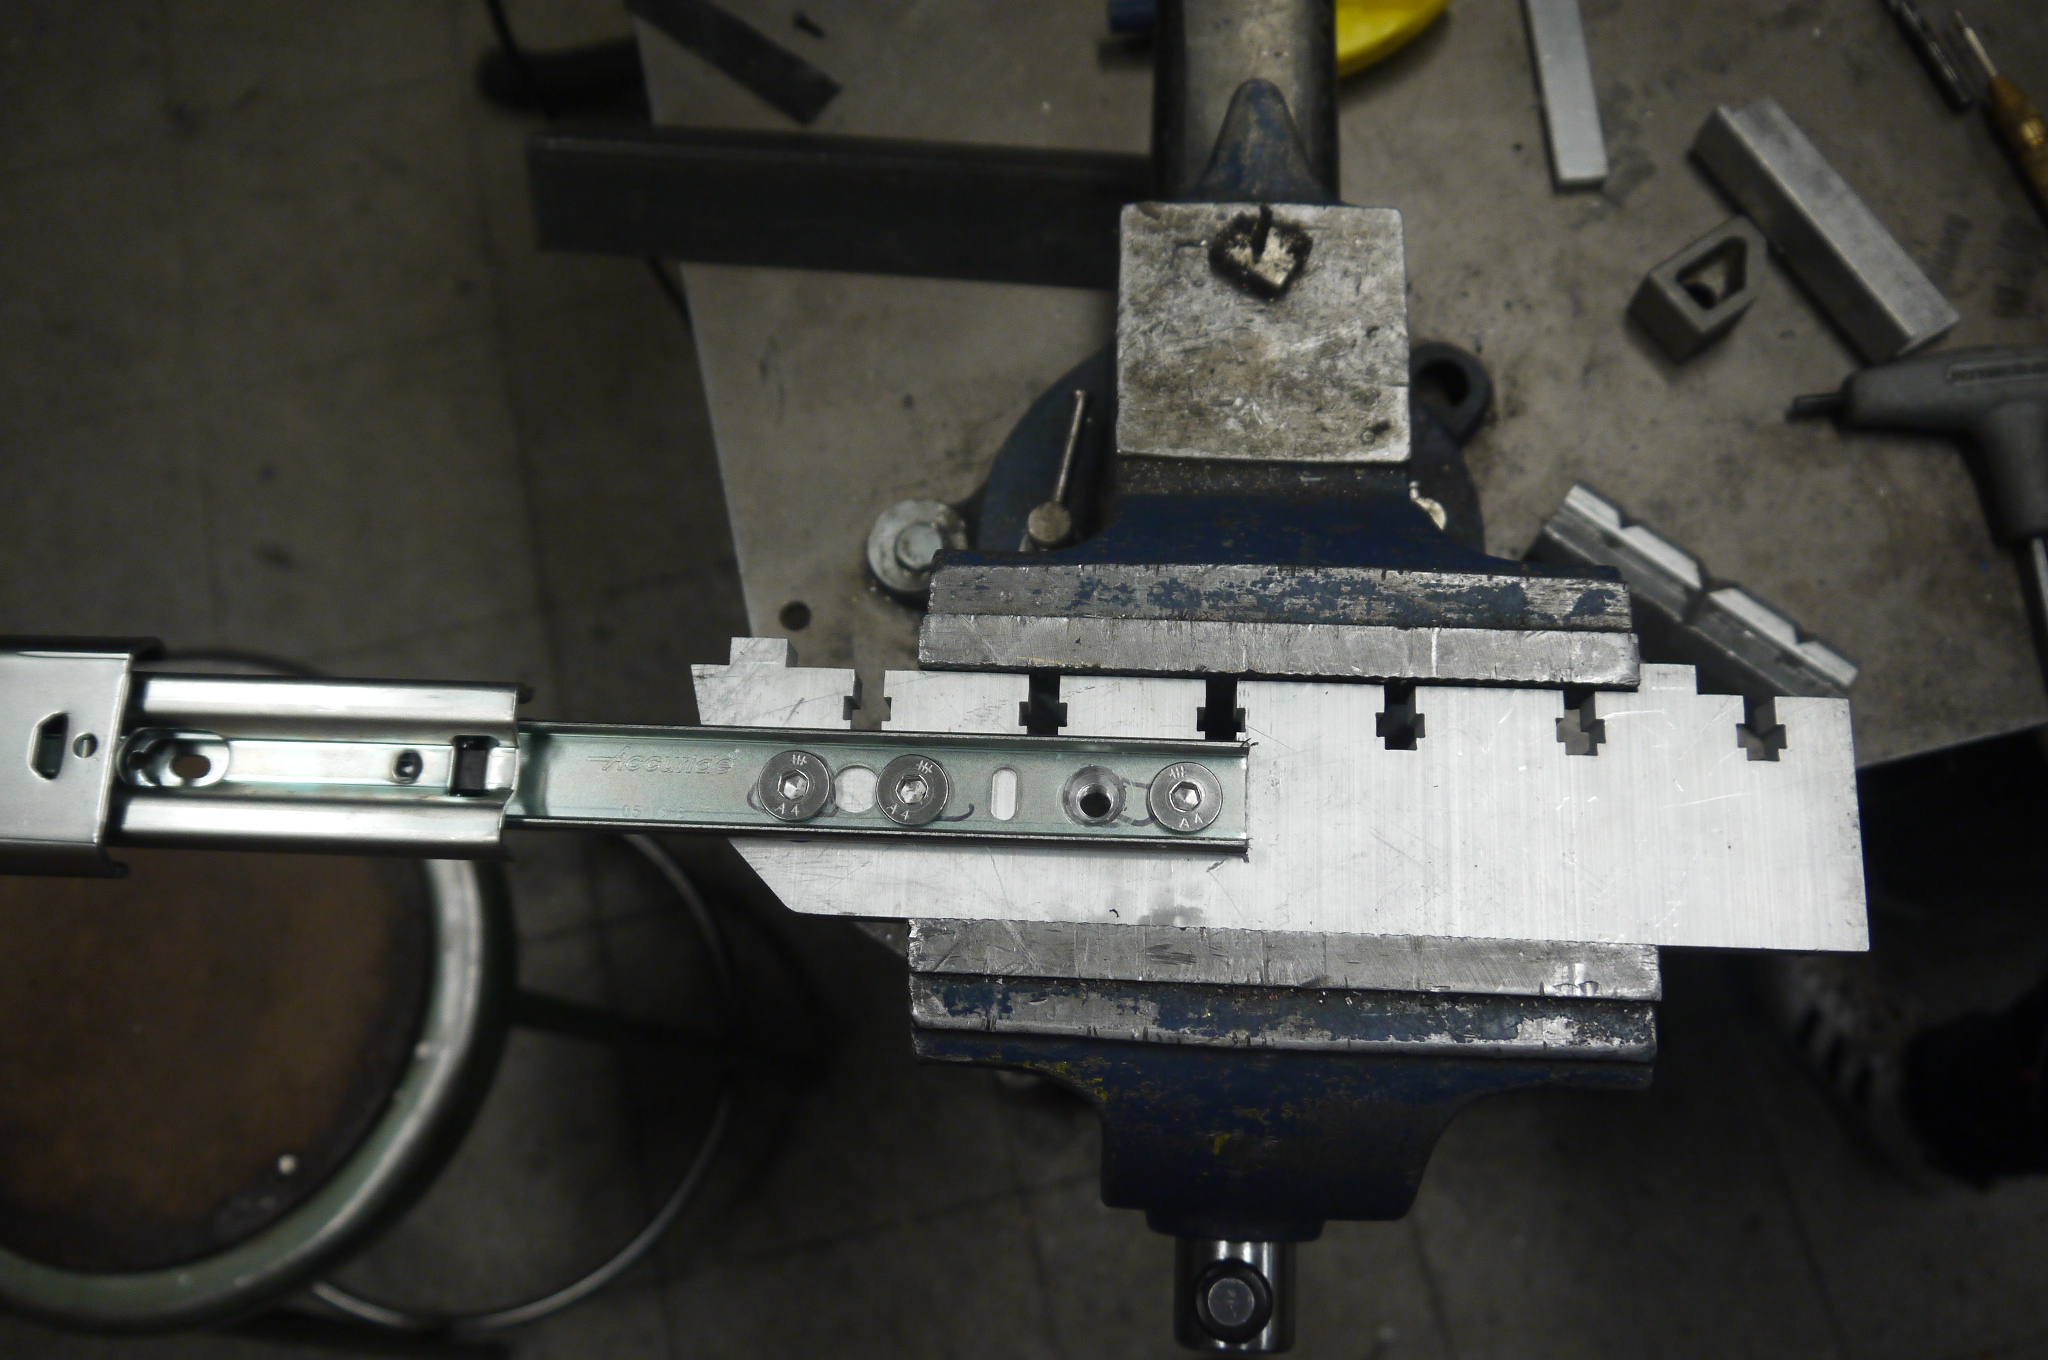
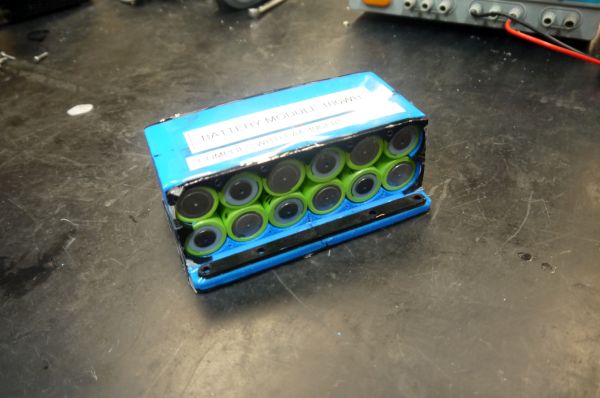
Testing the fitUsing the first completed drawer-slide assembly I did a test-fit again and lo, its starting to come together. A123 cells and some 3d printingI cadded up a 2-part 3d printed battery holder for a 12S1P A123 26650 LiFePO4 battery module, and printed it out using an UP! mini 3d printer. A few laser cut abs parts were added for increased stability. The module itself is fairly tight, but seems to fit the bill for energy density. Nominally this should provide a few miles of range. This comes in at ~40v nominal, 43v max at 2.5AH. 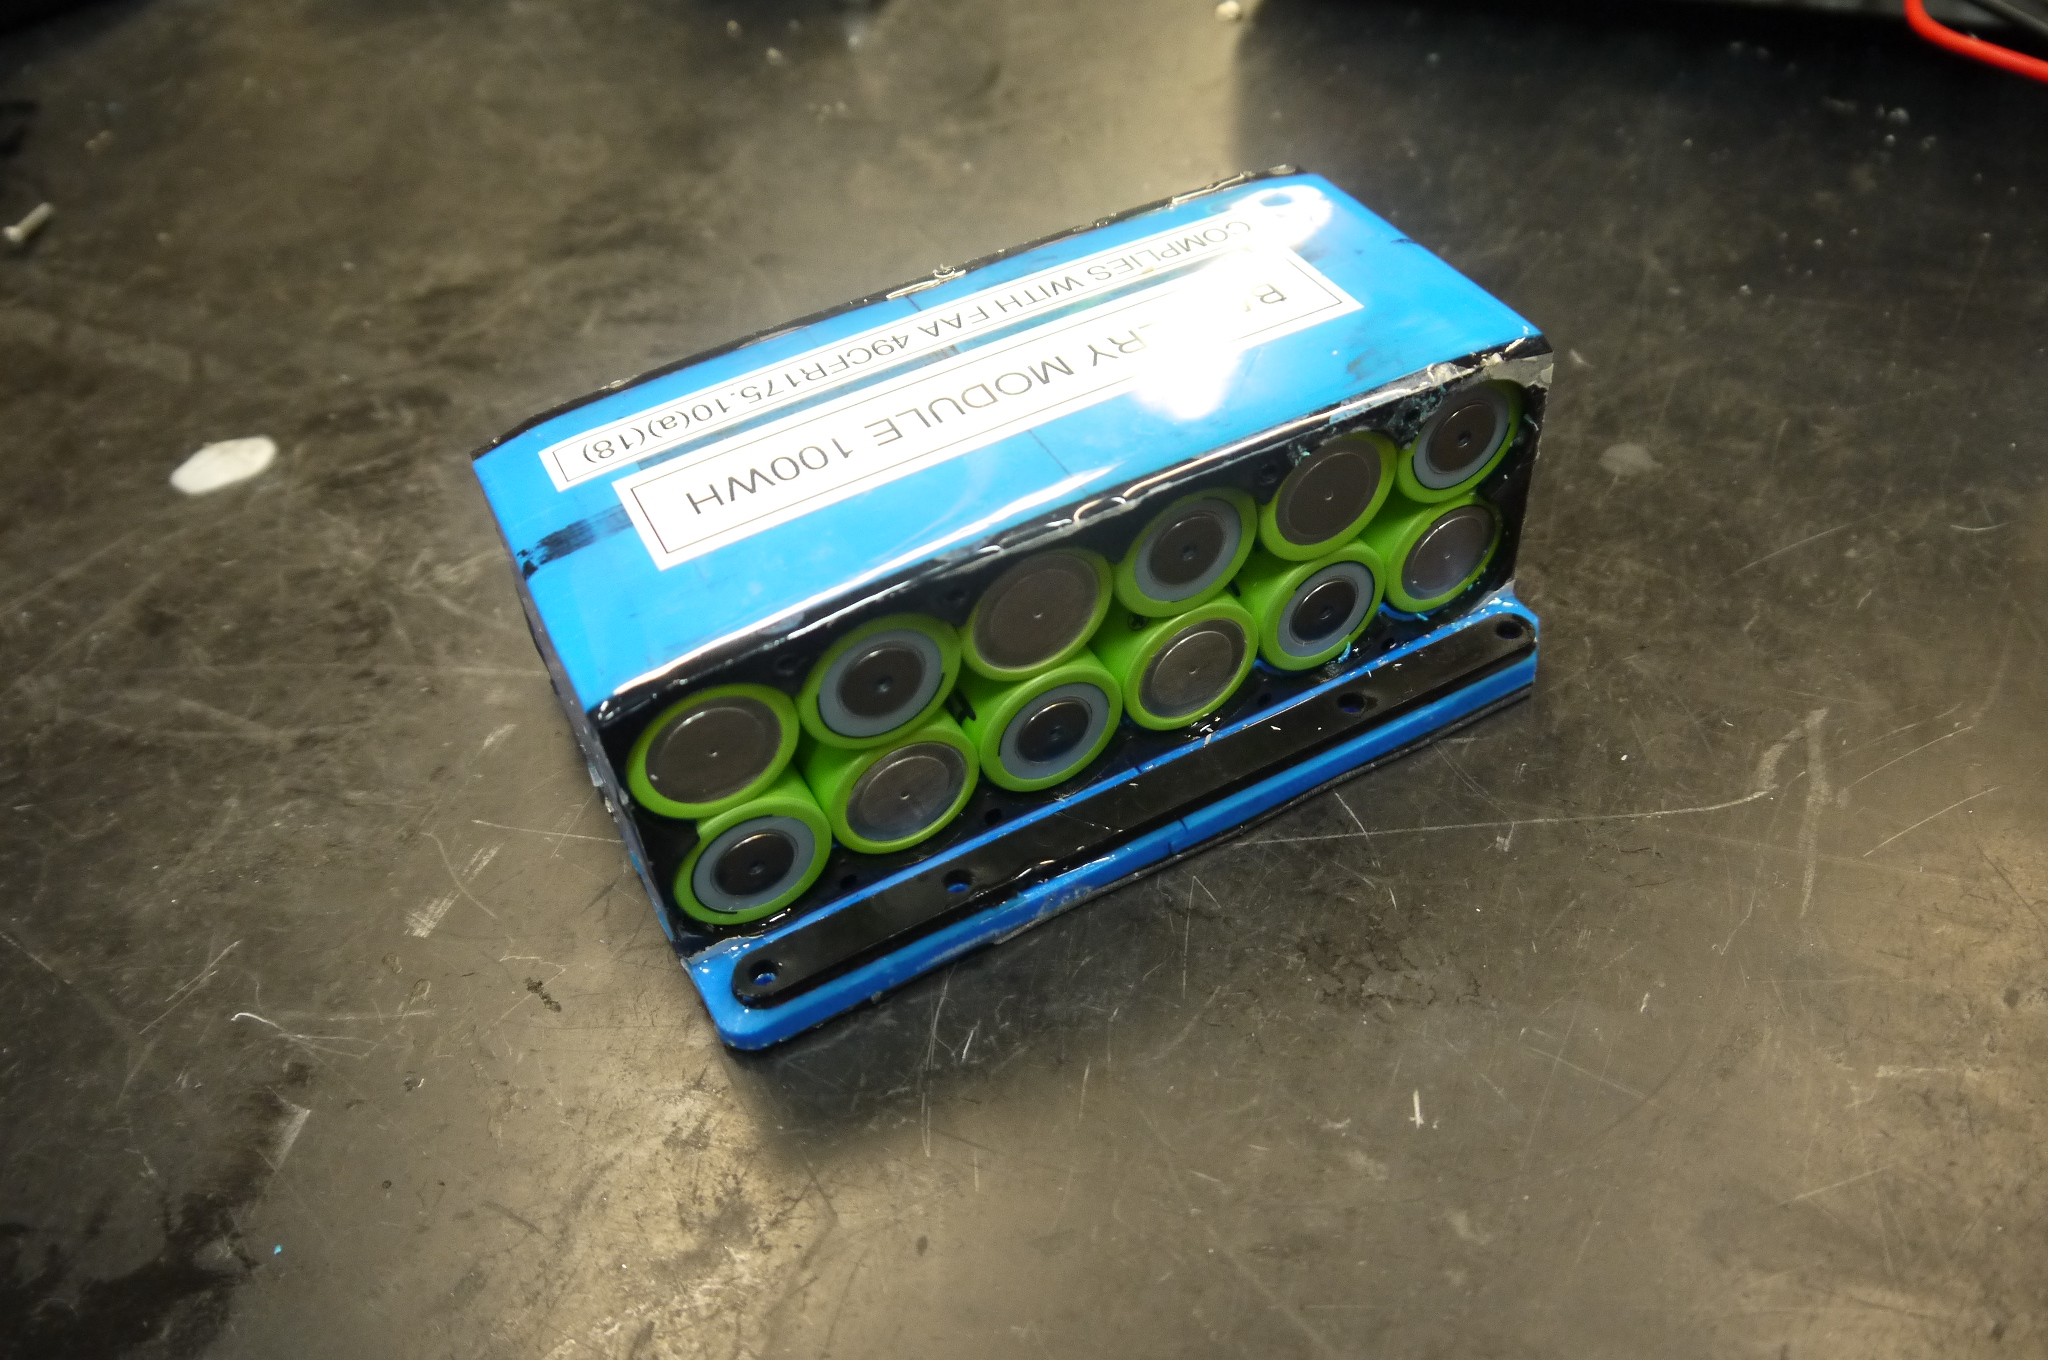
Plotting for overseas travel.One thing that came up after I designed and fabricated this pack was 'how the heck can I bring this overseas, without subsequently end up in the stockade'. An idea popped up: use an off the shelf UL/TUV listed battery pack, if i need to fly, and otherwise use a homegrown pack with higher energy density. 40V battery packs have been appearing more often as of late, and shown here is a Ryobi 40v battery. 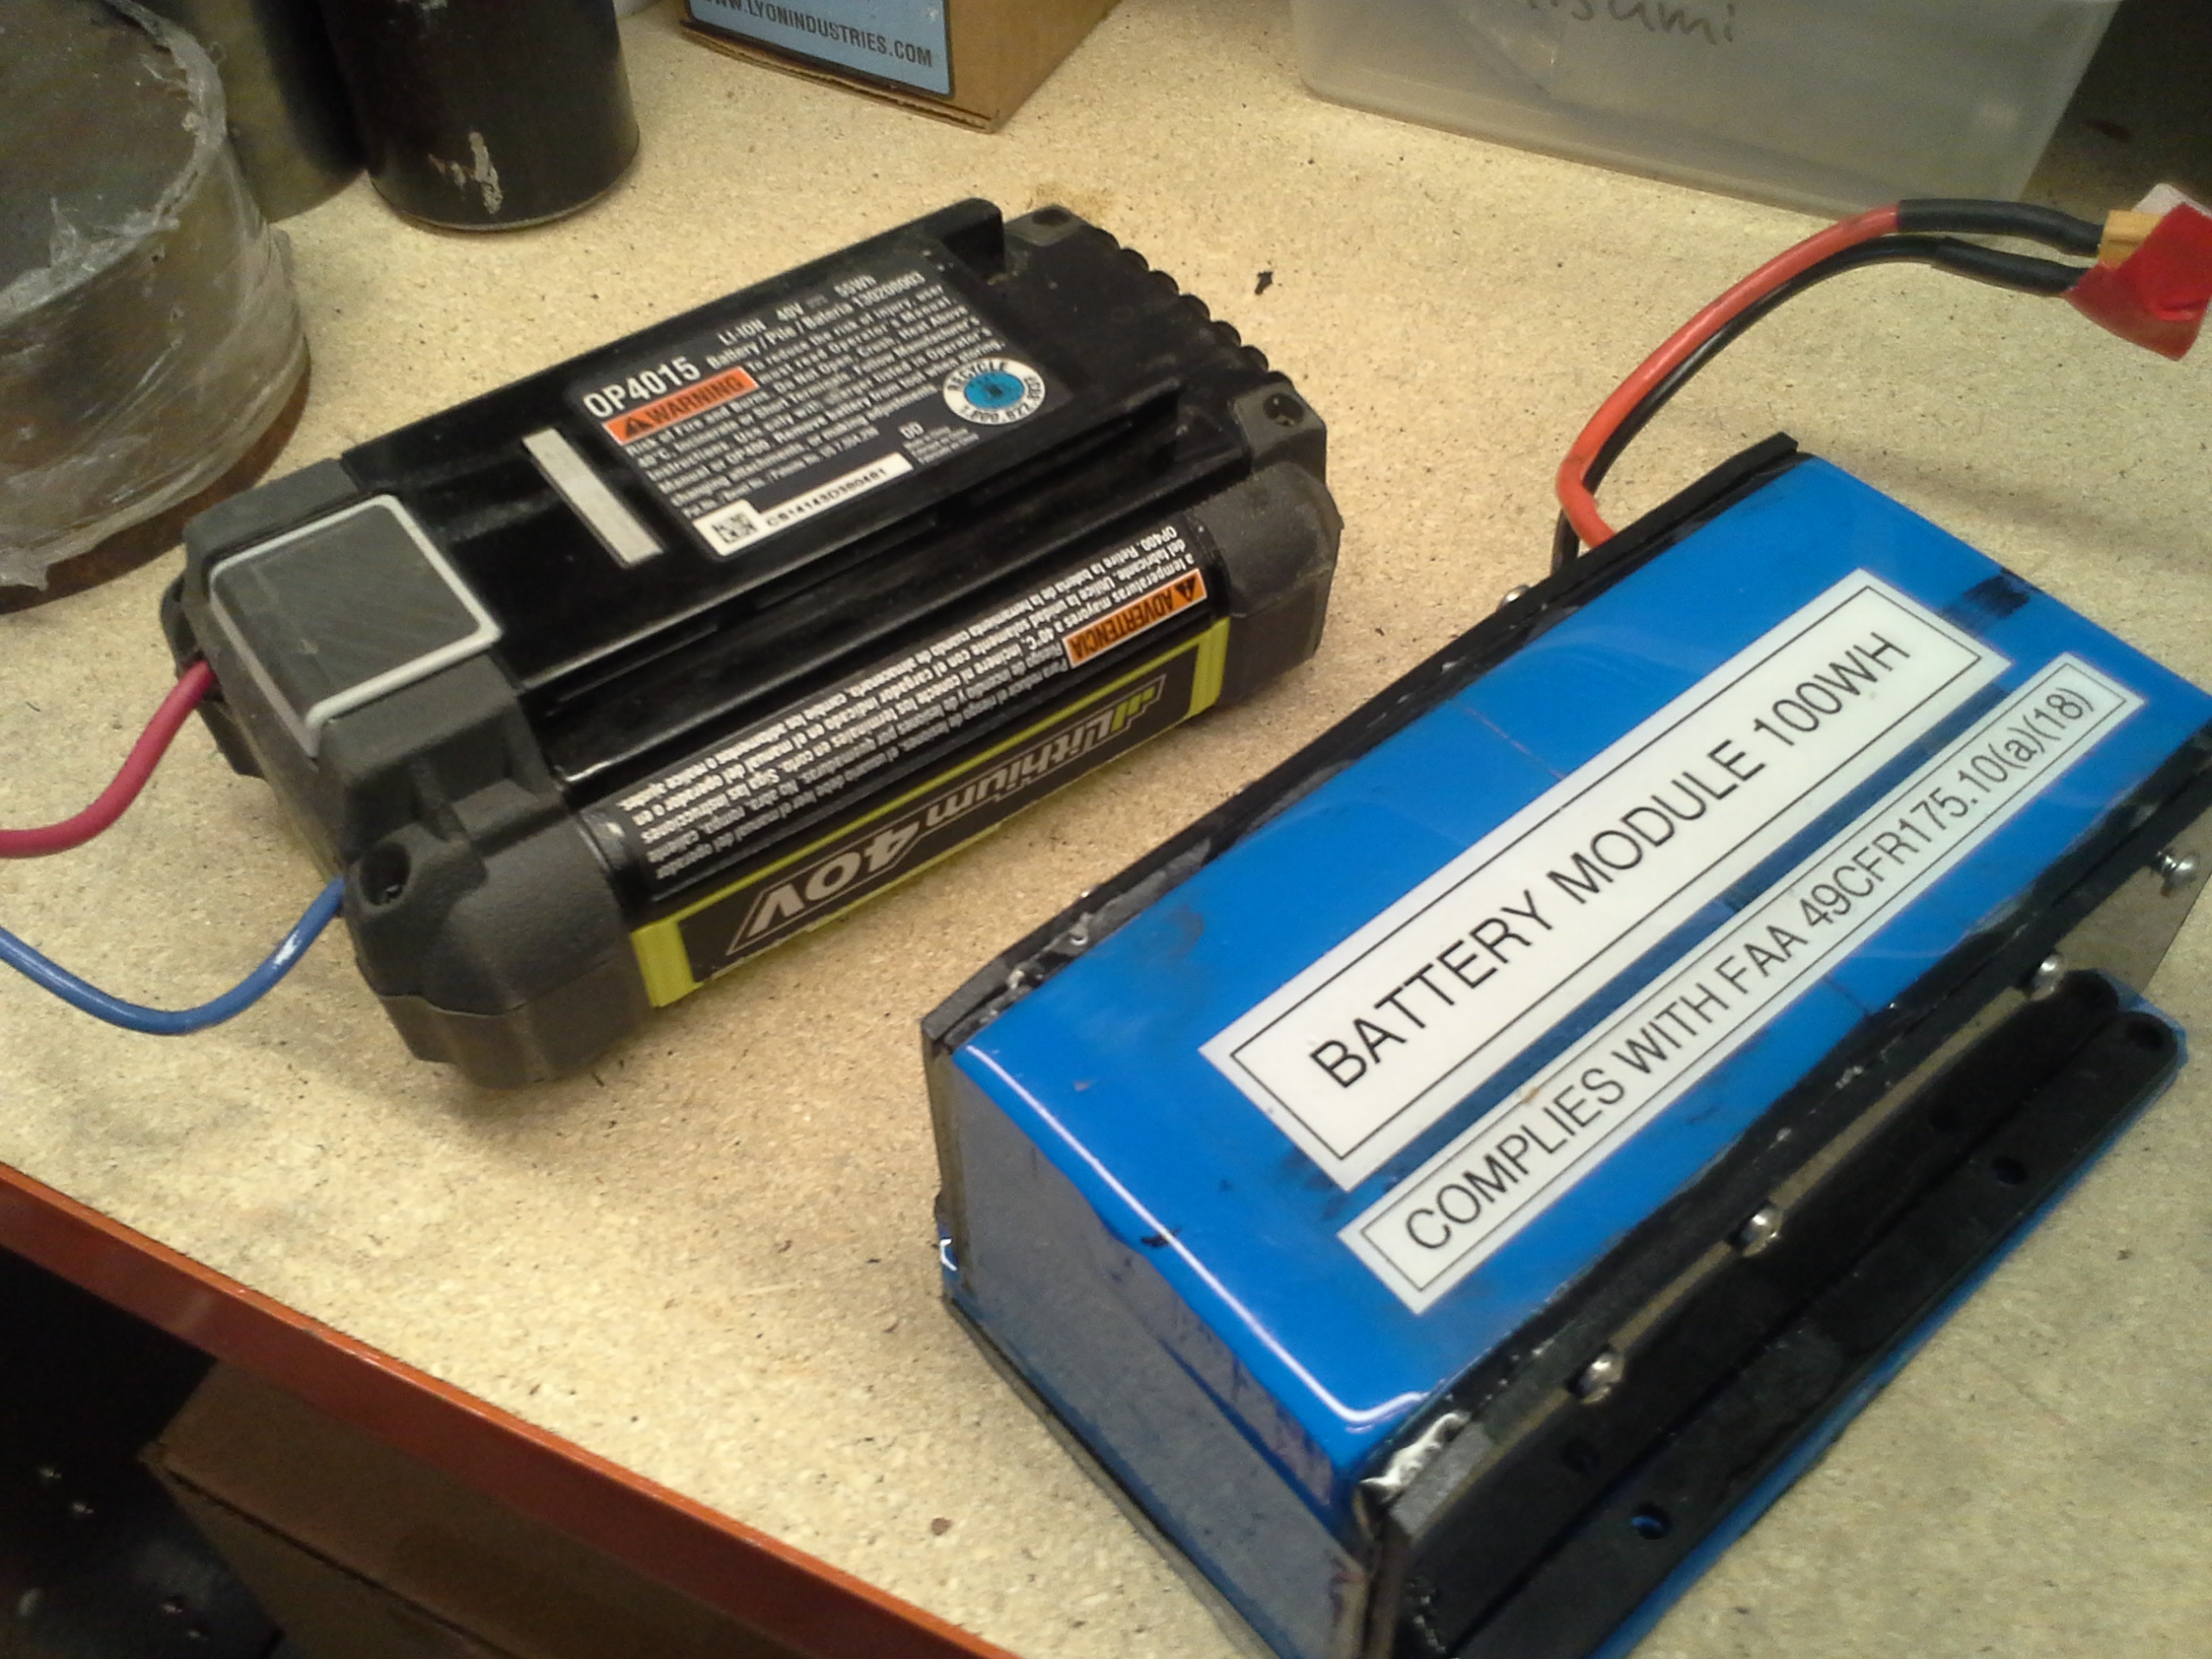

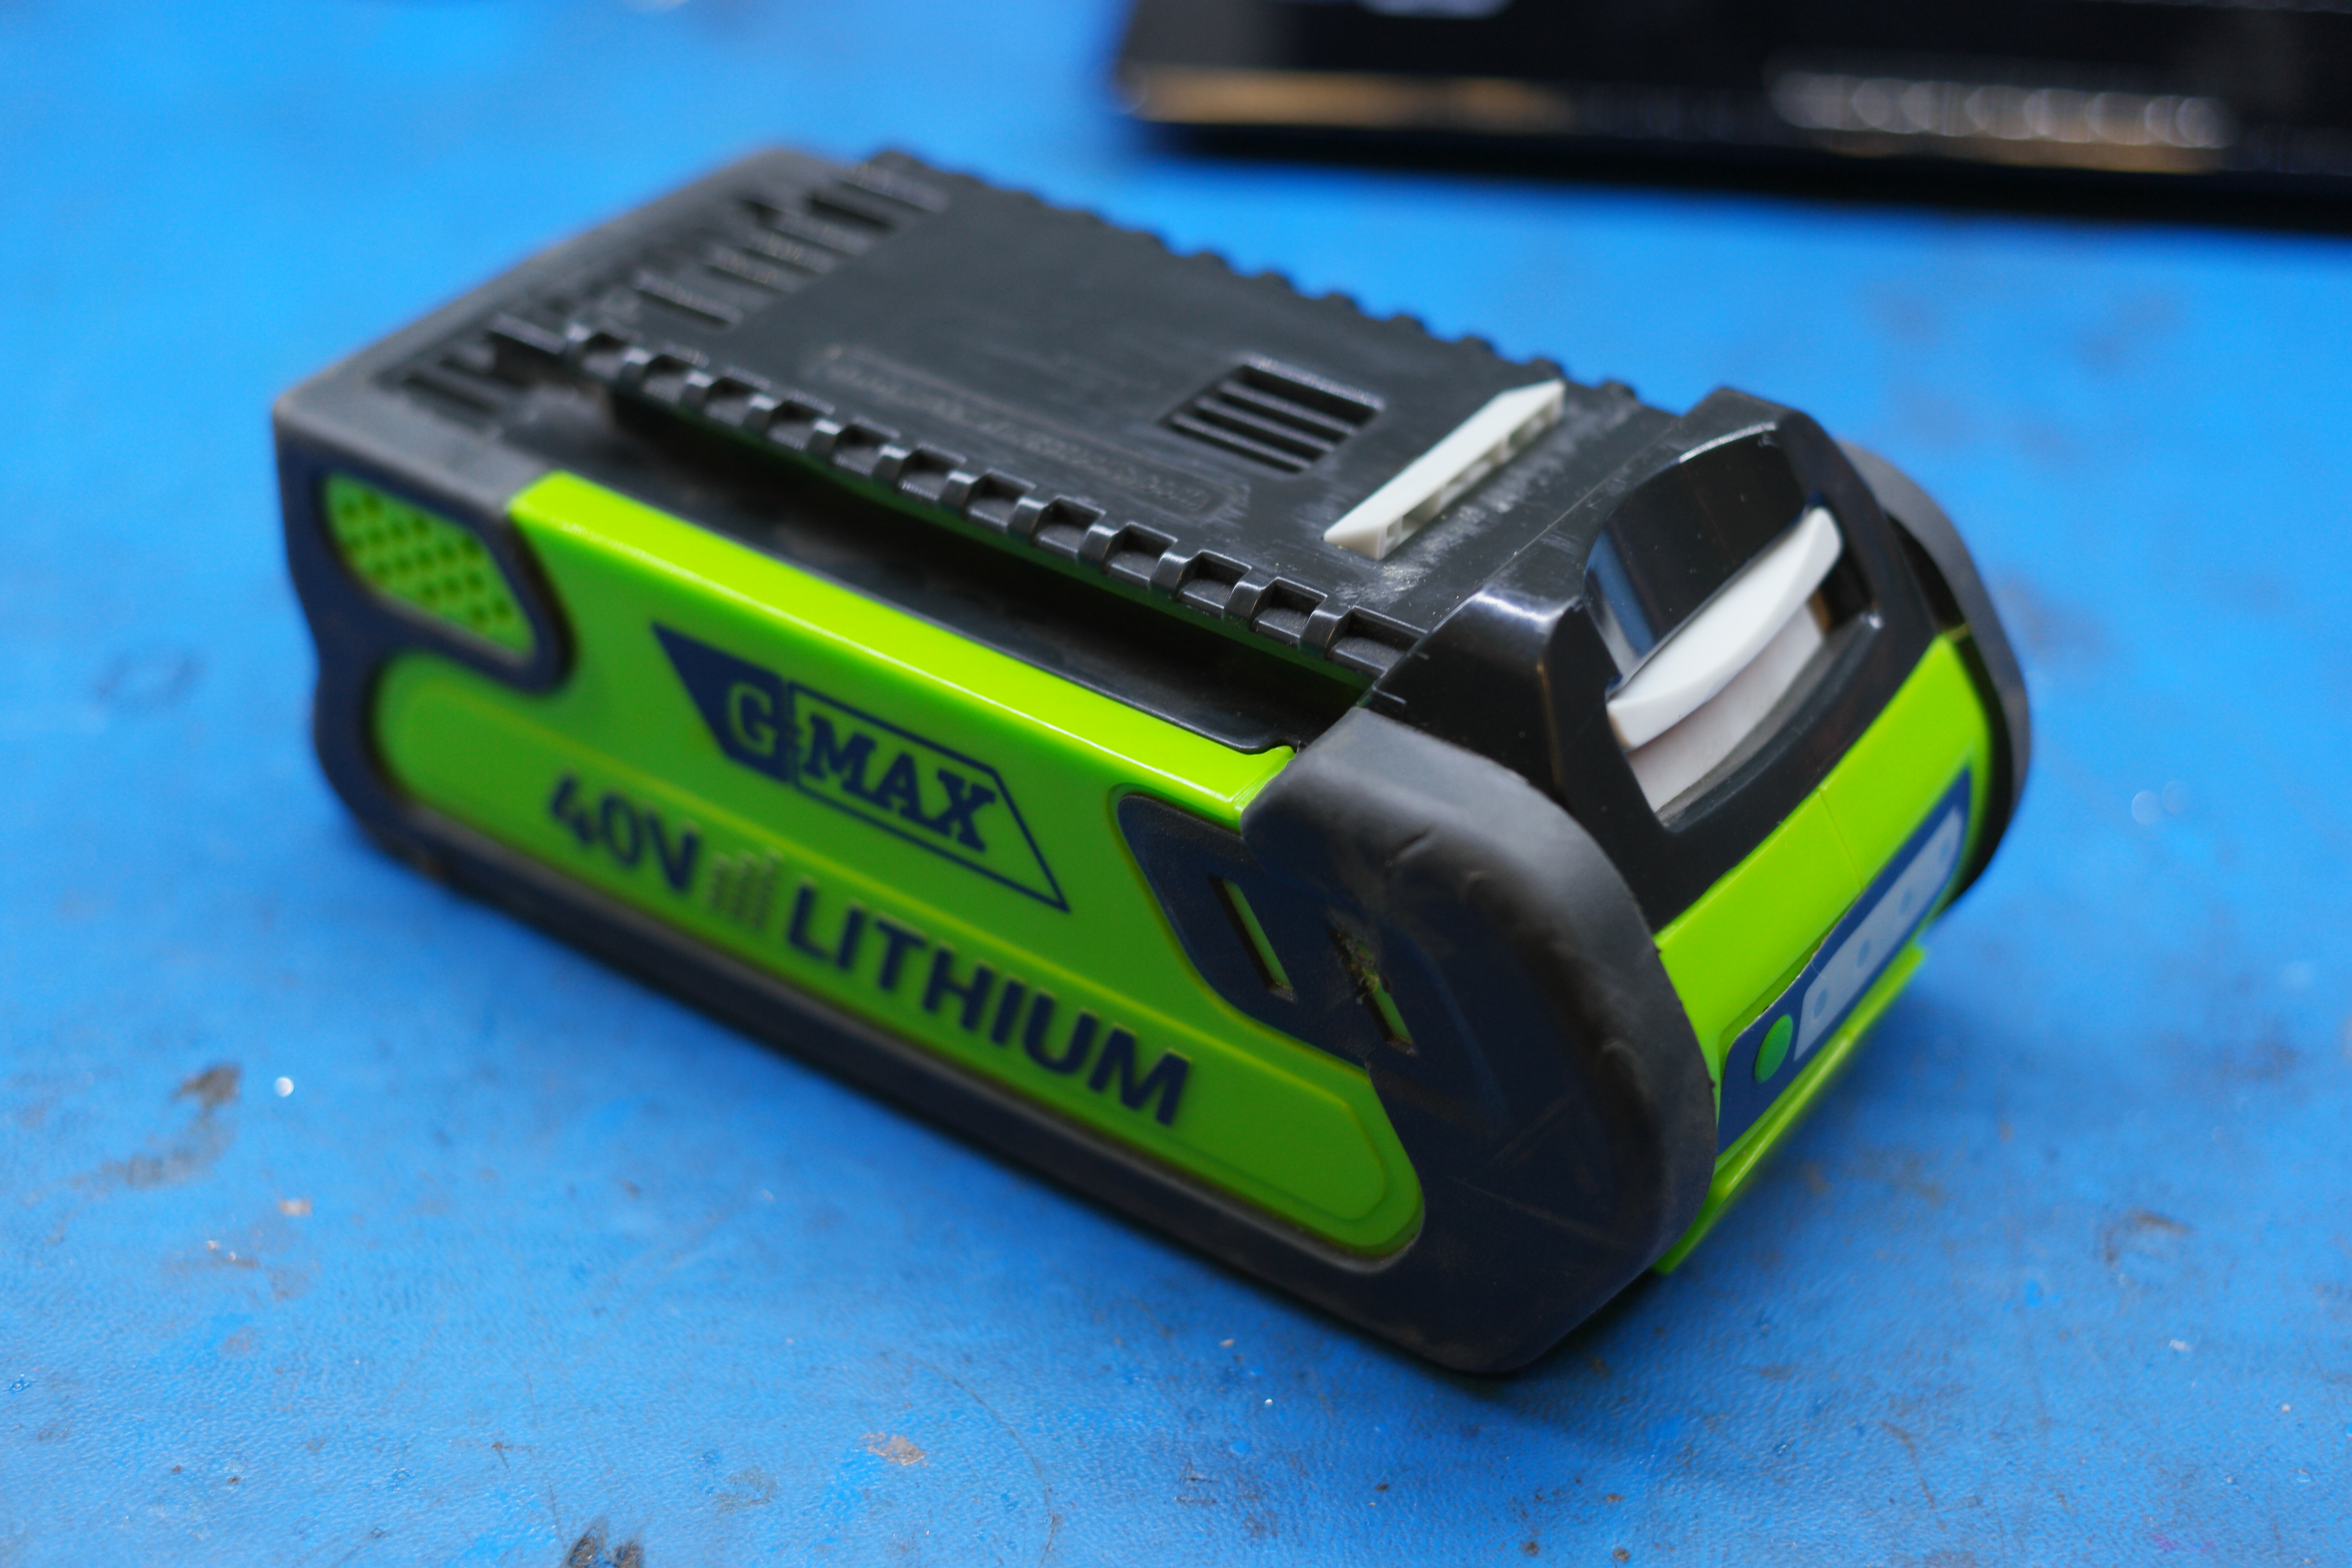
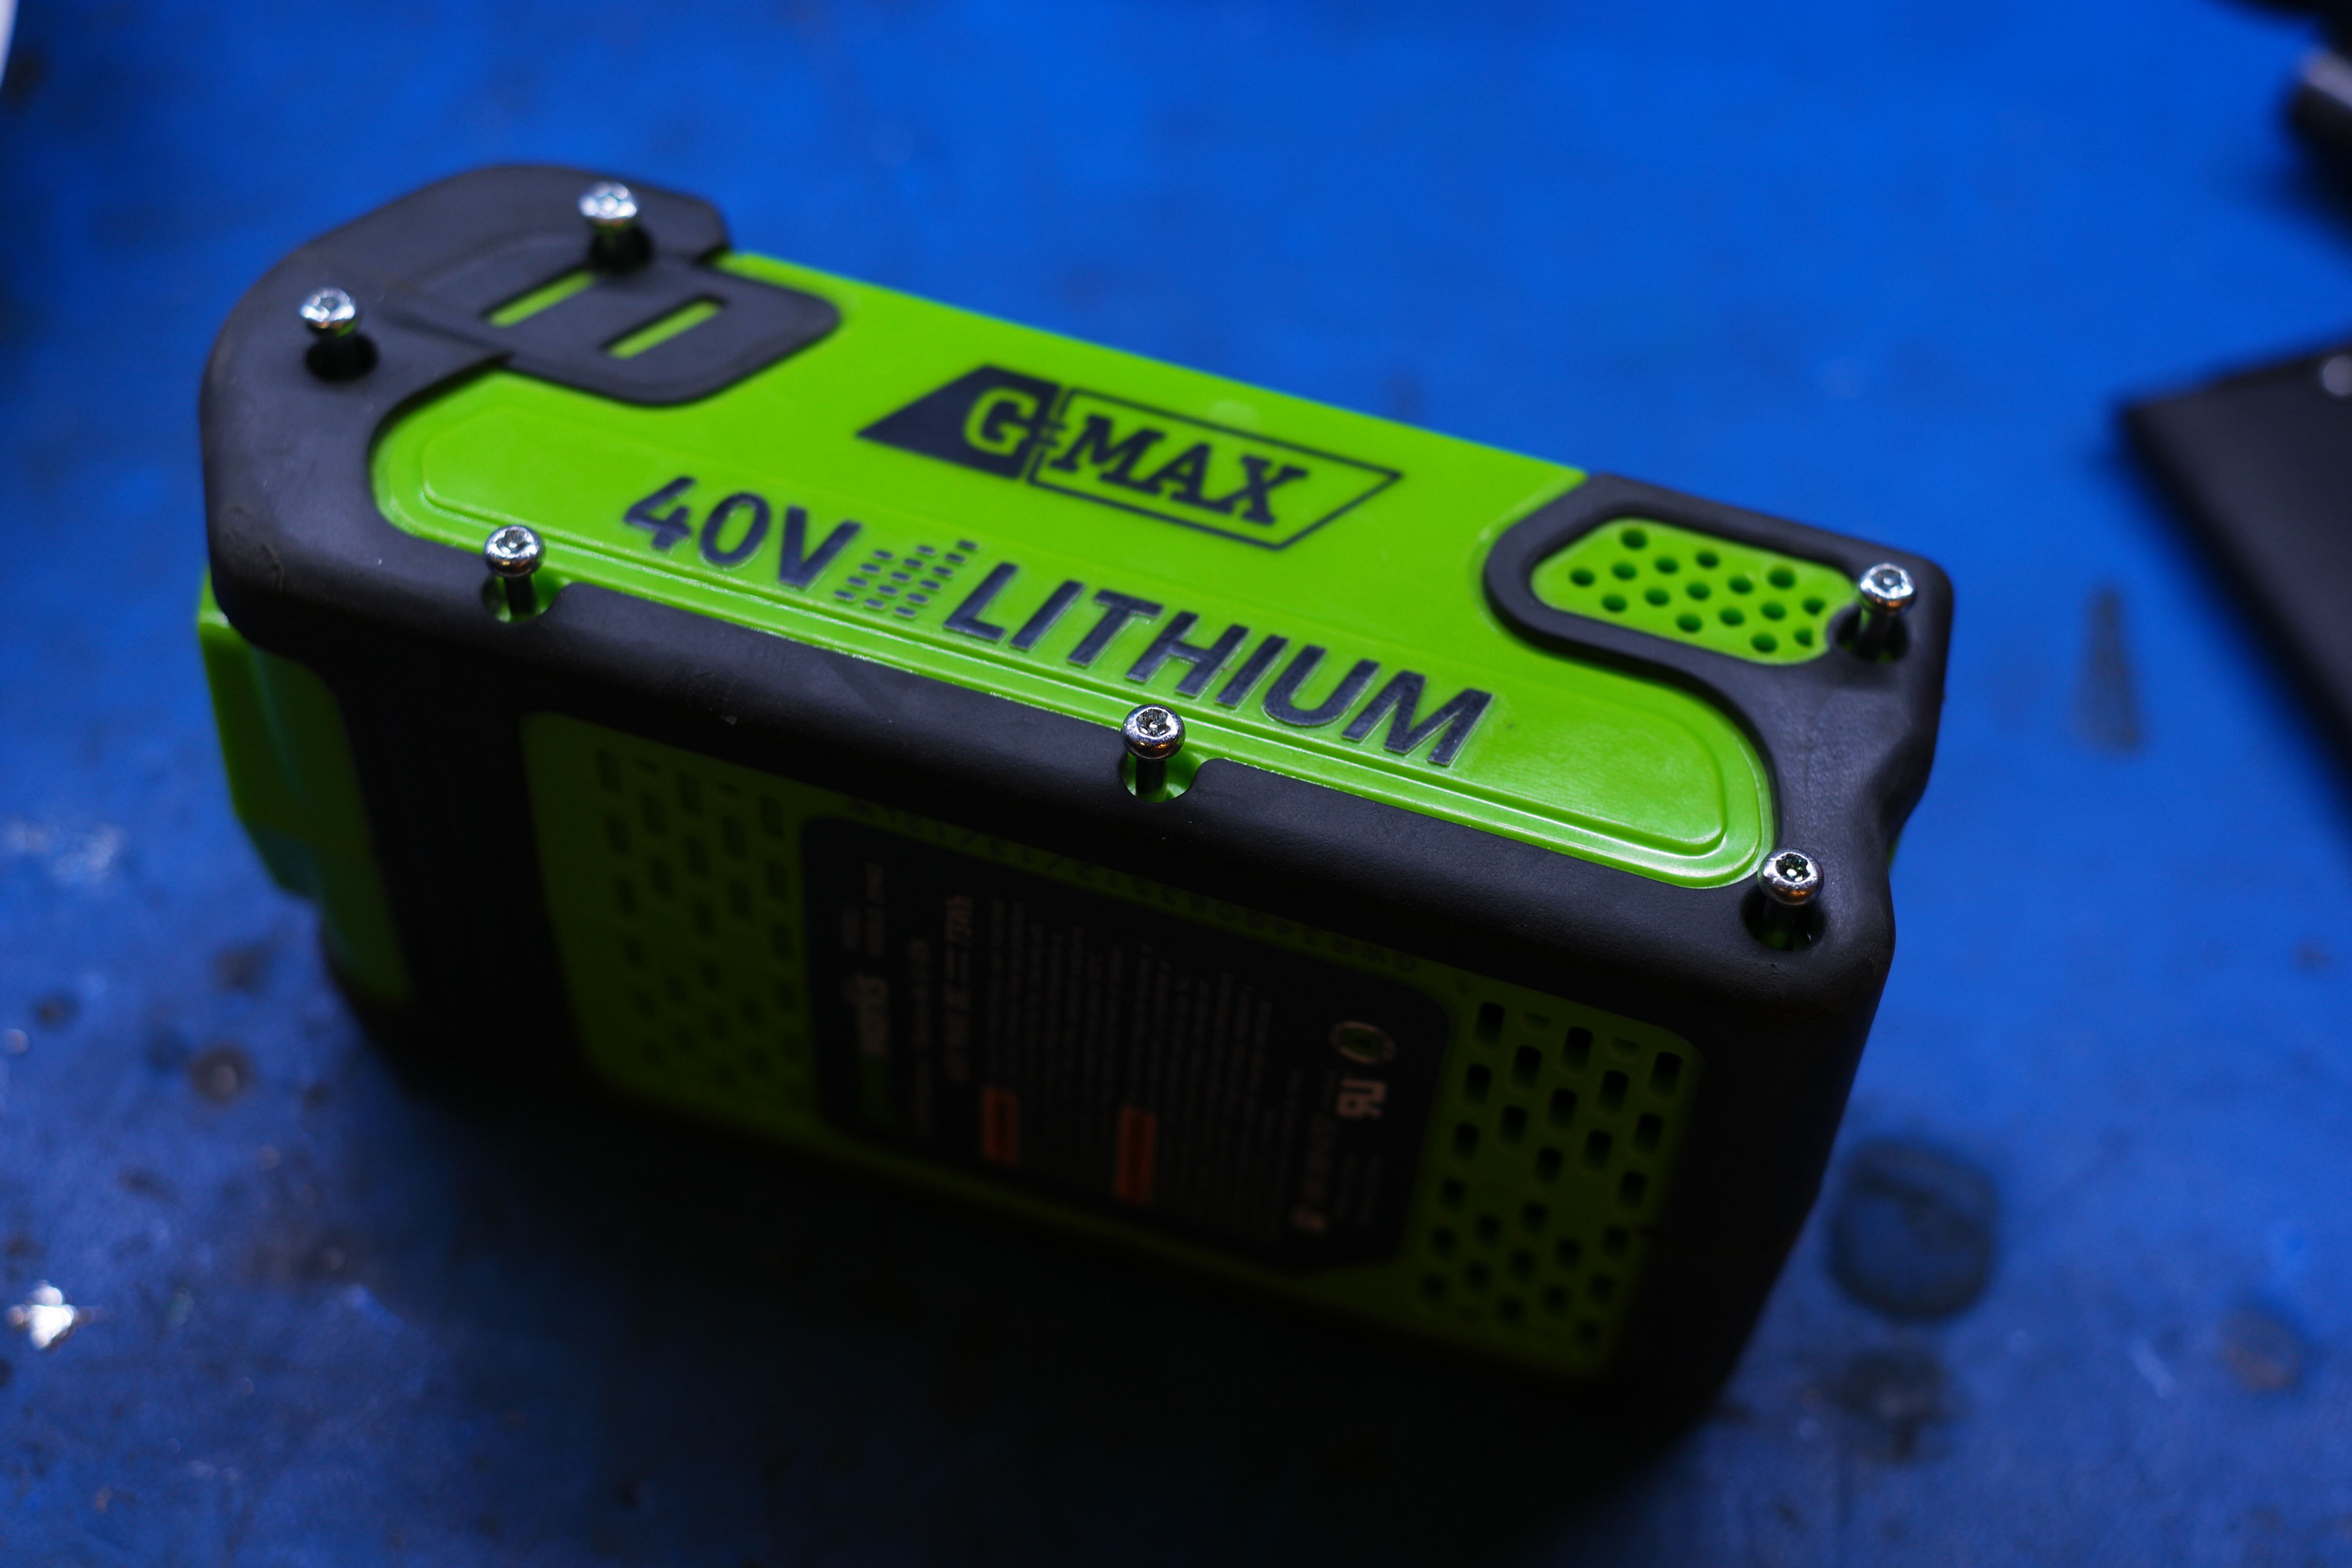
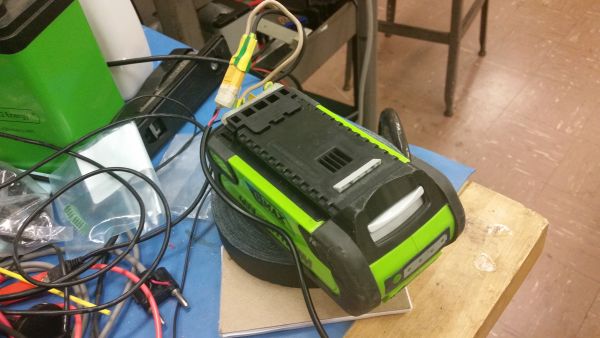
MMM BATTERYThe Ryobi pack in question was a watter logged 40V 55 watt-hour pack from a portable electric chainsaw. It was similar-ish in dimension to my homemade pack, but unfortunately is still a bit pricey, while incredibly low in the watt-hour / unit volume category. Time for some battery hunting! Enter the GMAX 40V Lithium Pack from greenworksThis module is smaller than the Ryobi, but touts 73 watt hours. For flying, less than 100 watt-hours is fairly ideal, as it is within the boundaries of the rules both overseas and within the US, nothing special is required for carrying it, aside from a cover for the terminals. You are allowed, with permission, up to two 160wh packs, but it does require some extra effort and I didnt want to cause a delay for an overseas business trip on a technicality. 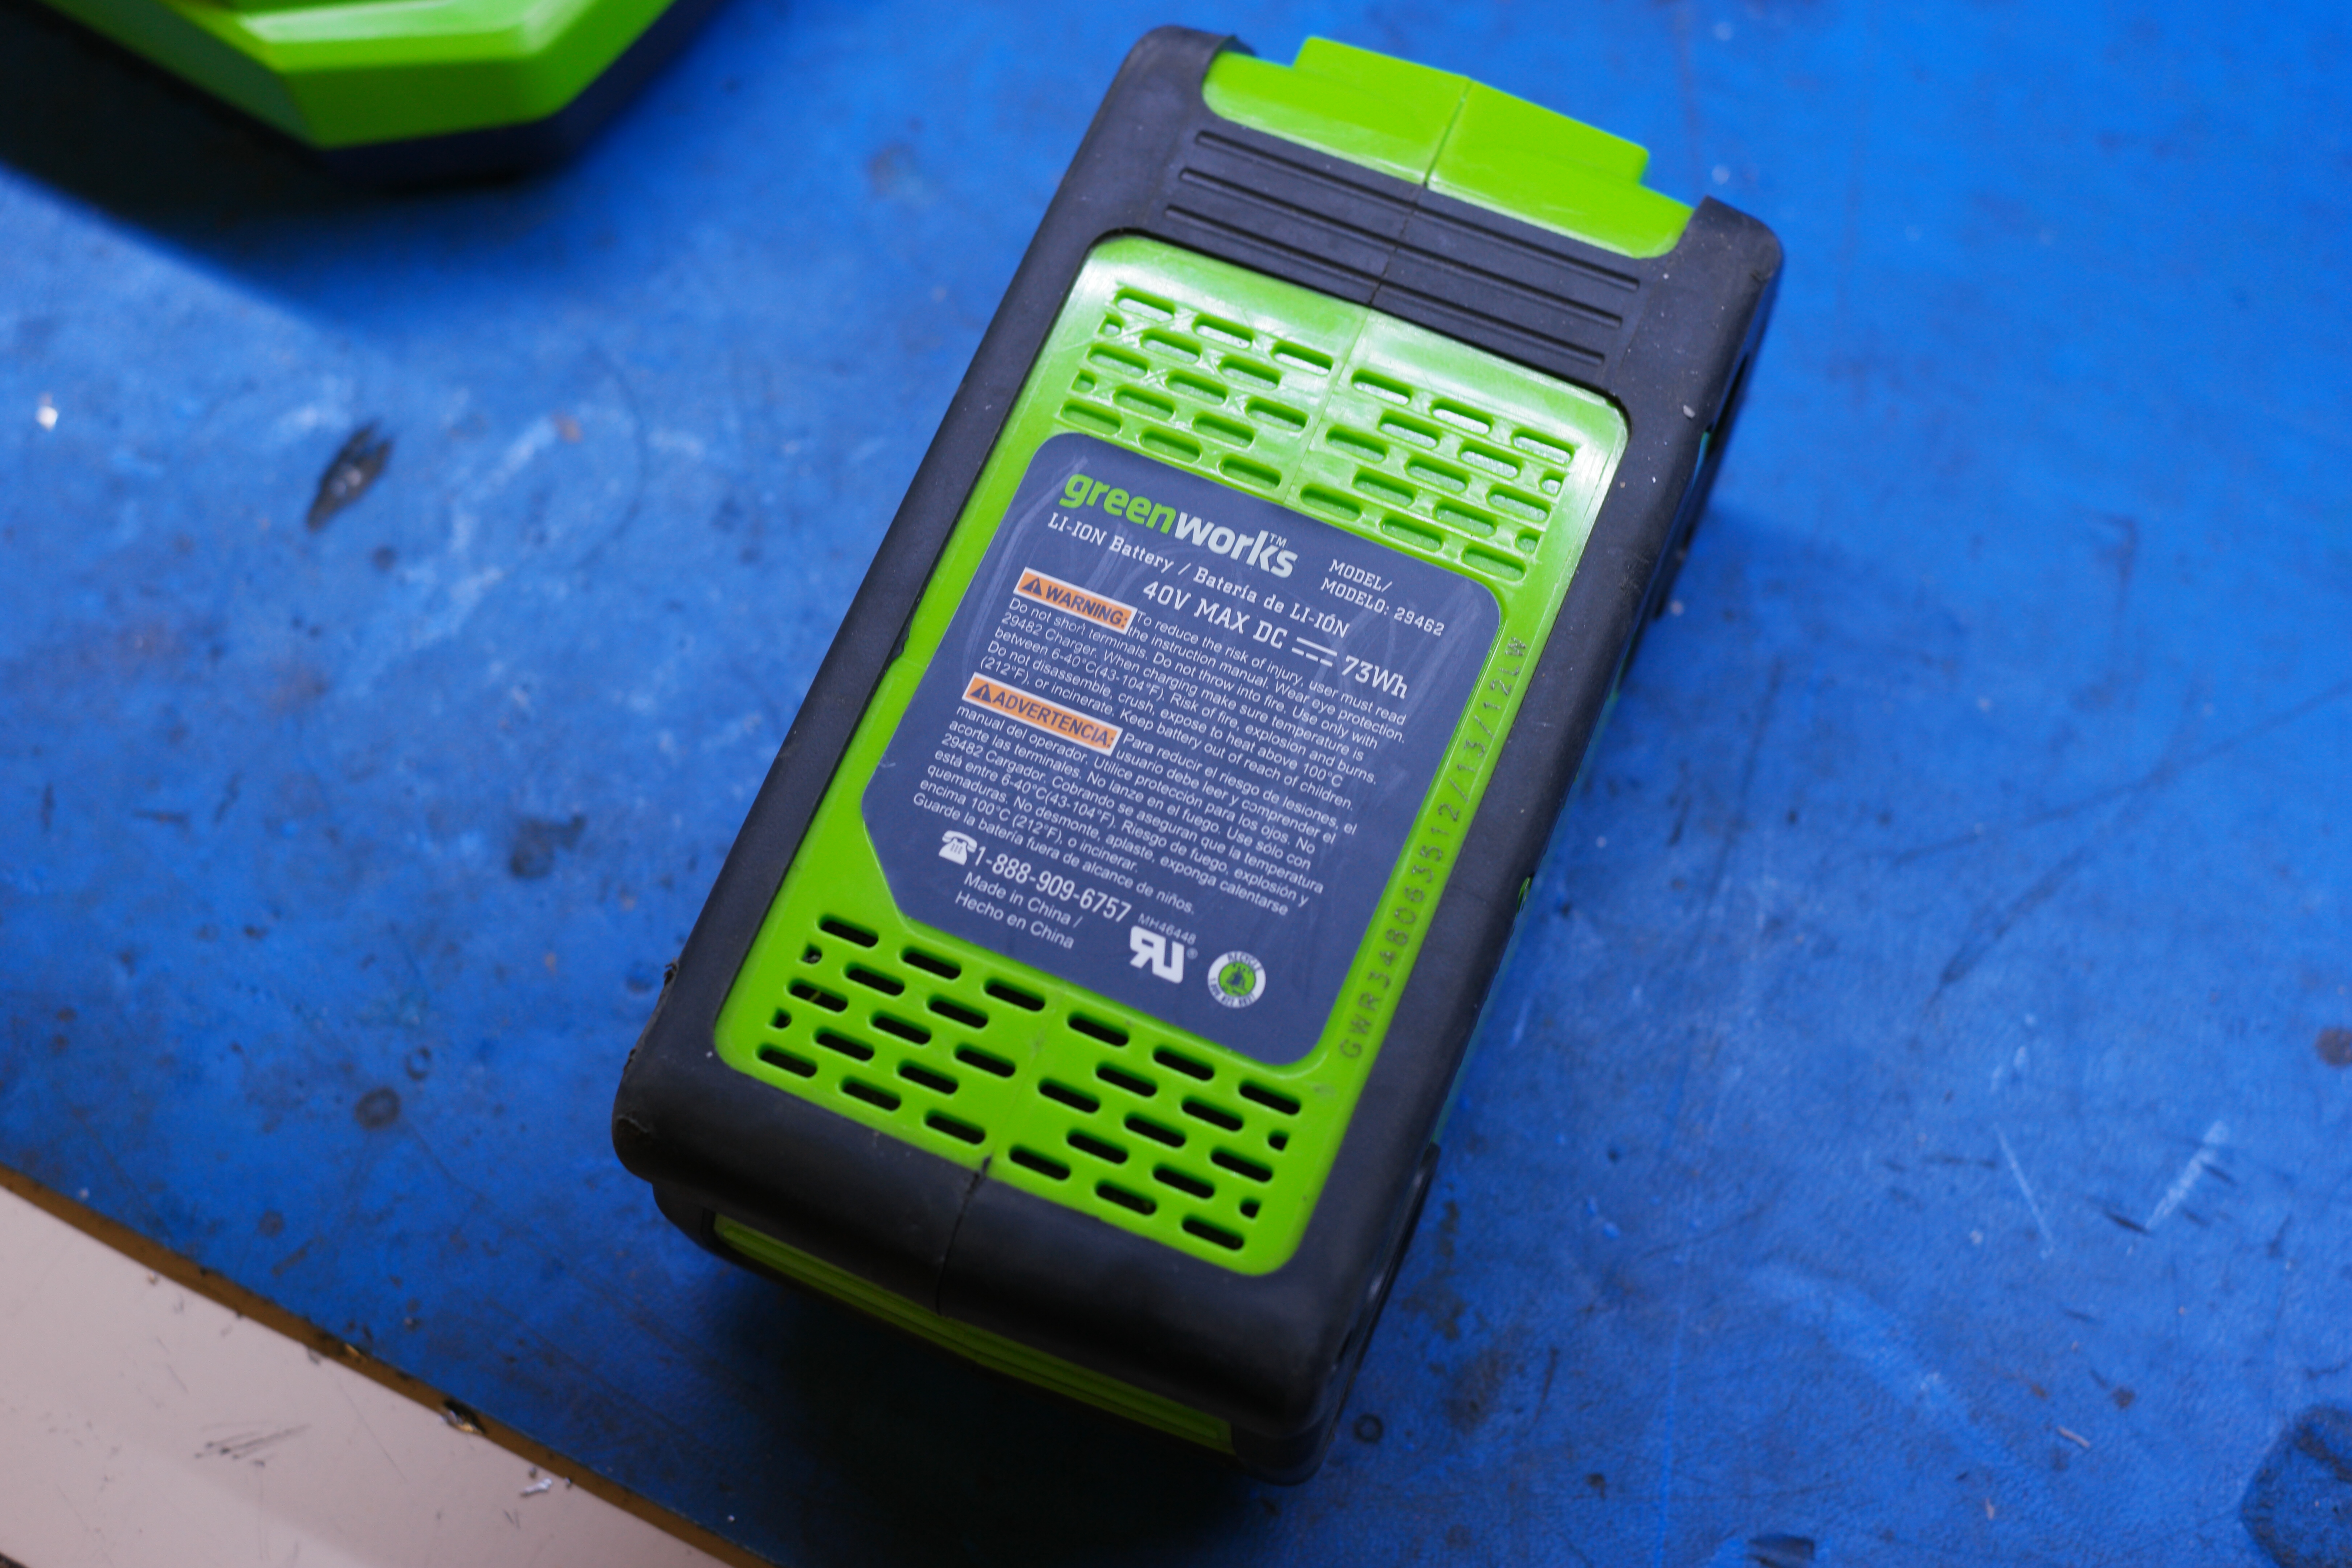
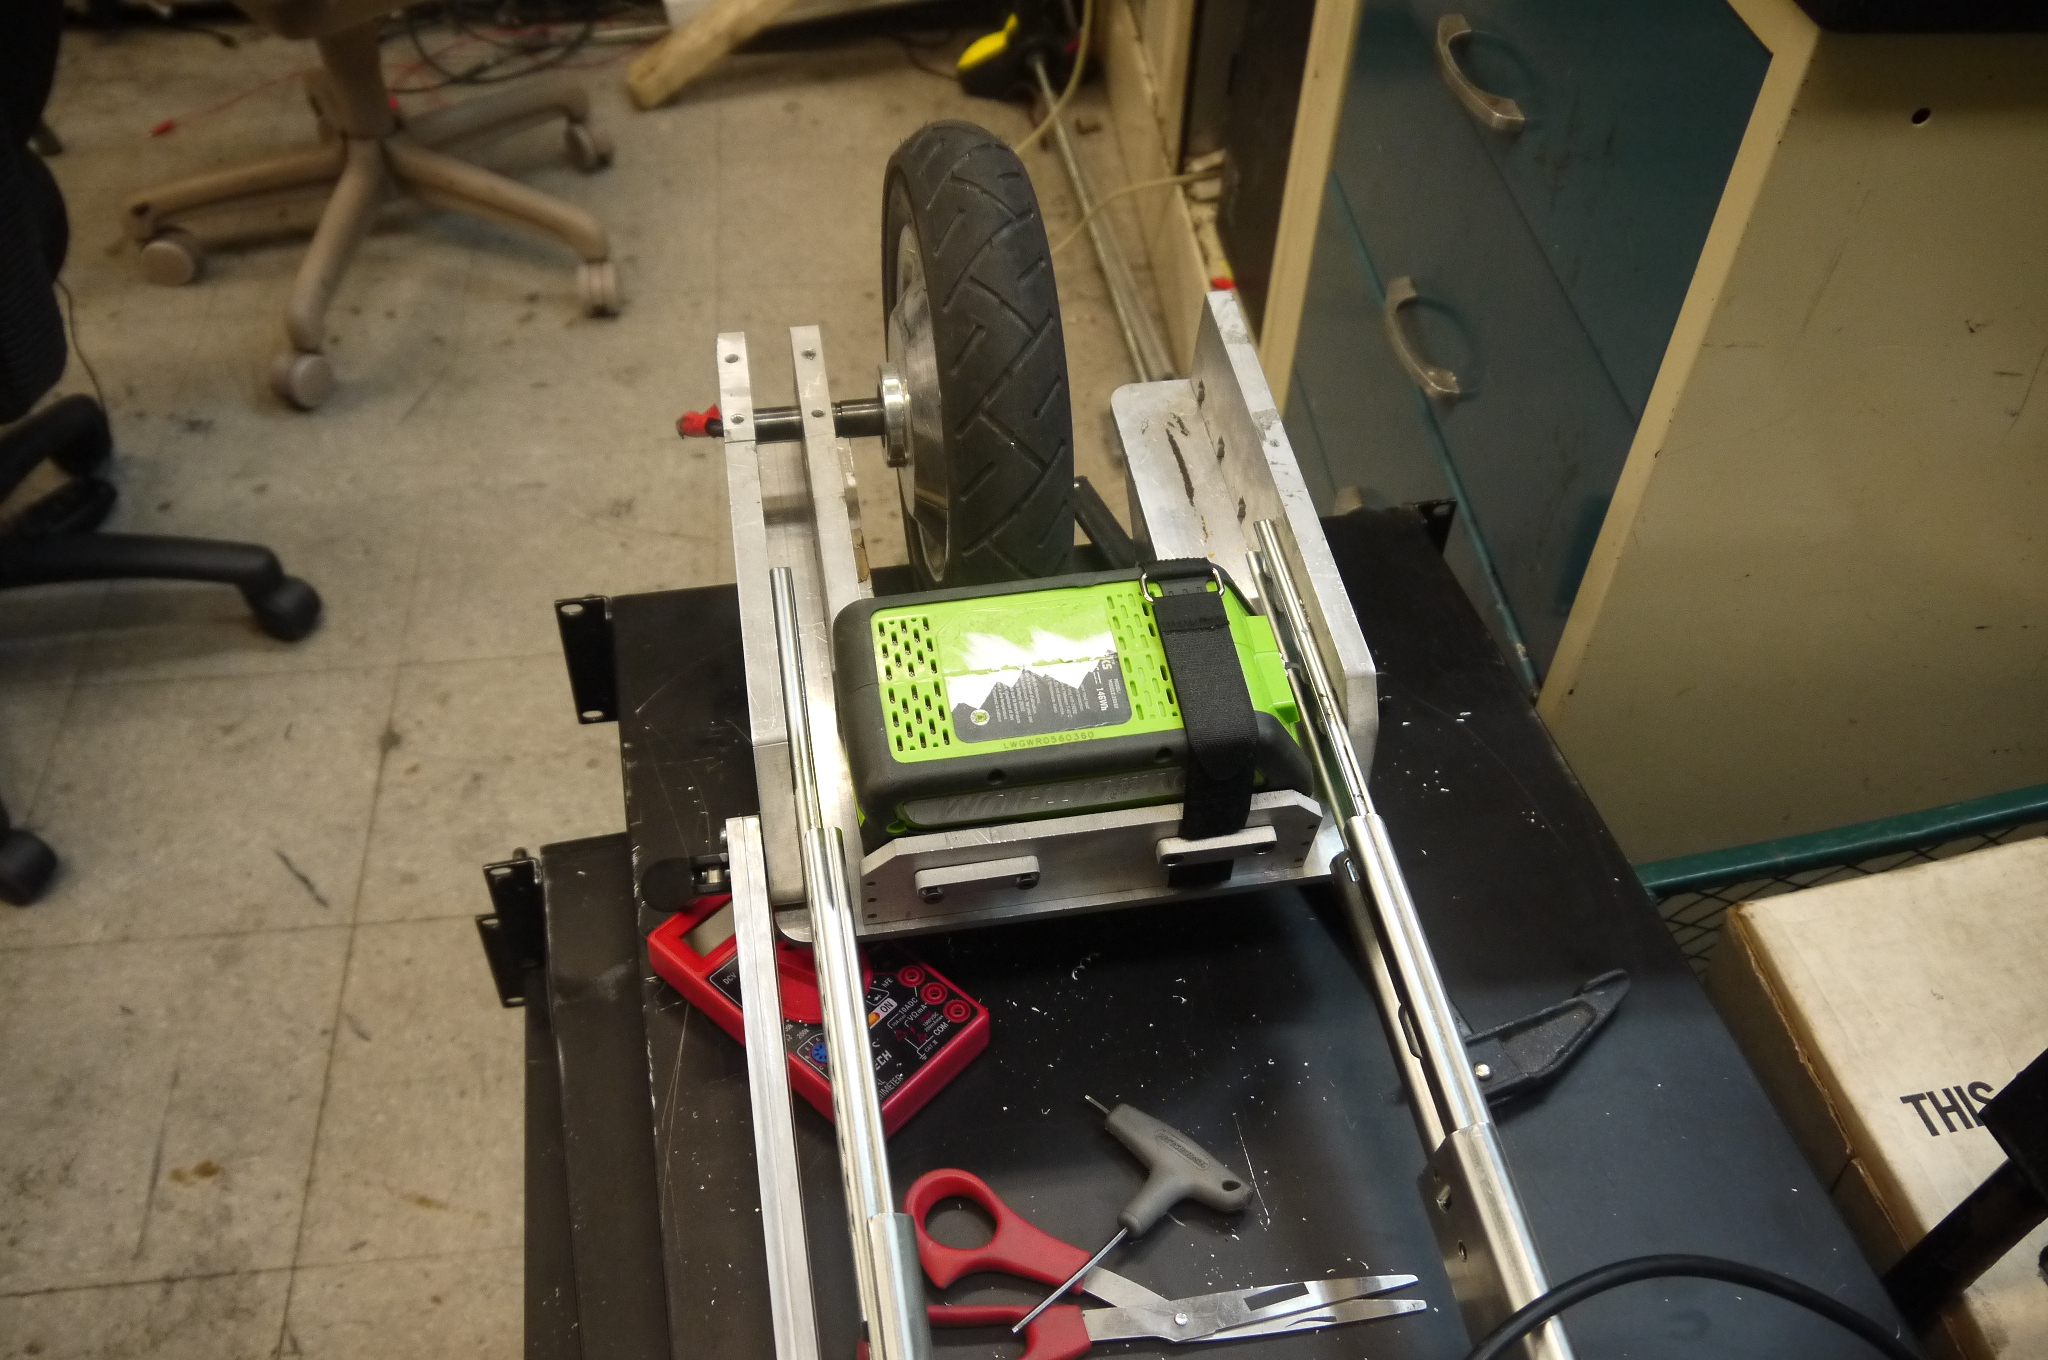
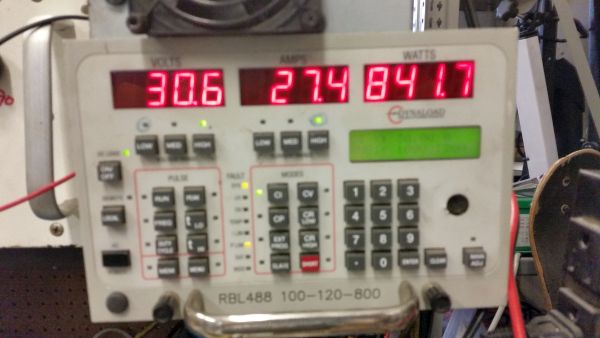
Lets test it on the loadBefore opening the pack i clipped in to the battery +/- terminals and connected a DYNAL LOAD at various currents to check if the pack had onboard under voltage protection. At 15A the pack was holding up well, 500W is more than plenty for a skateboard. I ramped up the load in constant current mode to the loads limits (800w). By the end of the discharge the pack was quite a bit warmer but not overly hot. 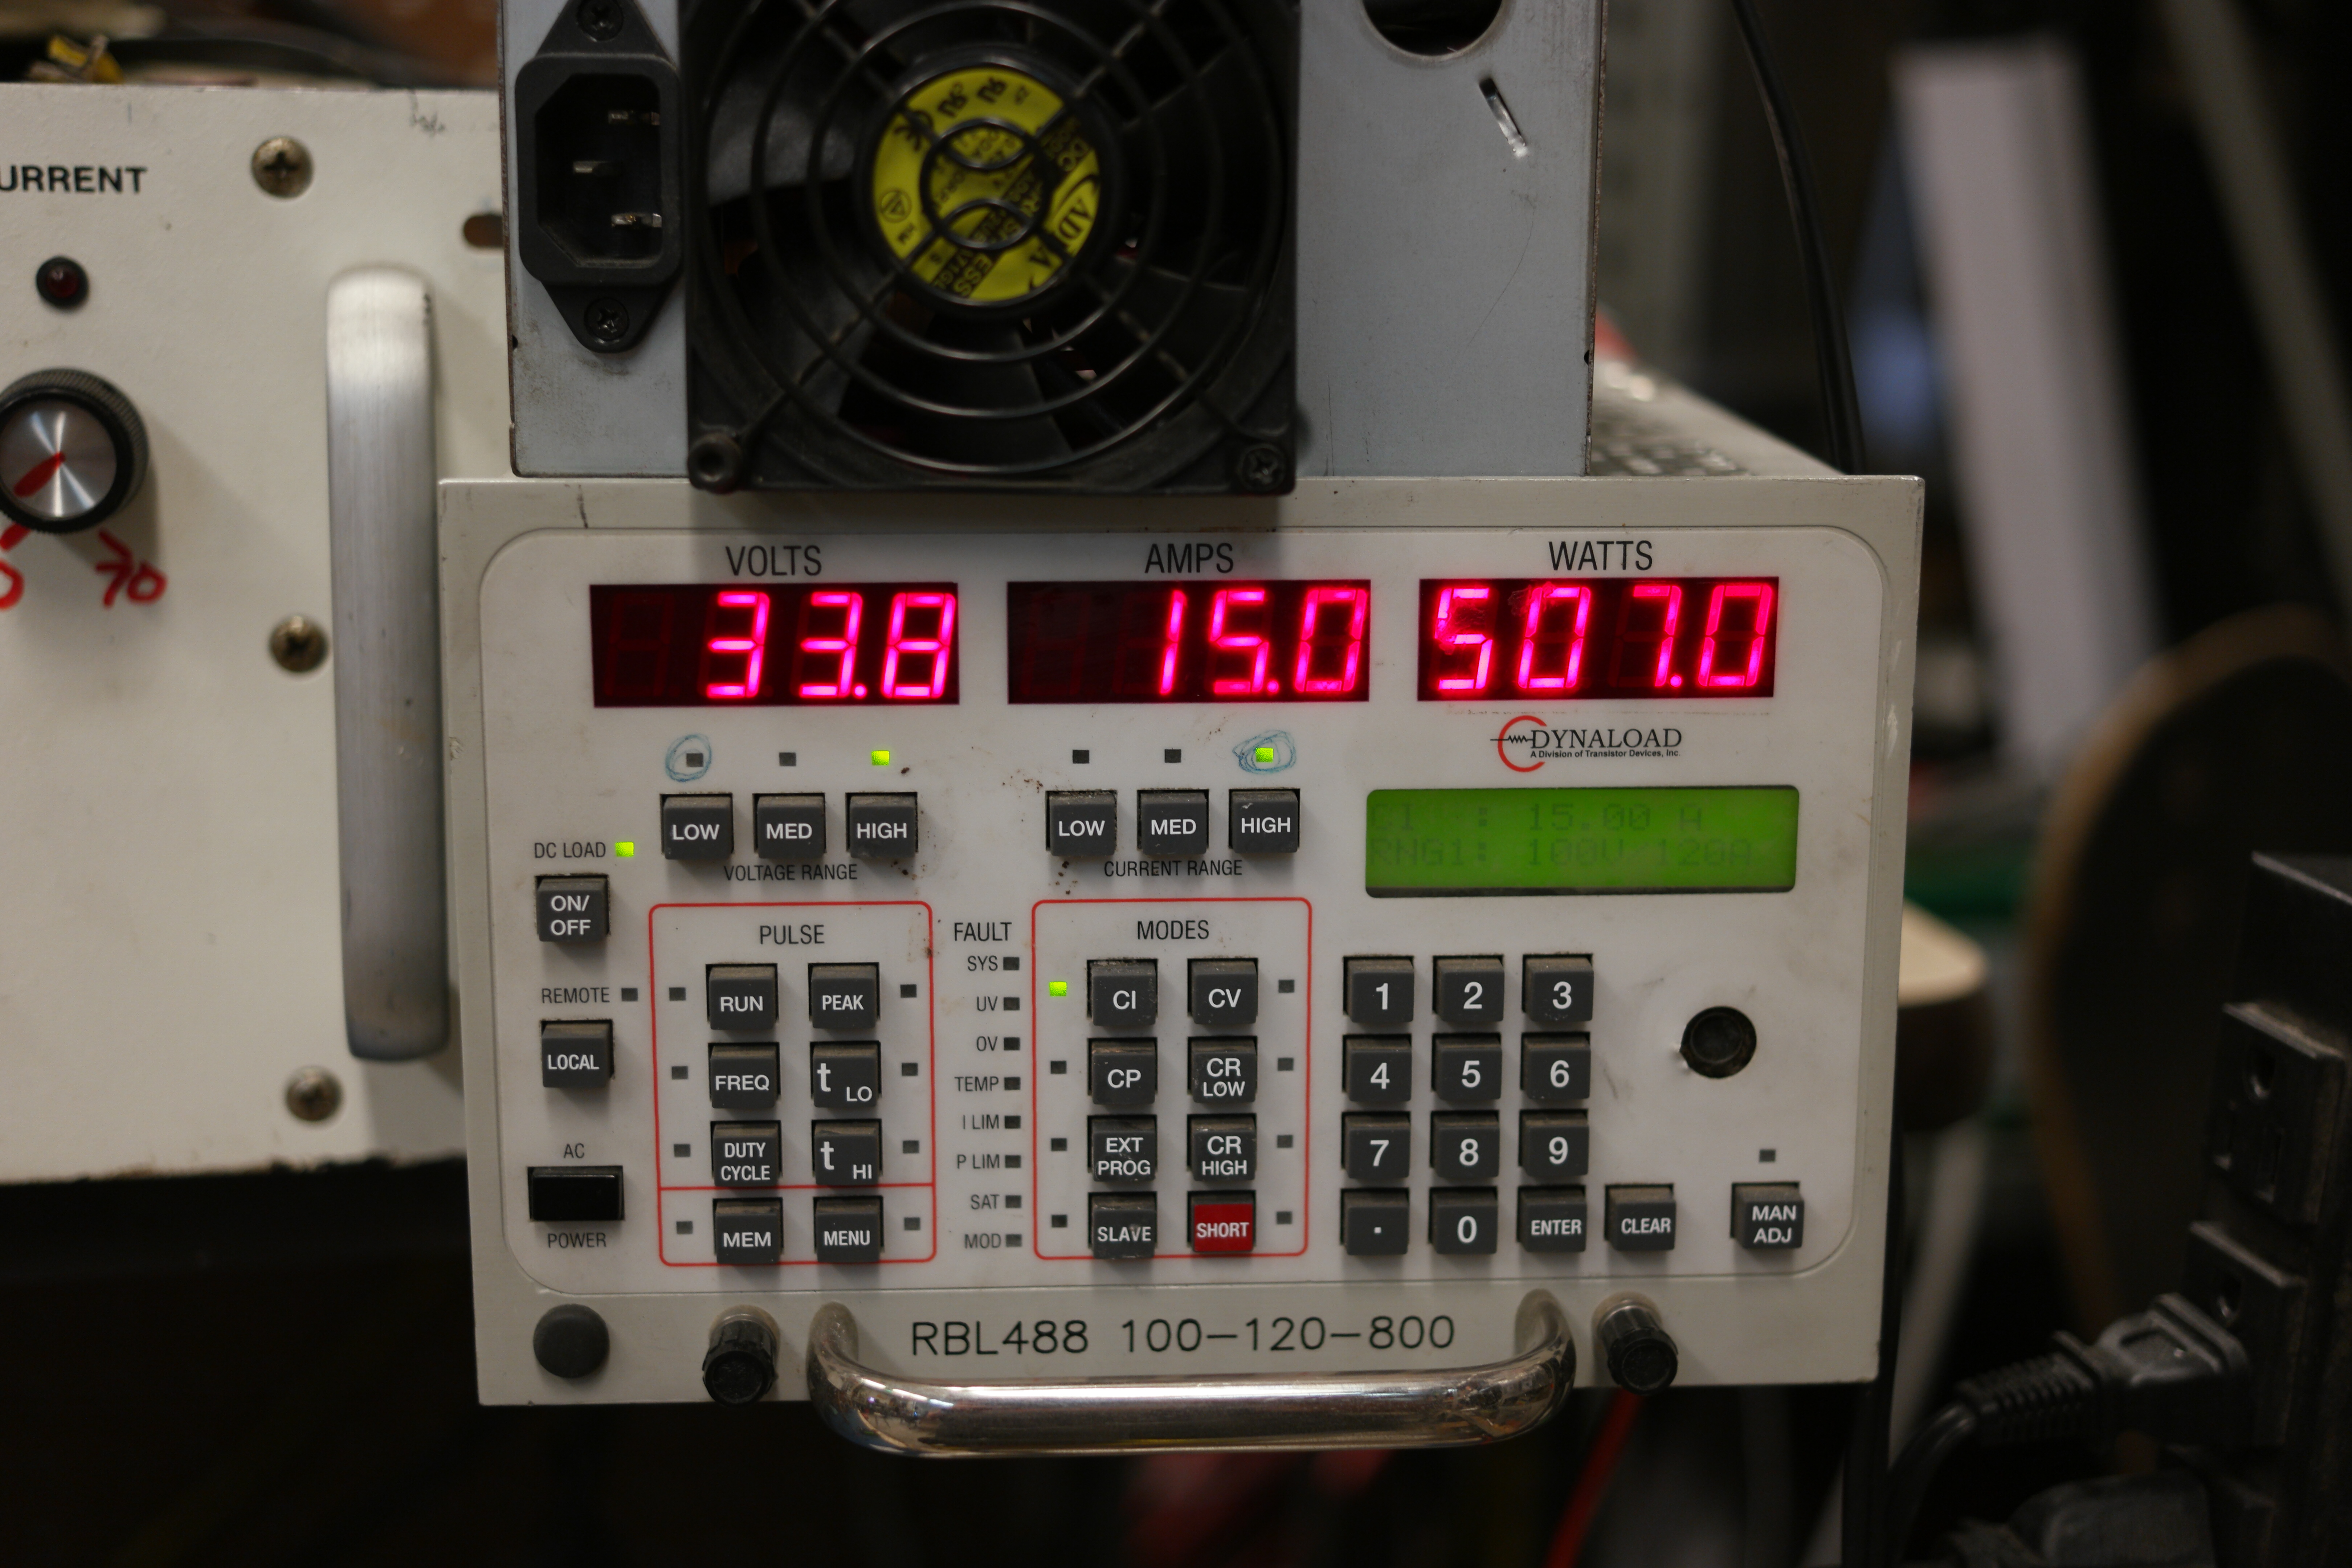

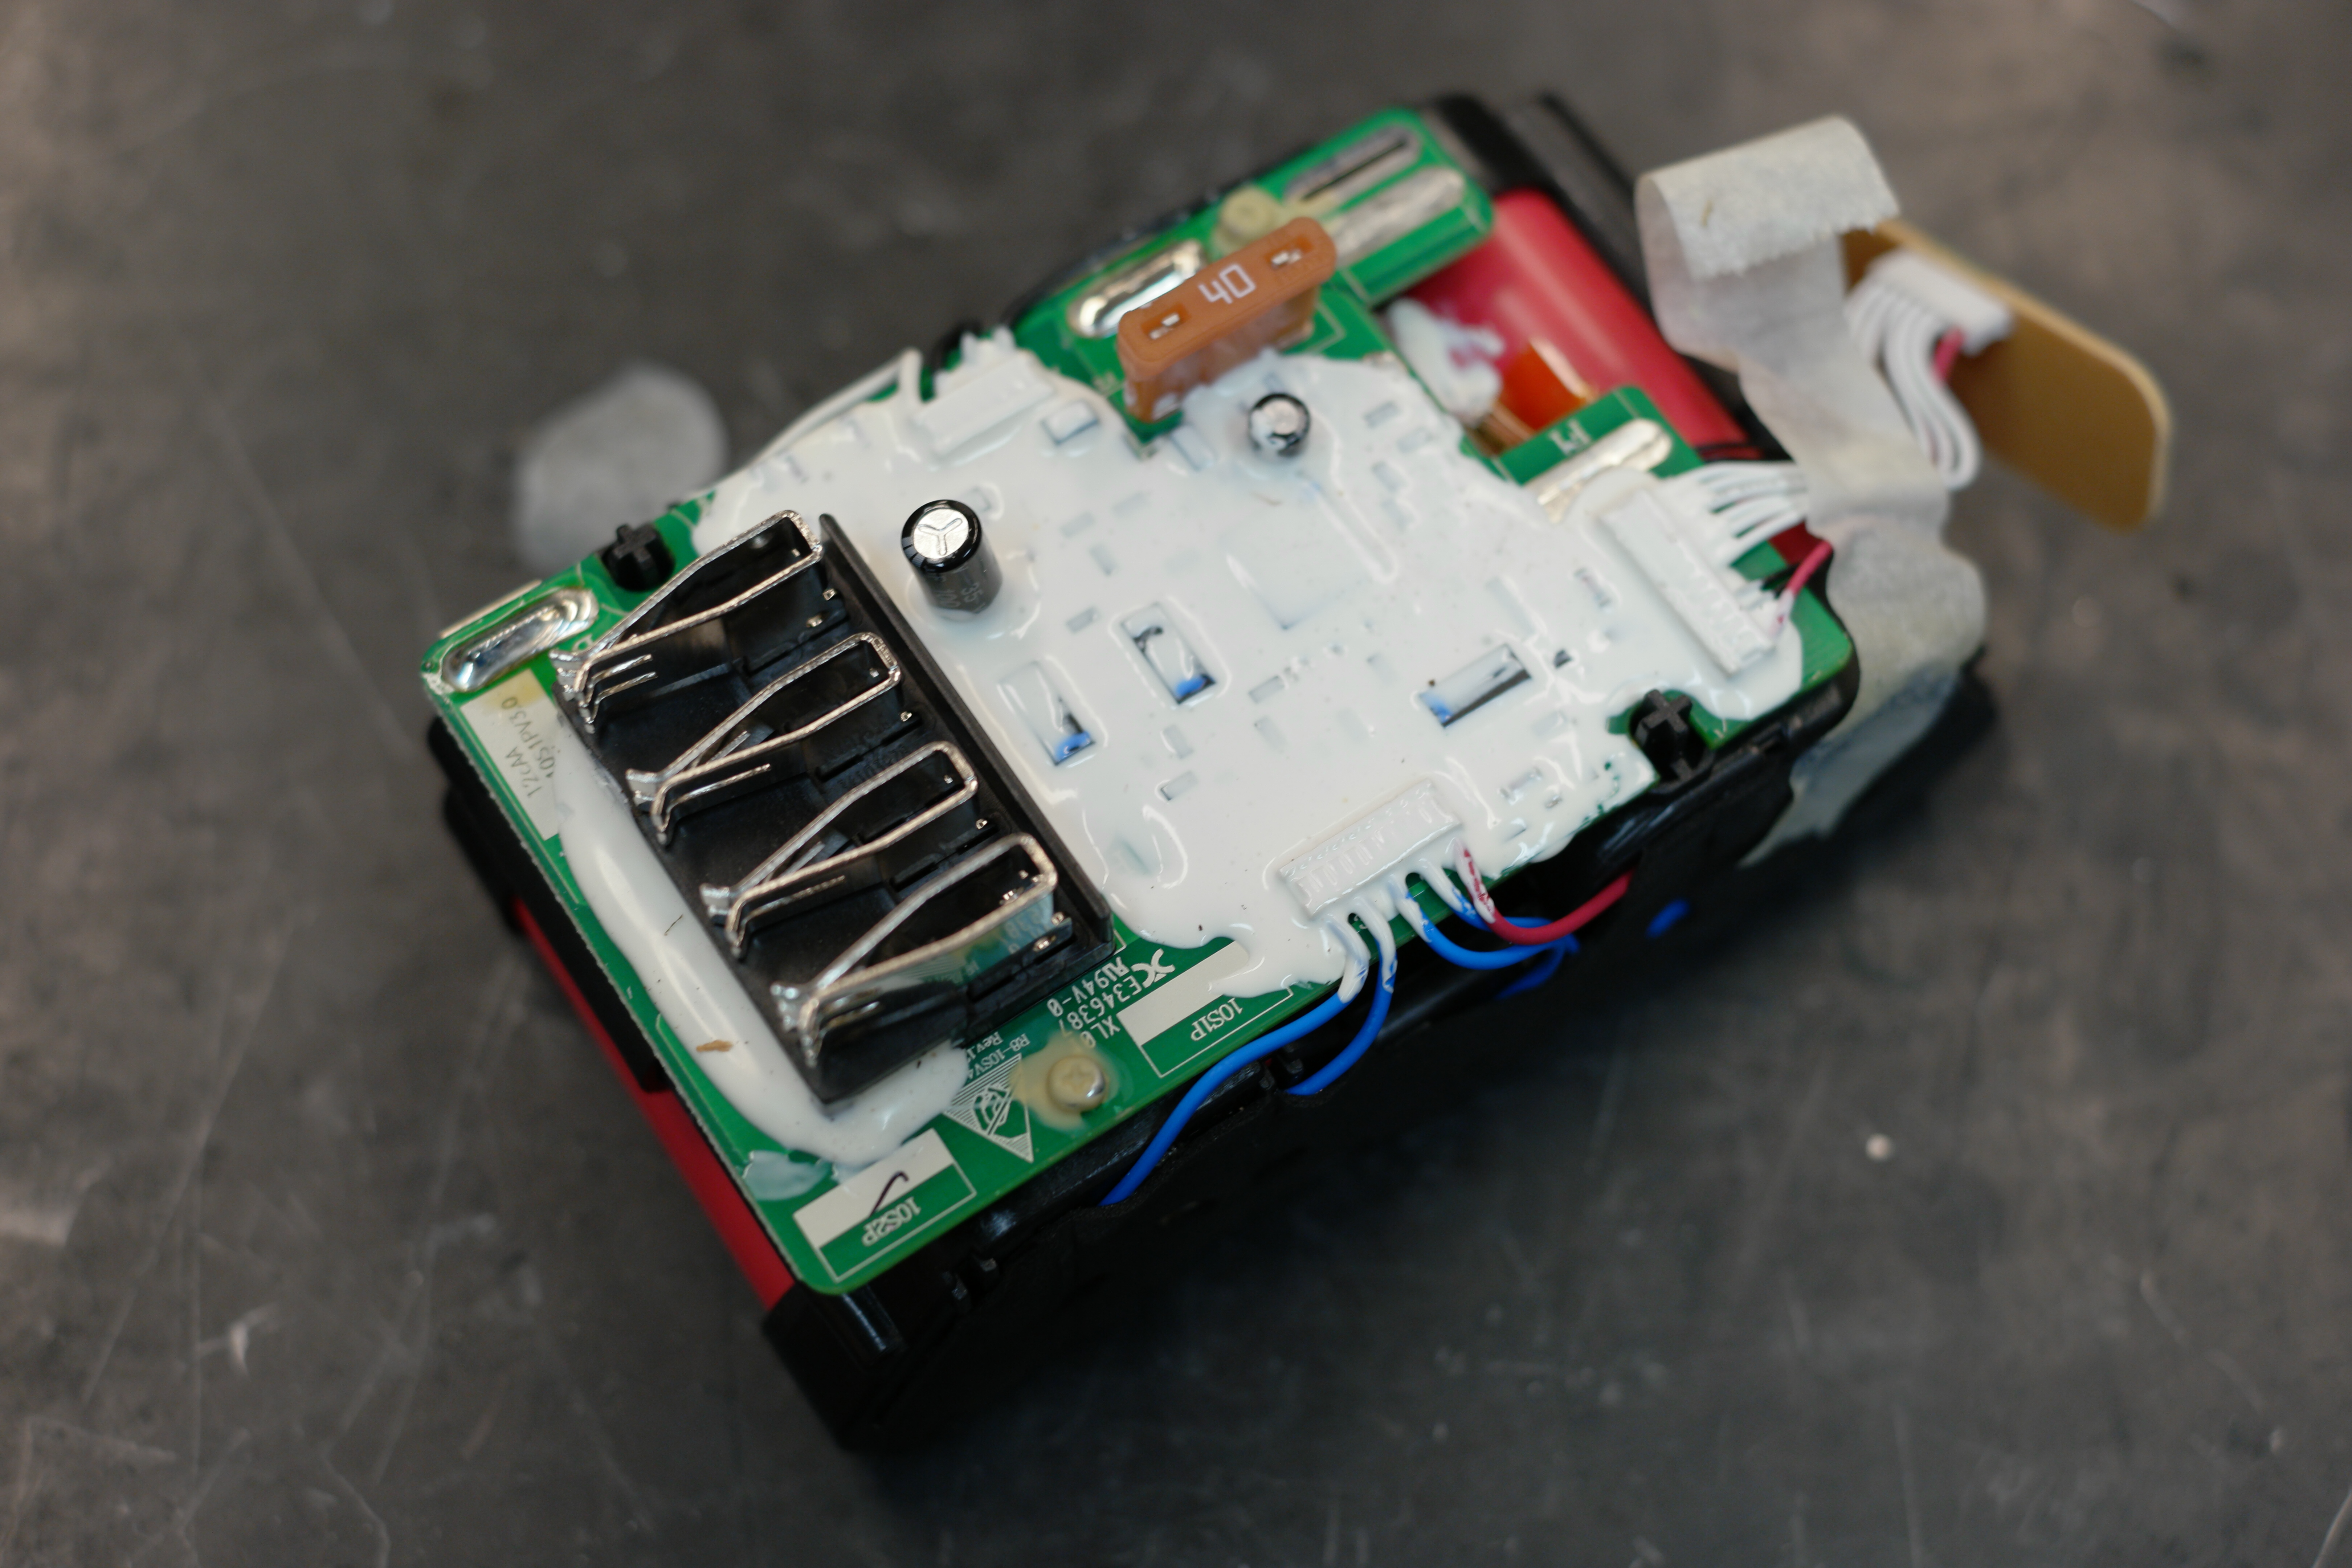
Opening up the packThe module itself is held together with 6 safety Torx screws, all accessible from the side. No tamper stickers are hiding any screws which is a welcome sight. The case itself is a 2 part injection molded assembly, with some 'accoutroments' added on to shield the ventilation holes and add style. 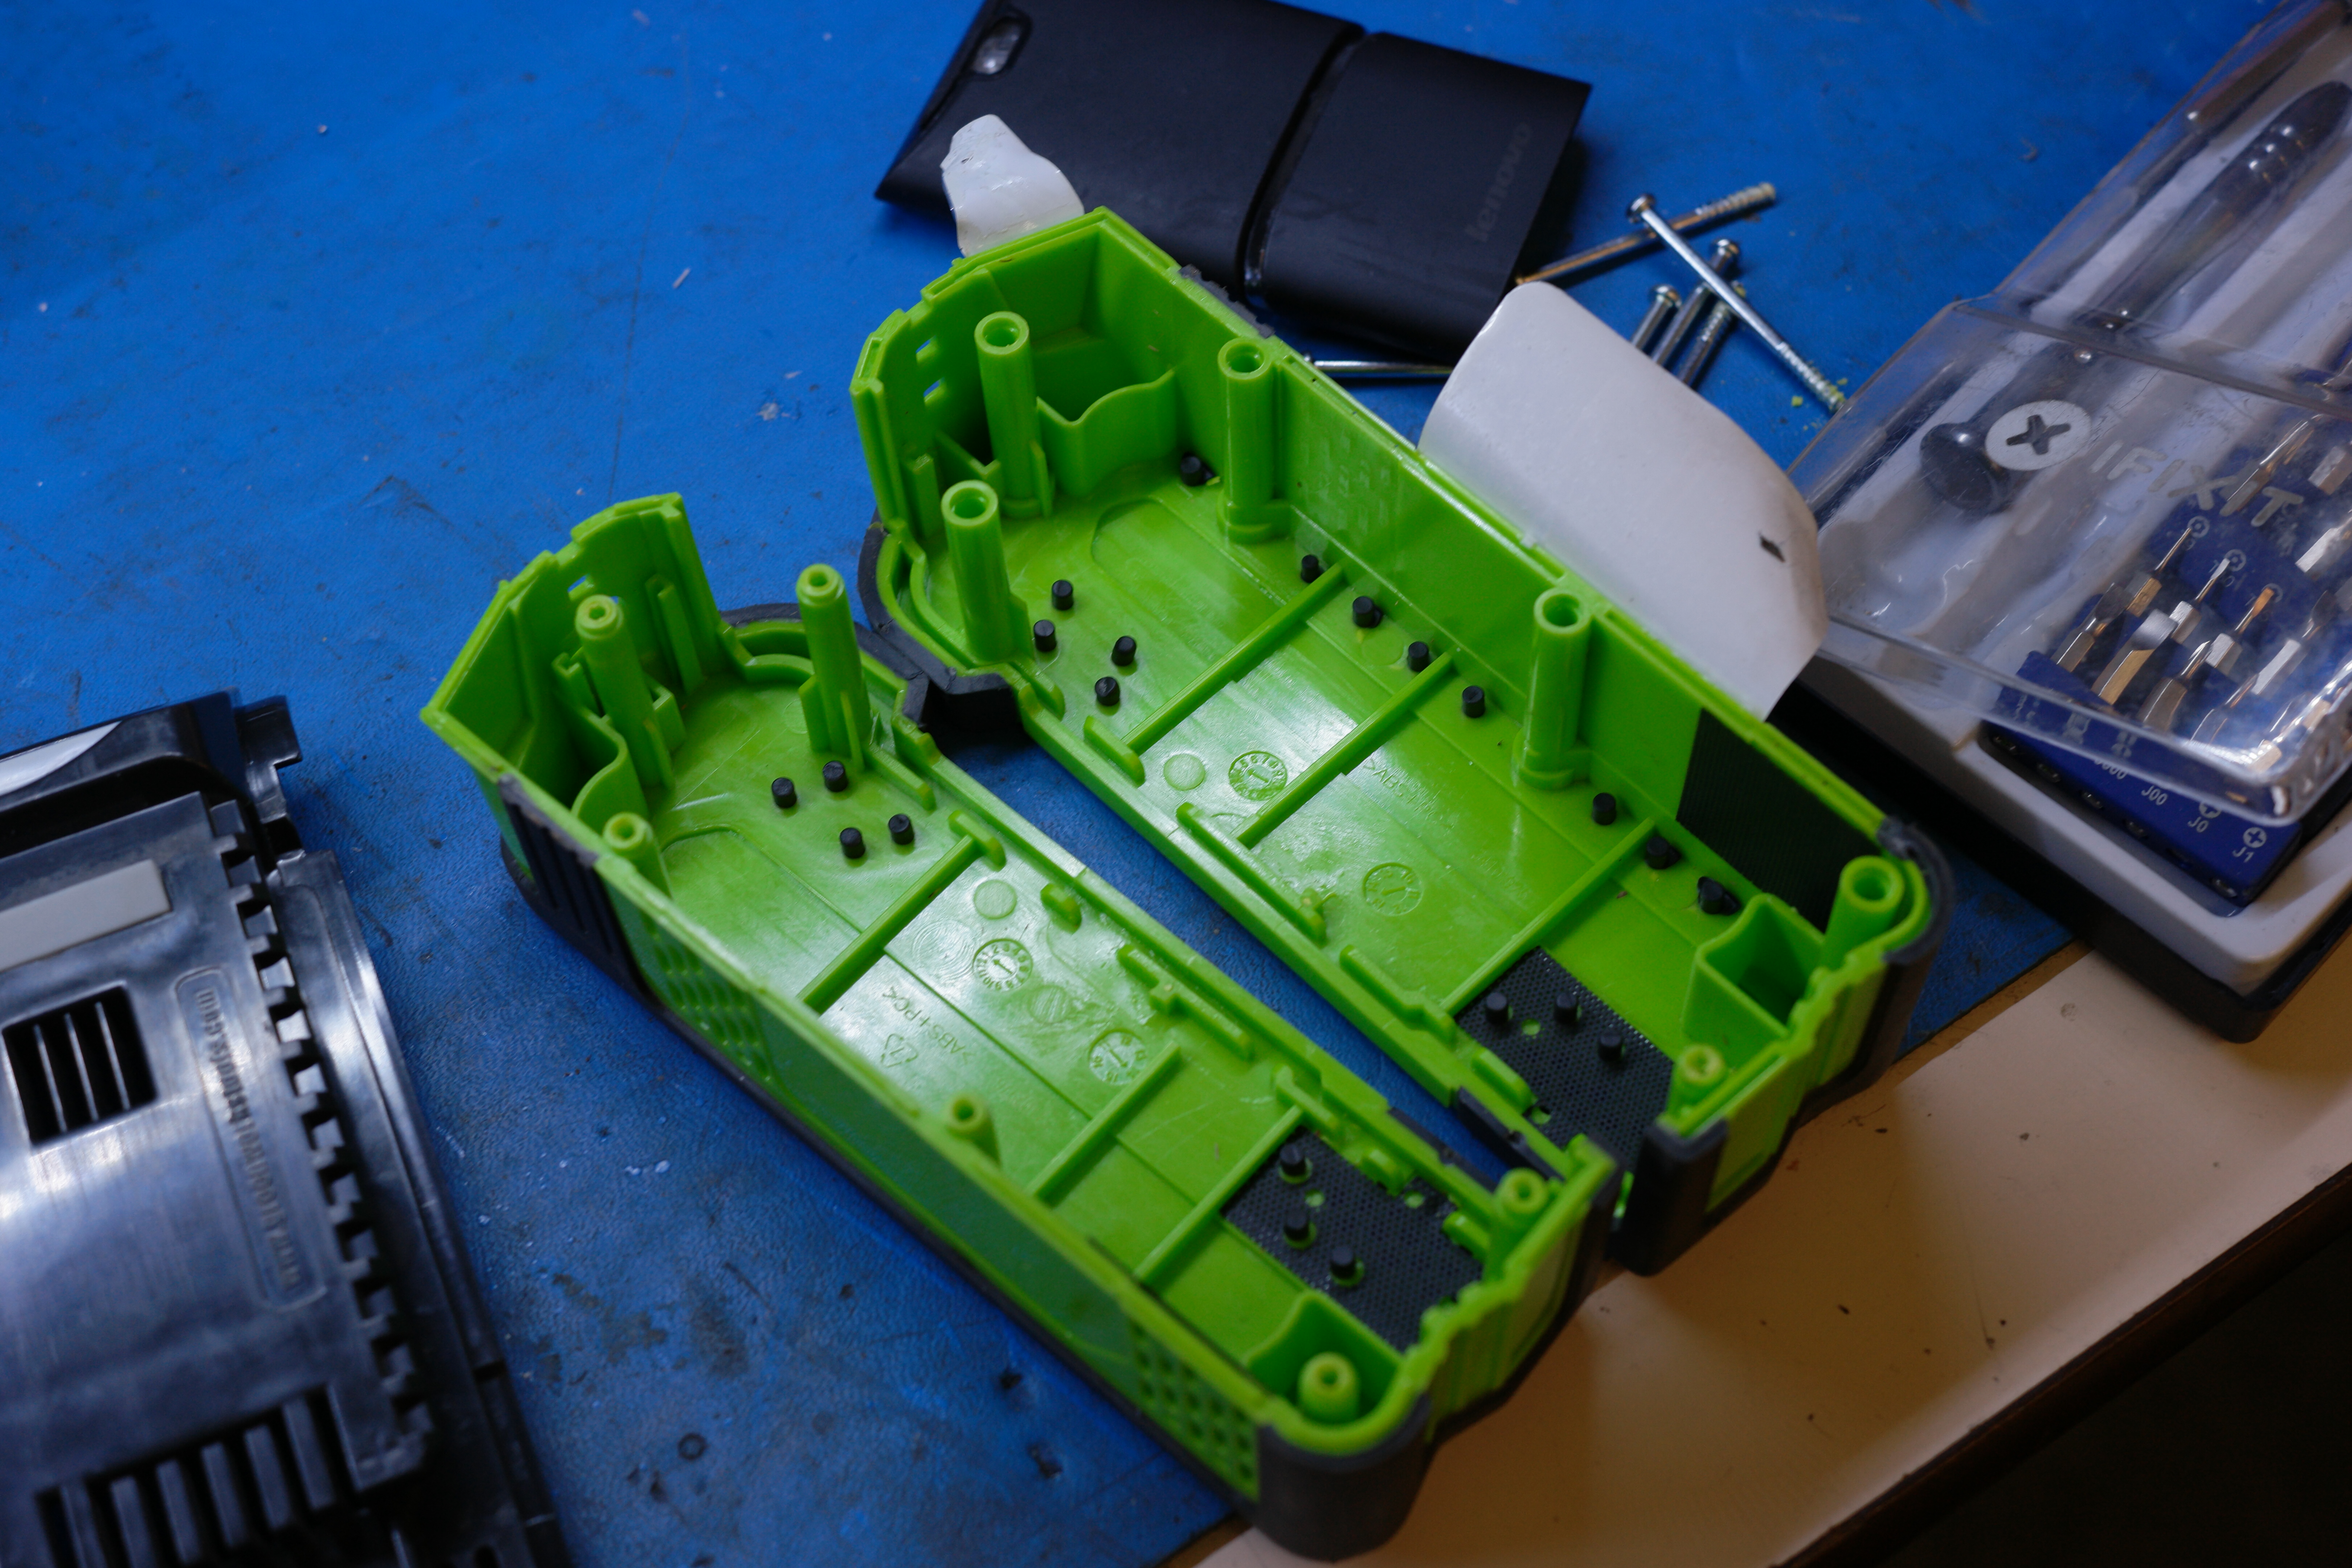
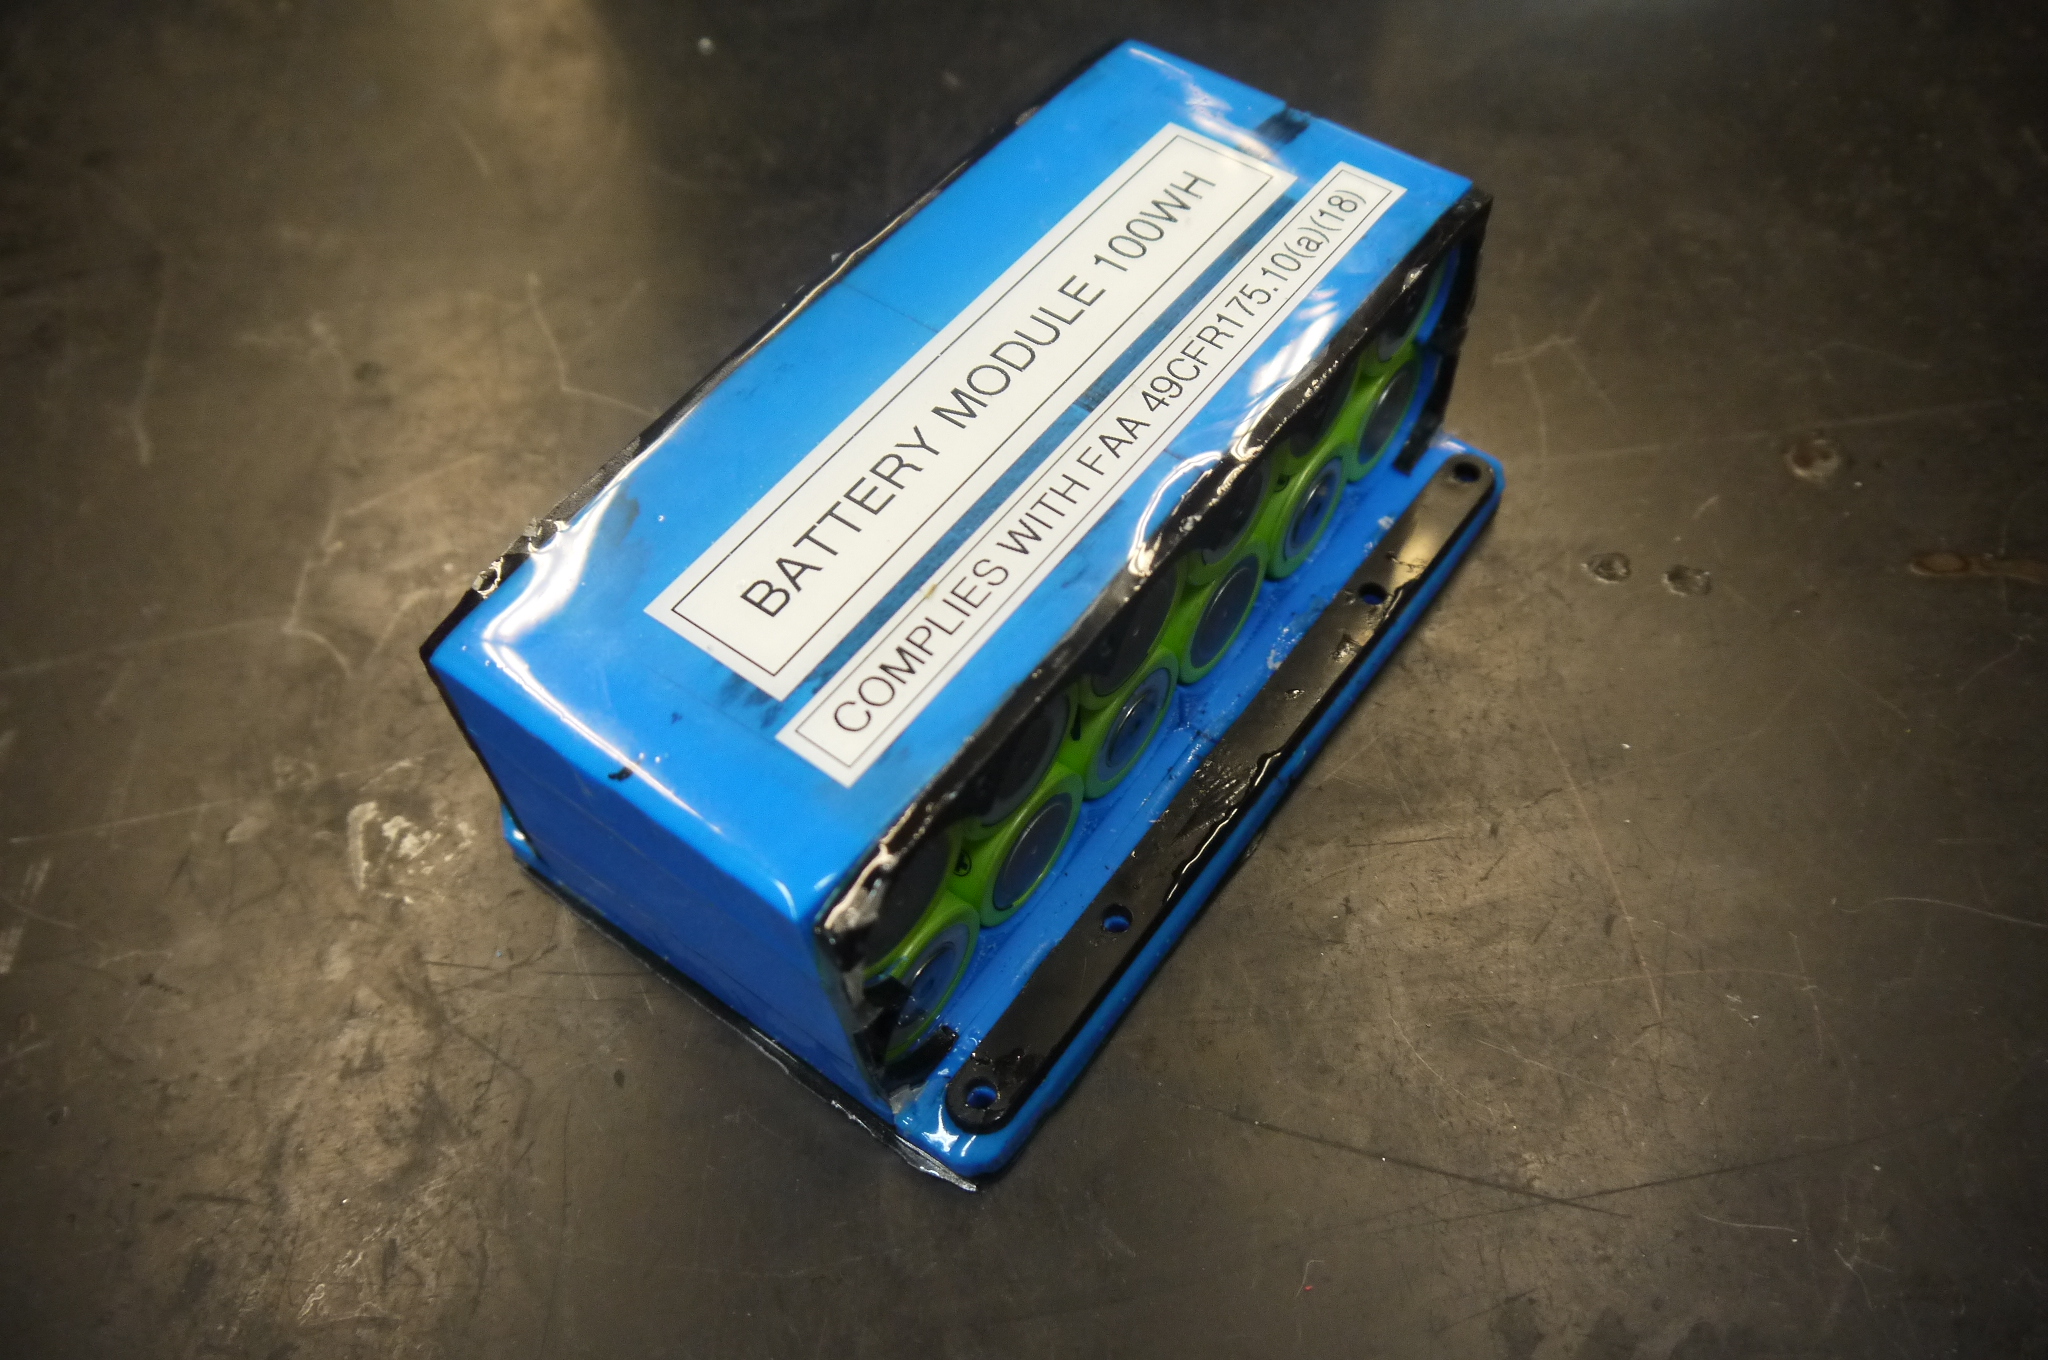
The actual module itself was quite curious, the battery subassembly is a 10S 1P 18650 cell array, with a 40A ATO fuse soldered directly to the pcb. The cells arent really labeled, or are over-coated with an extra heat shrink layer. At 2AH, that puts them square in the 'power cell' arena. Cells are voltage sensed and passed to the main board for (i hope) balancing and Under / over voltage protection. Everything sensitive on the pcb is 'glopped' with white conformal goo. This is curious, but probably allows the board to be soldered to the cell module after being potted, or some such manufacturing reason. The 'soldered to board' ato fuse is questionable, theres no indication its a HV ATO fuse (there are 12v and 58v variants) but moreover, fuses are thermal devices, heating them during the reflow may change their characteristics. I will give them some credit, there are no fuse holders rated for 40A for the ATO fuse style, for which I blame littelfuse. No large mosfets are visible on the pcb which is concerning. 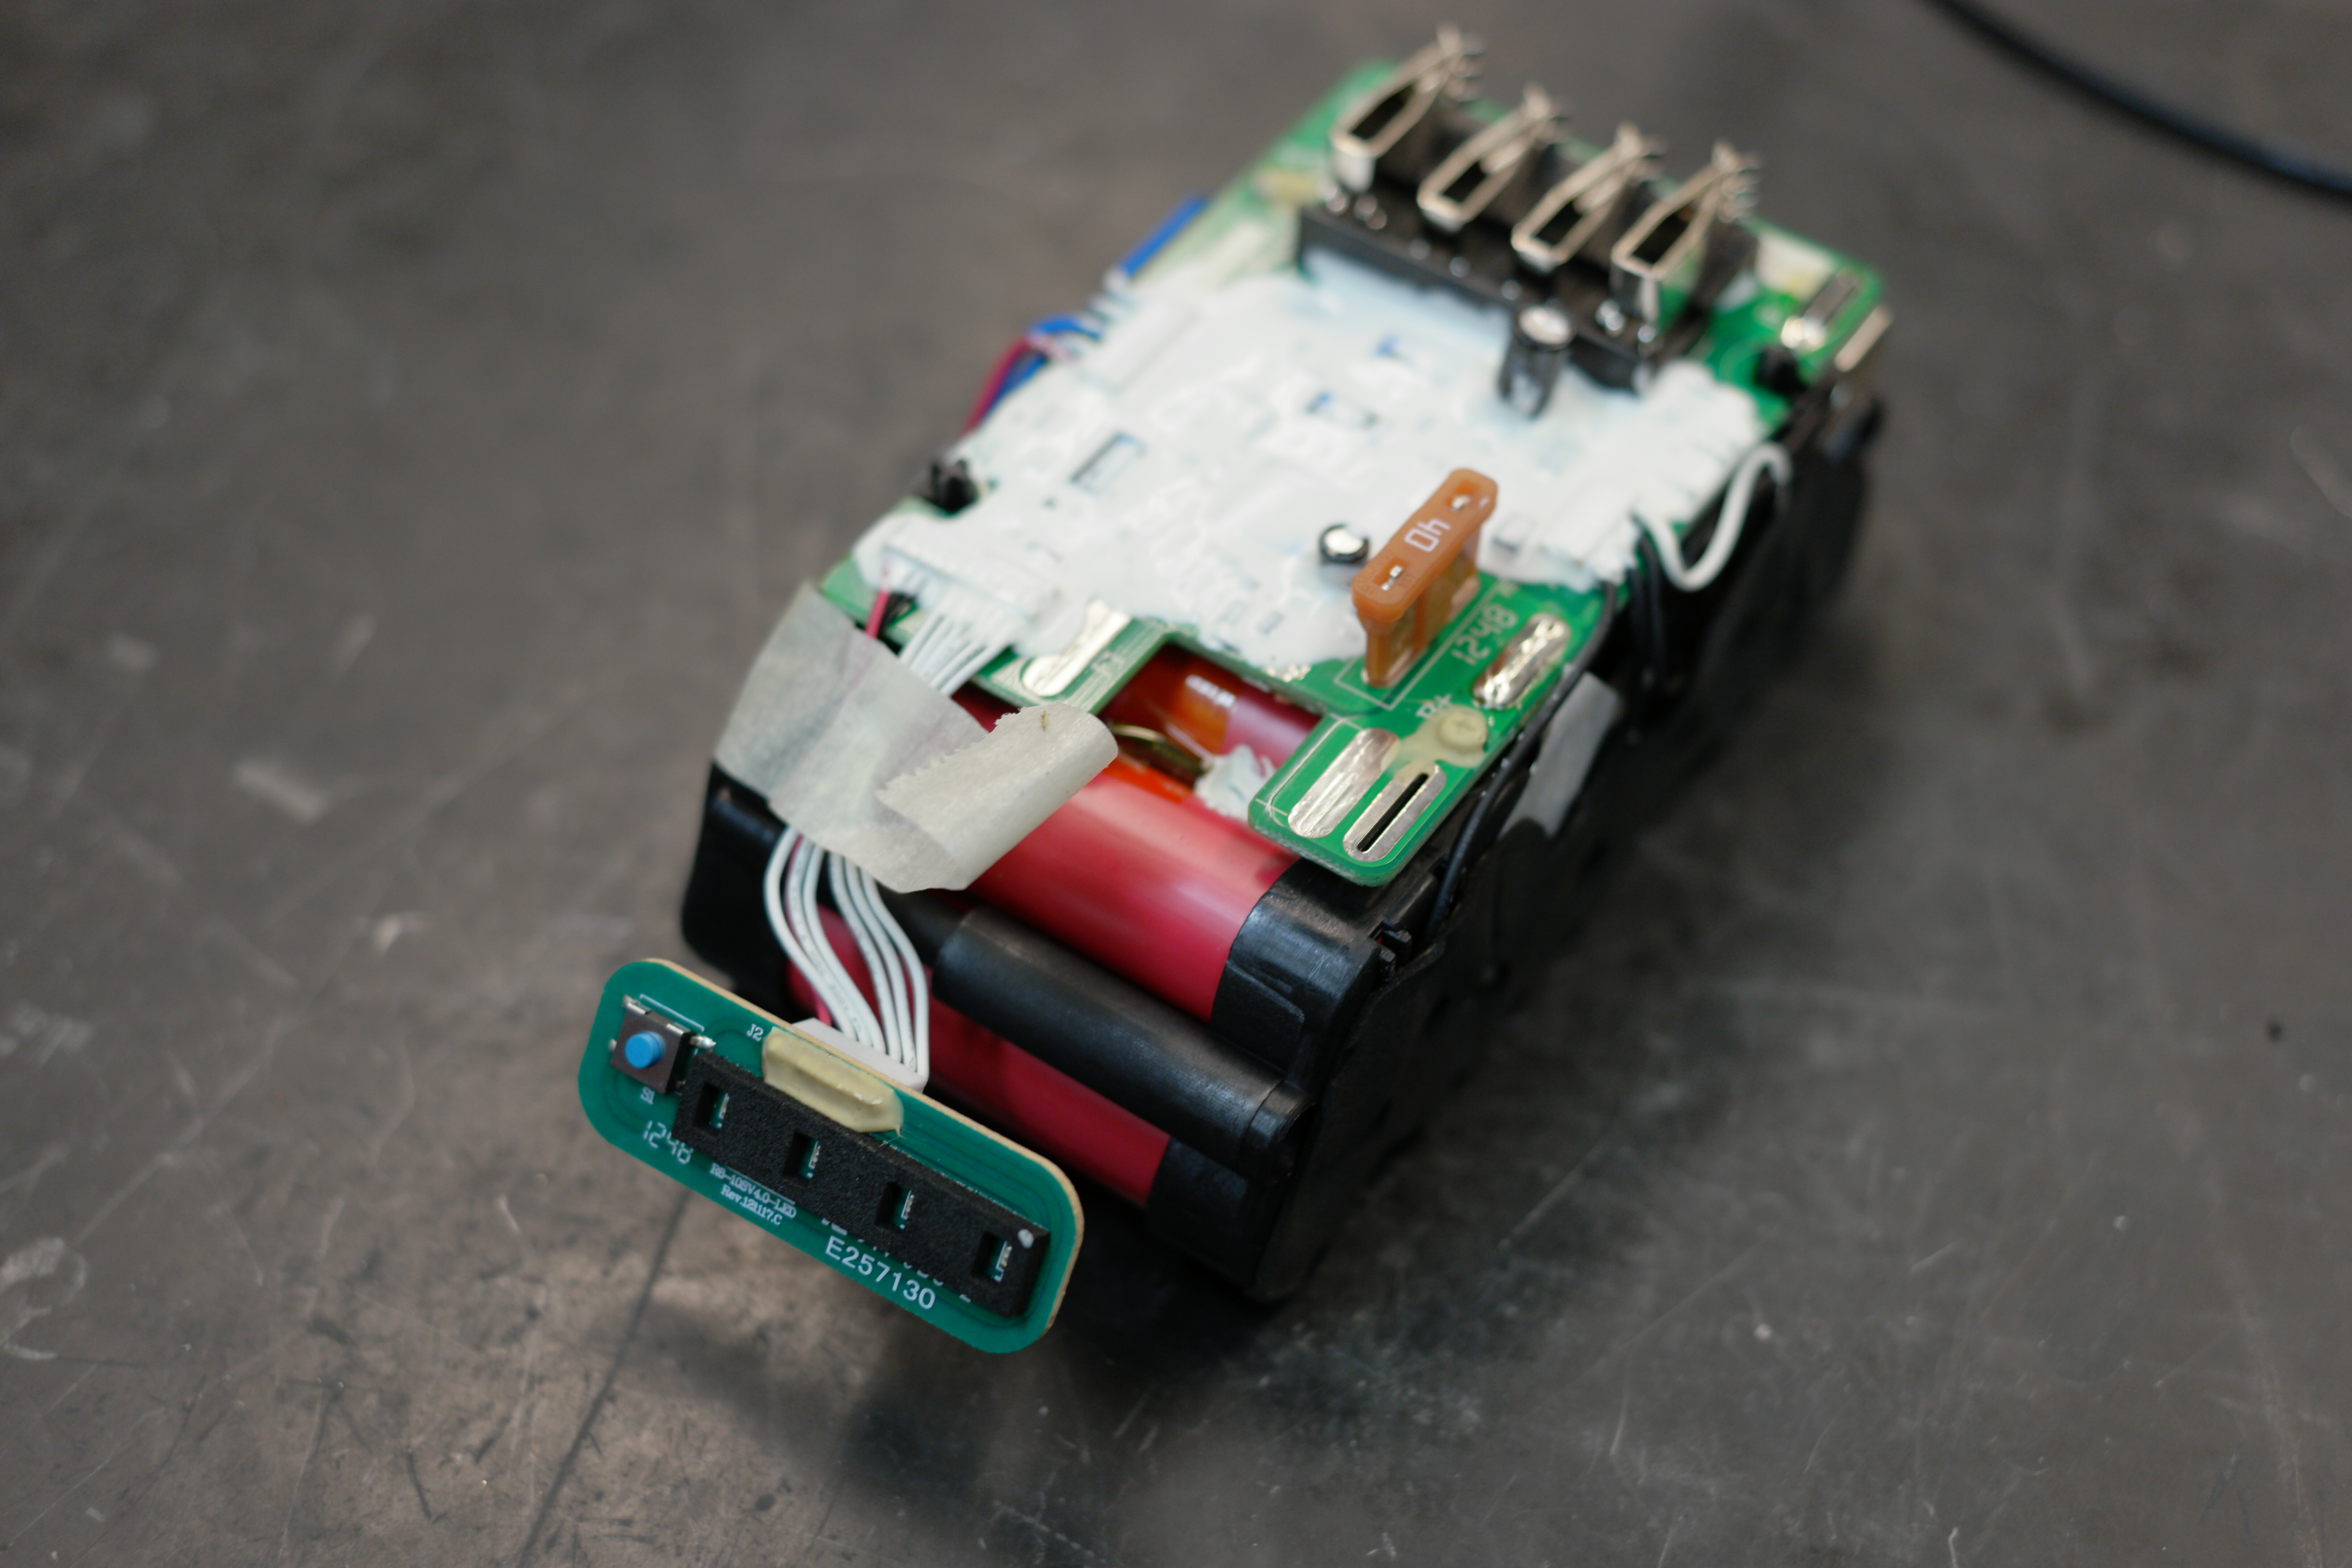
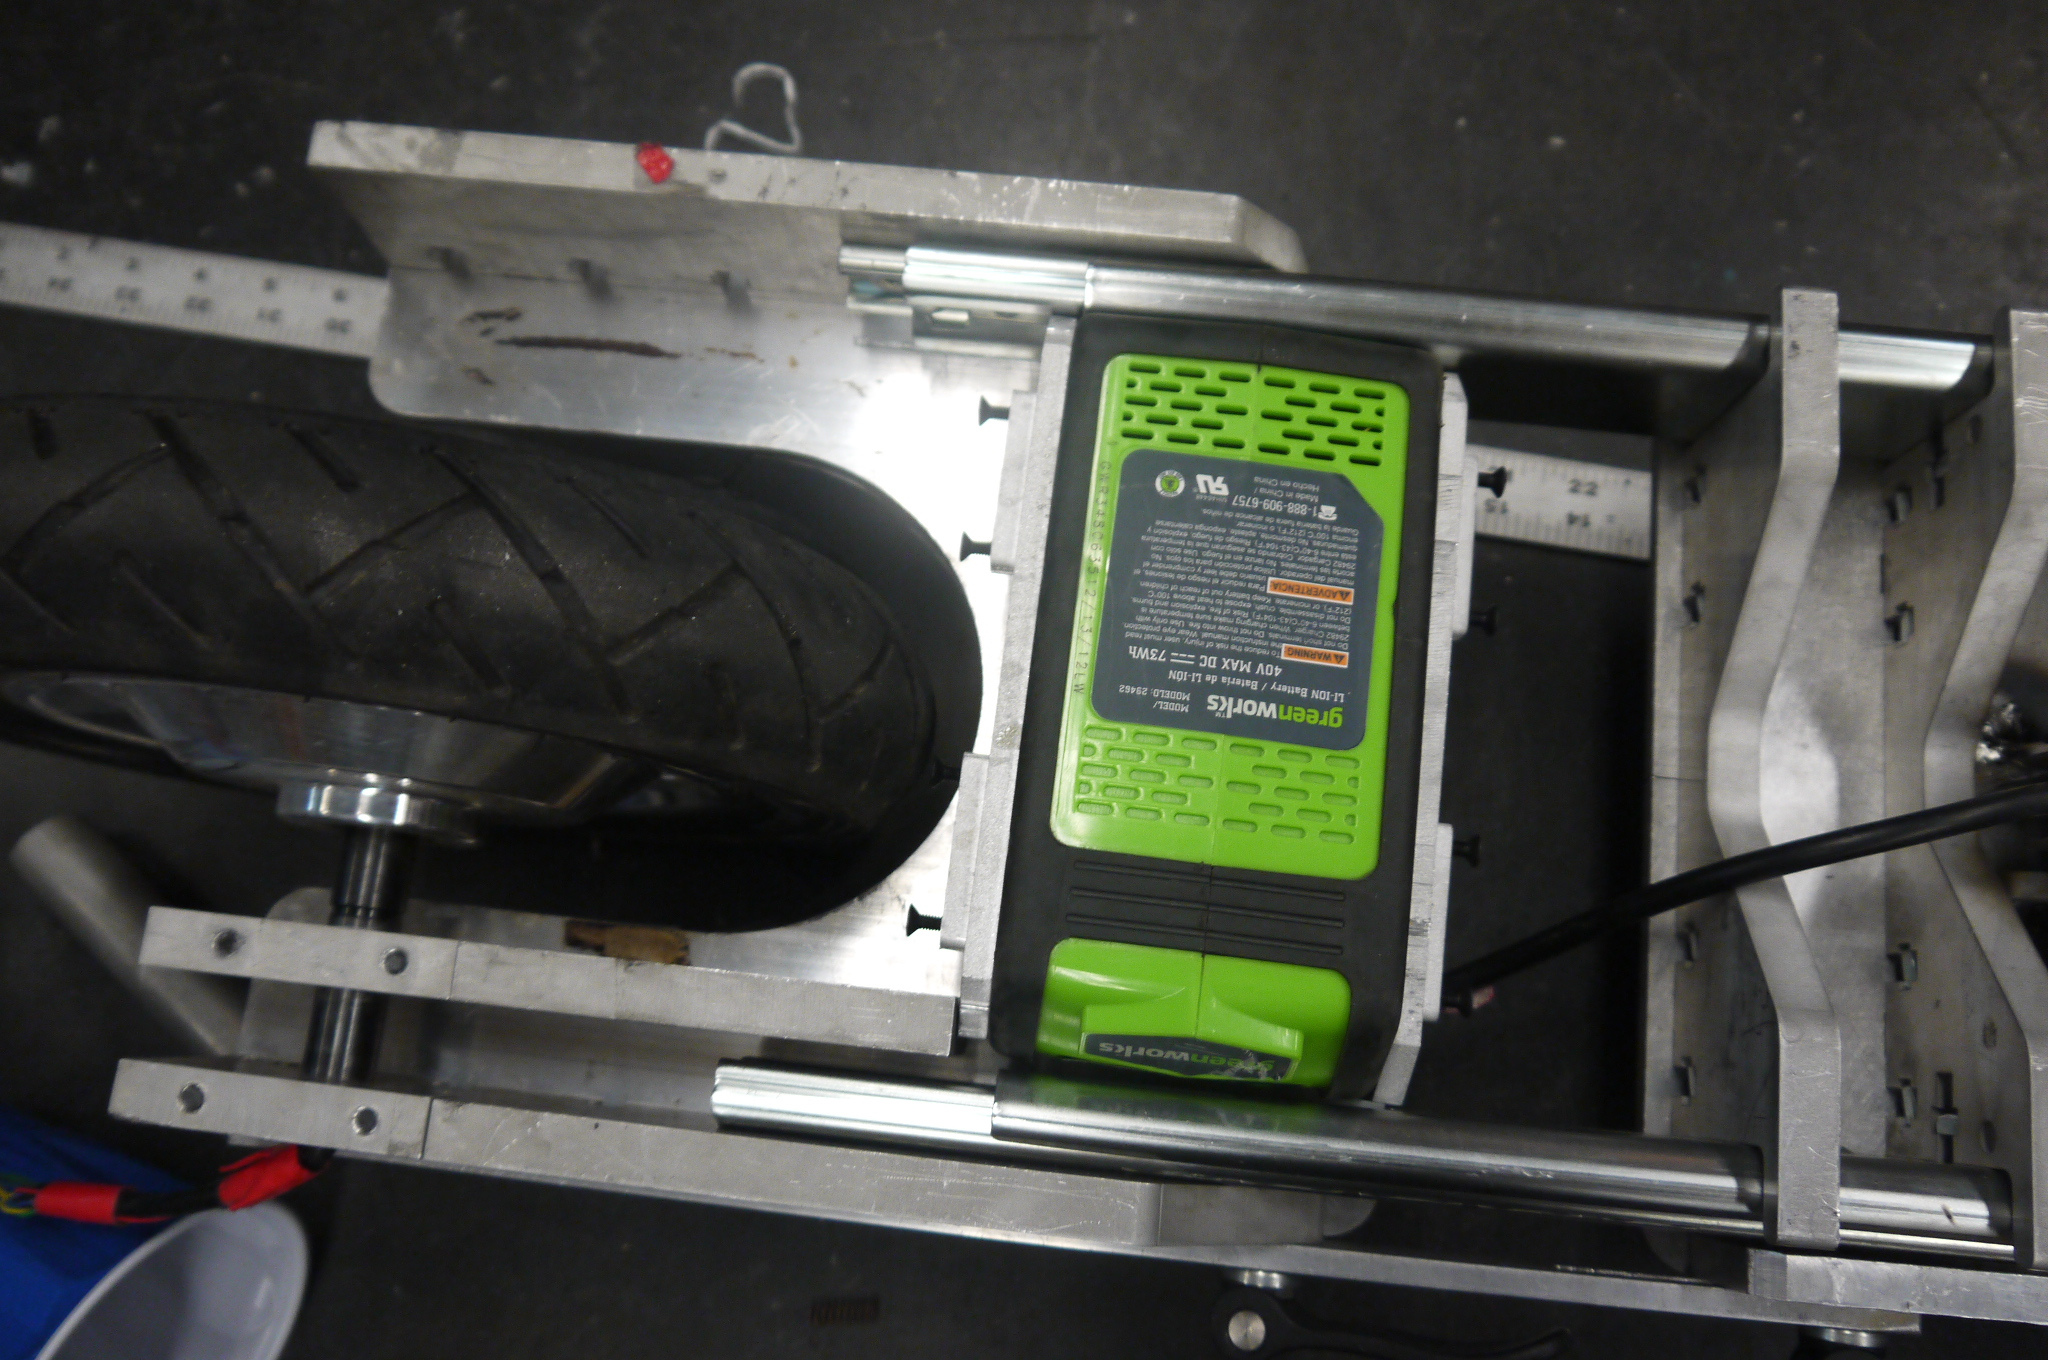
Fit testing the battery packThe greenworks battery itself is quite cute. The 2Ah battery comes in at 74 watt-hours, which makes it easy to bring on a plane in carry-on luggage. Its also ~30-40$ used, which makes it reasonably affordable. Note I cant 'just stick a lipo brick underneath' the board and bring it on a plane. An appropriate holster cavity should work quite well to hold the battery. As this was an 'after the fact; design process, I played around with what orientations would be easiest, and nominally, what options were available for a bit more capacity. 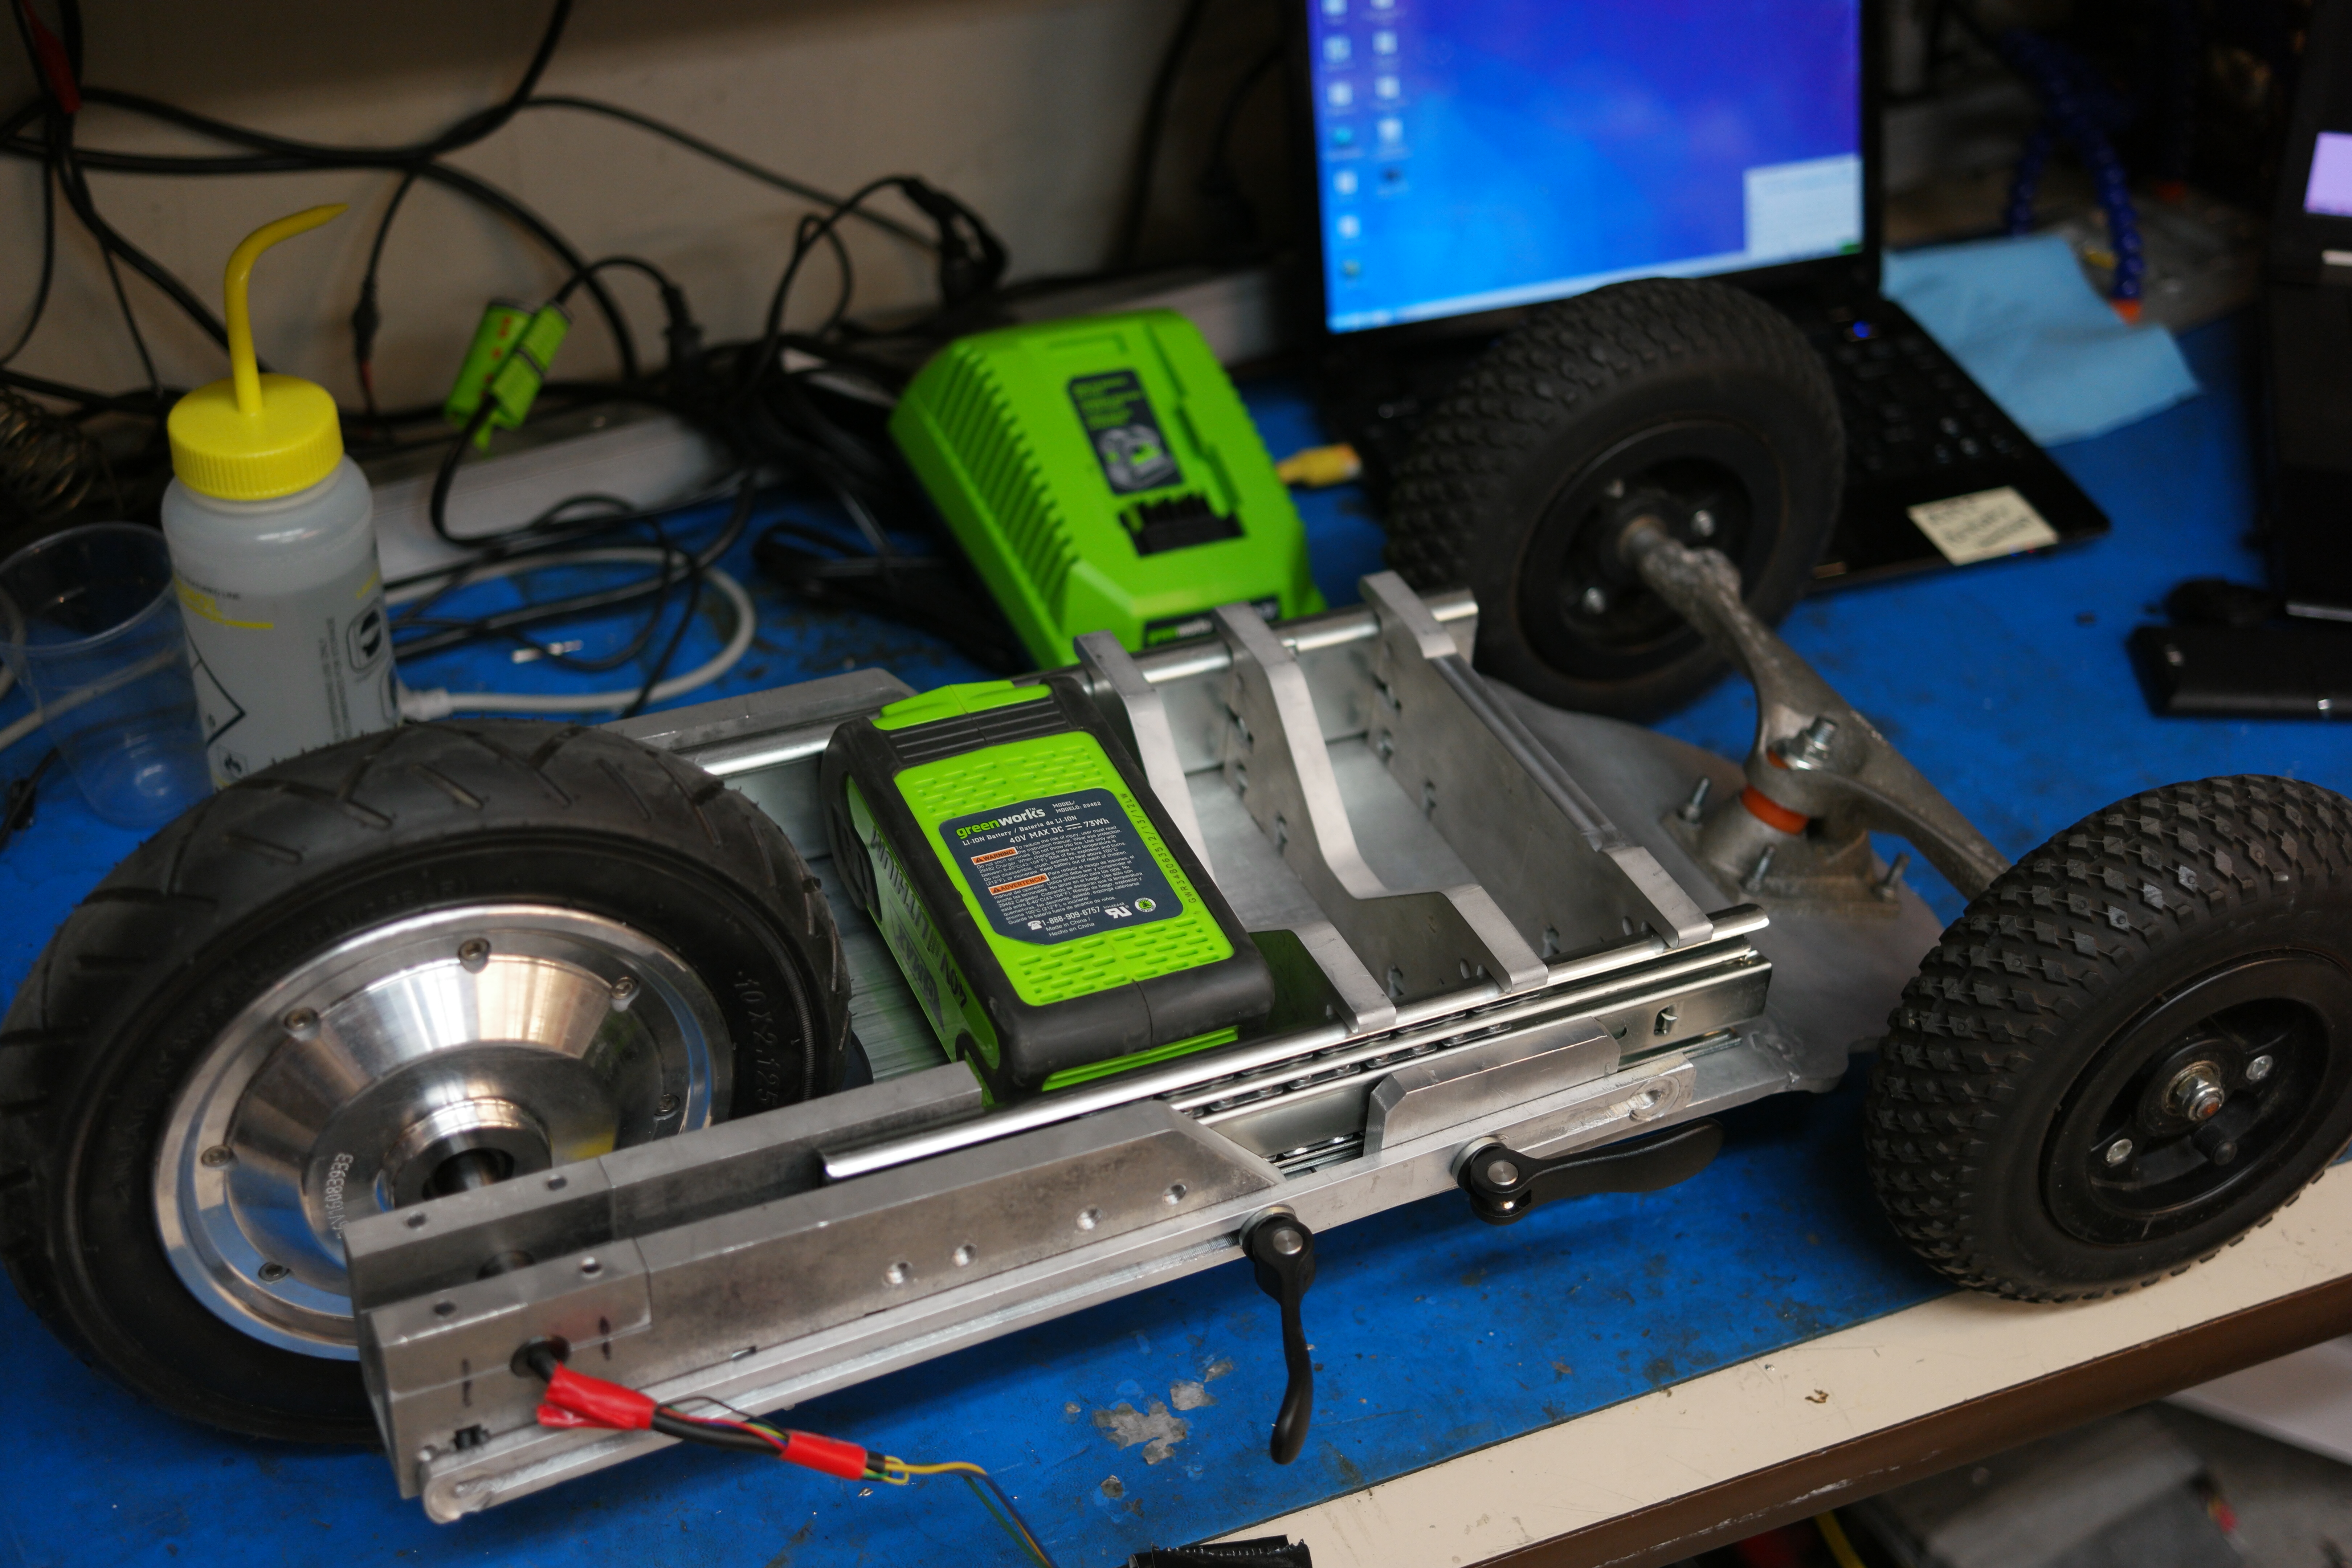
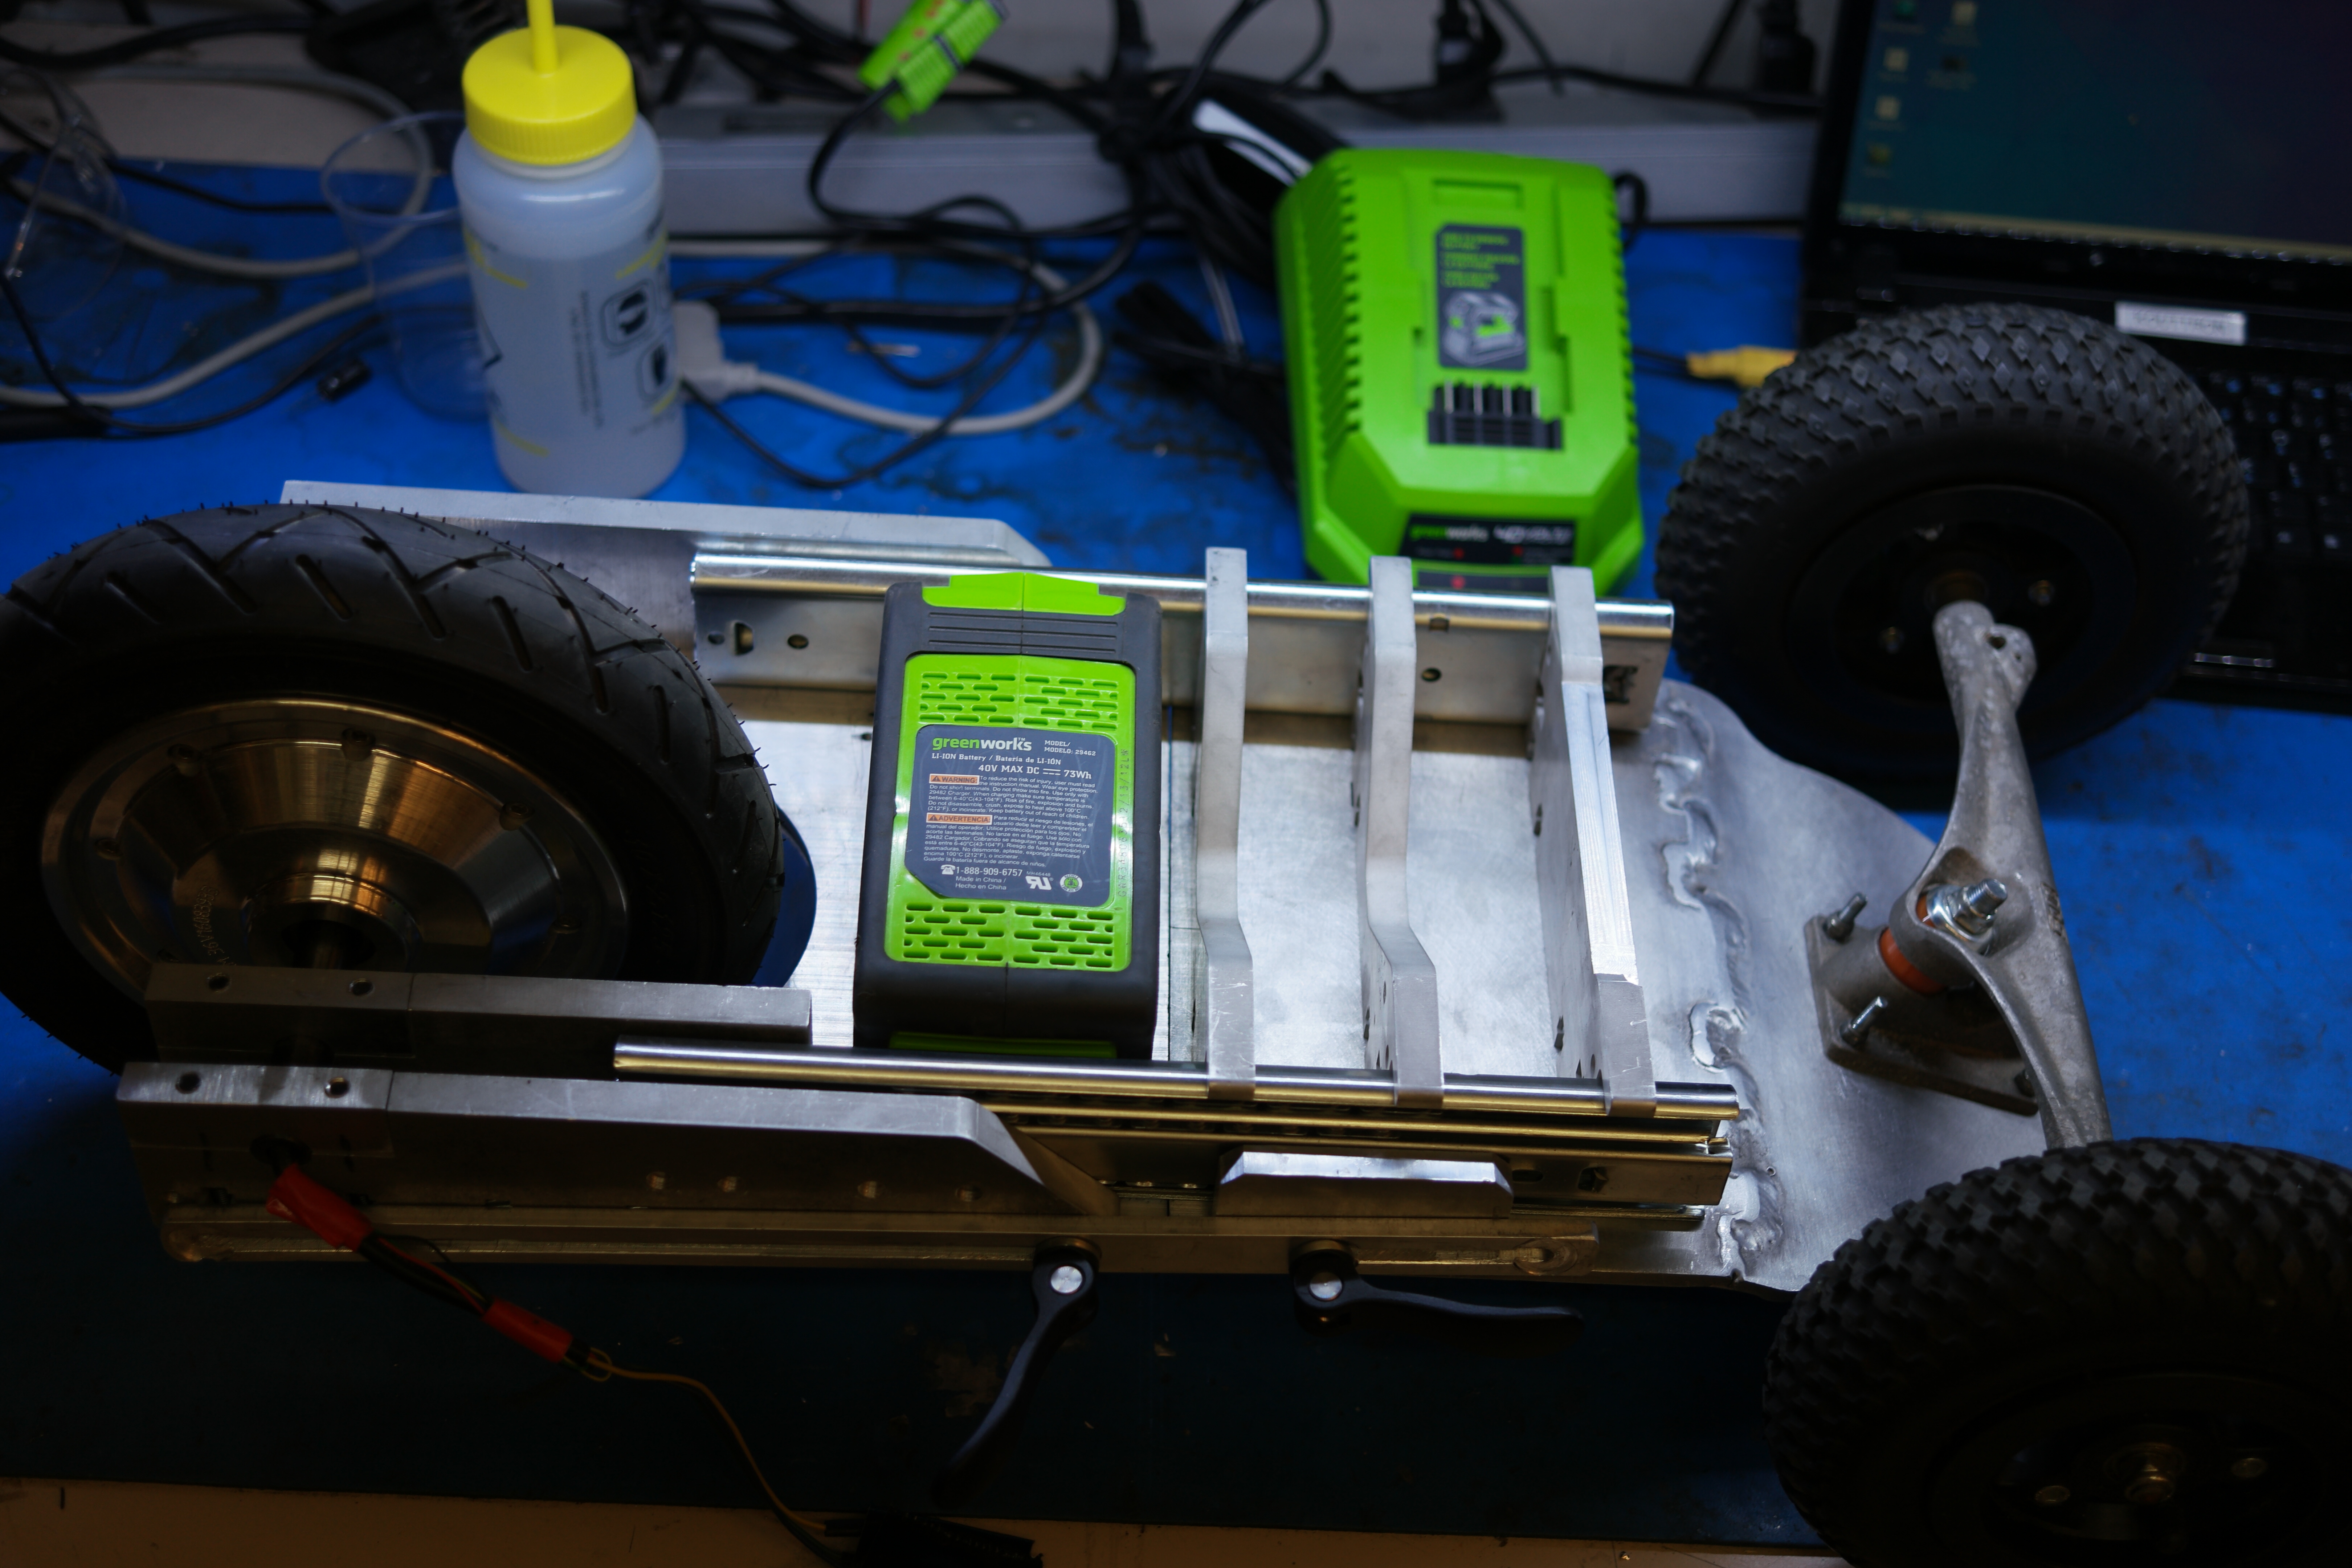
Initially I wanted to slide-lock the battery in place, but due to space constraints, and not super trusting a drill slide-latch assembly, I'm opting for a pocket that the battery is held into with Velcro straps. Why Velcro straps? well as it turns out there is a 4AH version of this battery, which, is most likely just a 10S2P version of this pack. Its a bit taller but the same height and width dimensions. Having extra Velcro space should work well as an adjustable battery holster. The 4AH version is not quite plane-able on overseas flights, but is allowable as it is under the 160 watt-hour limit for travel in the states (146 watt-hours). I grabbed a used pack for 40$. This could net over 8 miles of range 2AH vs 4AH with the battery module in placeThe 4AH battery module is a bit tall, but the Velcro straps adjust to fit either pack. I'm fairly happy with how well this worked out. 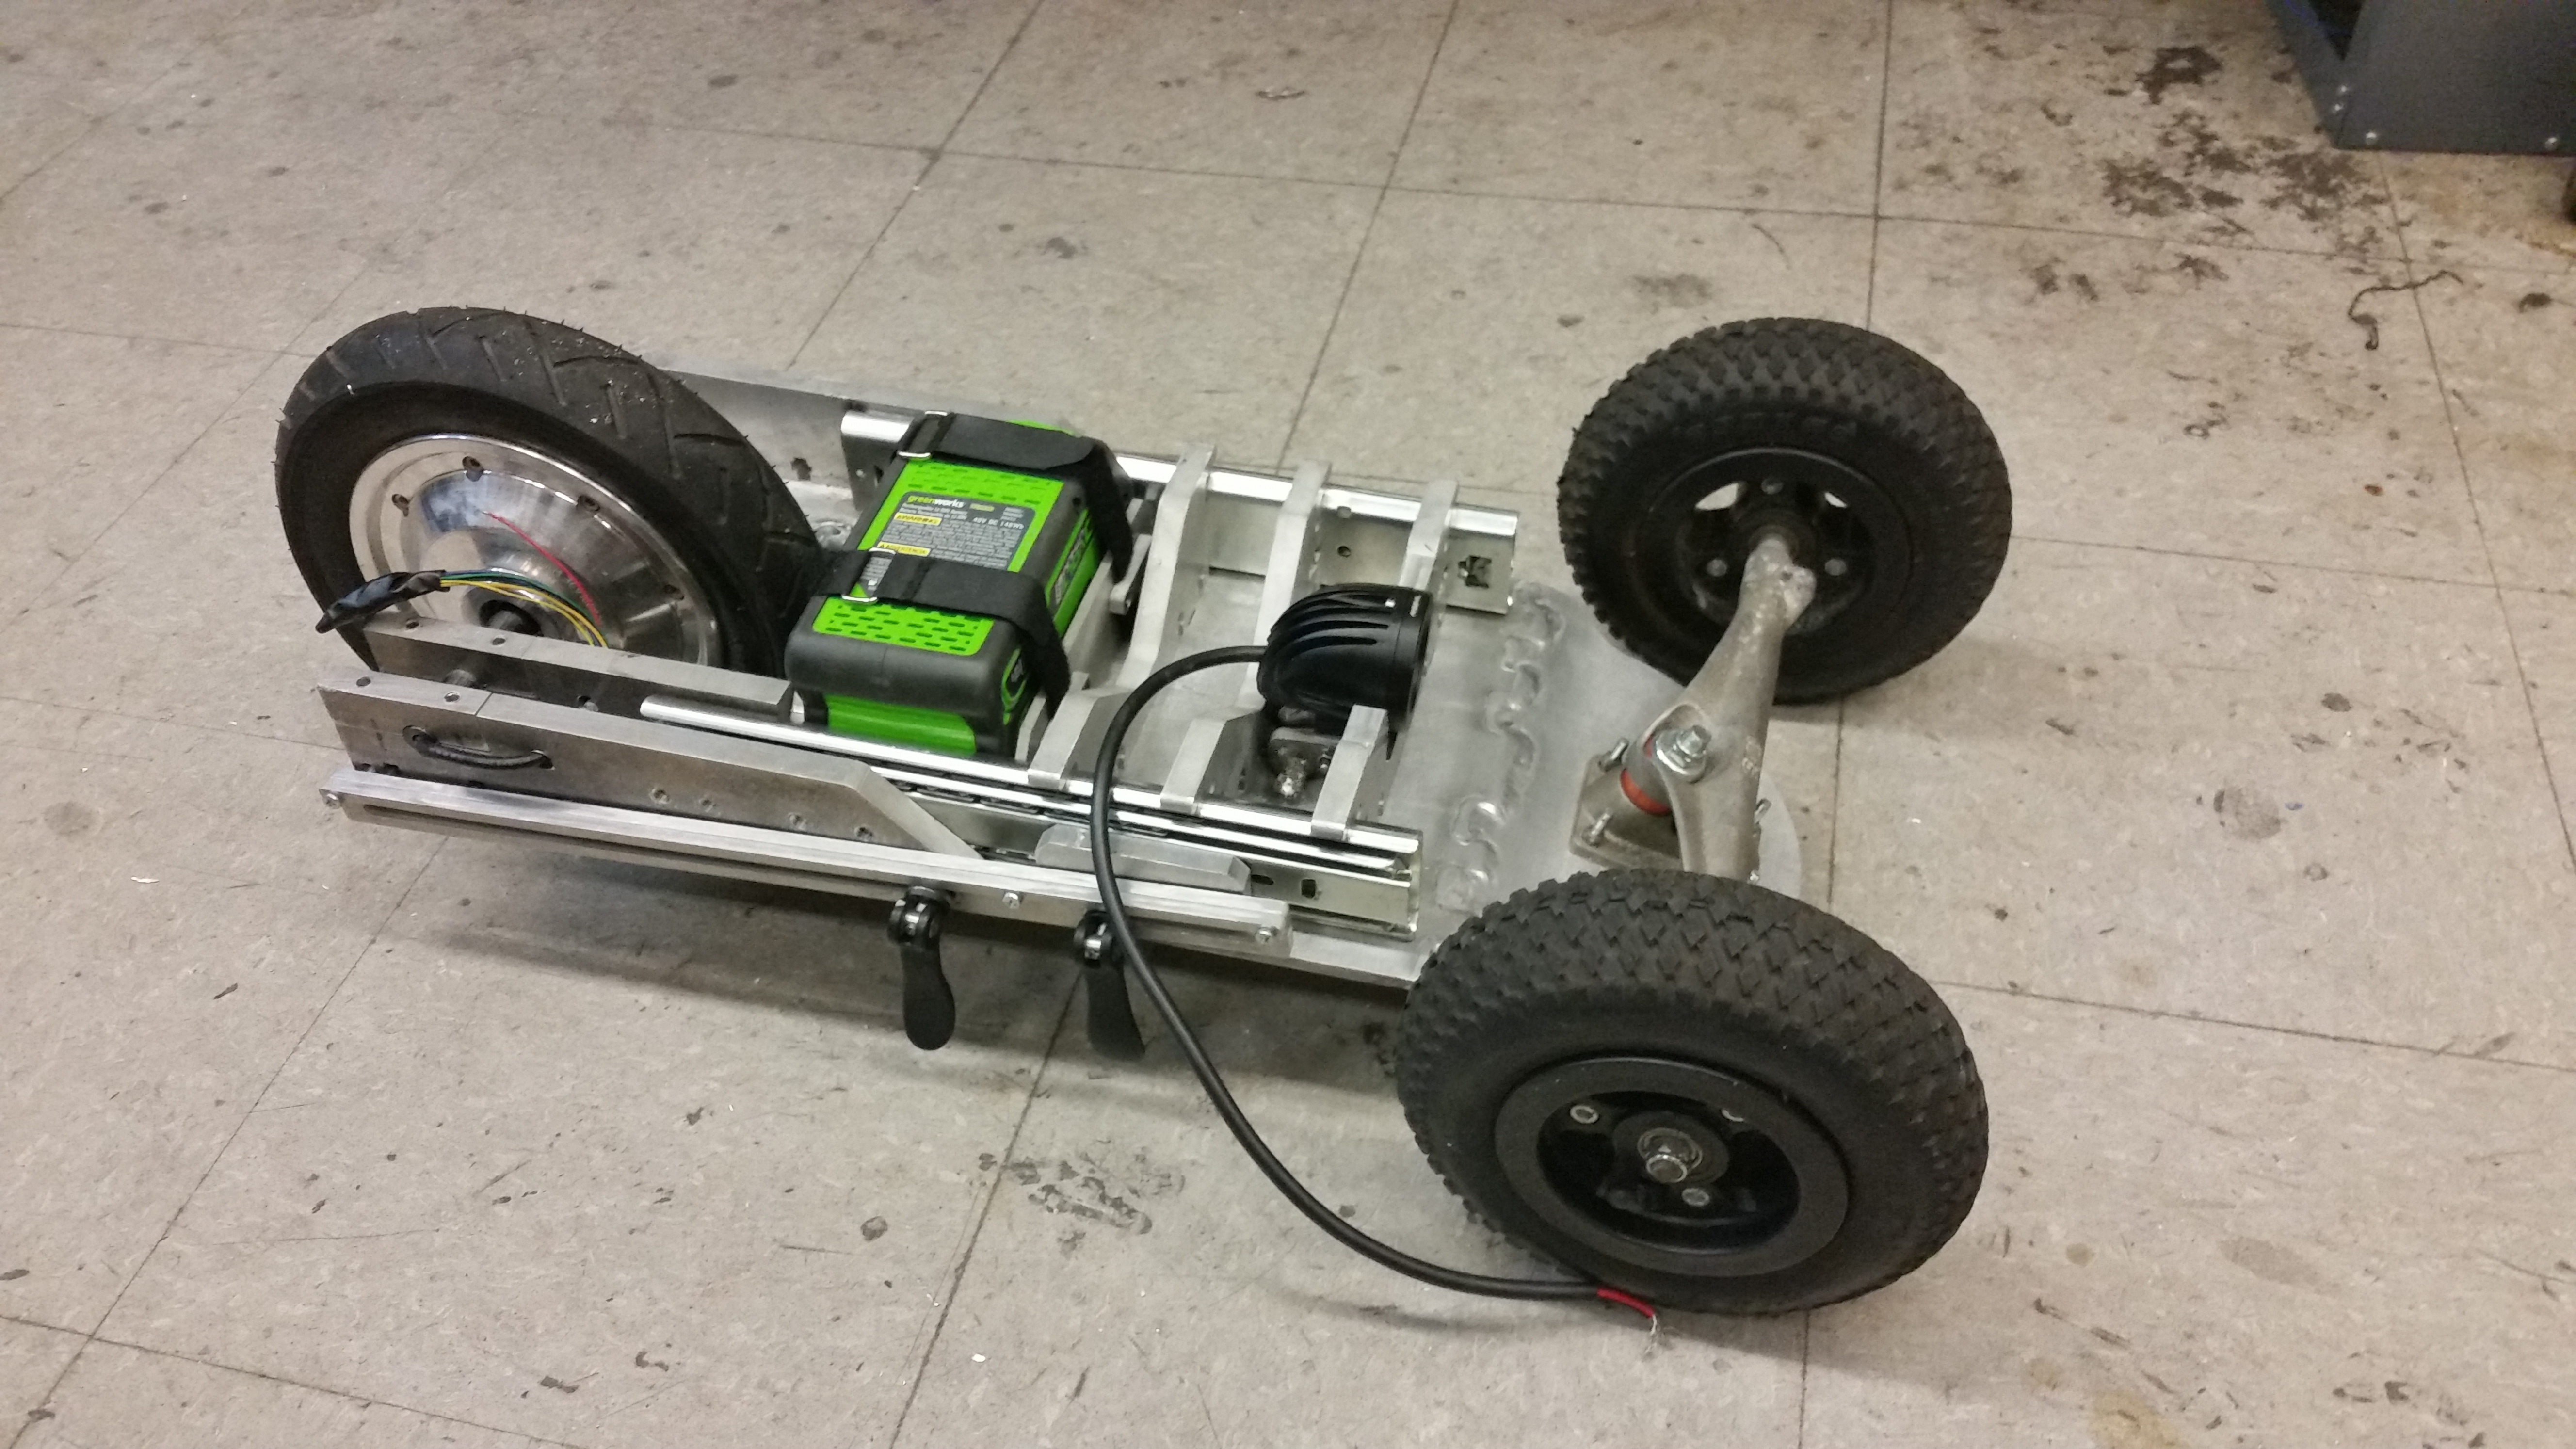

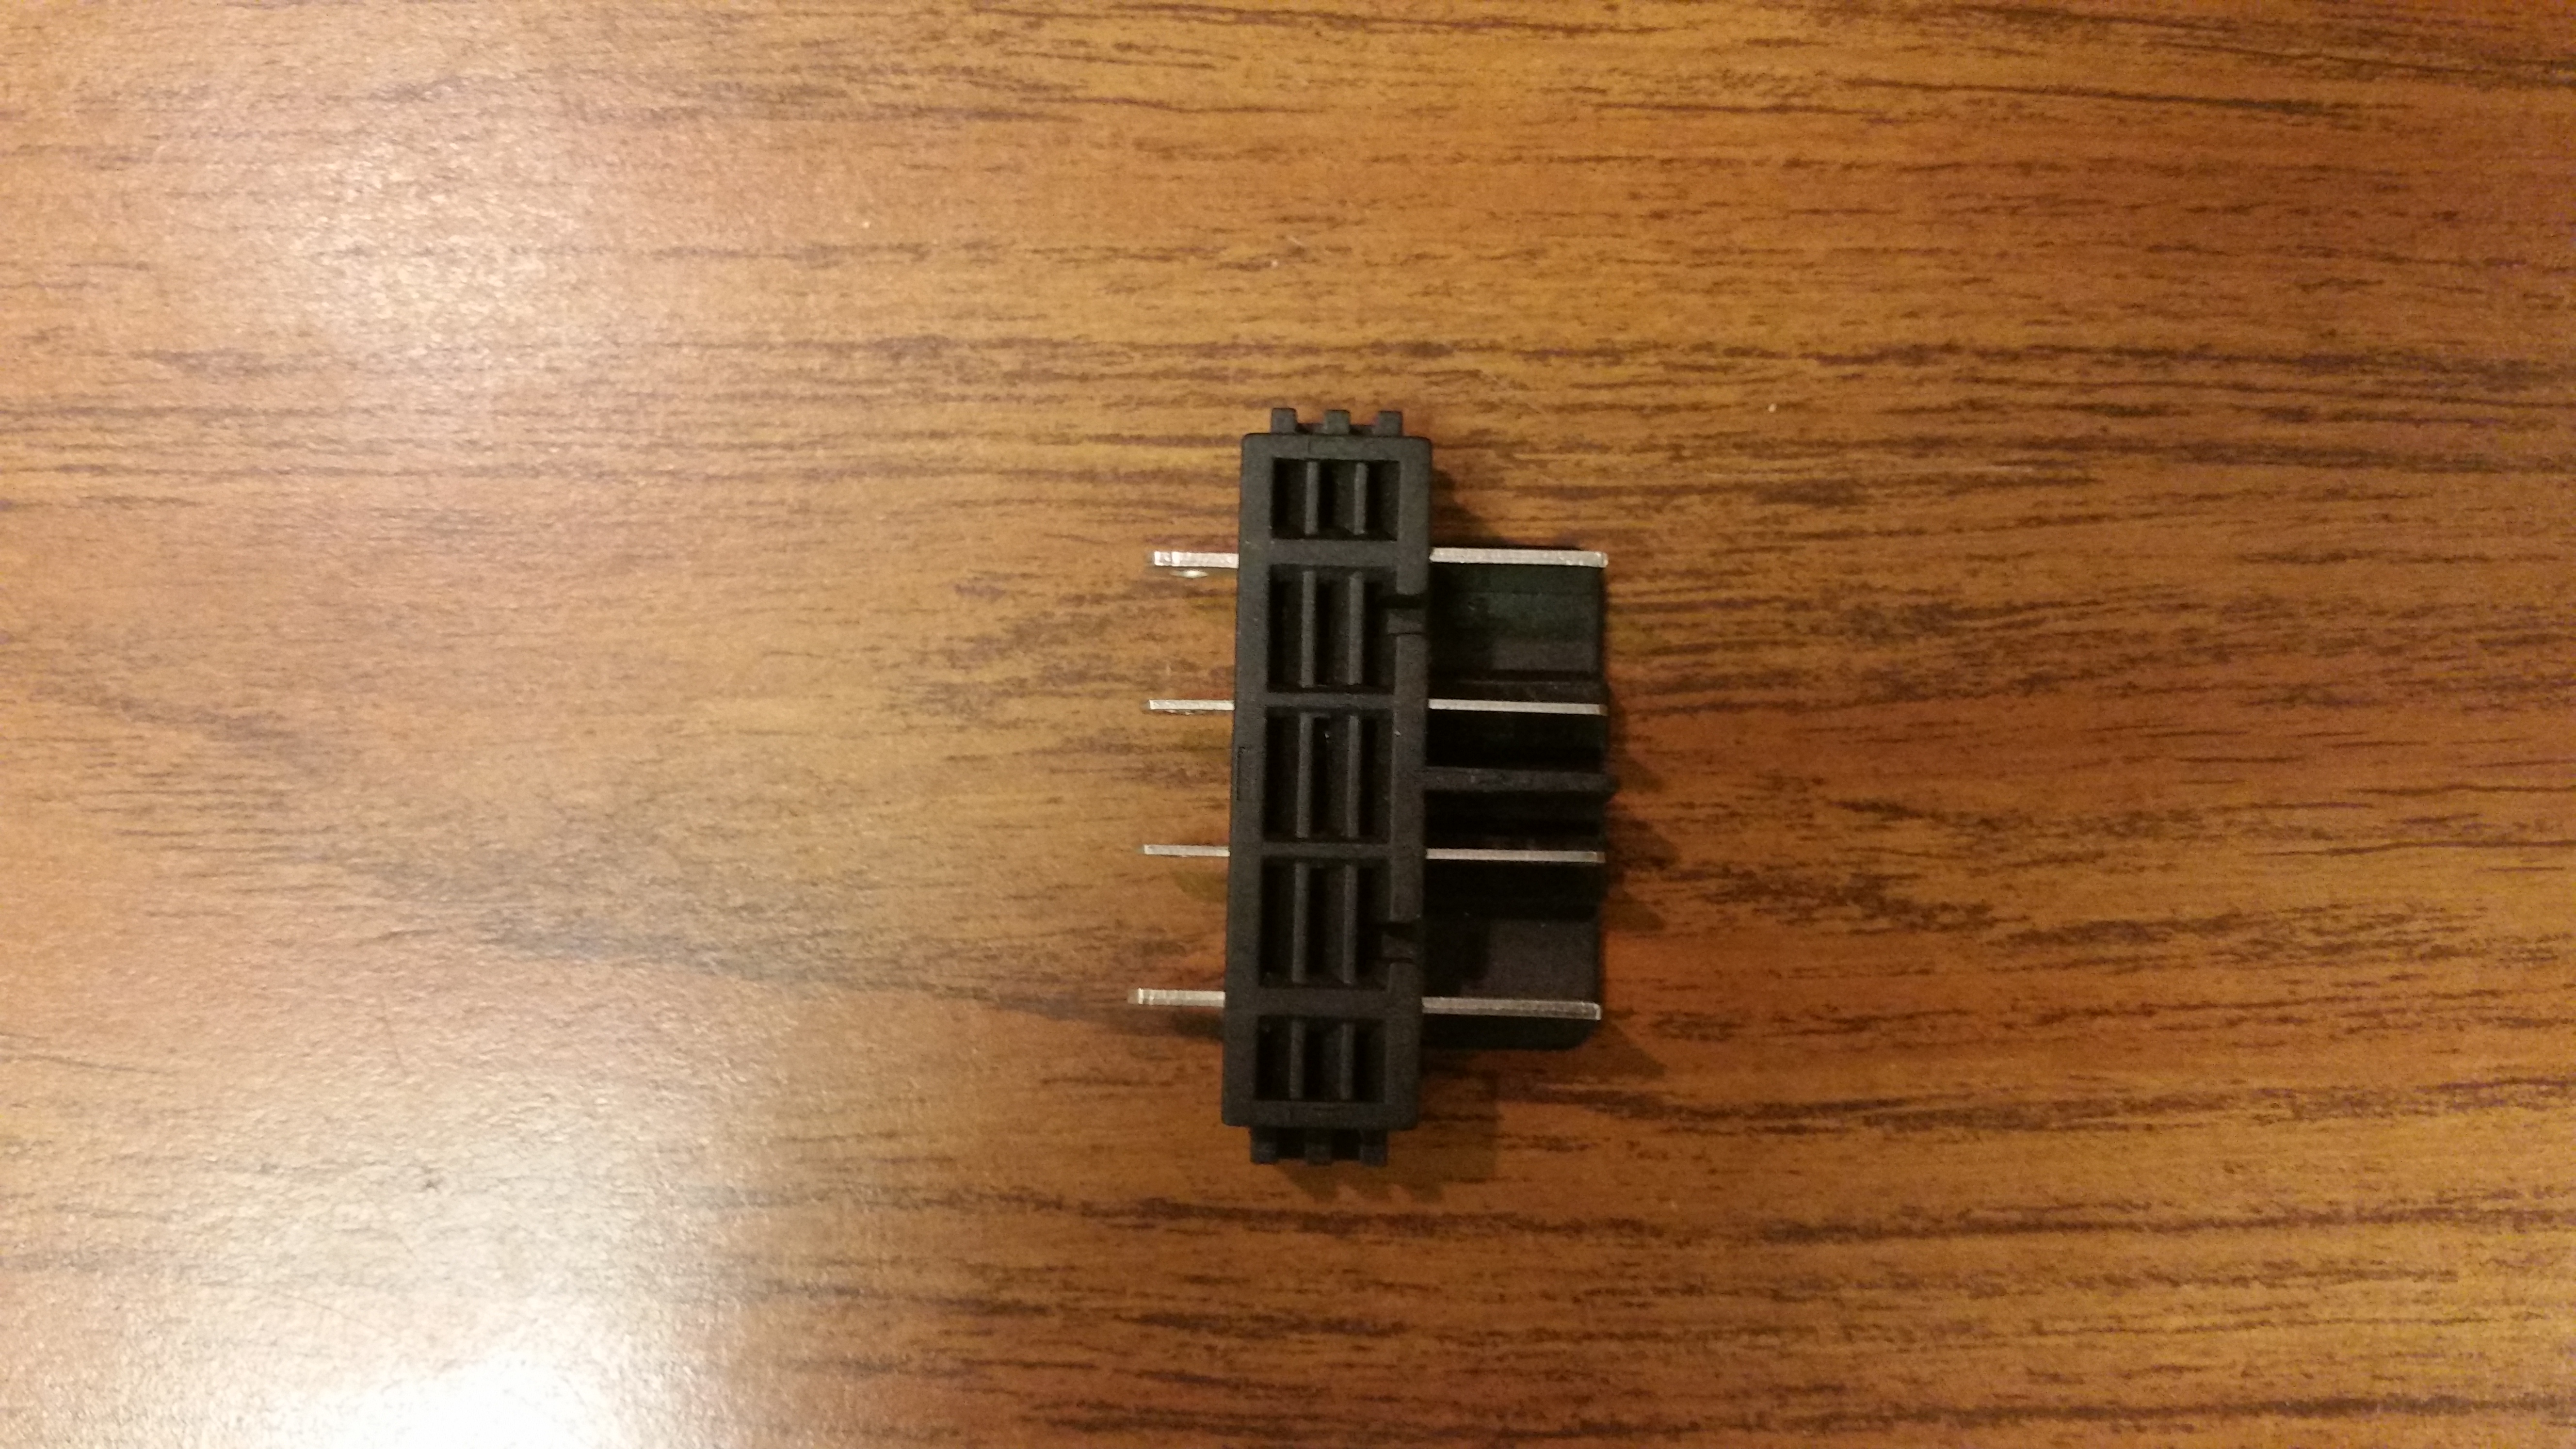
ConnectorAs it turns out, the greenworks connector is an actual part. Thanks to the magical endless-sphere, I was able to buy these separately. Comically, they dont quiet fit with the G-MAX series packs, some band sawing / dremel-ing was necessary. 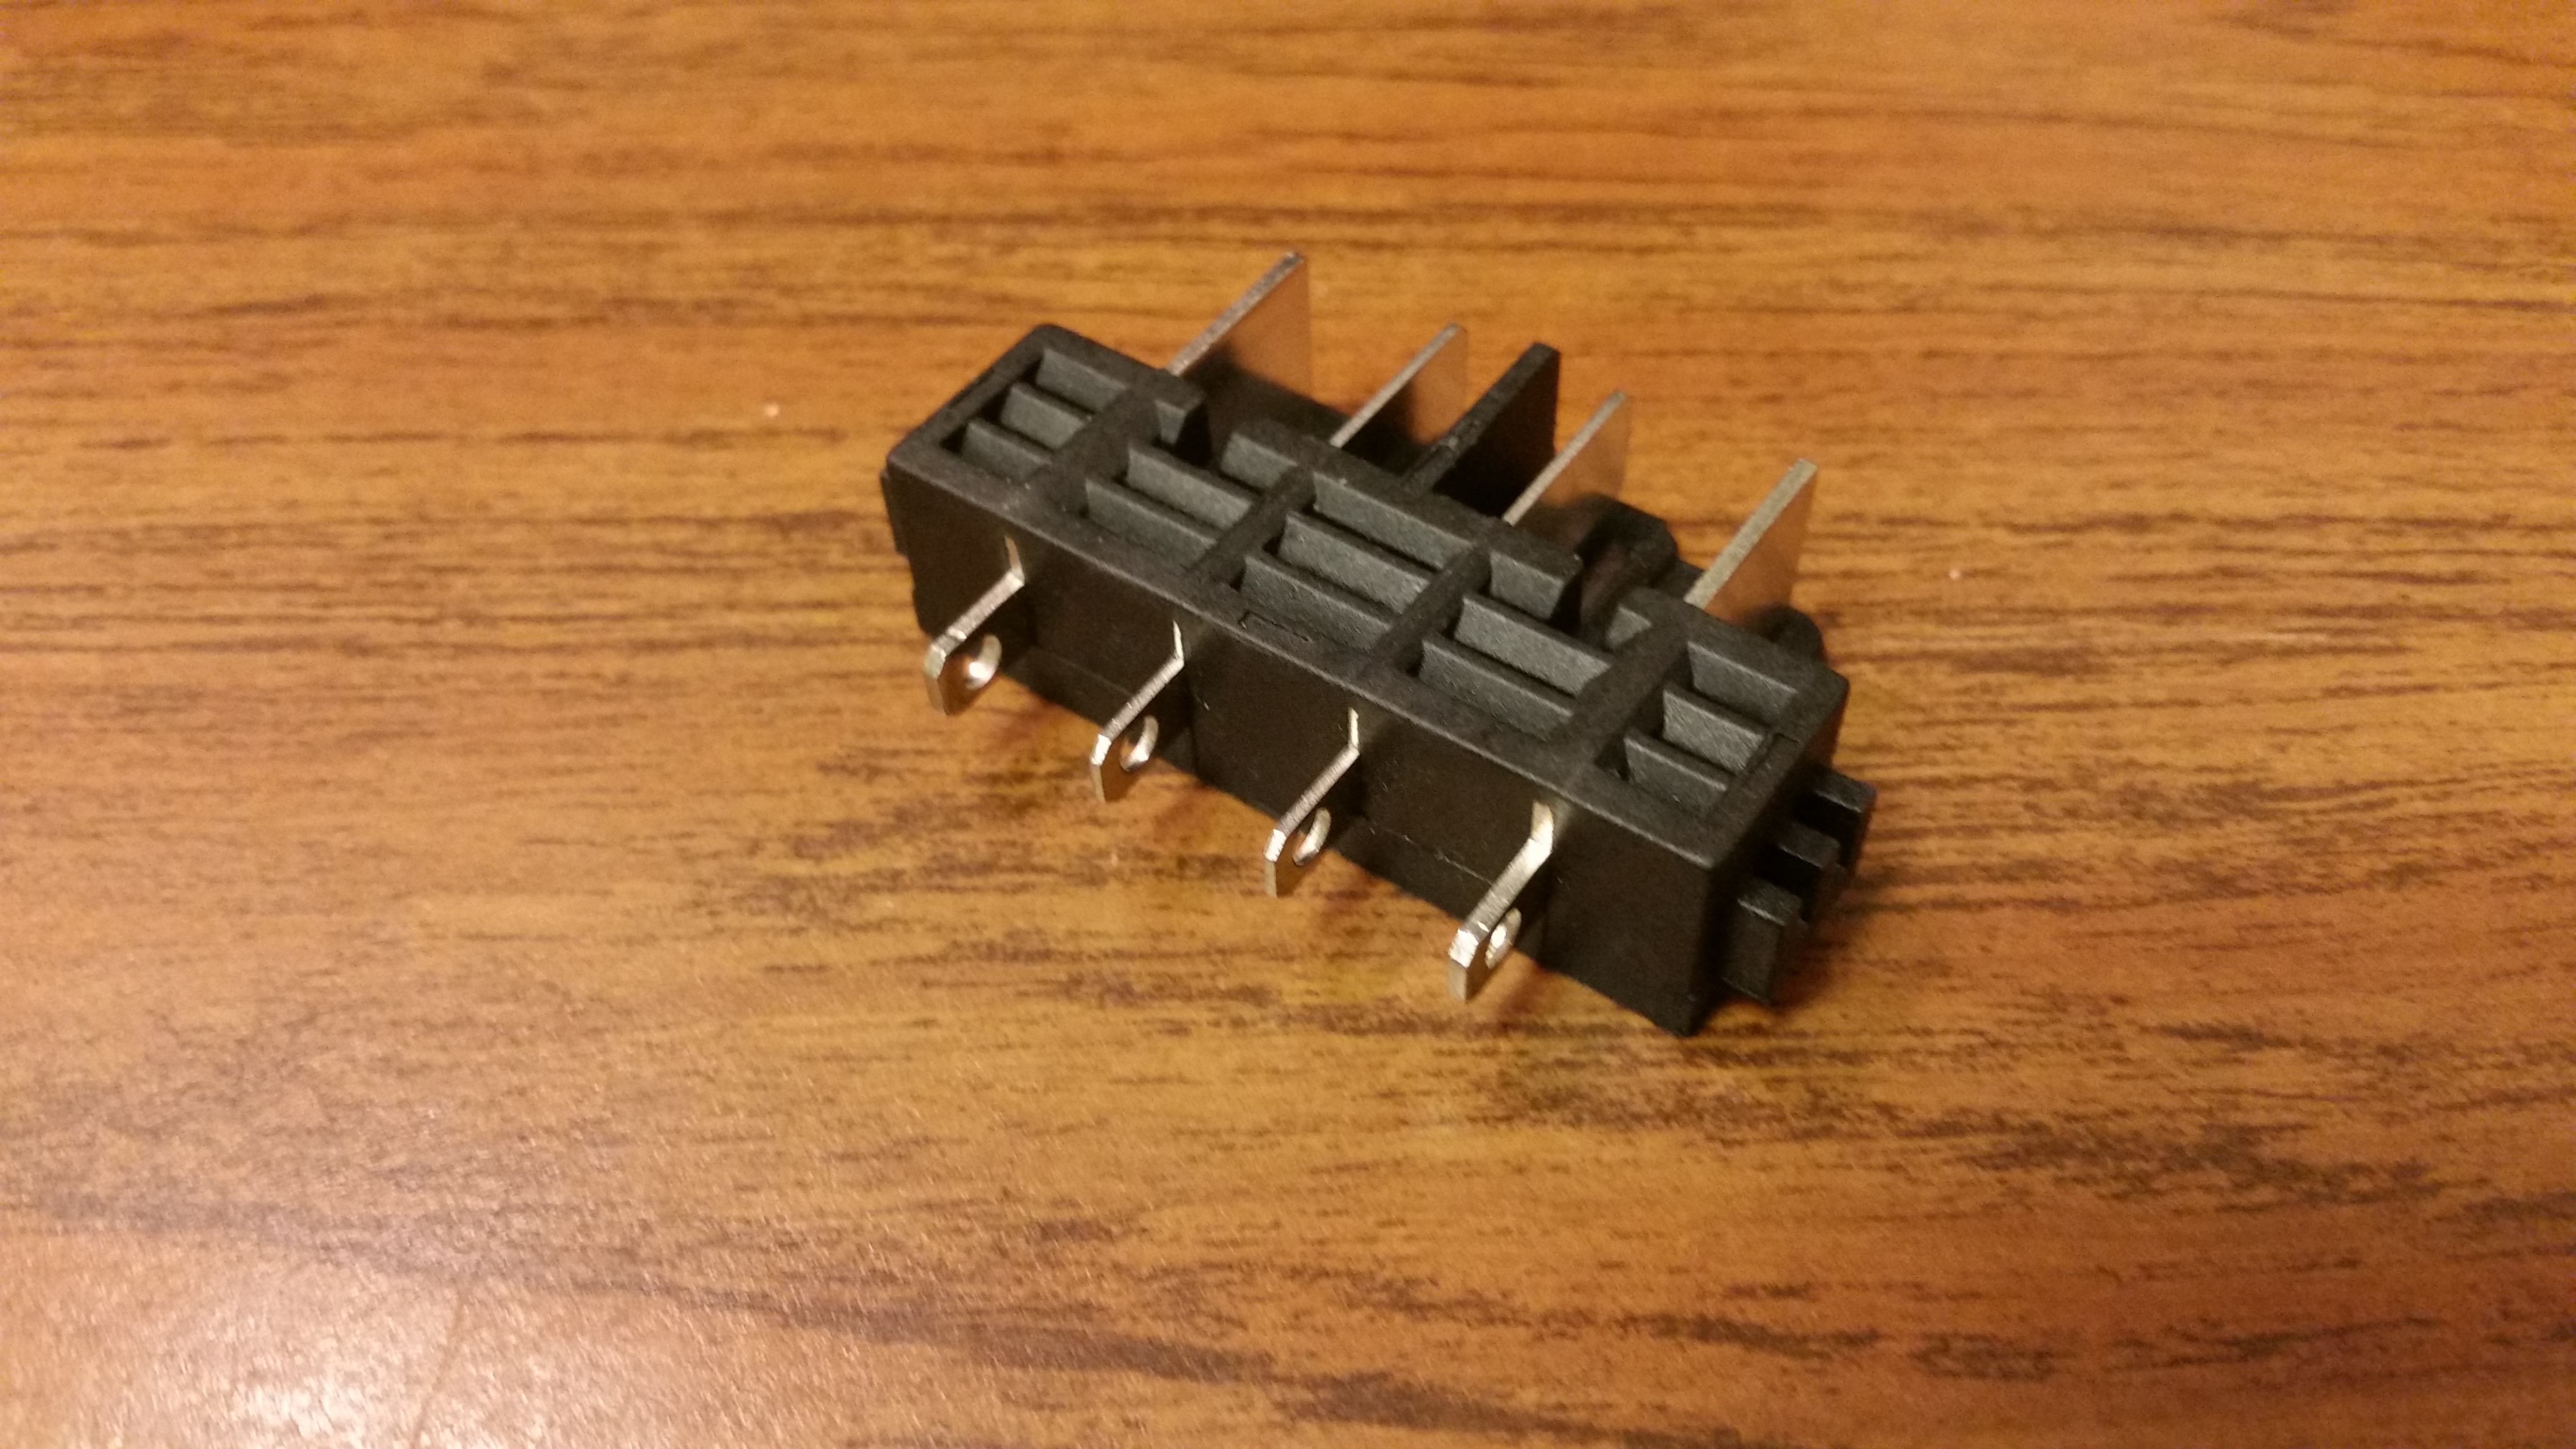
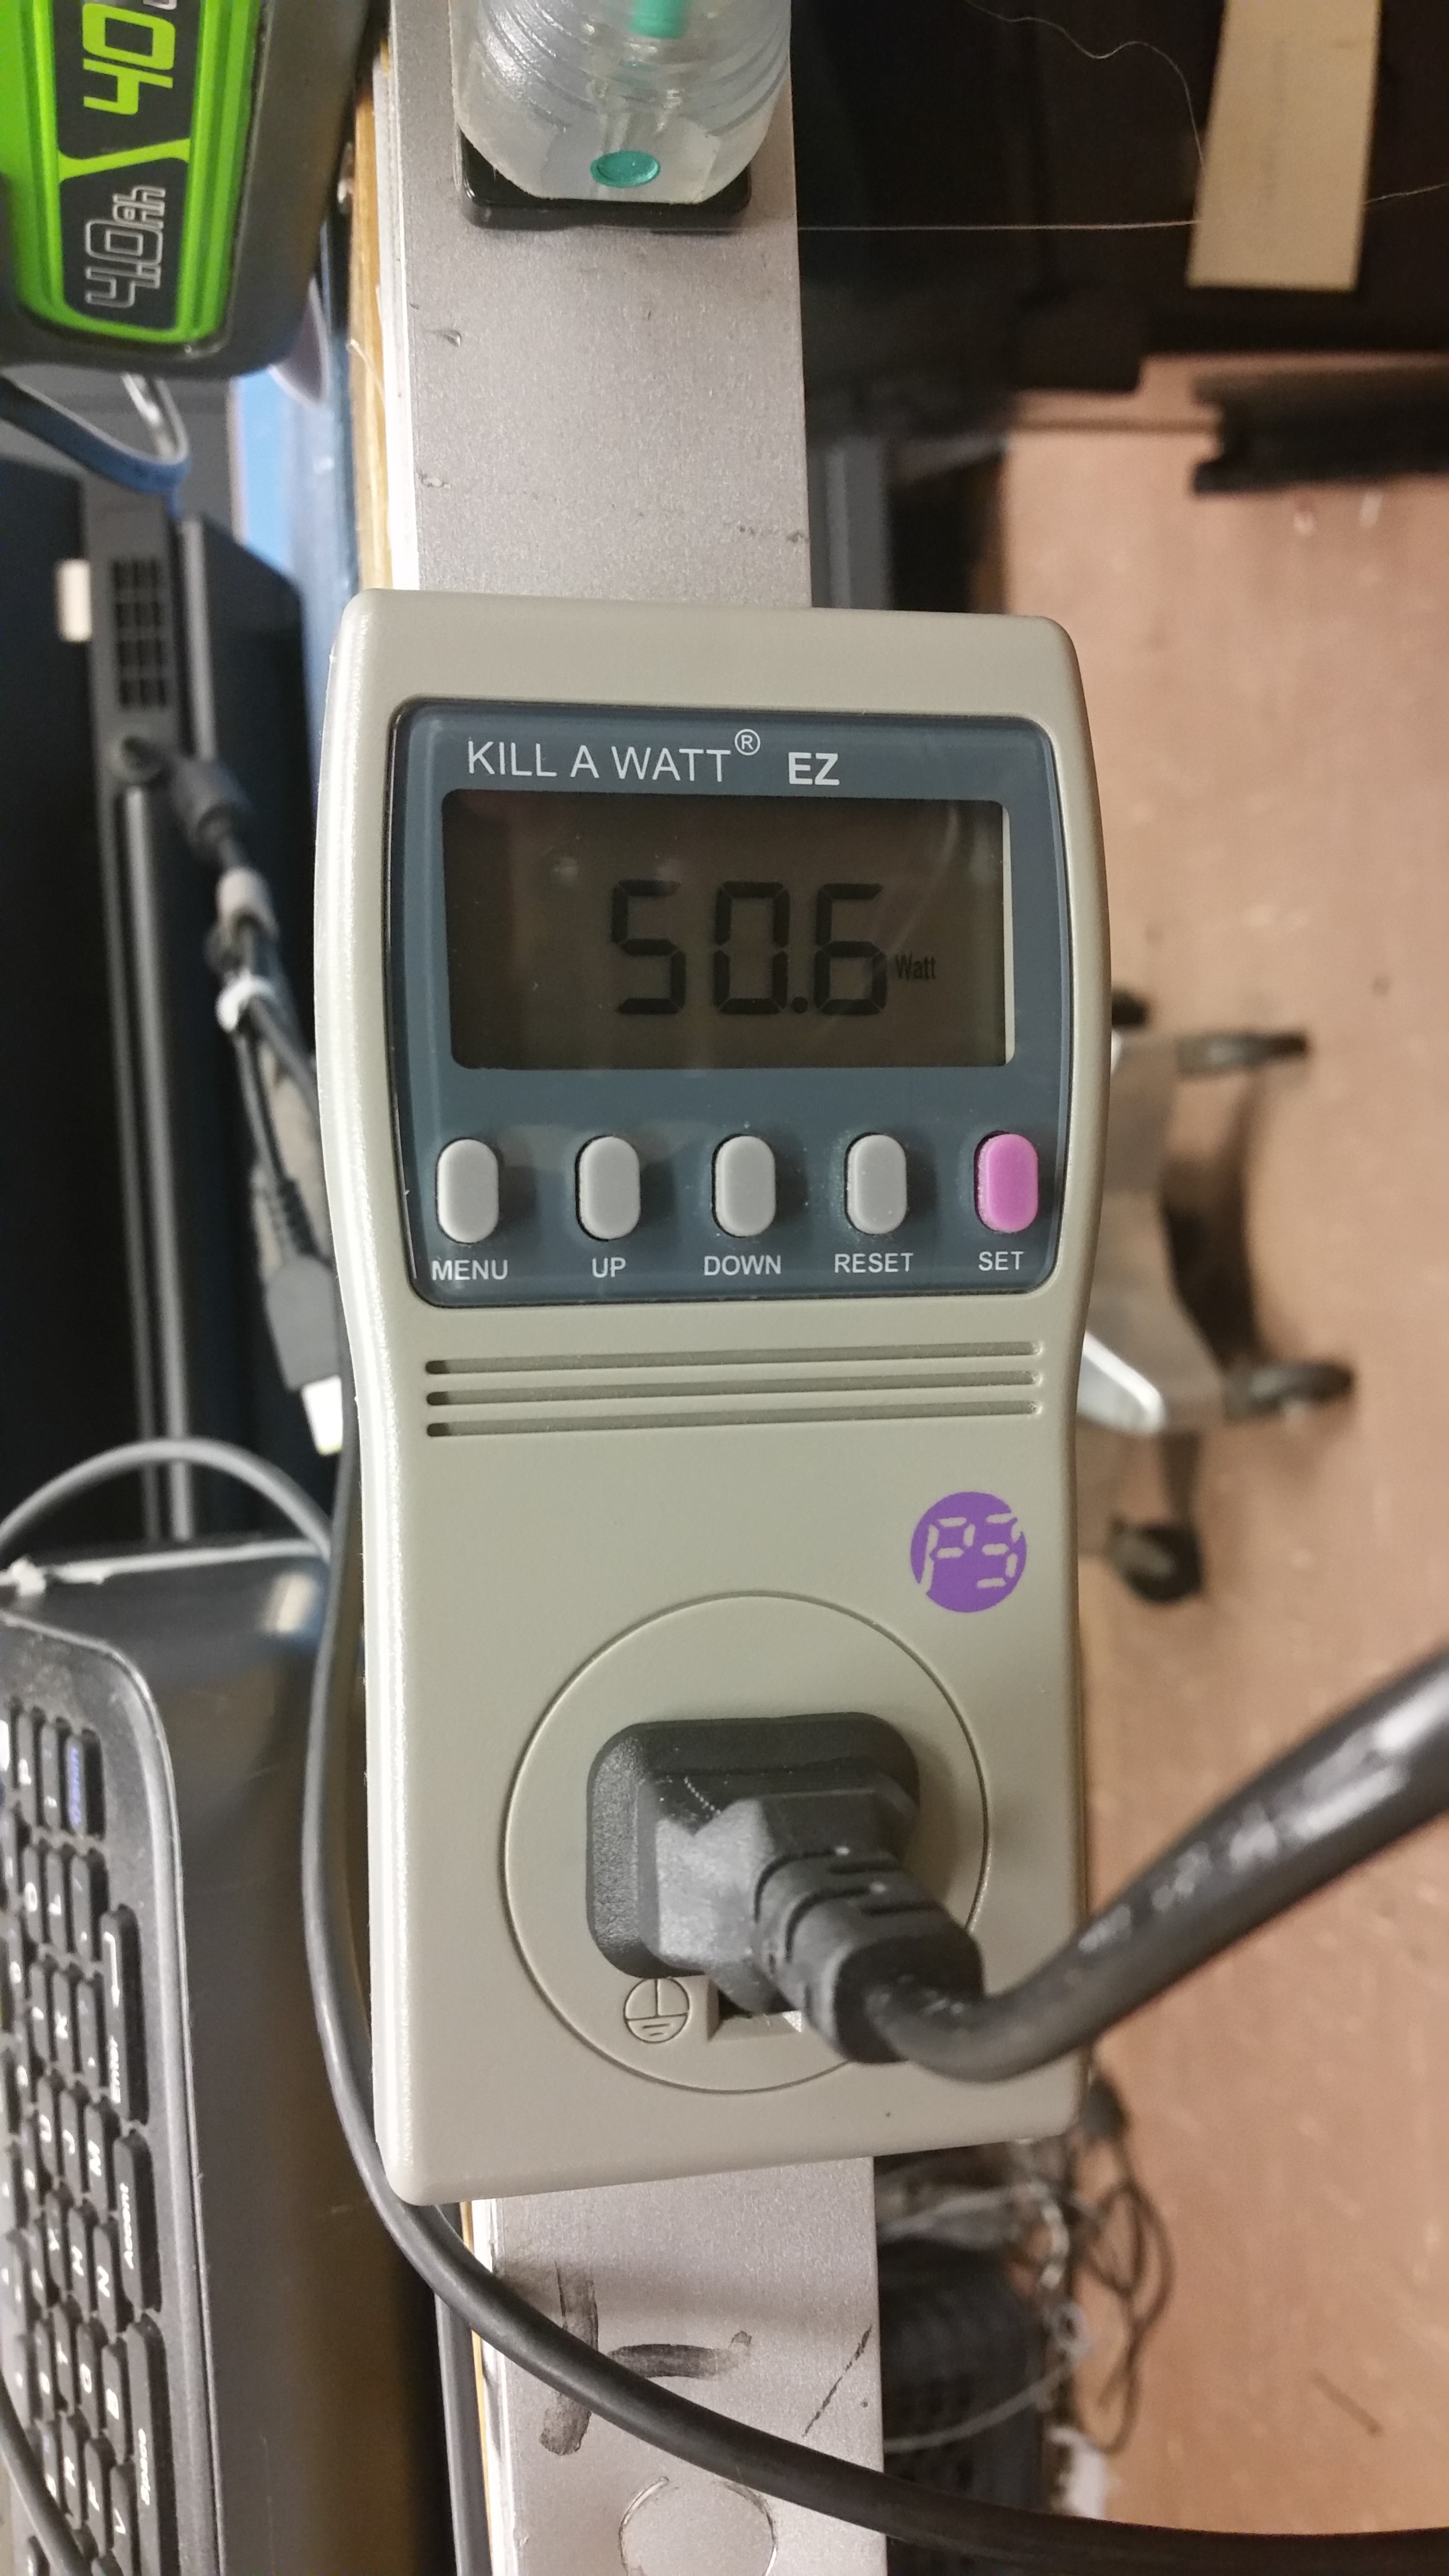
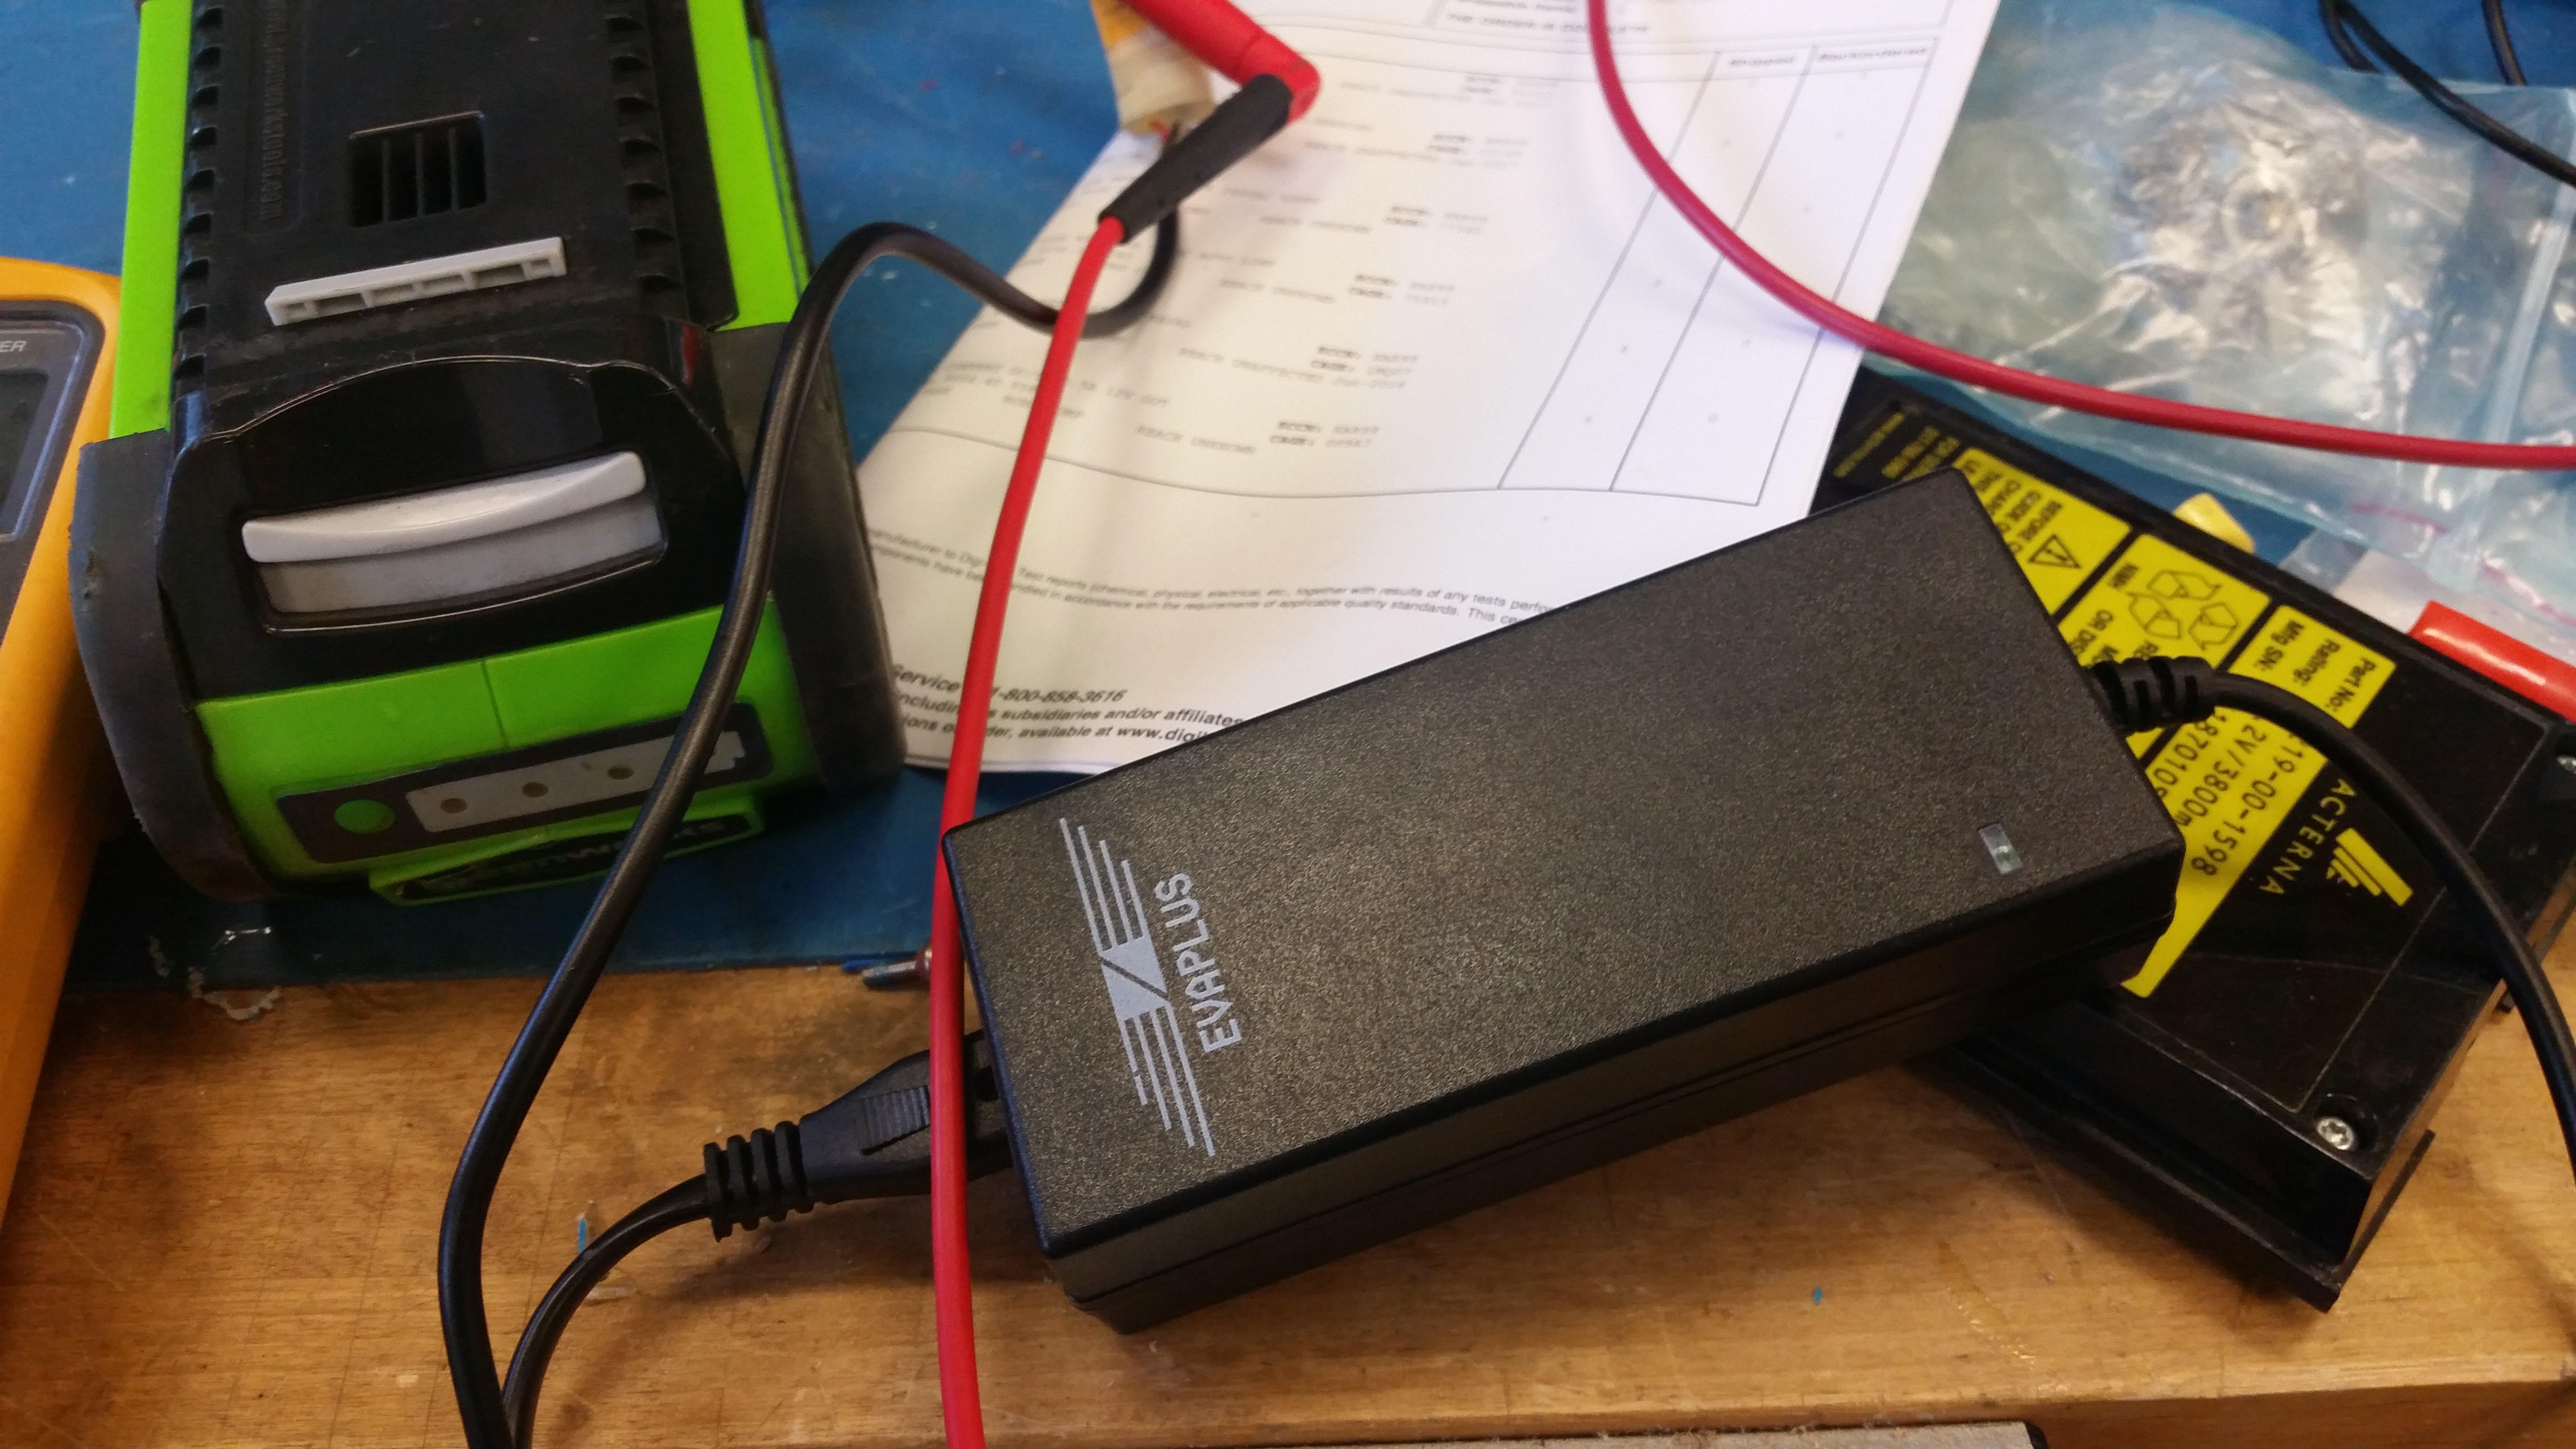
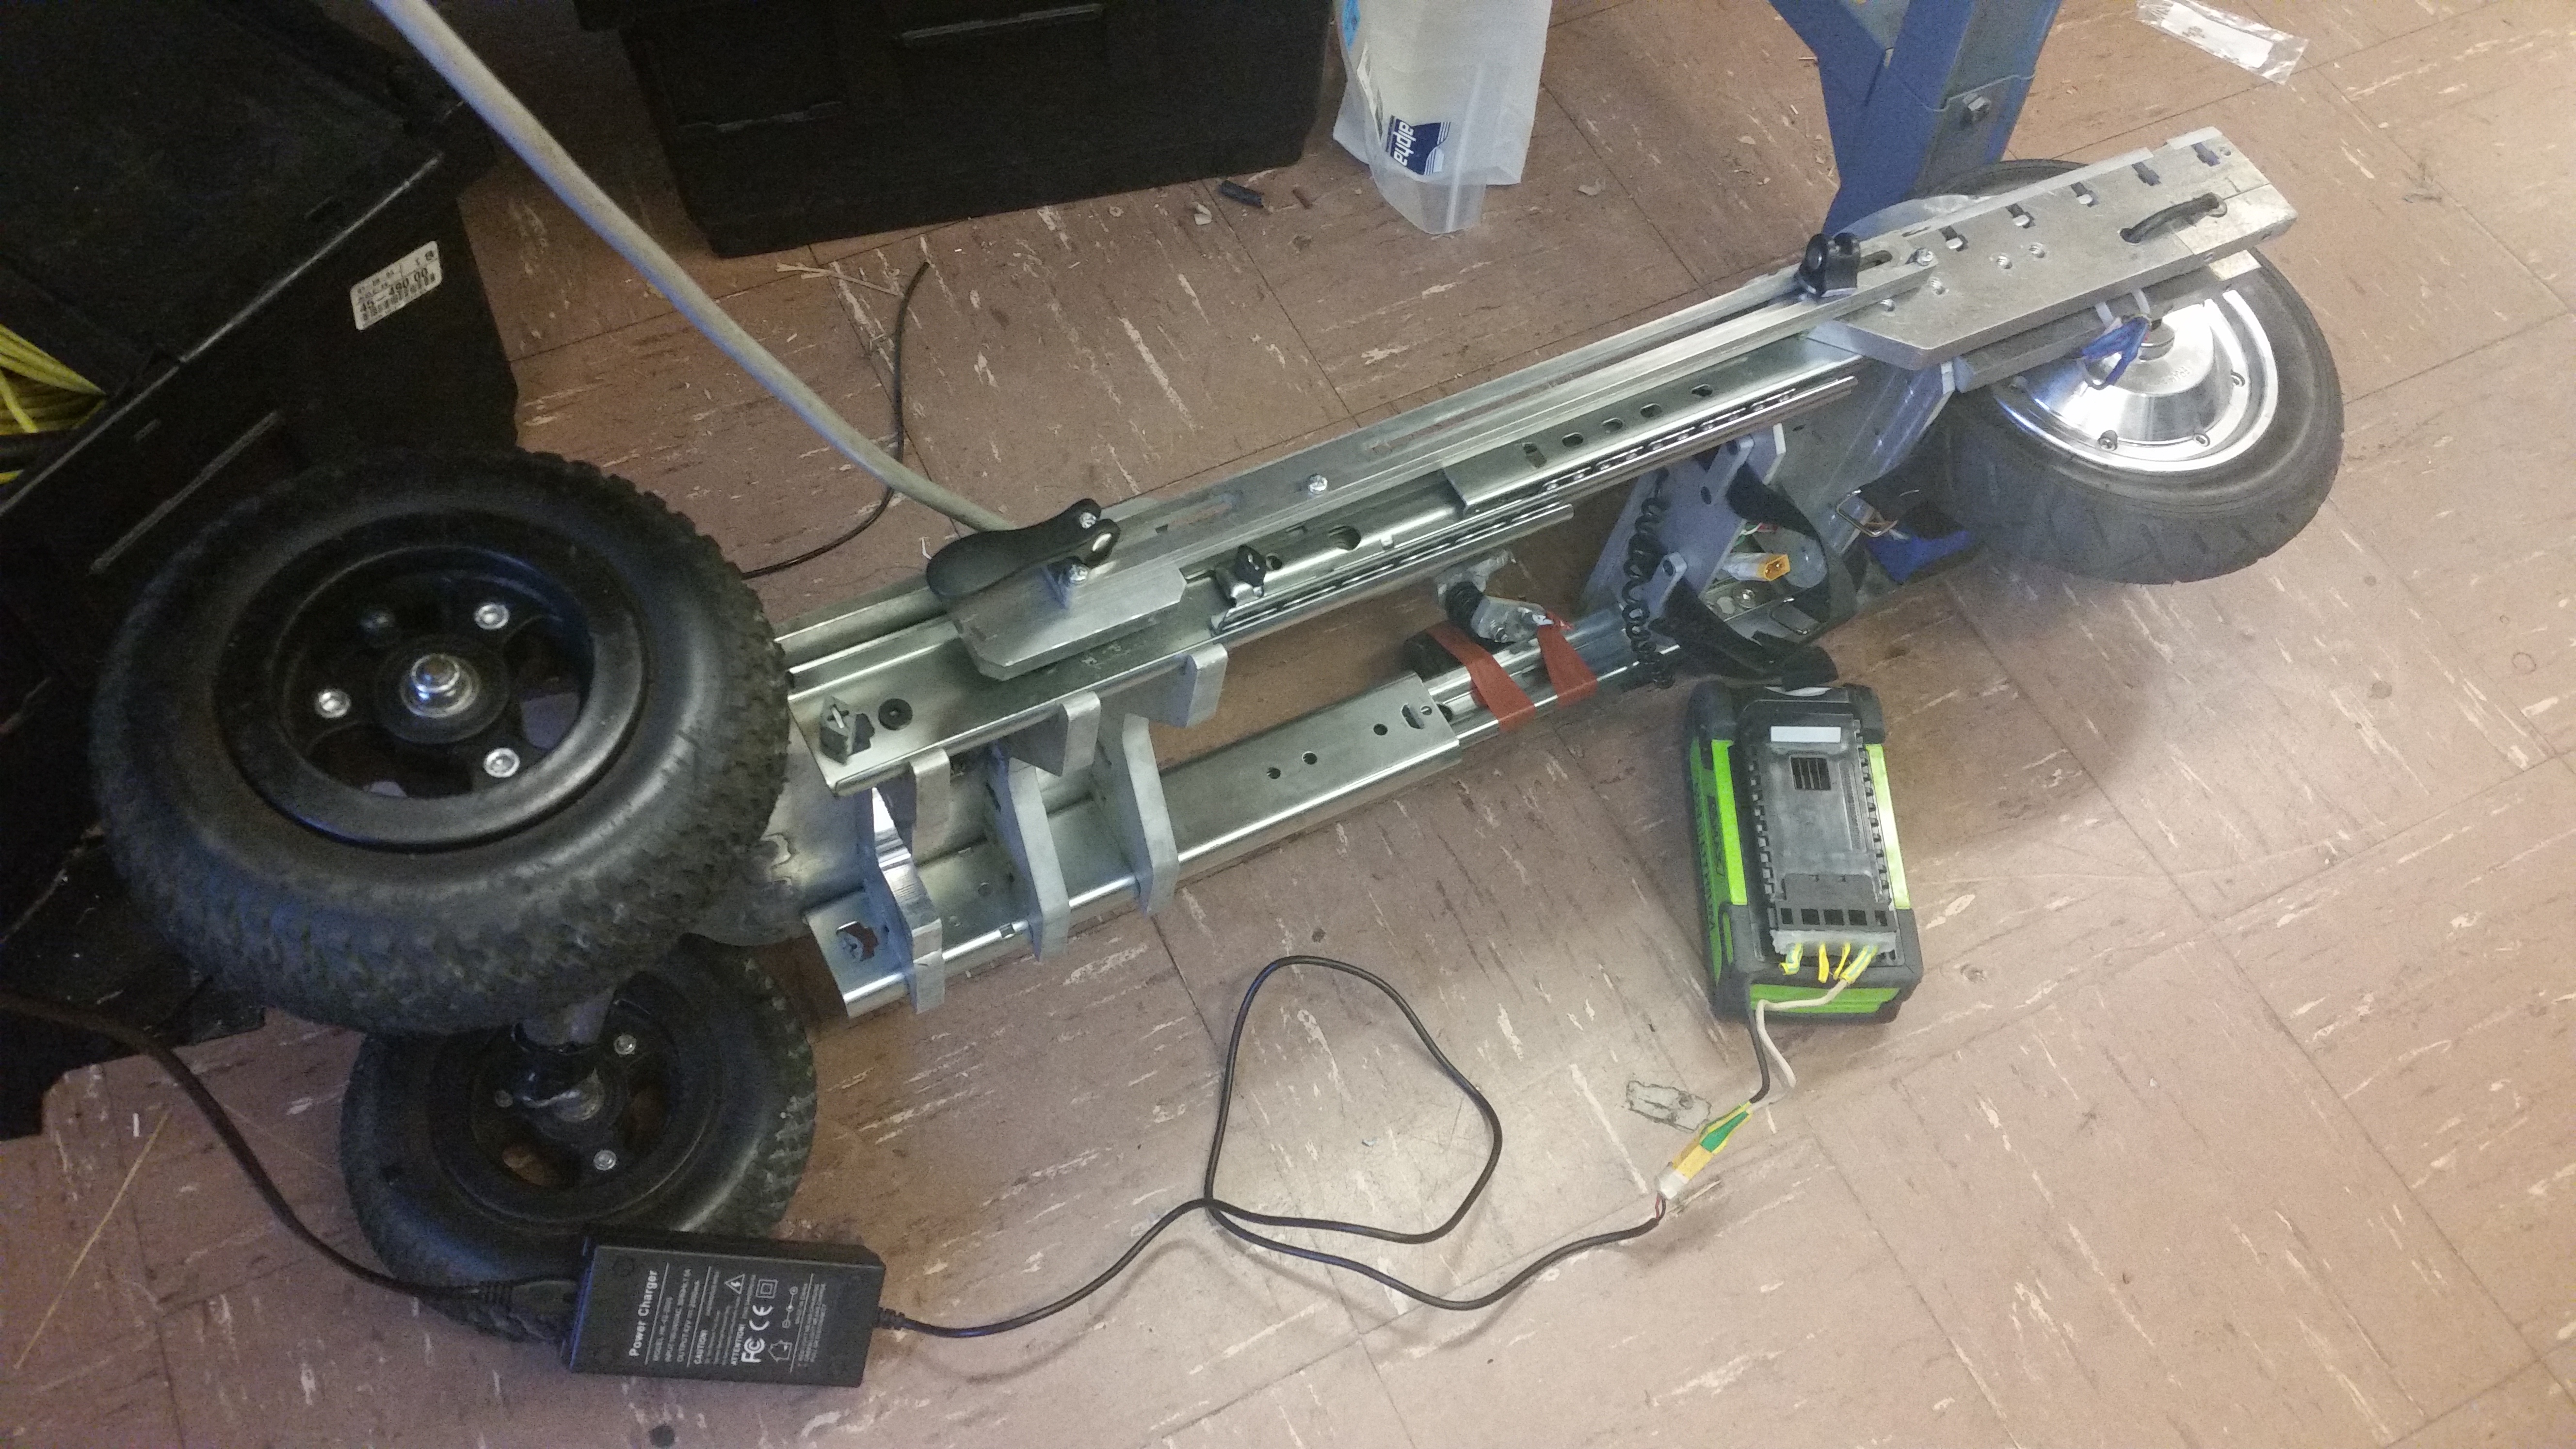
Mobile ChargerFor recharging at 110/220 vac, I initially opted for something small, as i knew I would be backpack-constrained on this trip. So whats 10 series cells, and lithium? those ridiculous seg-things. -___- I purchased a hoverboard charger, [link] which is really a 42V CC-CV supply in 'tiny laptop brick' form factor. This one in particular claims 2A at 42V. Here was the first thing i should have picked up on, thats a 1 hr recharge for the smaller battery pack, which is a bit slow, given that these cells are rated for 3C charge (~20 min recharge). On the larger battery pack this would be a 2 hr recharge, way longer than a 'im going to grab some coffee' and stealthly recharge. Back in the lab I tested the supply on a discharged pack, it pulled 50W with a power factor of 0.5. Some quality stuff here. I think next up is a higher current rated meanwell led supply for future travels. 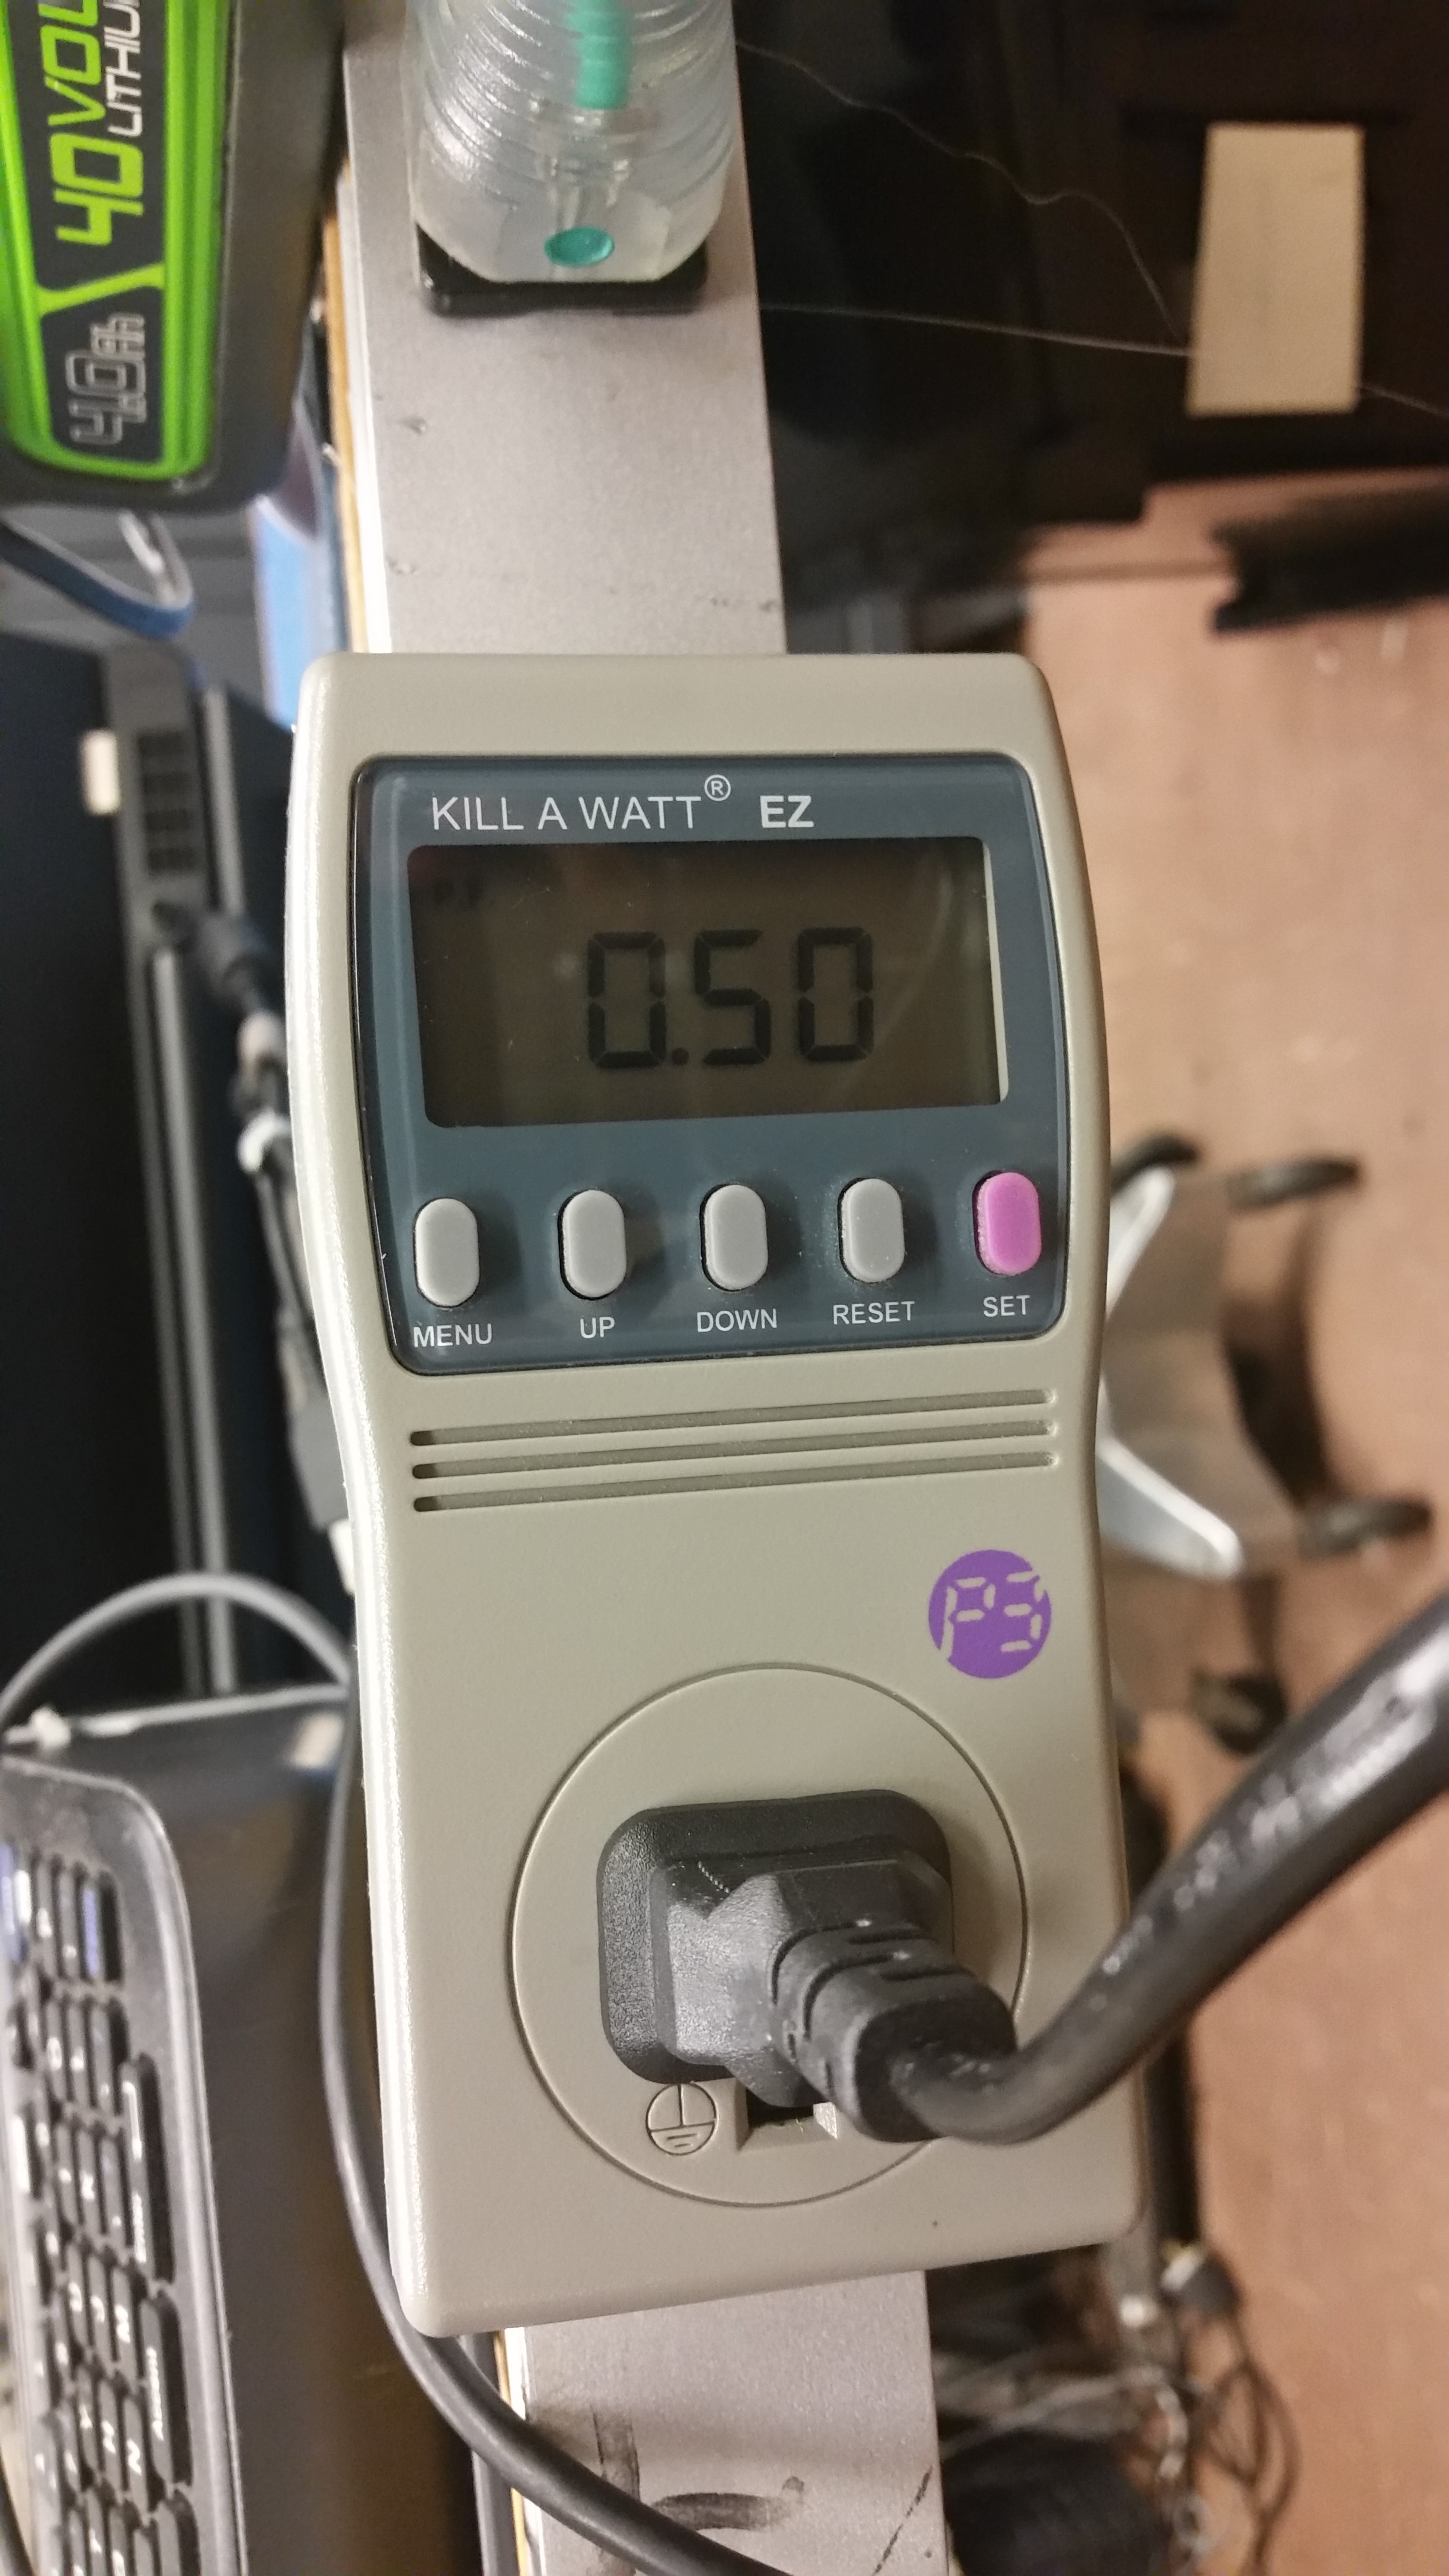
Looking a bit more in-depthThe quick-charger I had brought with me, which clamored a 2A charge rate actually came in at 1.4A charging, which was quite anemic. This was at a lower state of charge to ensure it wasnt measured as the pack approached 90% SOC. This explained why the charge time was longer than i had anticipated. HARUMPH :/ 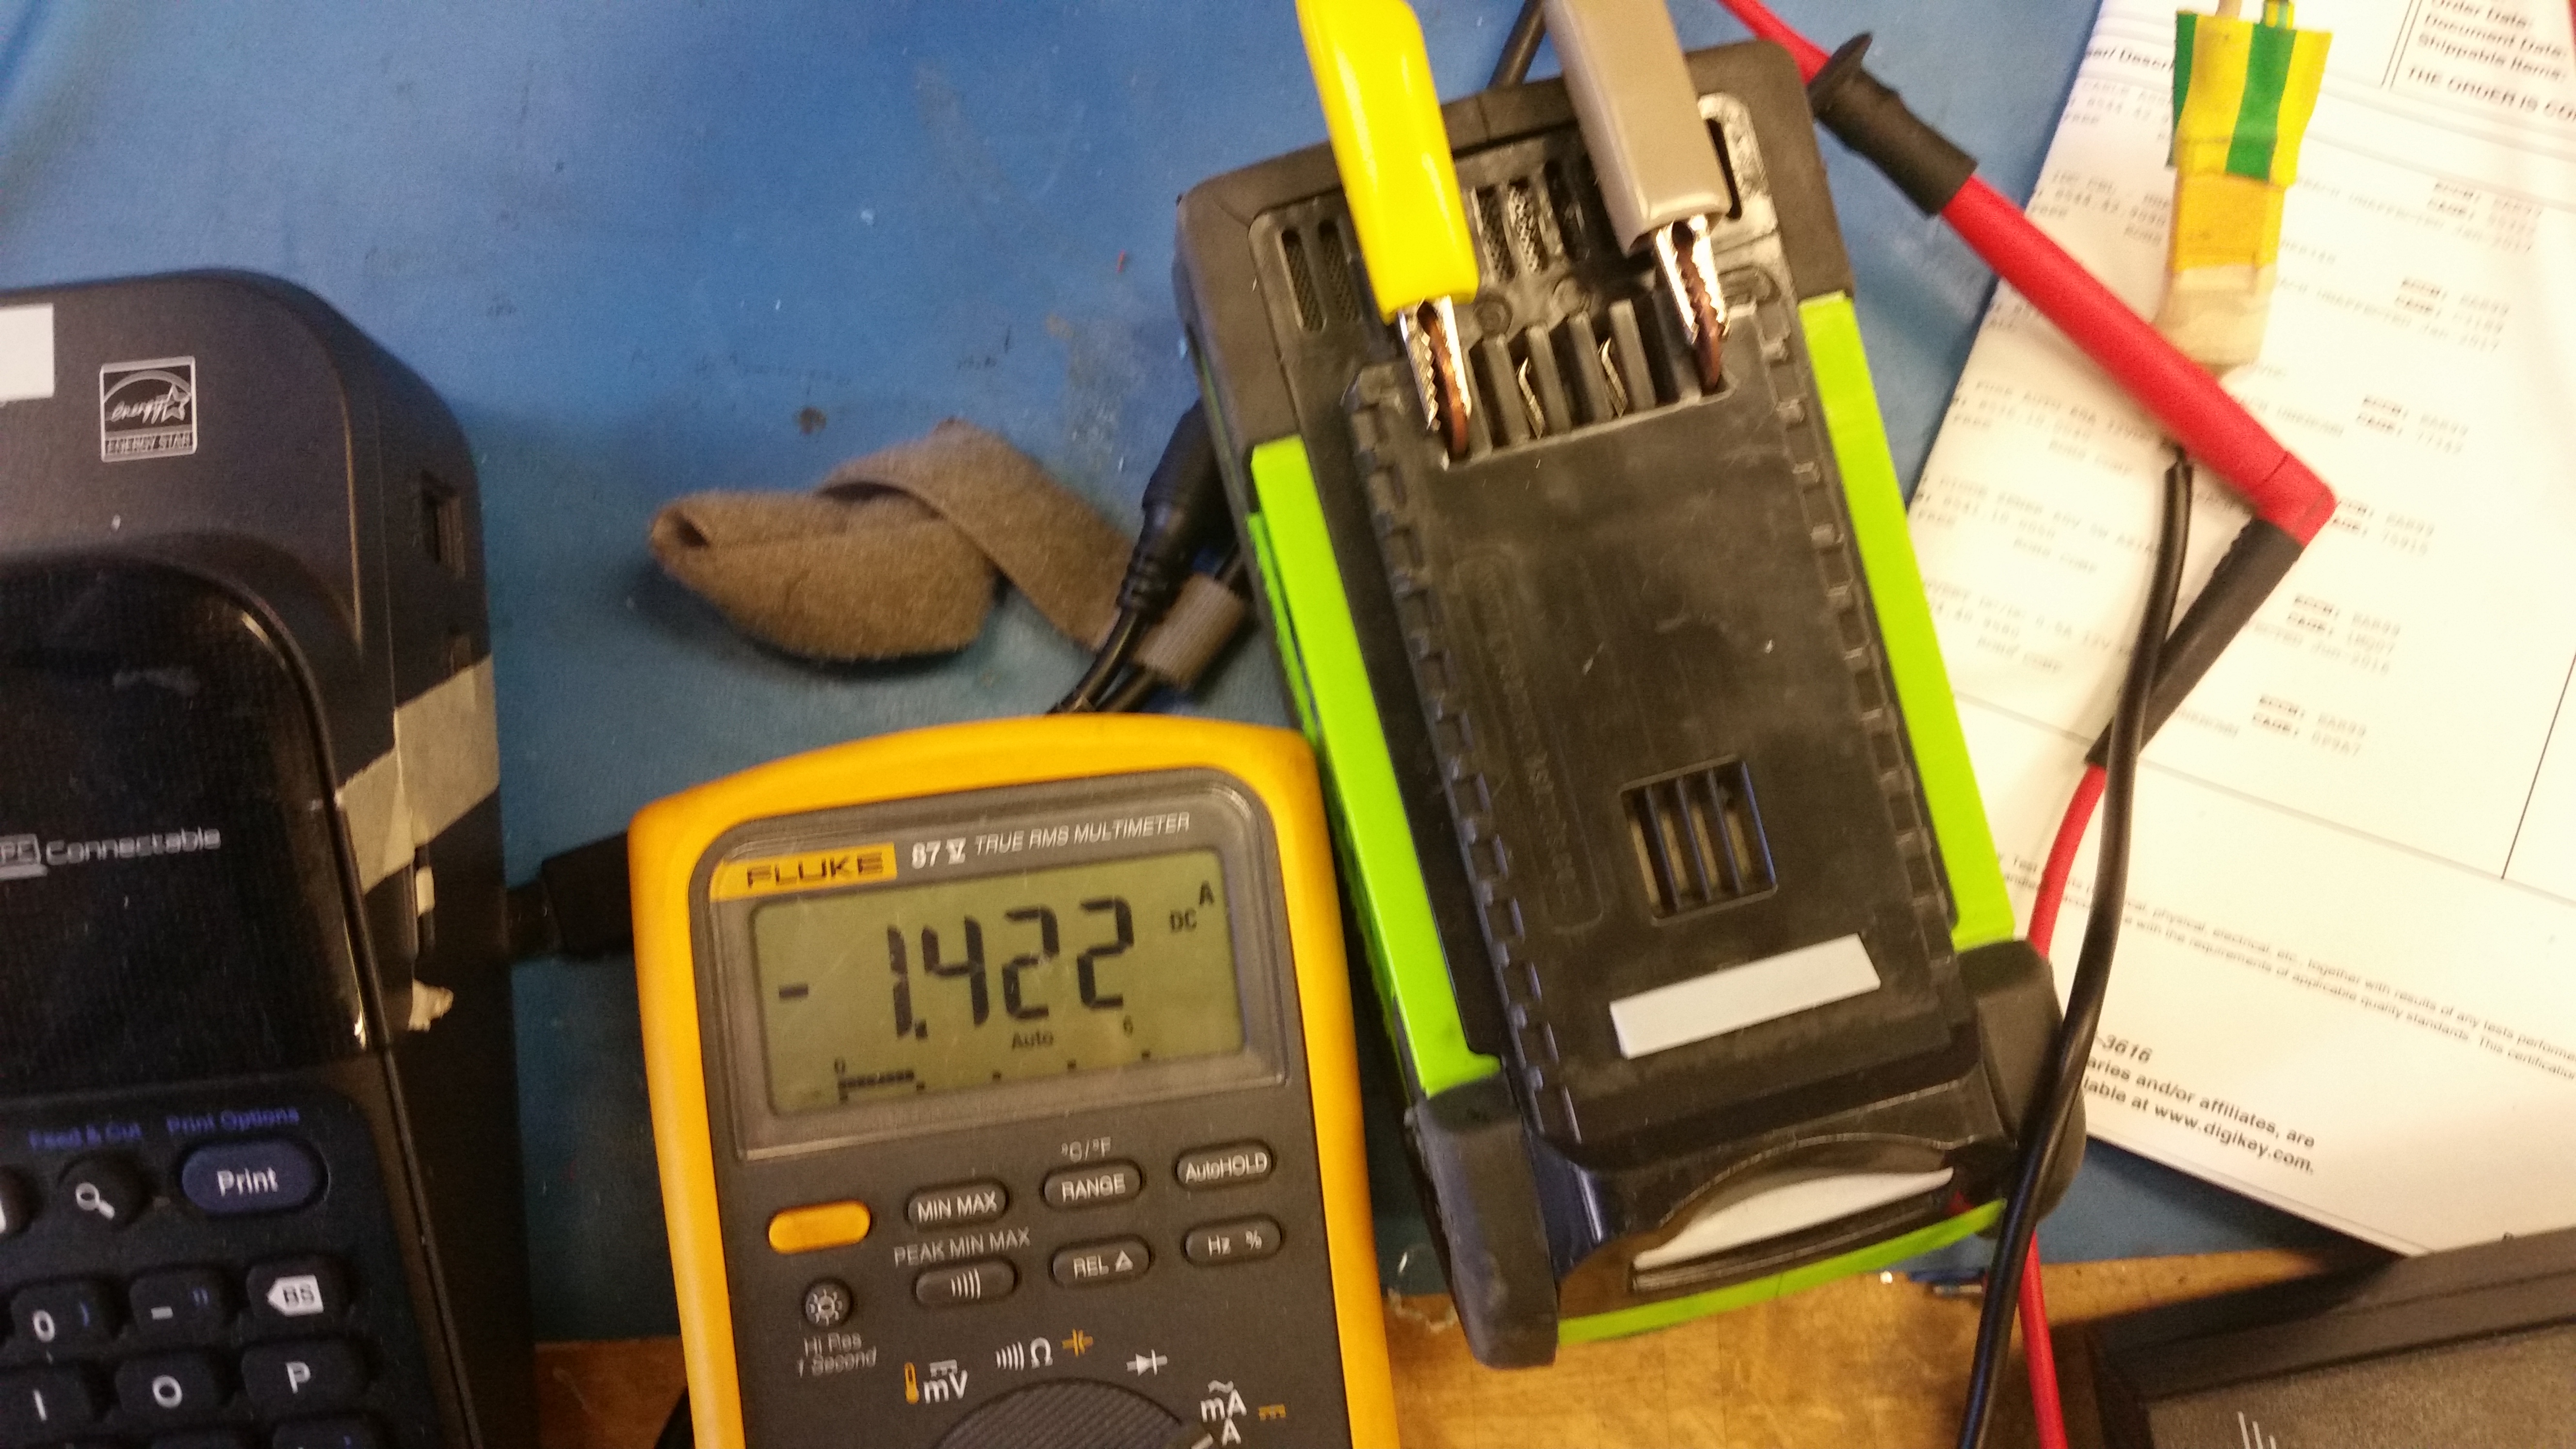
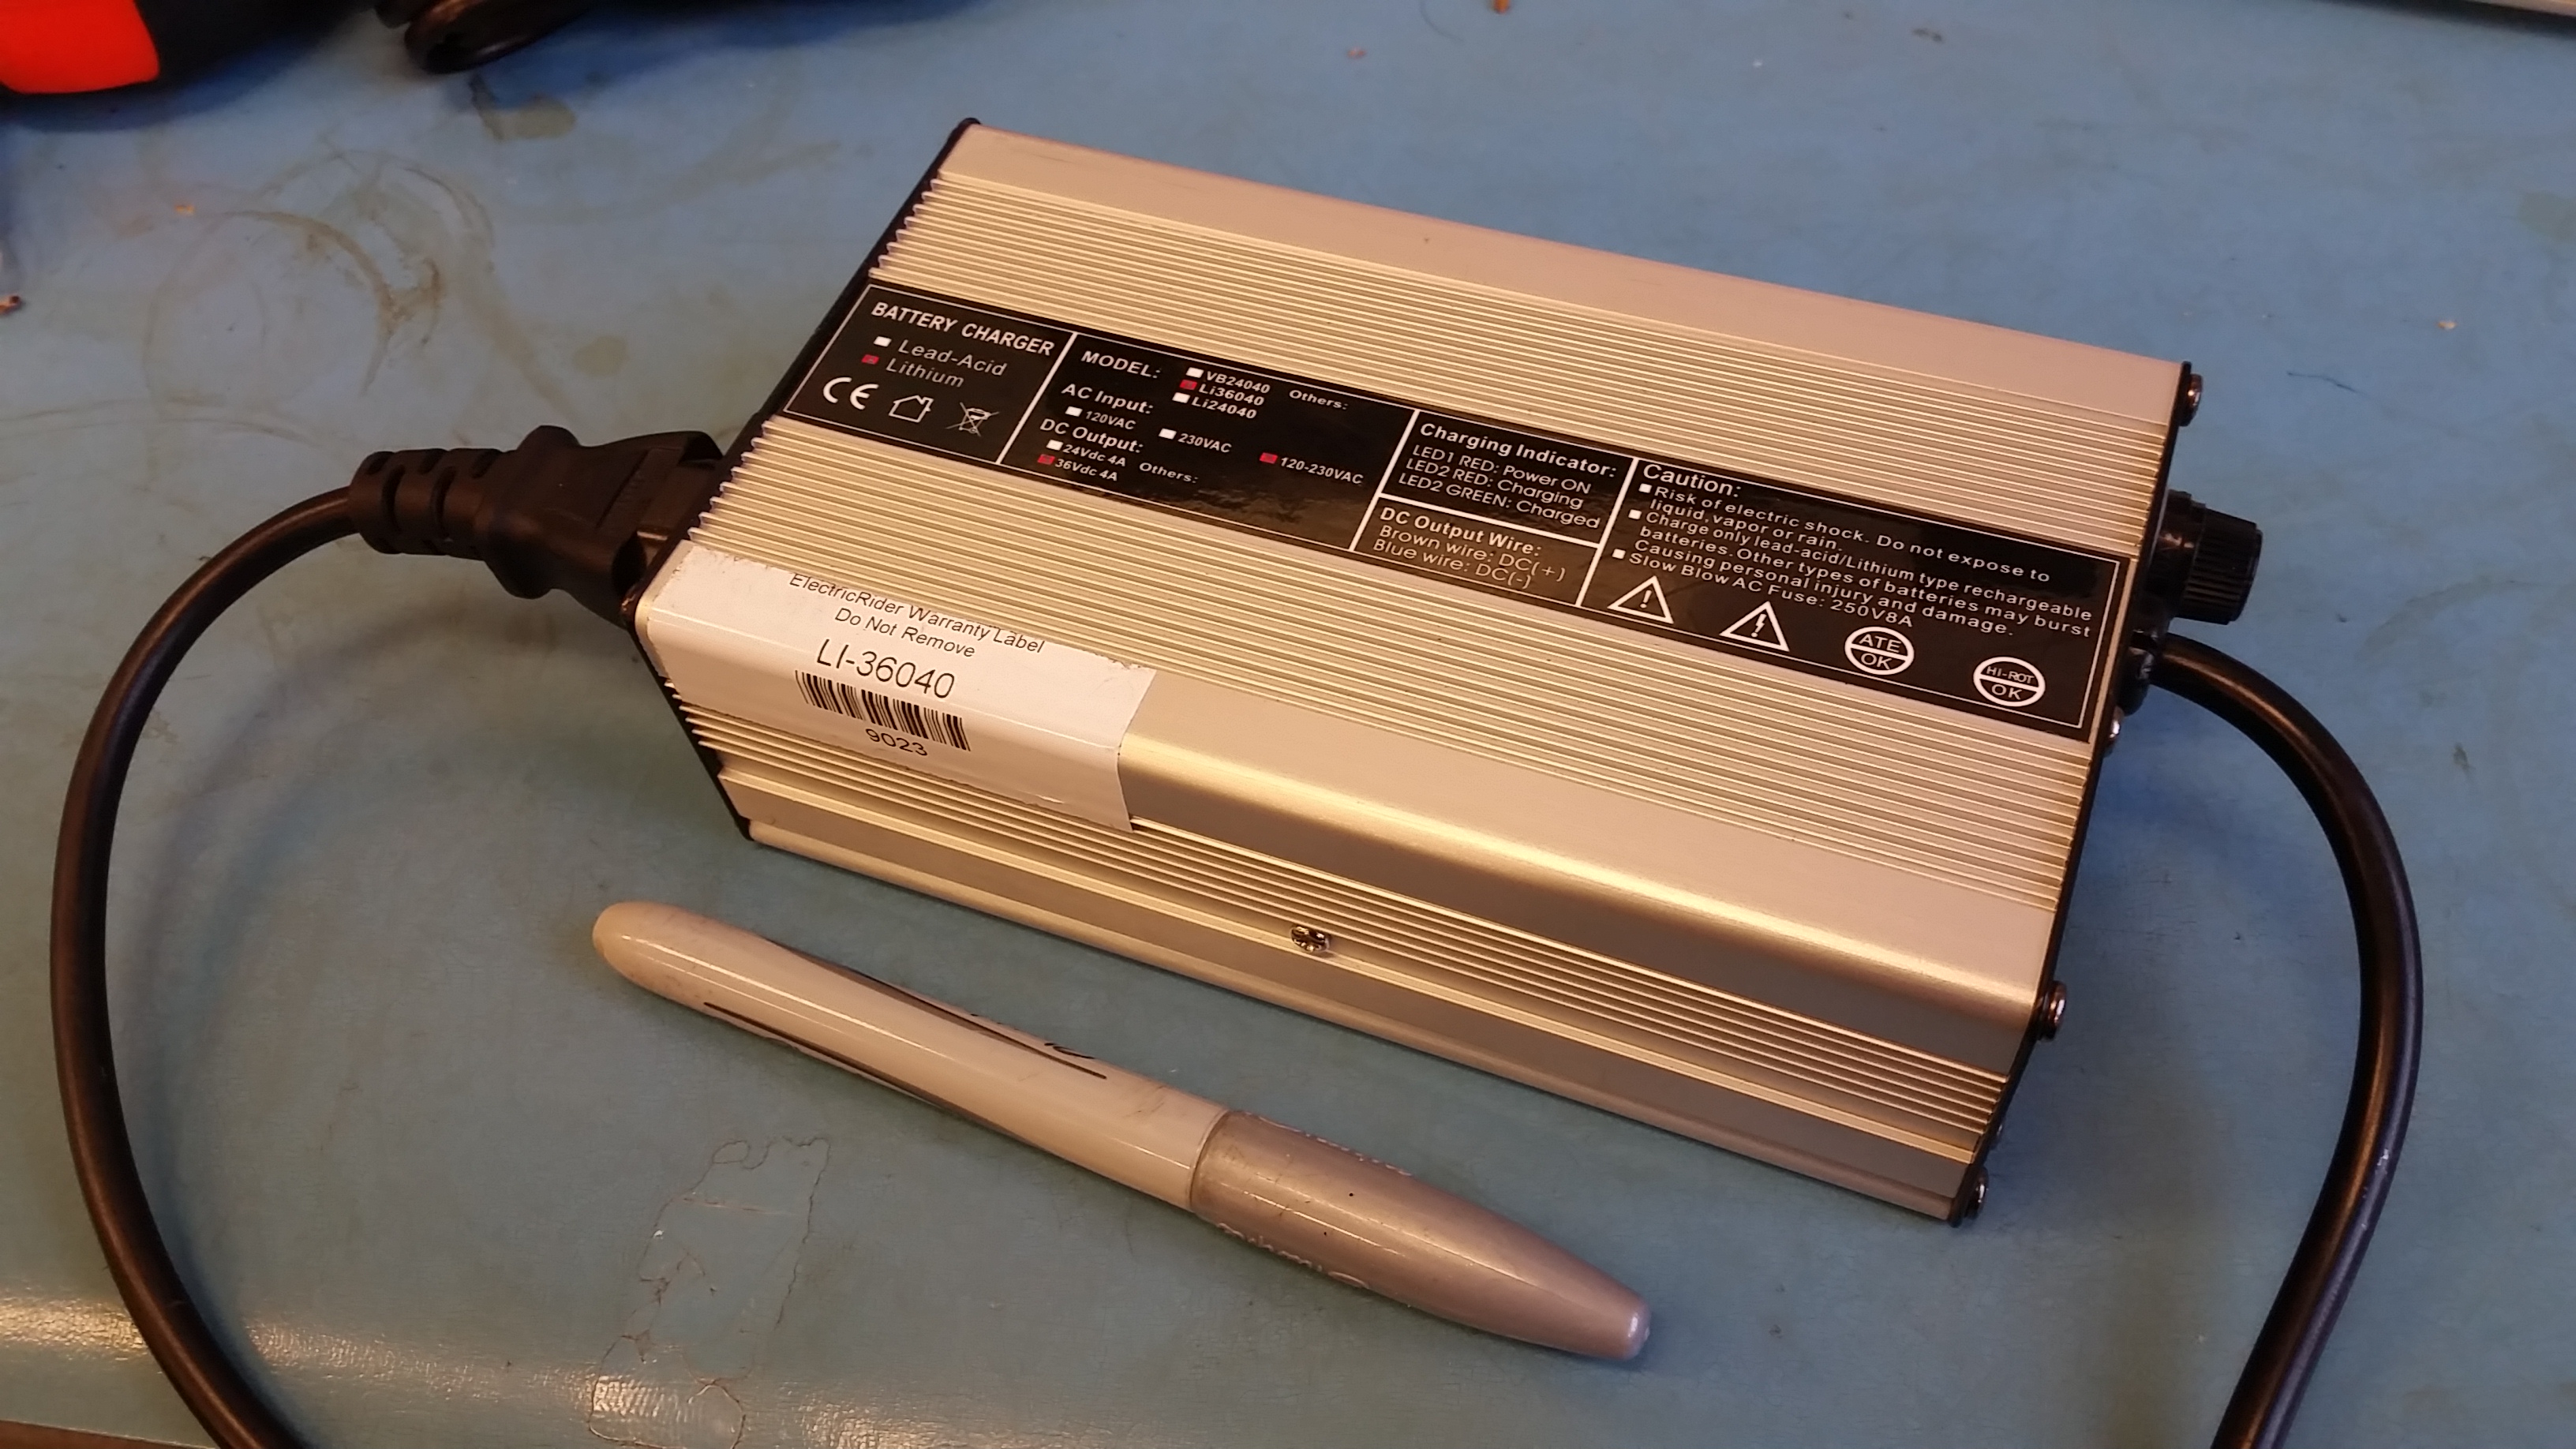
A bit better of a charging optionFor the sake of 'better backpack charging' I found a 4A 10S lithium charger that has a way better build quality. With a series ammeter, it actually charges at 4A, so this is a reasonable step-up. This still equates to a 1C charge rate, or a 60 minute charge. The pack should be able to do a 2C charge reasonably, but an 8A CC-CV charger is quite large, so I will probably stick with this for the time being. It also appears to be able to handle 110 or 220 mains, which, is useful for overseas adventures. 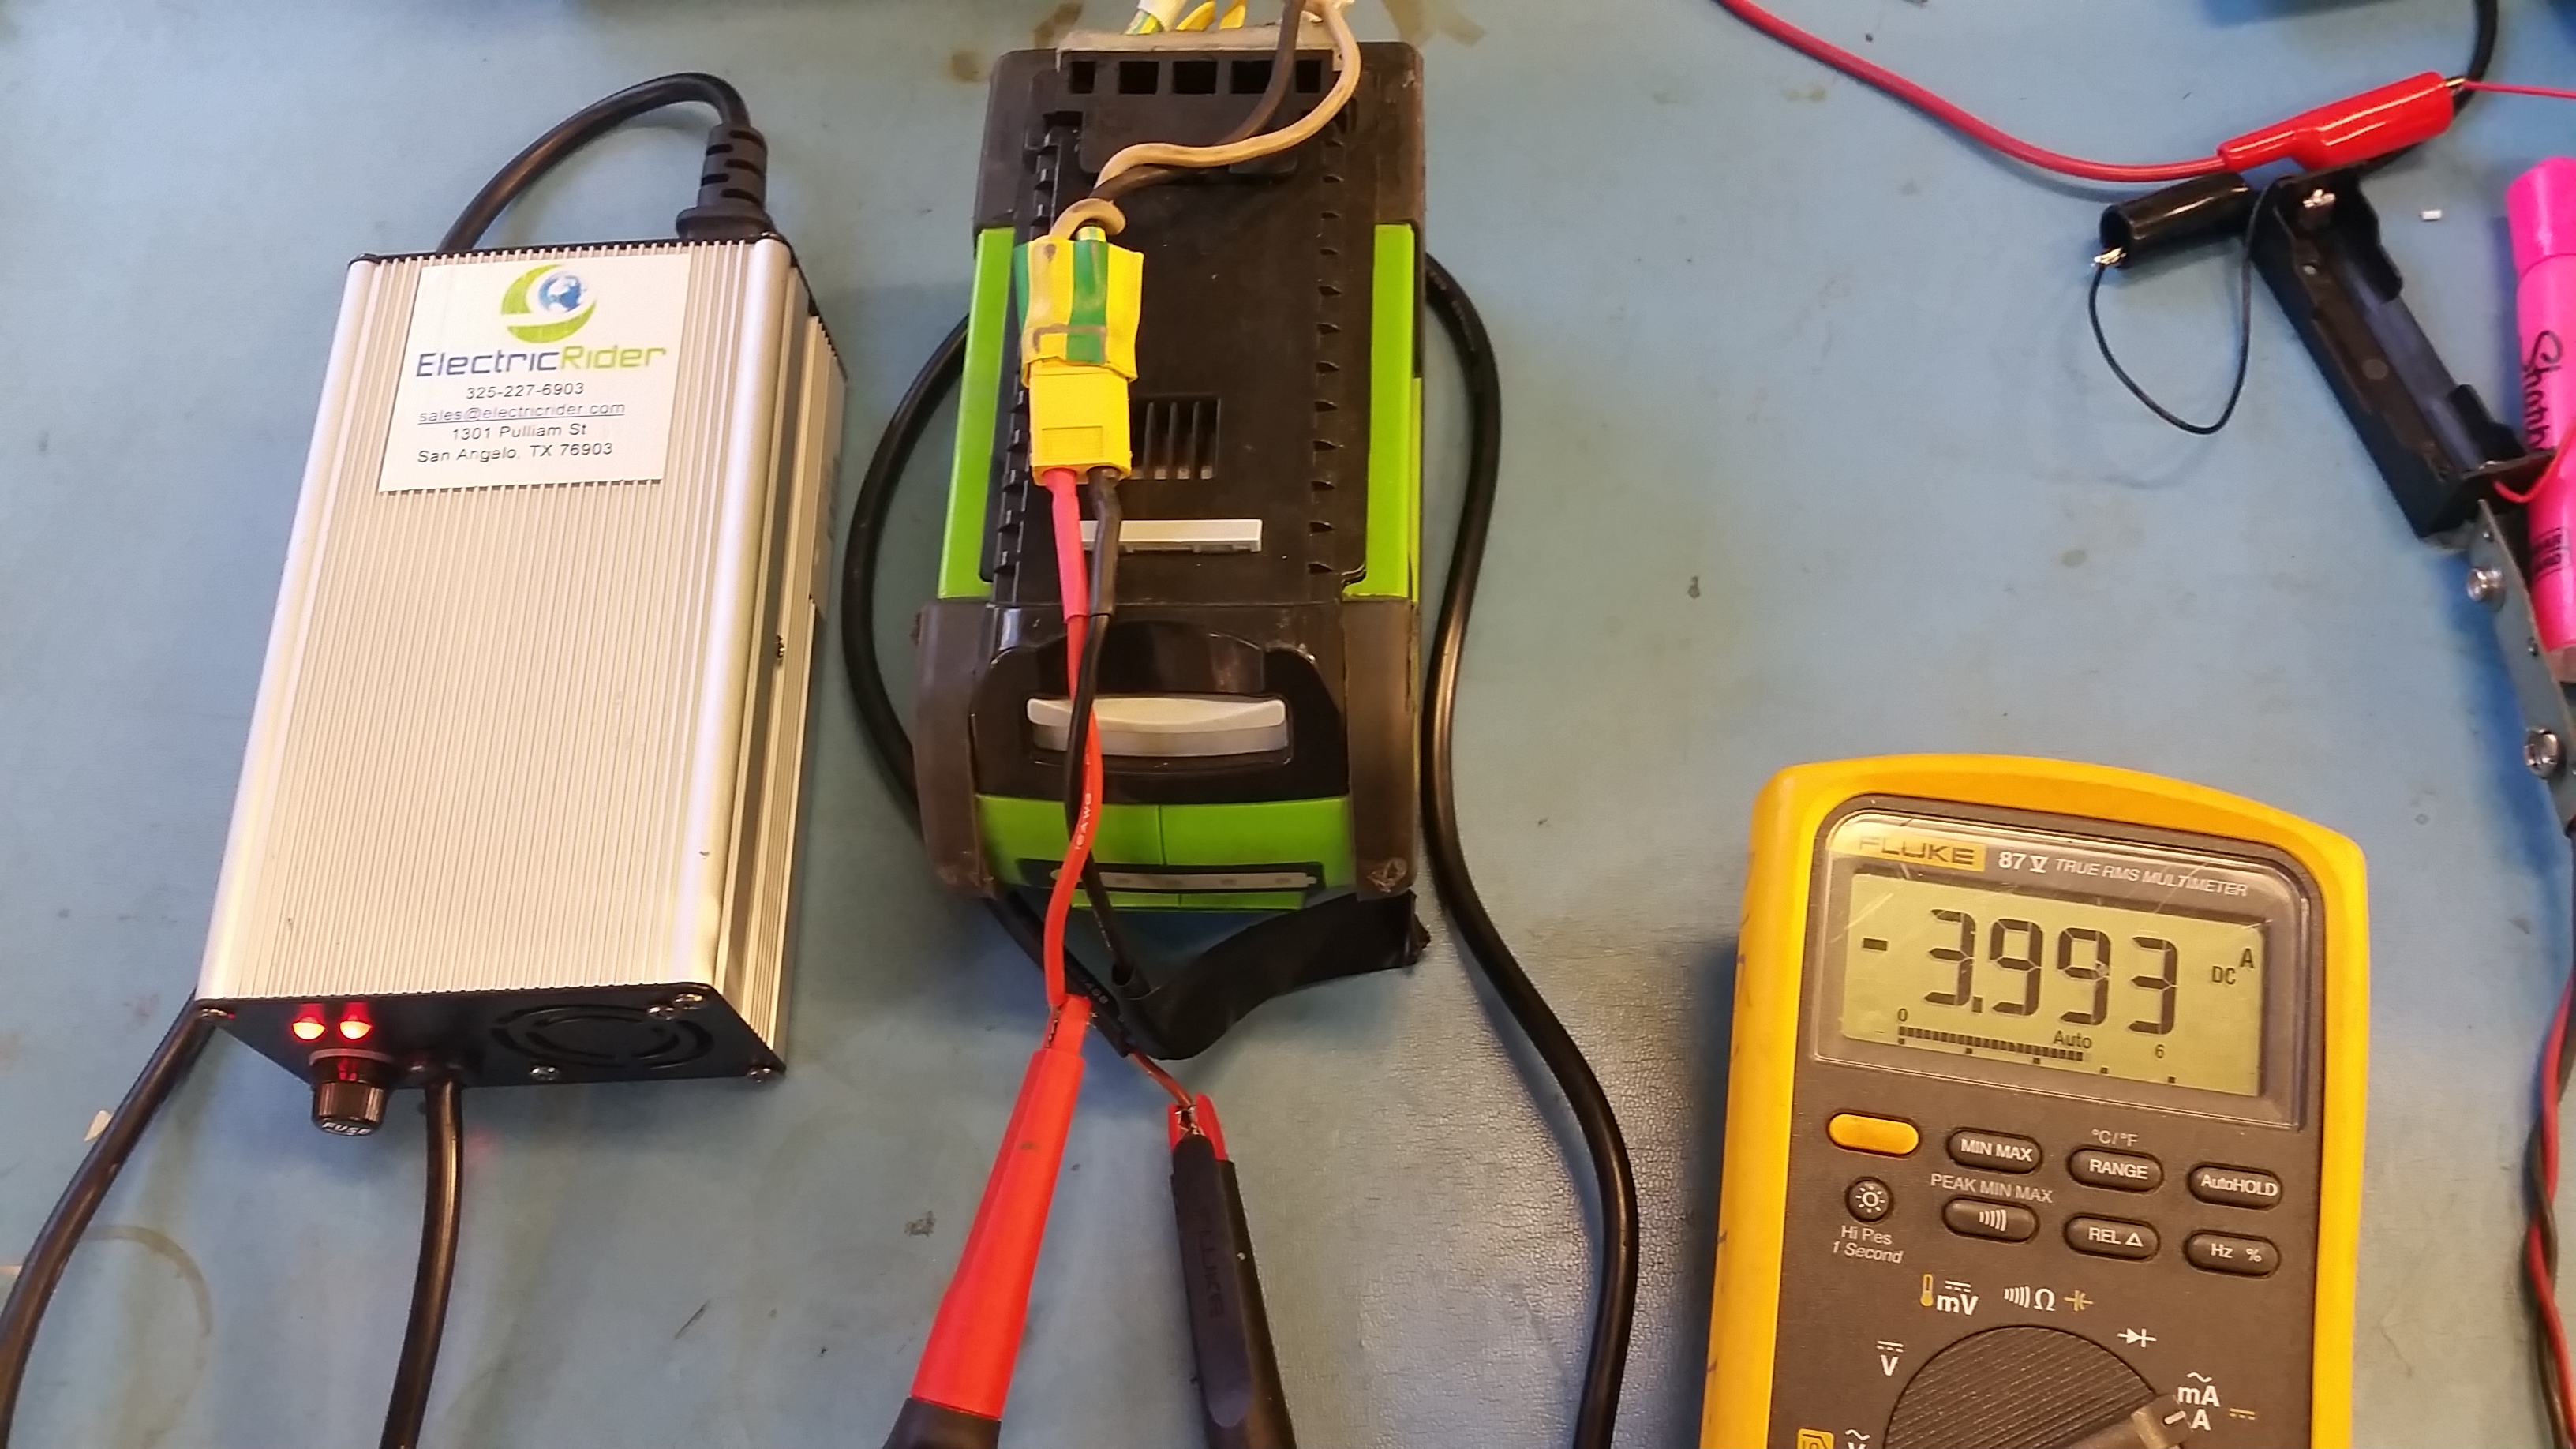
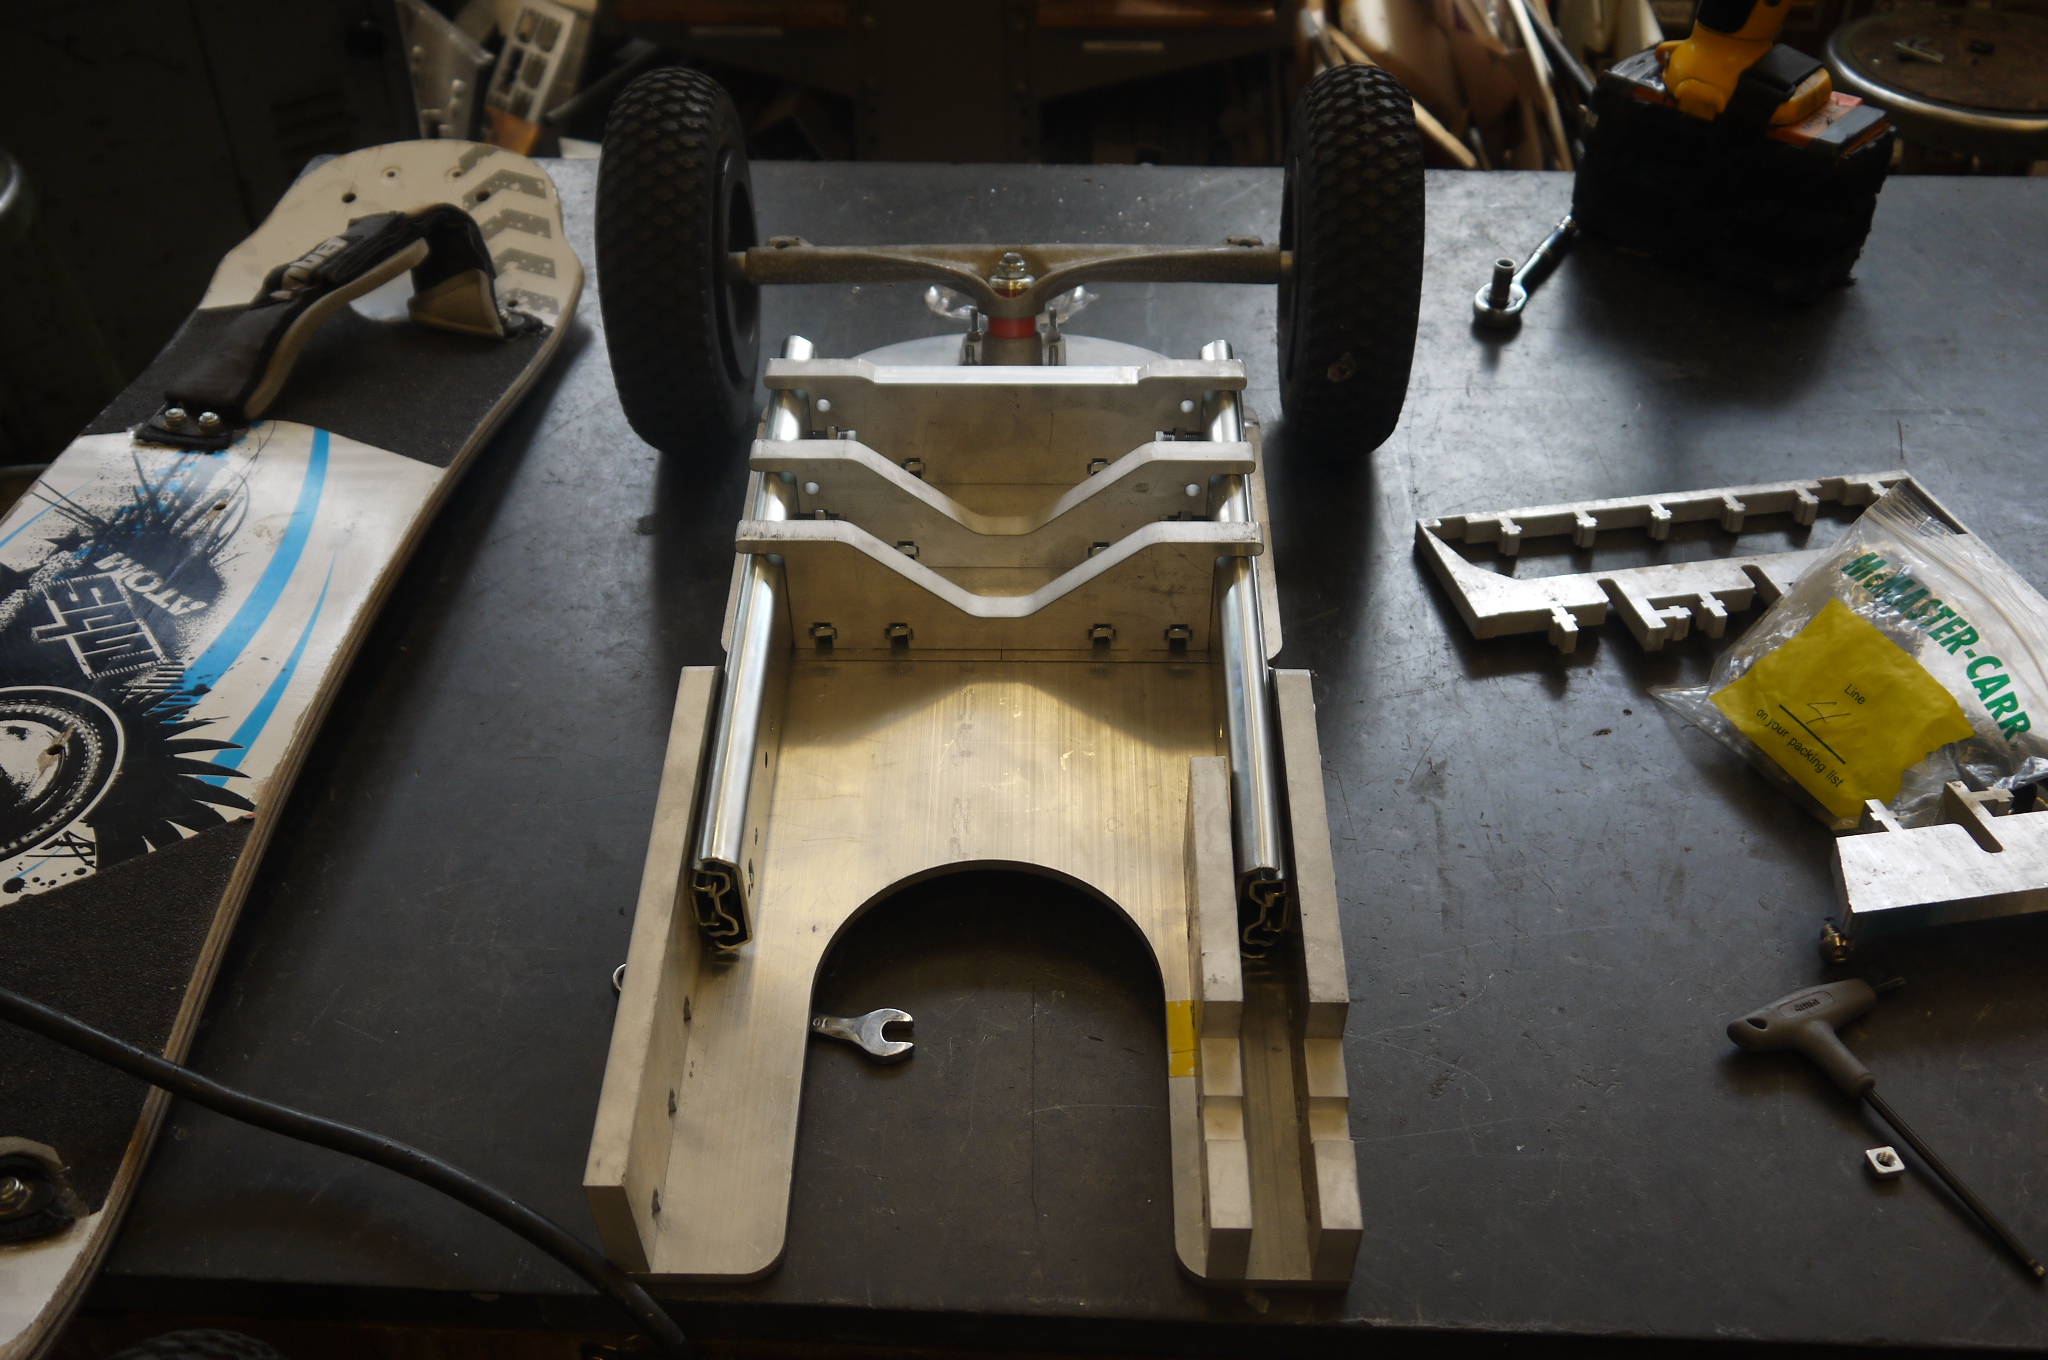
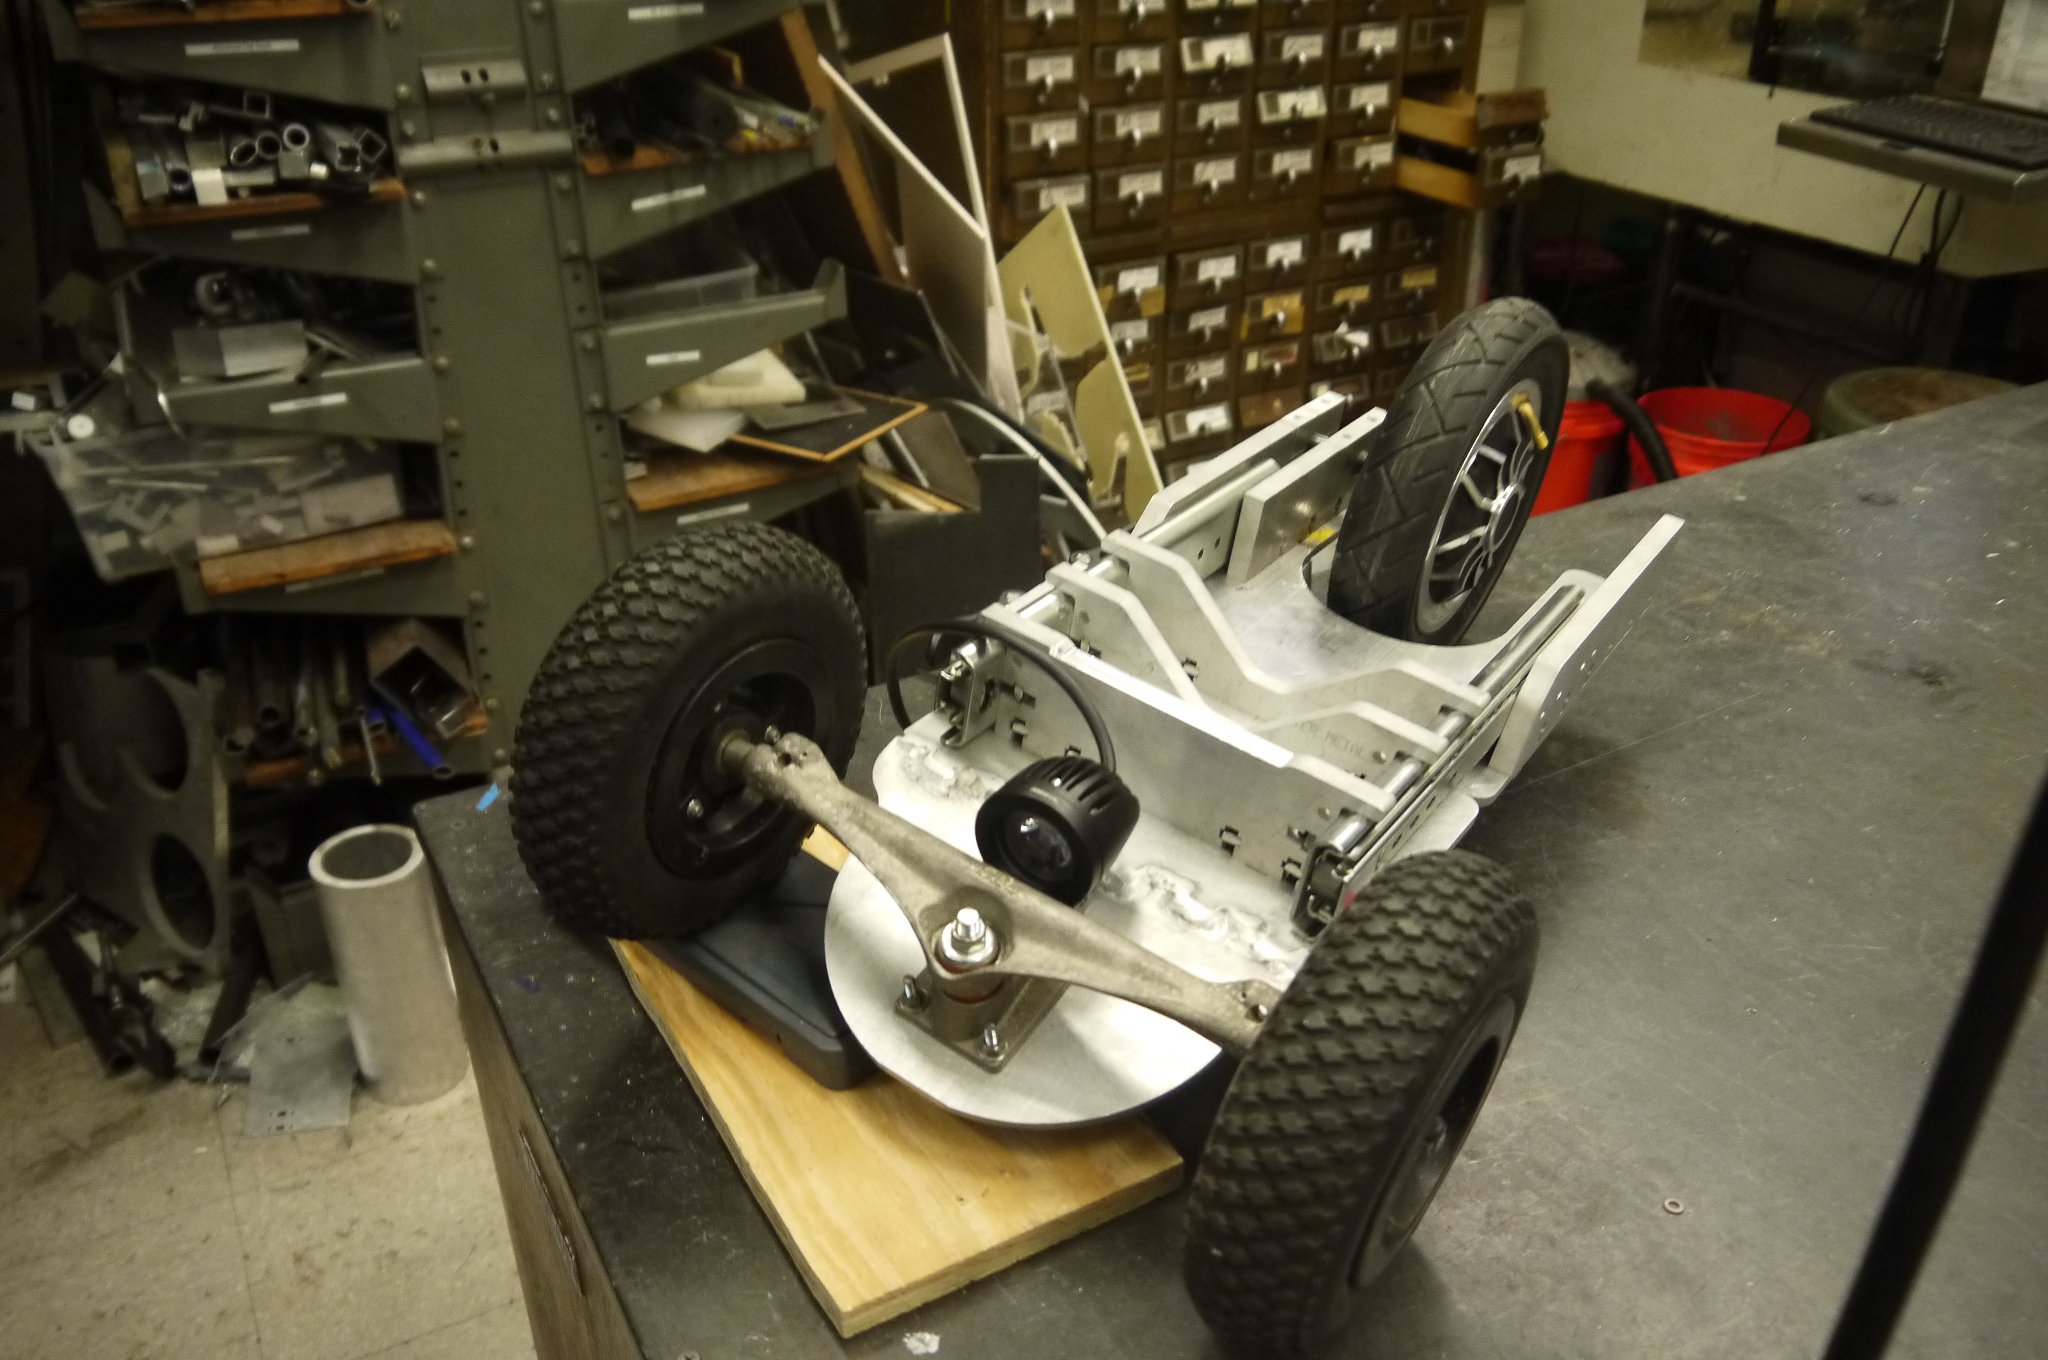
Welding and machining the remaining hardwareWheel guardThe first thing i noticed was how eaisy it was to get my foot to slide over to the wheel and get jammed. To fix this i plotted a foot guard. This started with some 5" ID 1/2" thick, 3" tall aluminum tubestock. Note 5" is the diameter of the wheelwell cutout. I began by turning the round down to ~1/4" thickness on the mighty miters lathe. 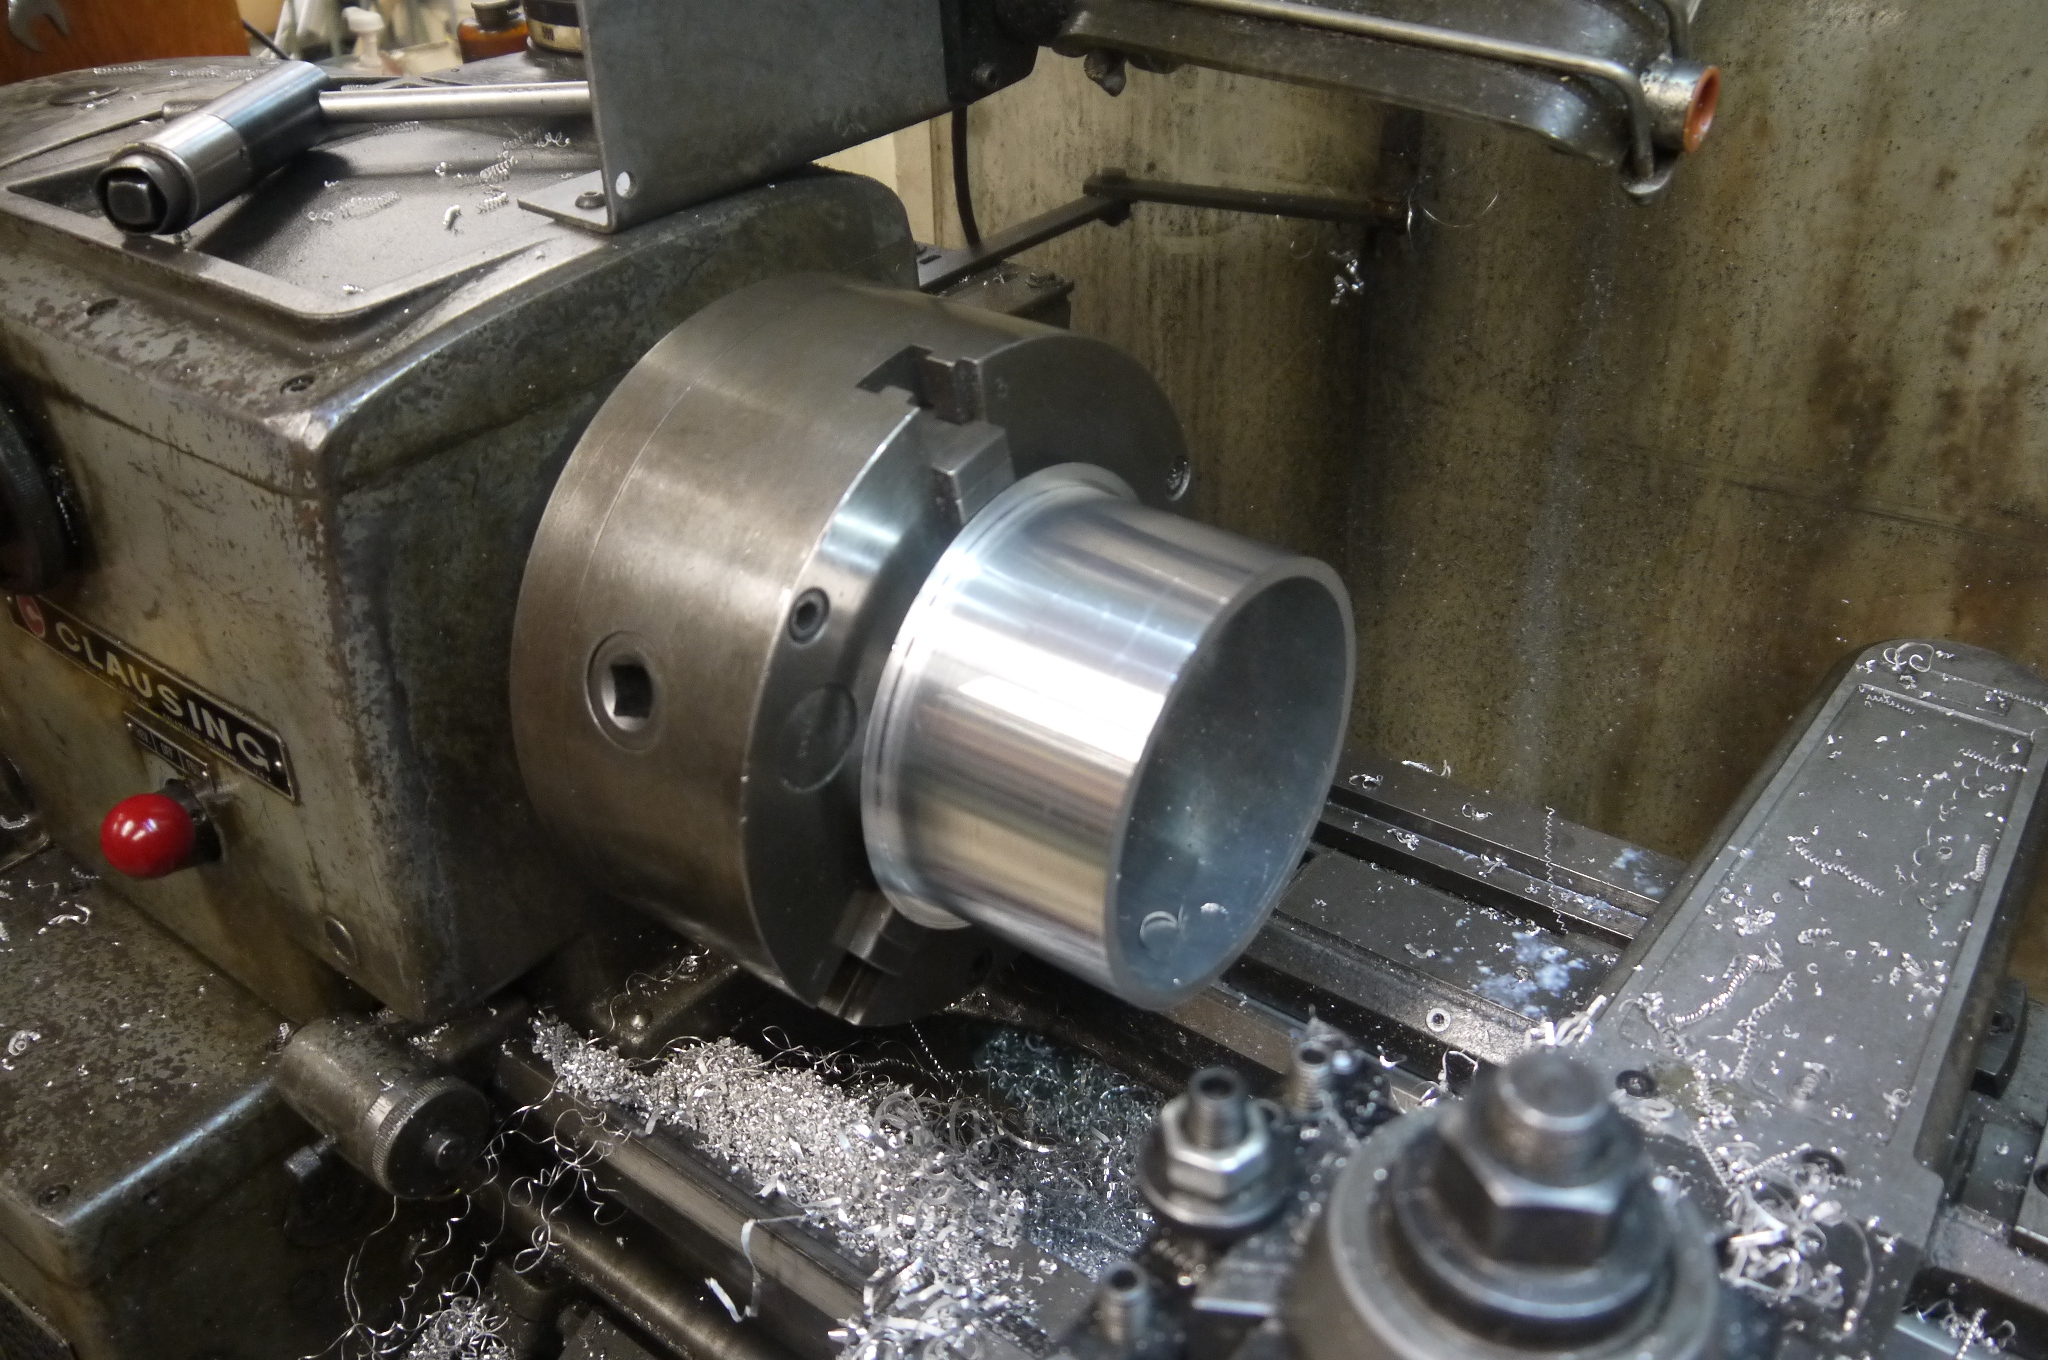
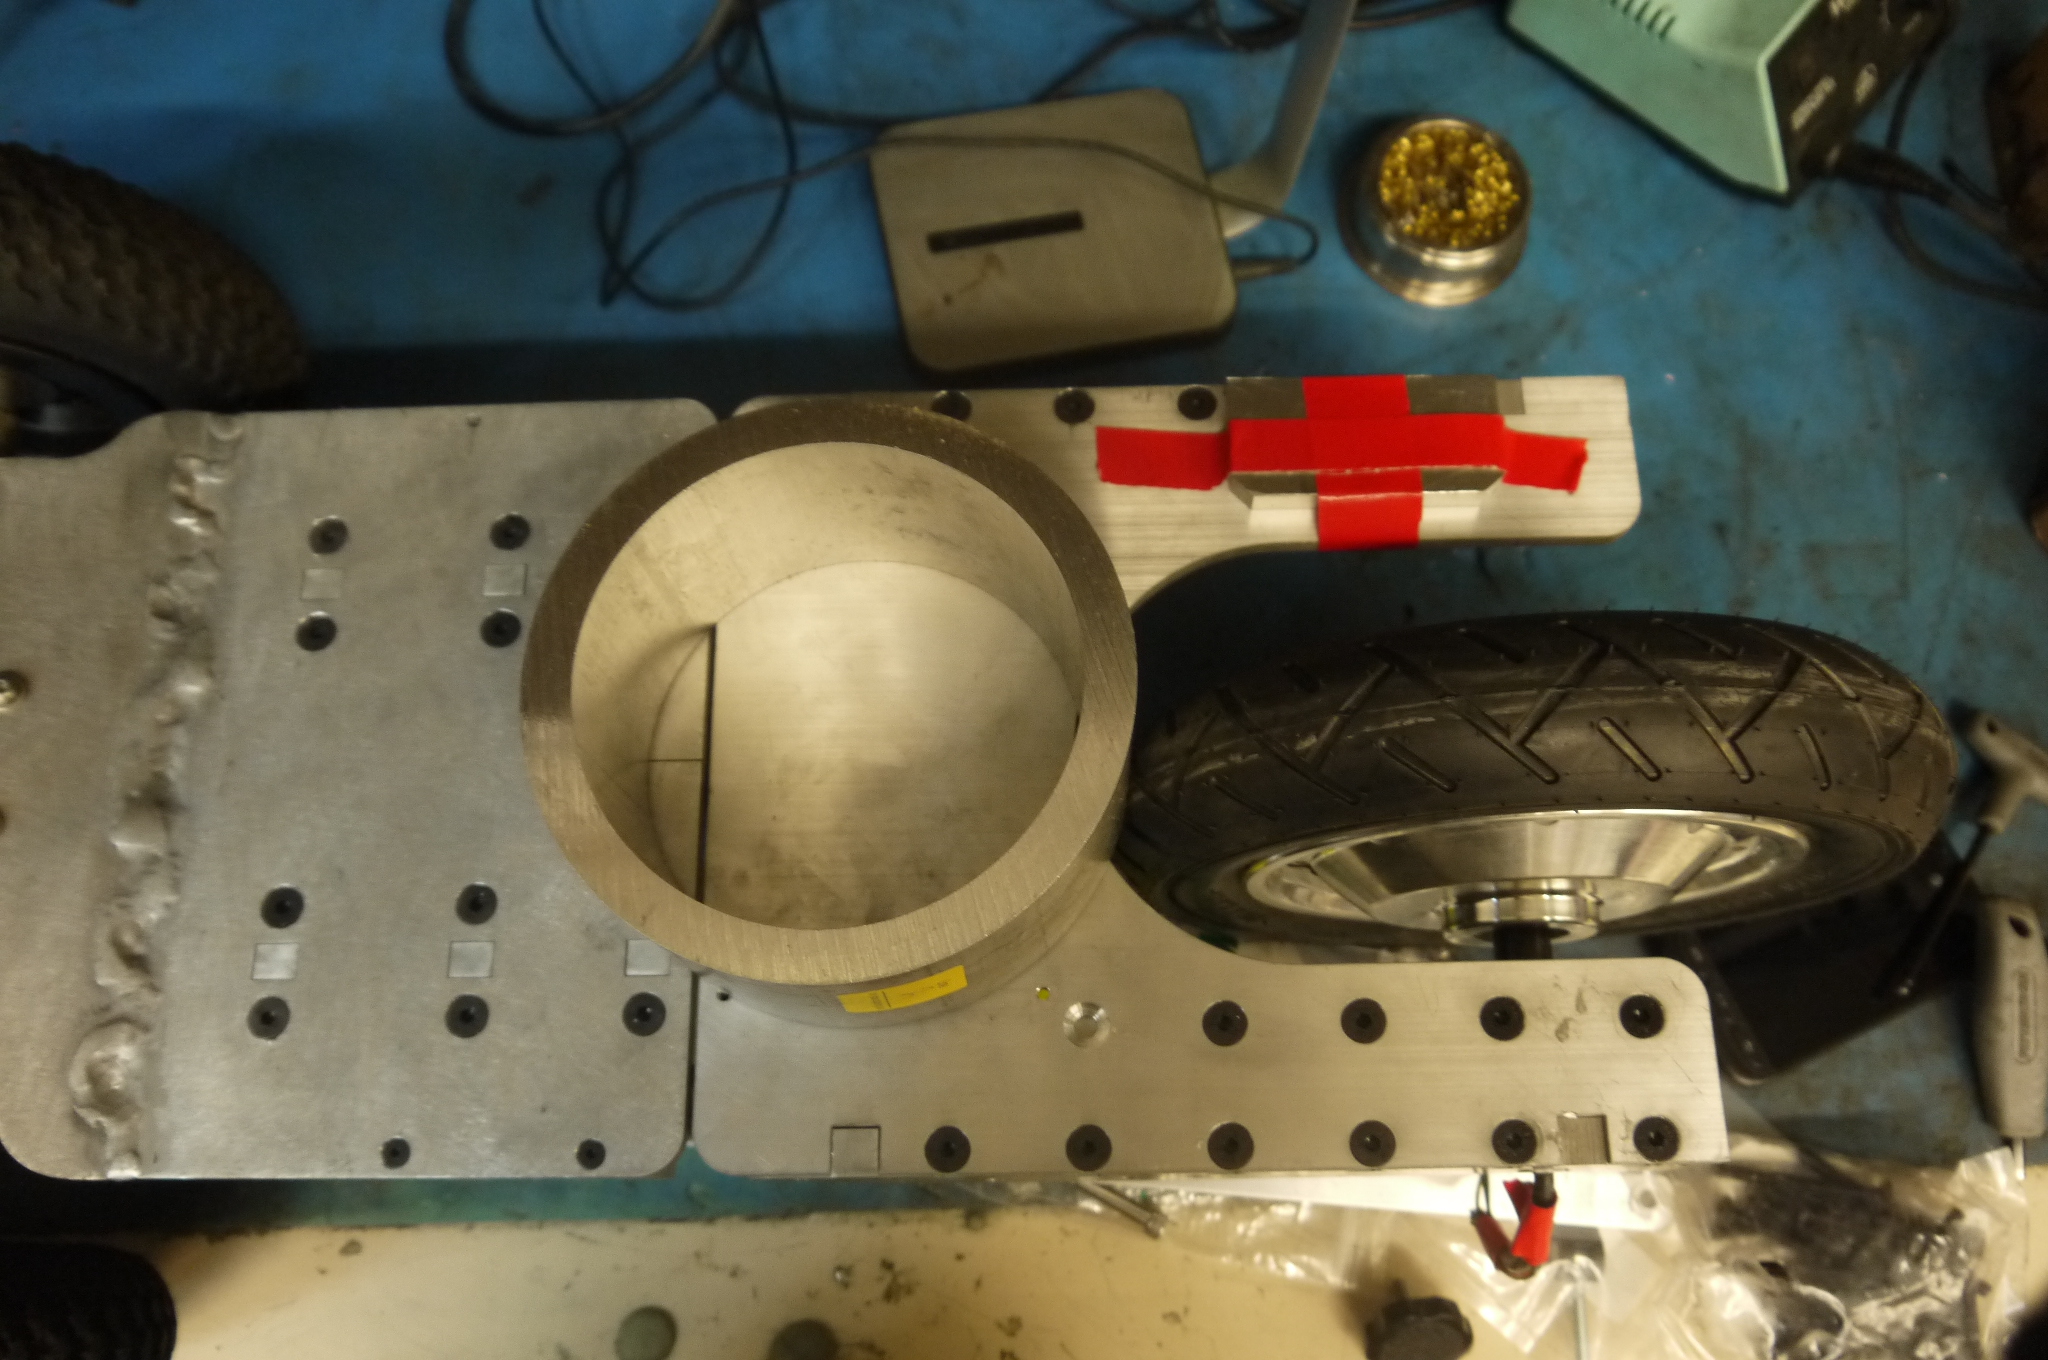
Testing the fit of the recently turned wheel guardNext up I band sawed the round in half. With the newly trimmed down round, I had a rough sizing on the wheel-well 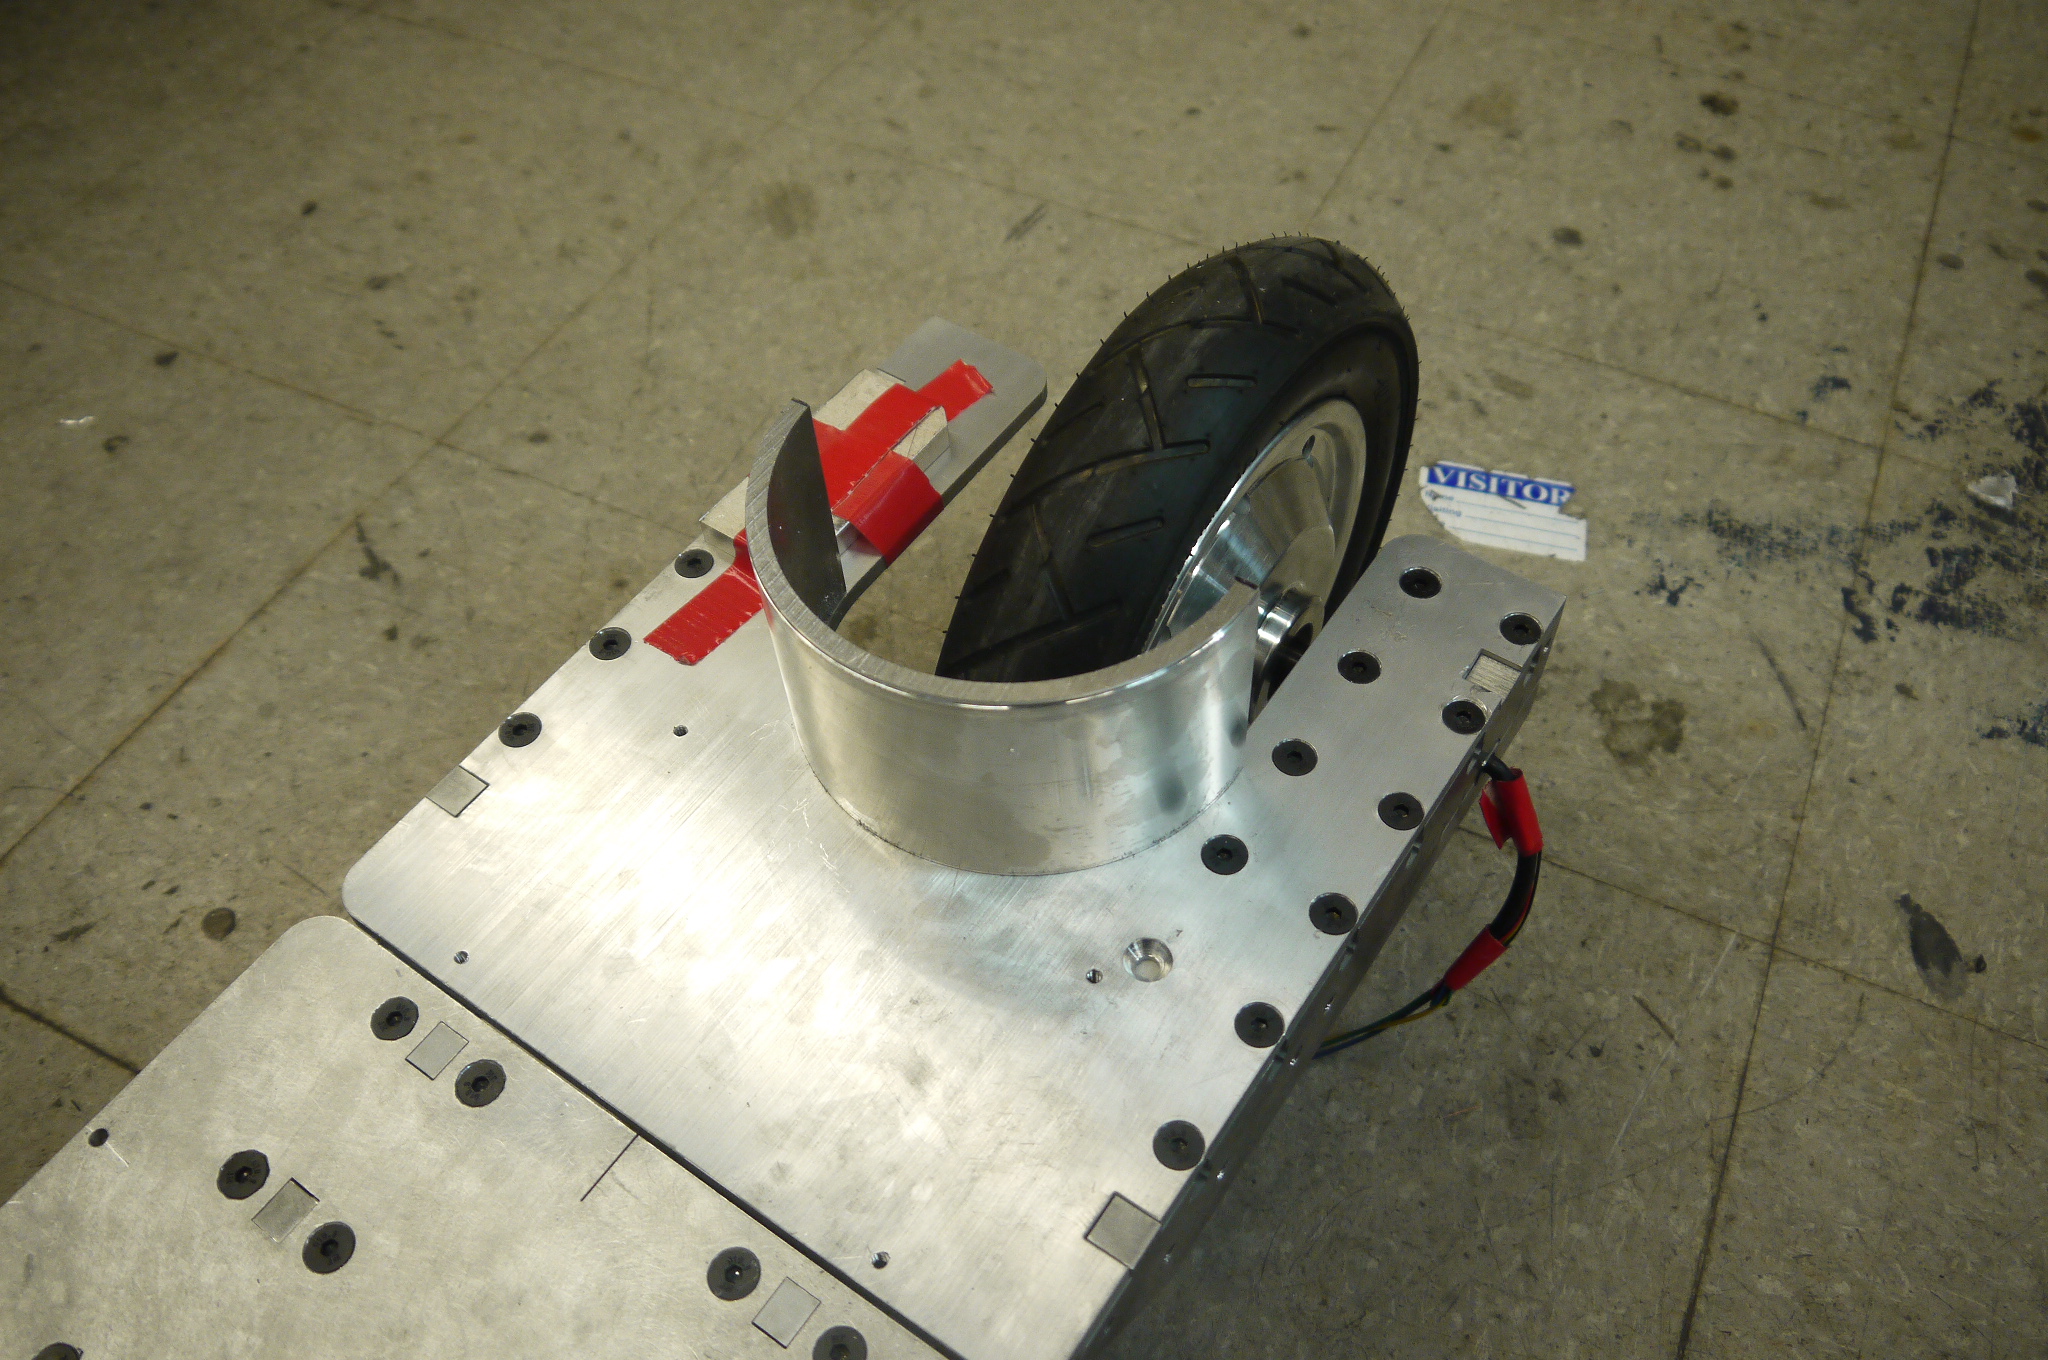
I made a quick jig and began band sawingThe wooden jig was too bizarre to document in photo format, but it held the half round in place and was consumed in the process of cutting up the round stock. I really liked how this came out and after some sanding to cleanup the bandsaw markings it was time to weld this in place. 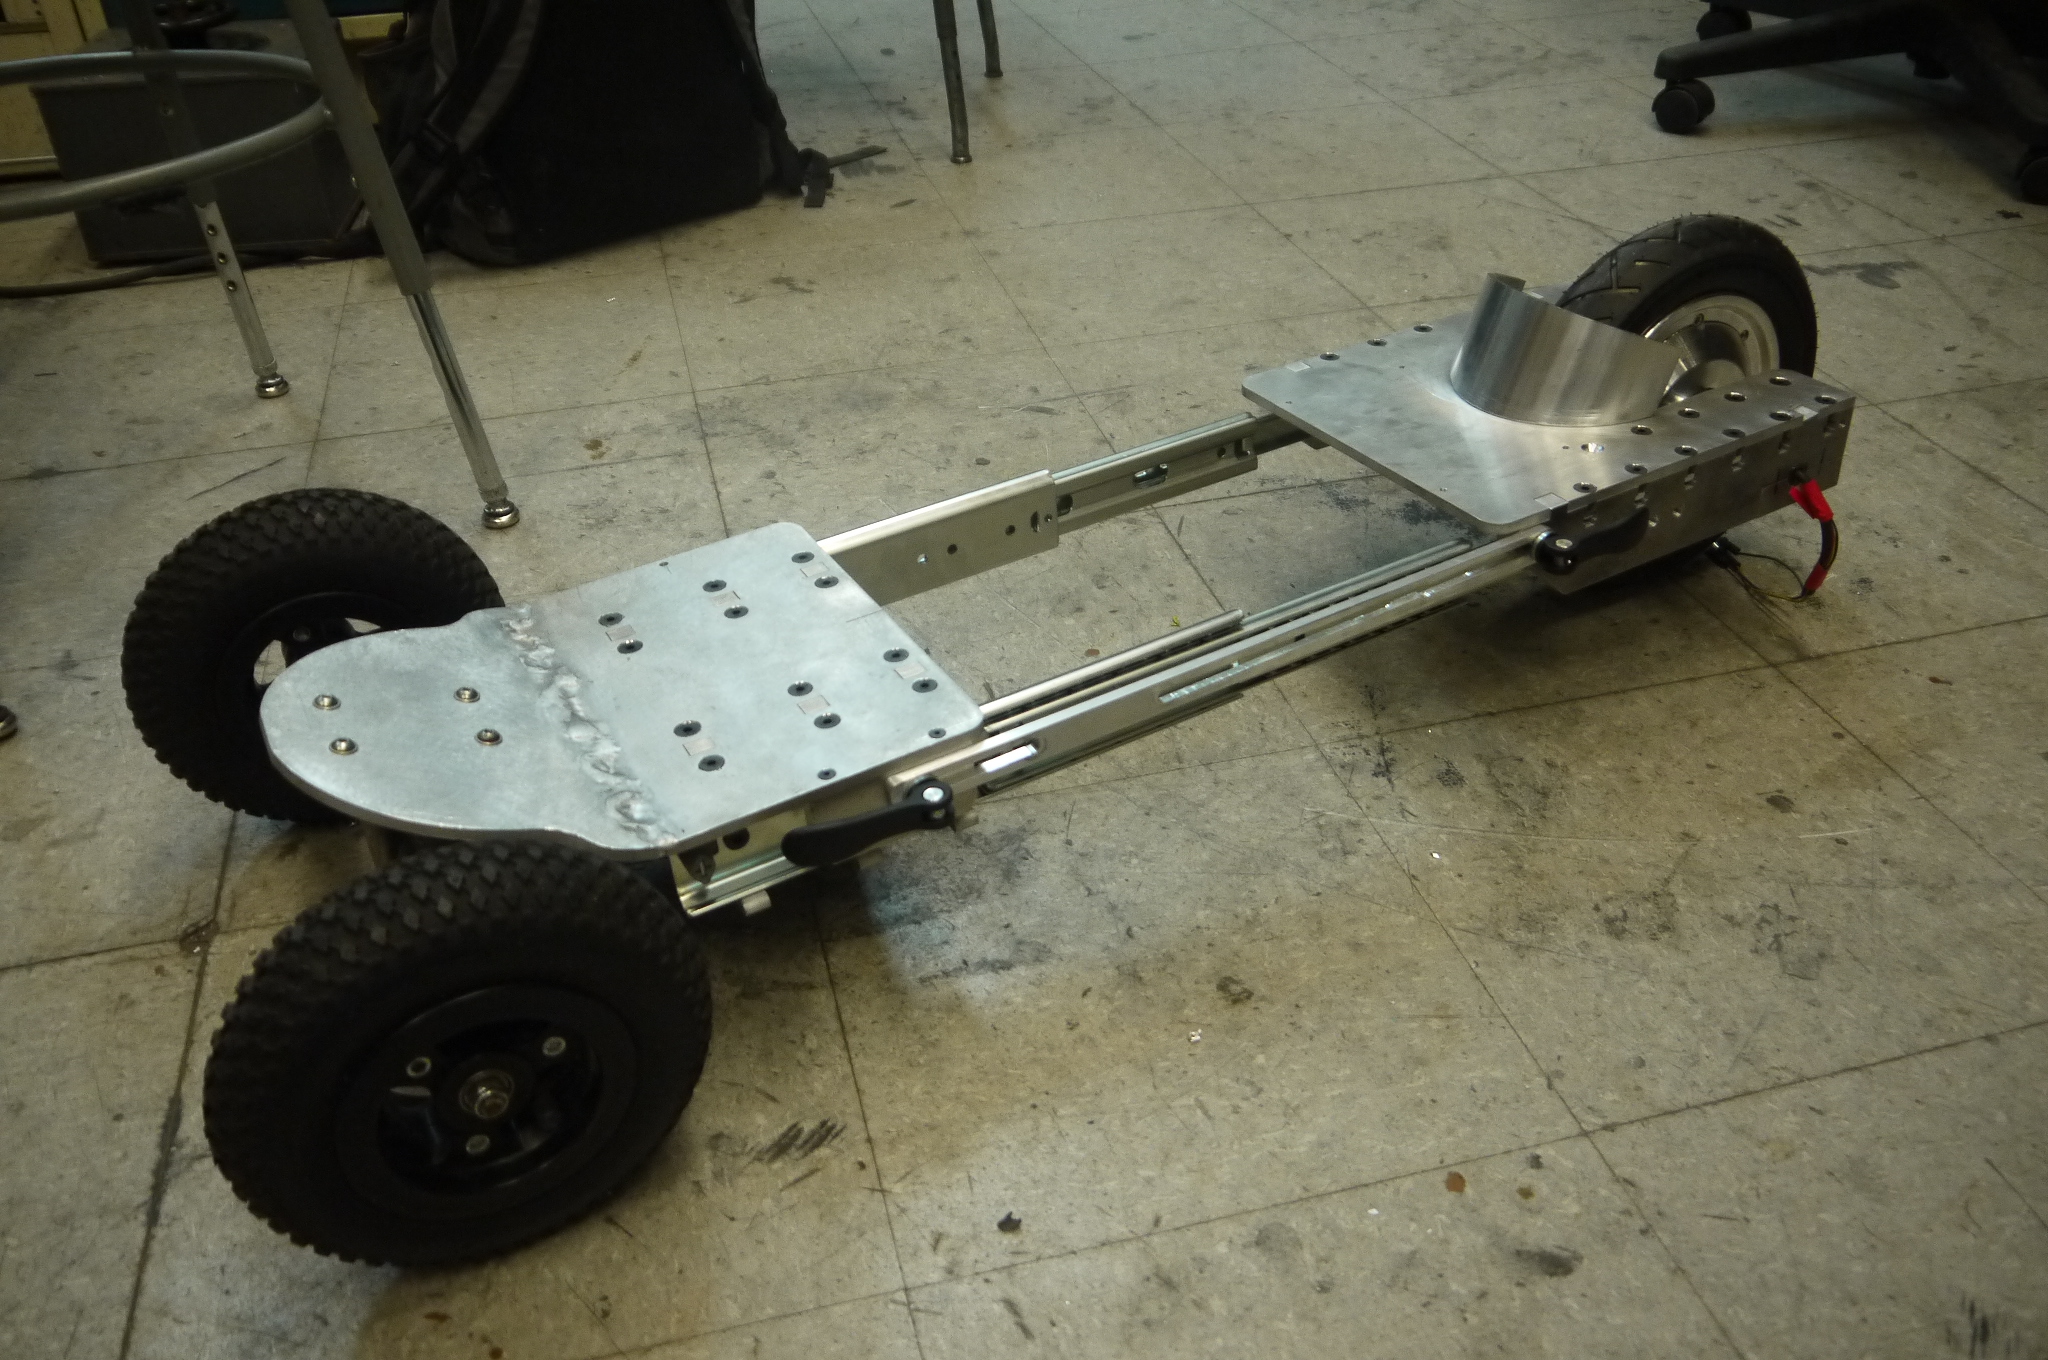
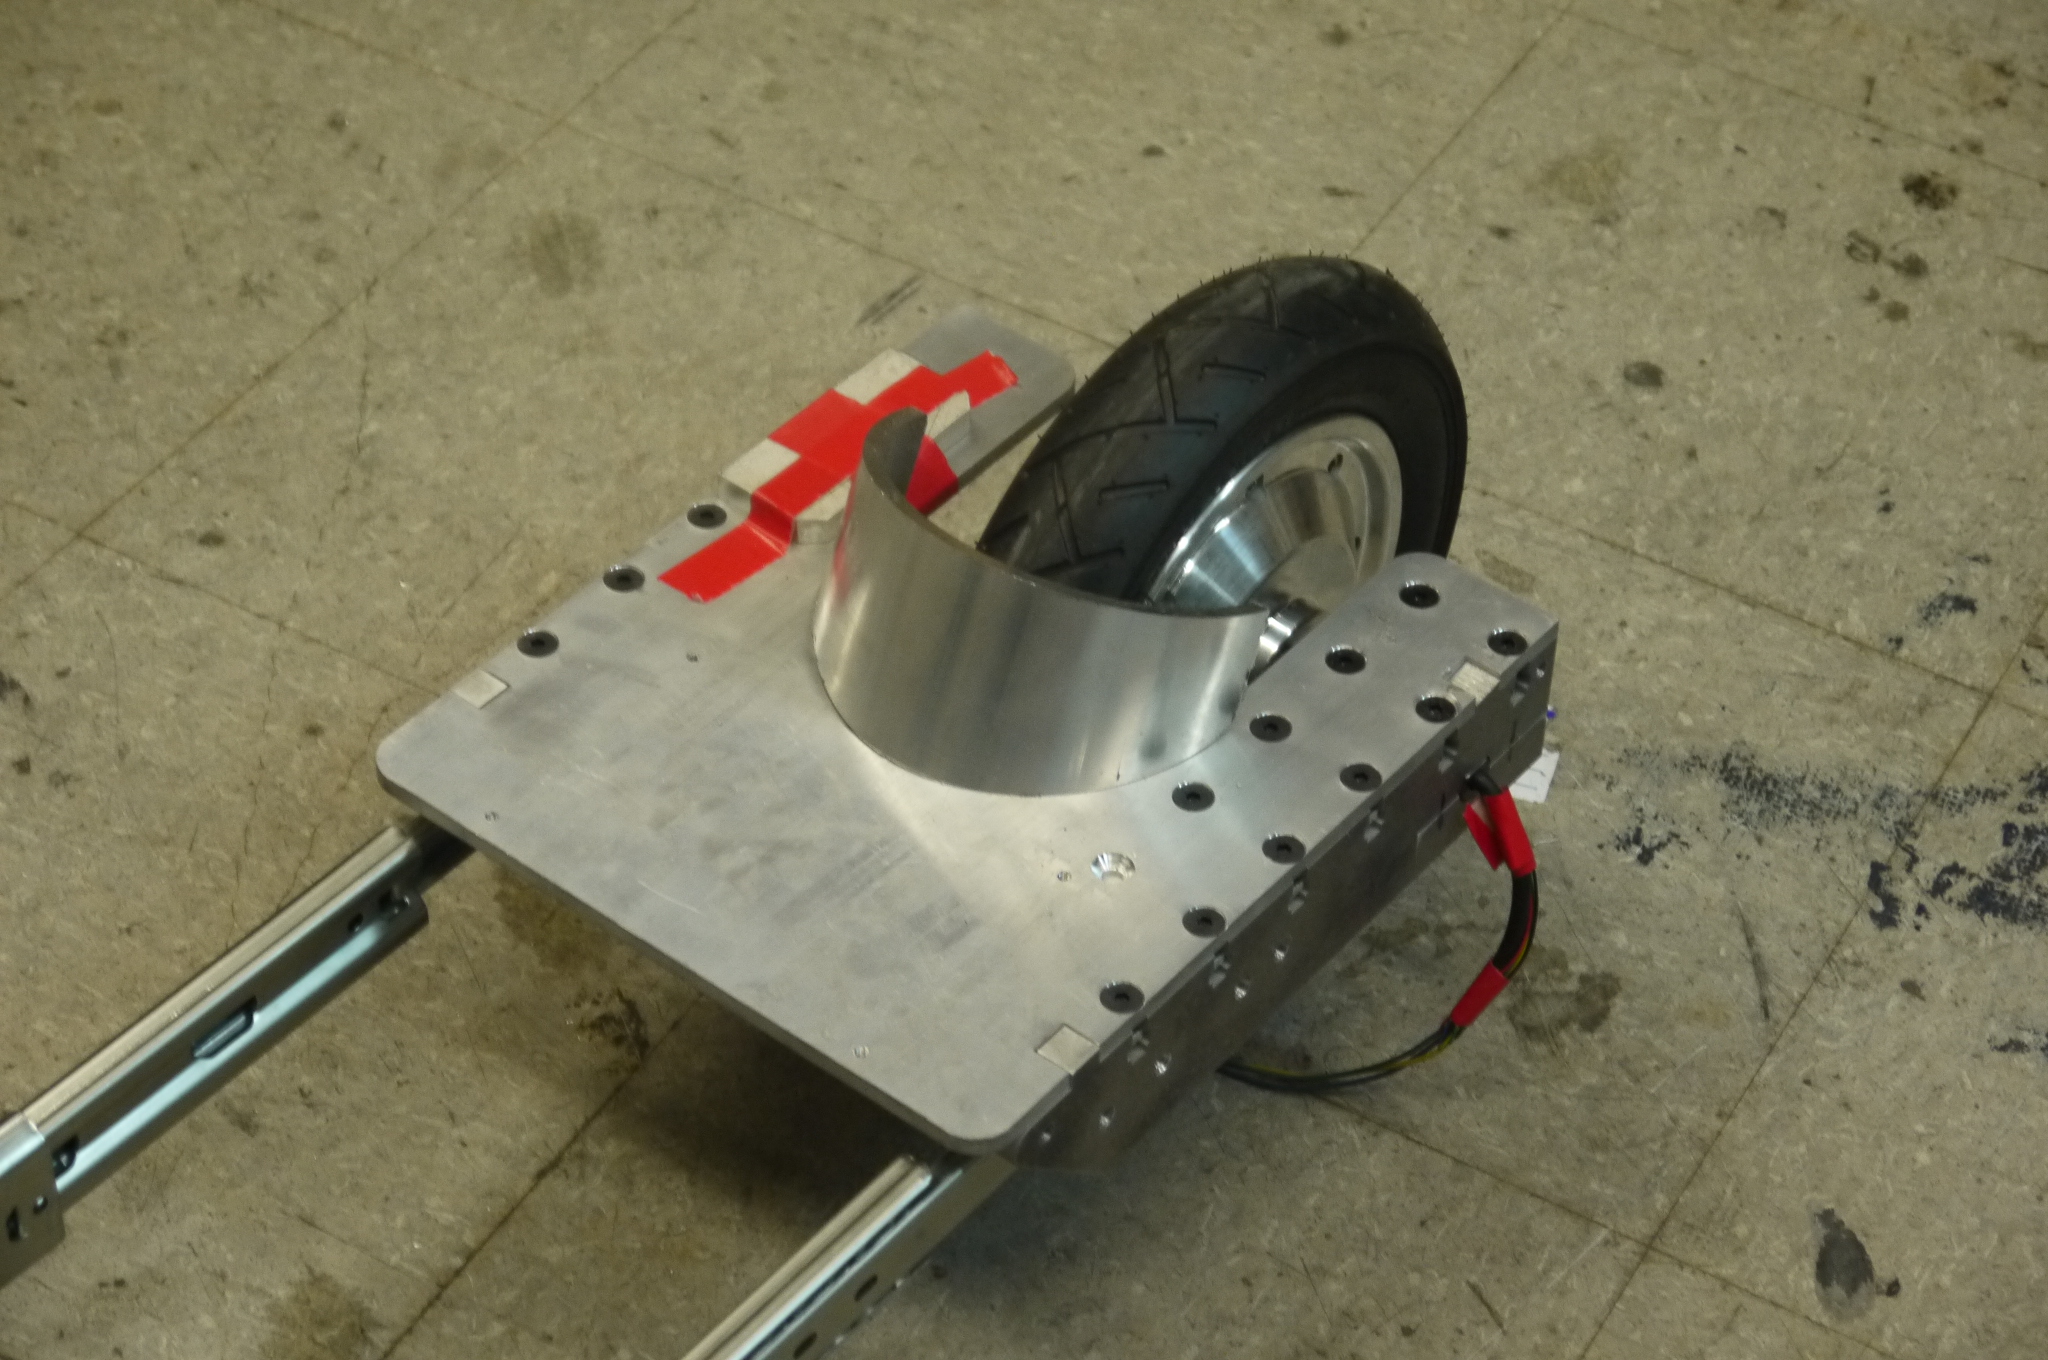
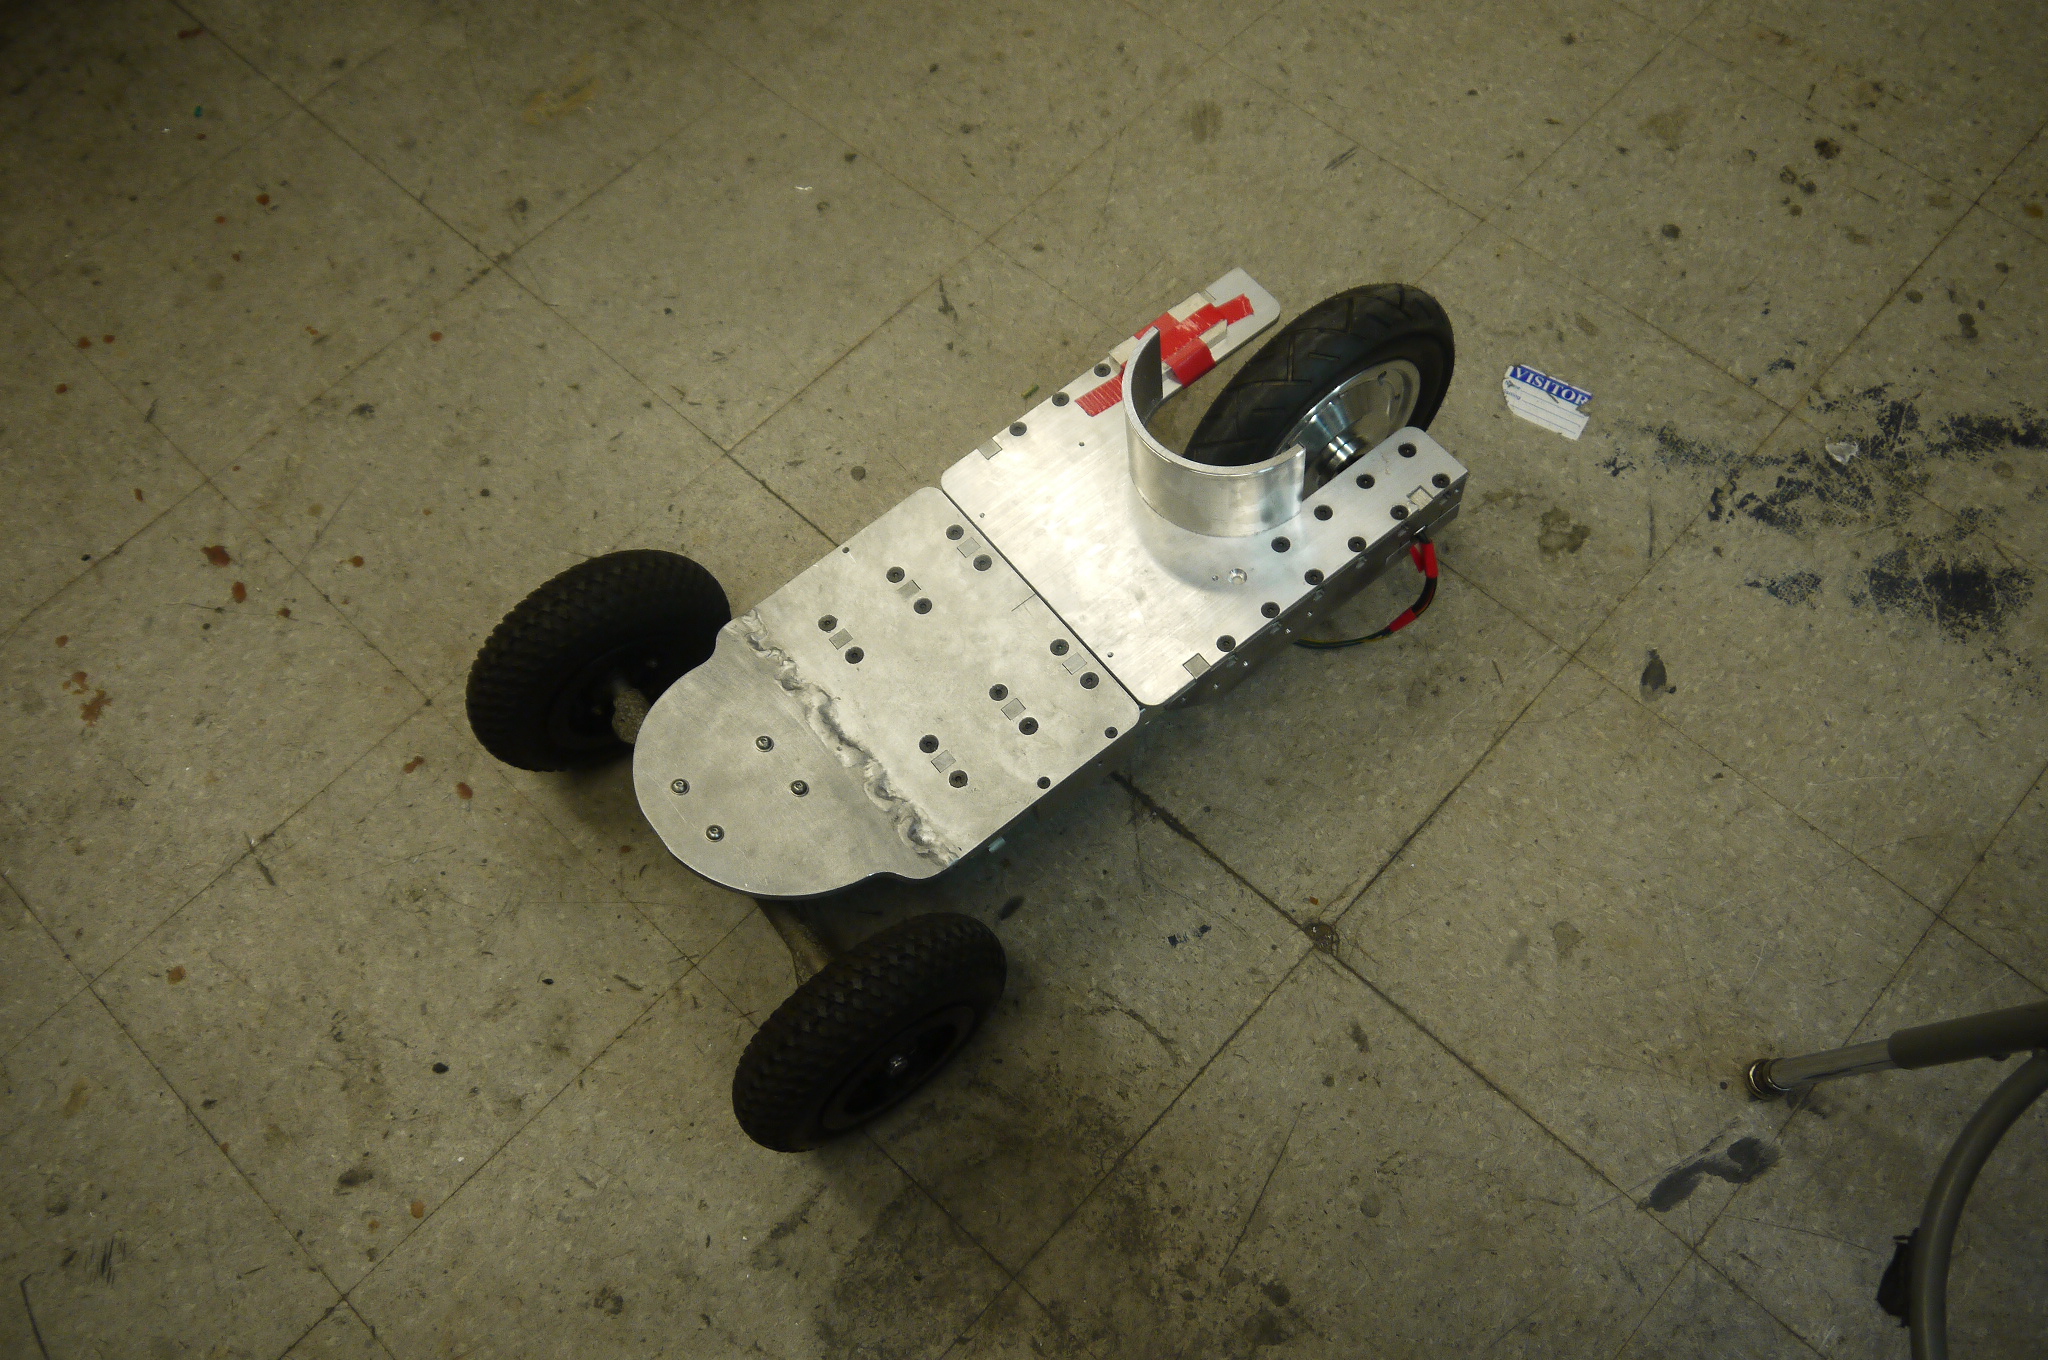
I returned to the magical DLAB shop and, with the aide of the mighty Birkel, welded on the back shroud. As each of these parts were 0.25" thick, it took a lot of energy to get everything up to temperature and welding well. Welding ahoyEEE, quite excellent, a structural foot brace. I really liked the final look of this. The skateboard is coming together! 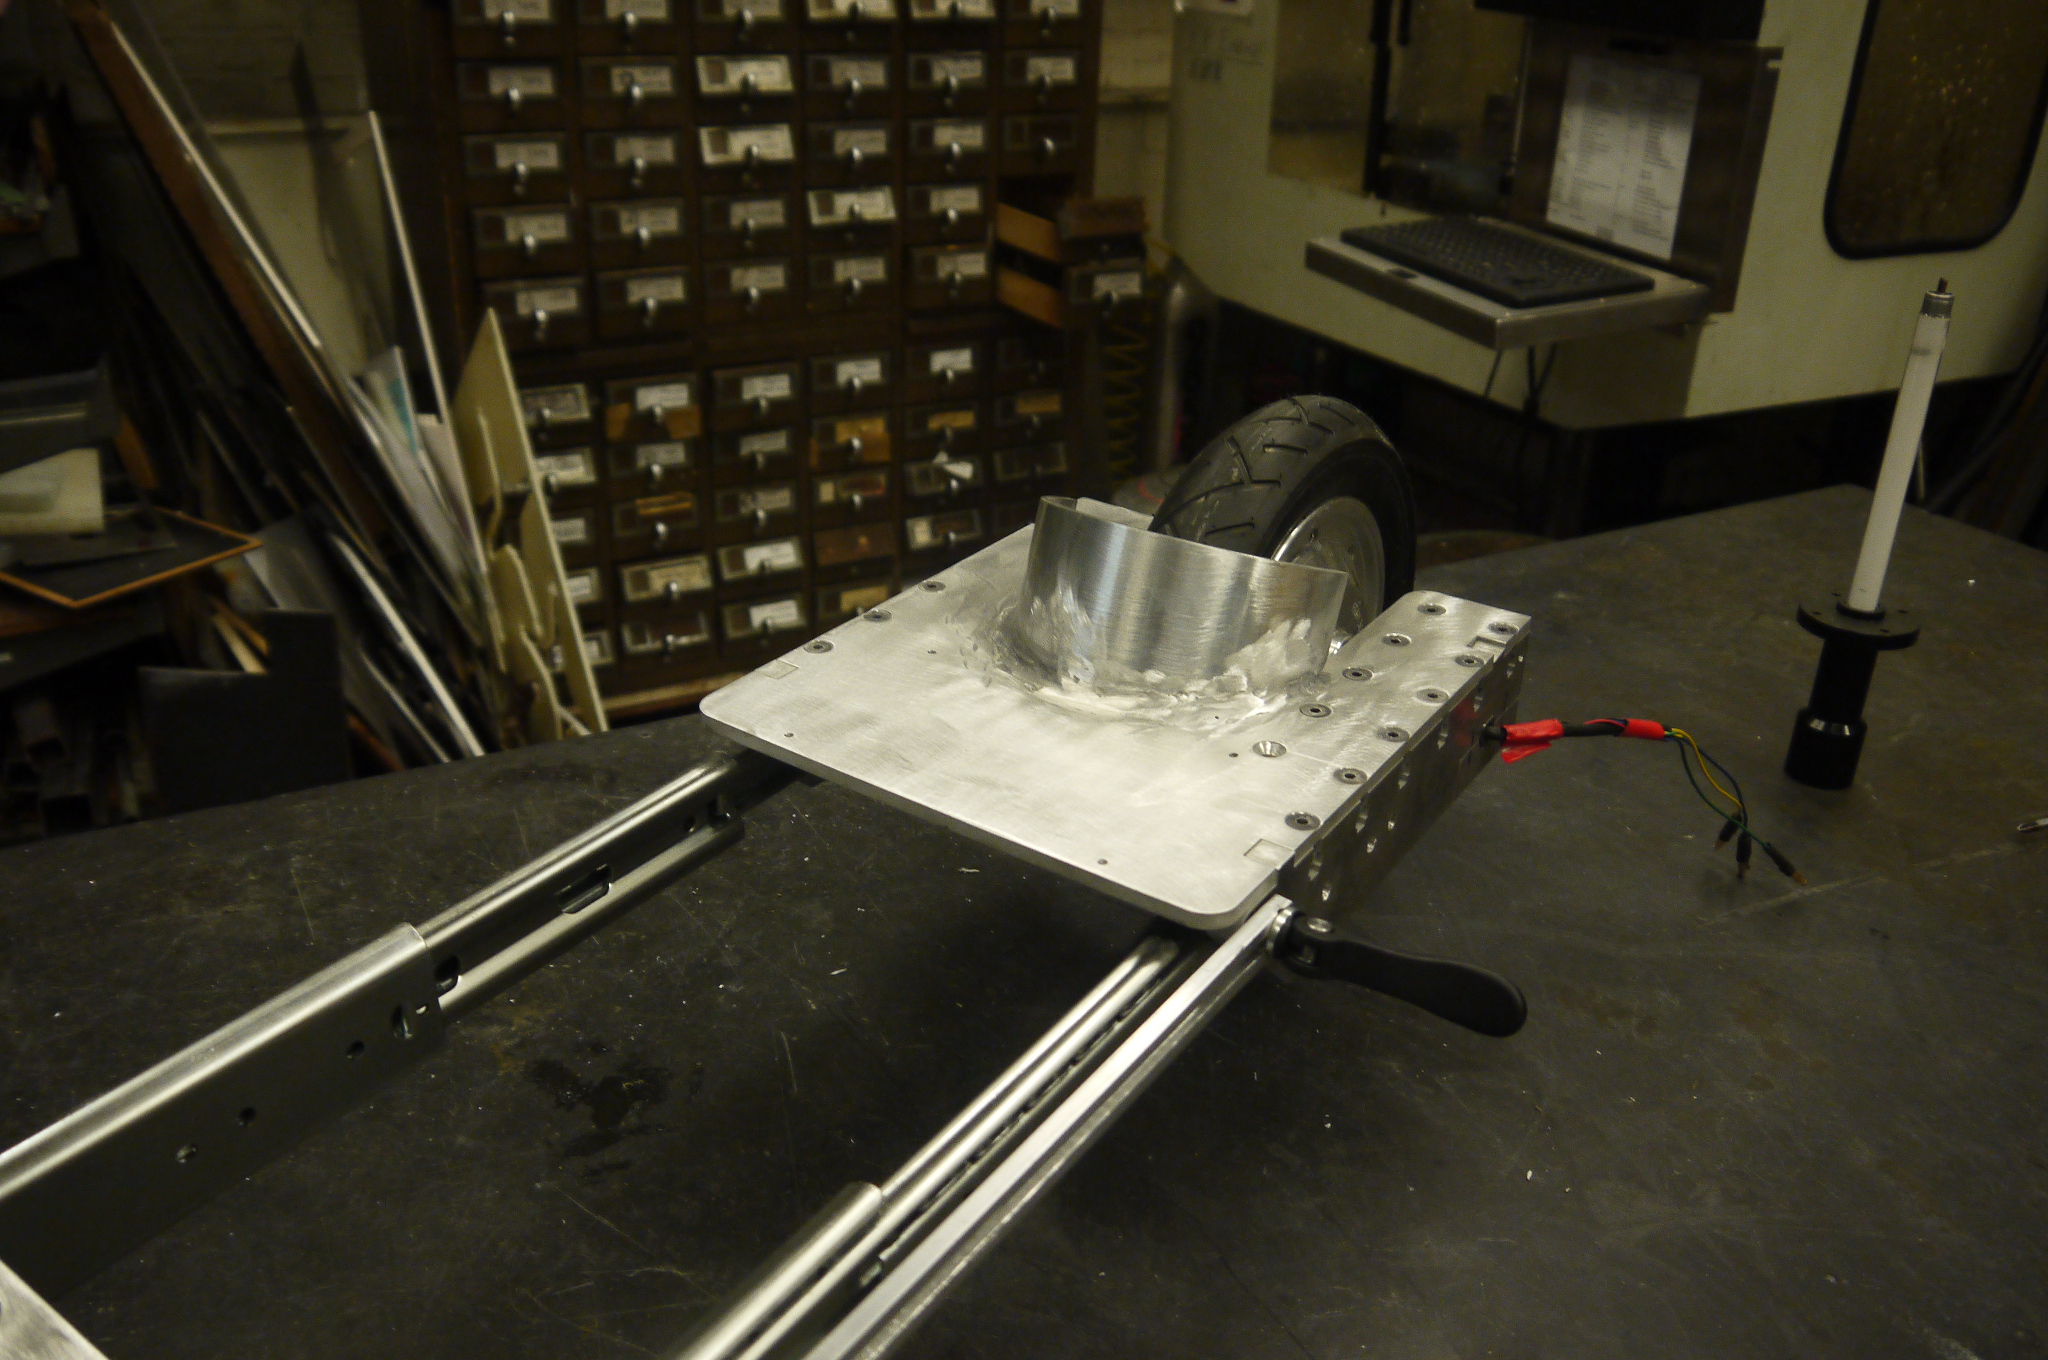

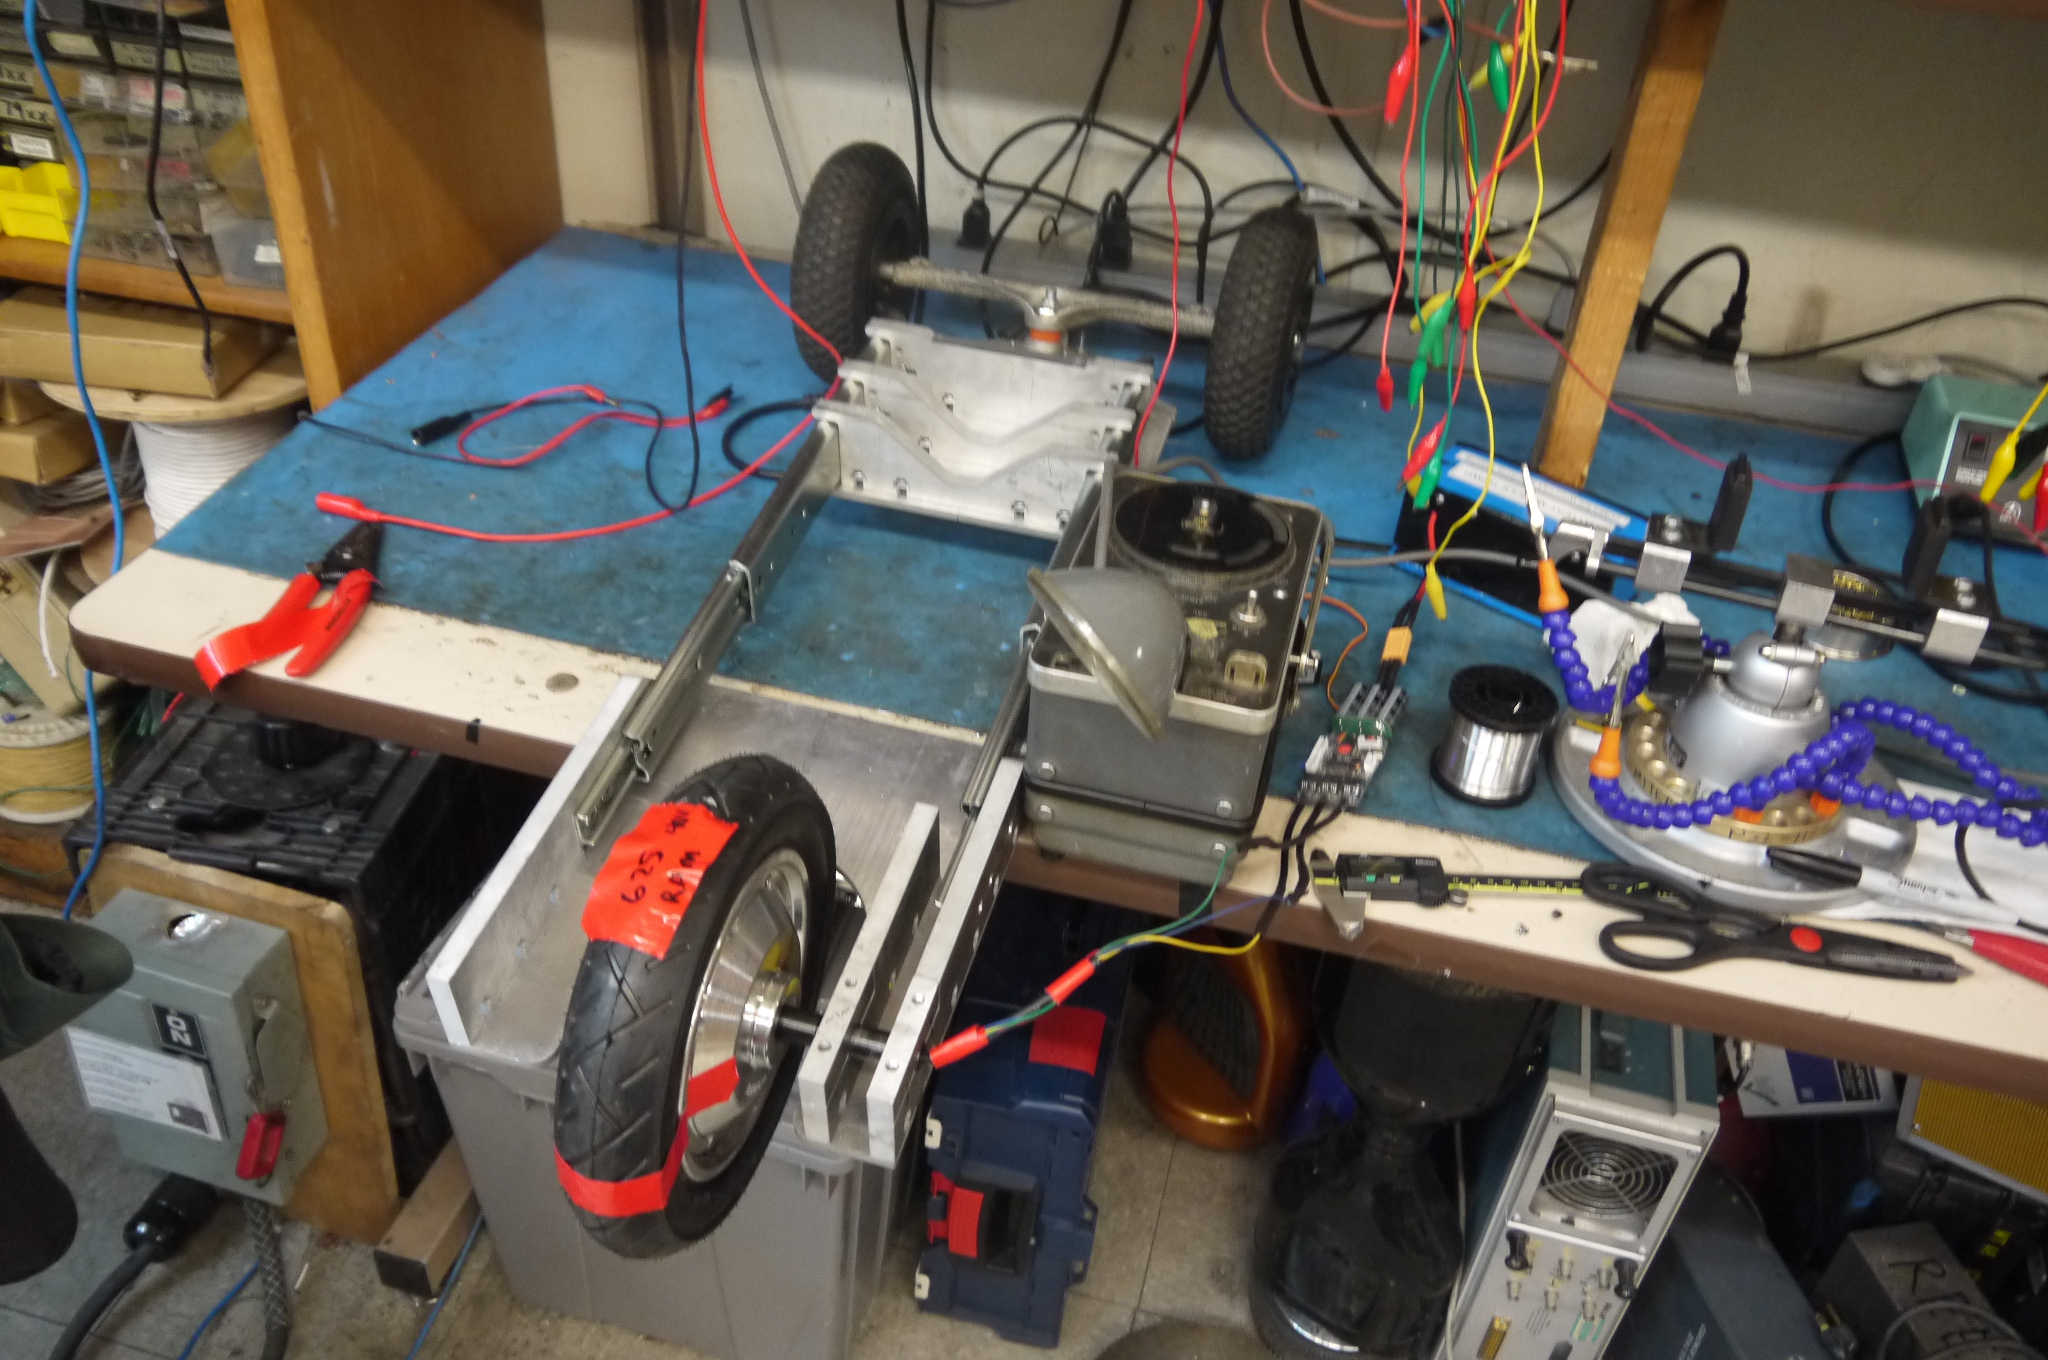
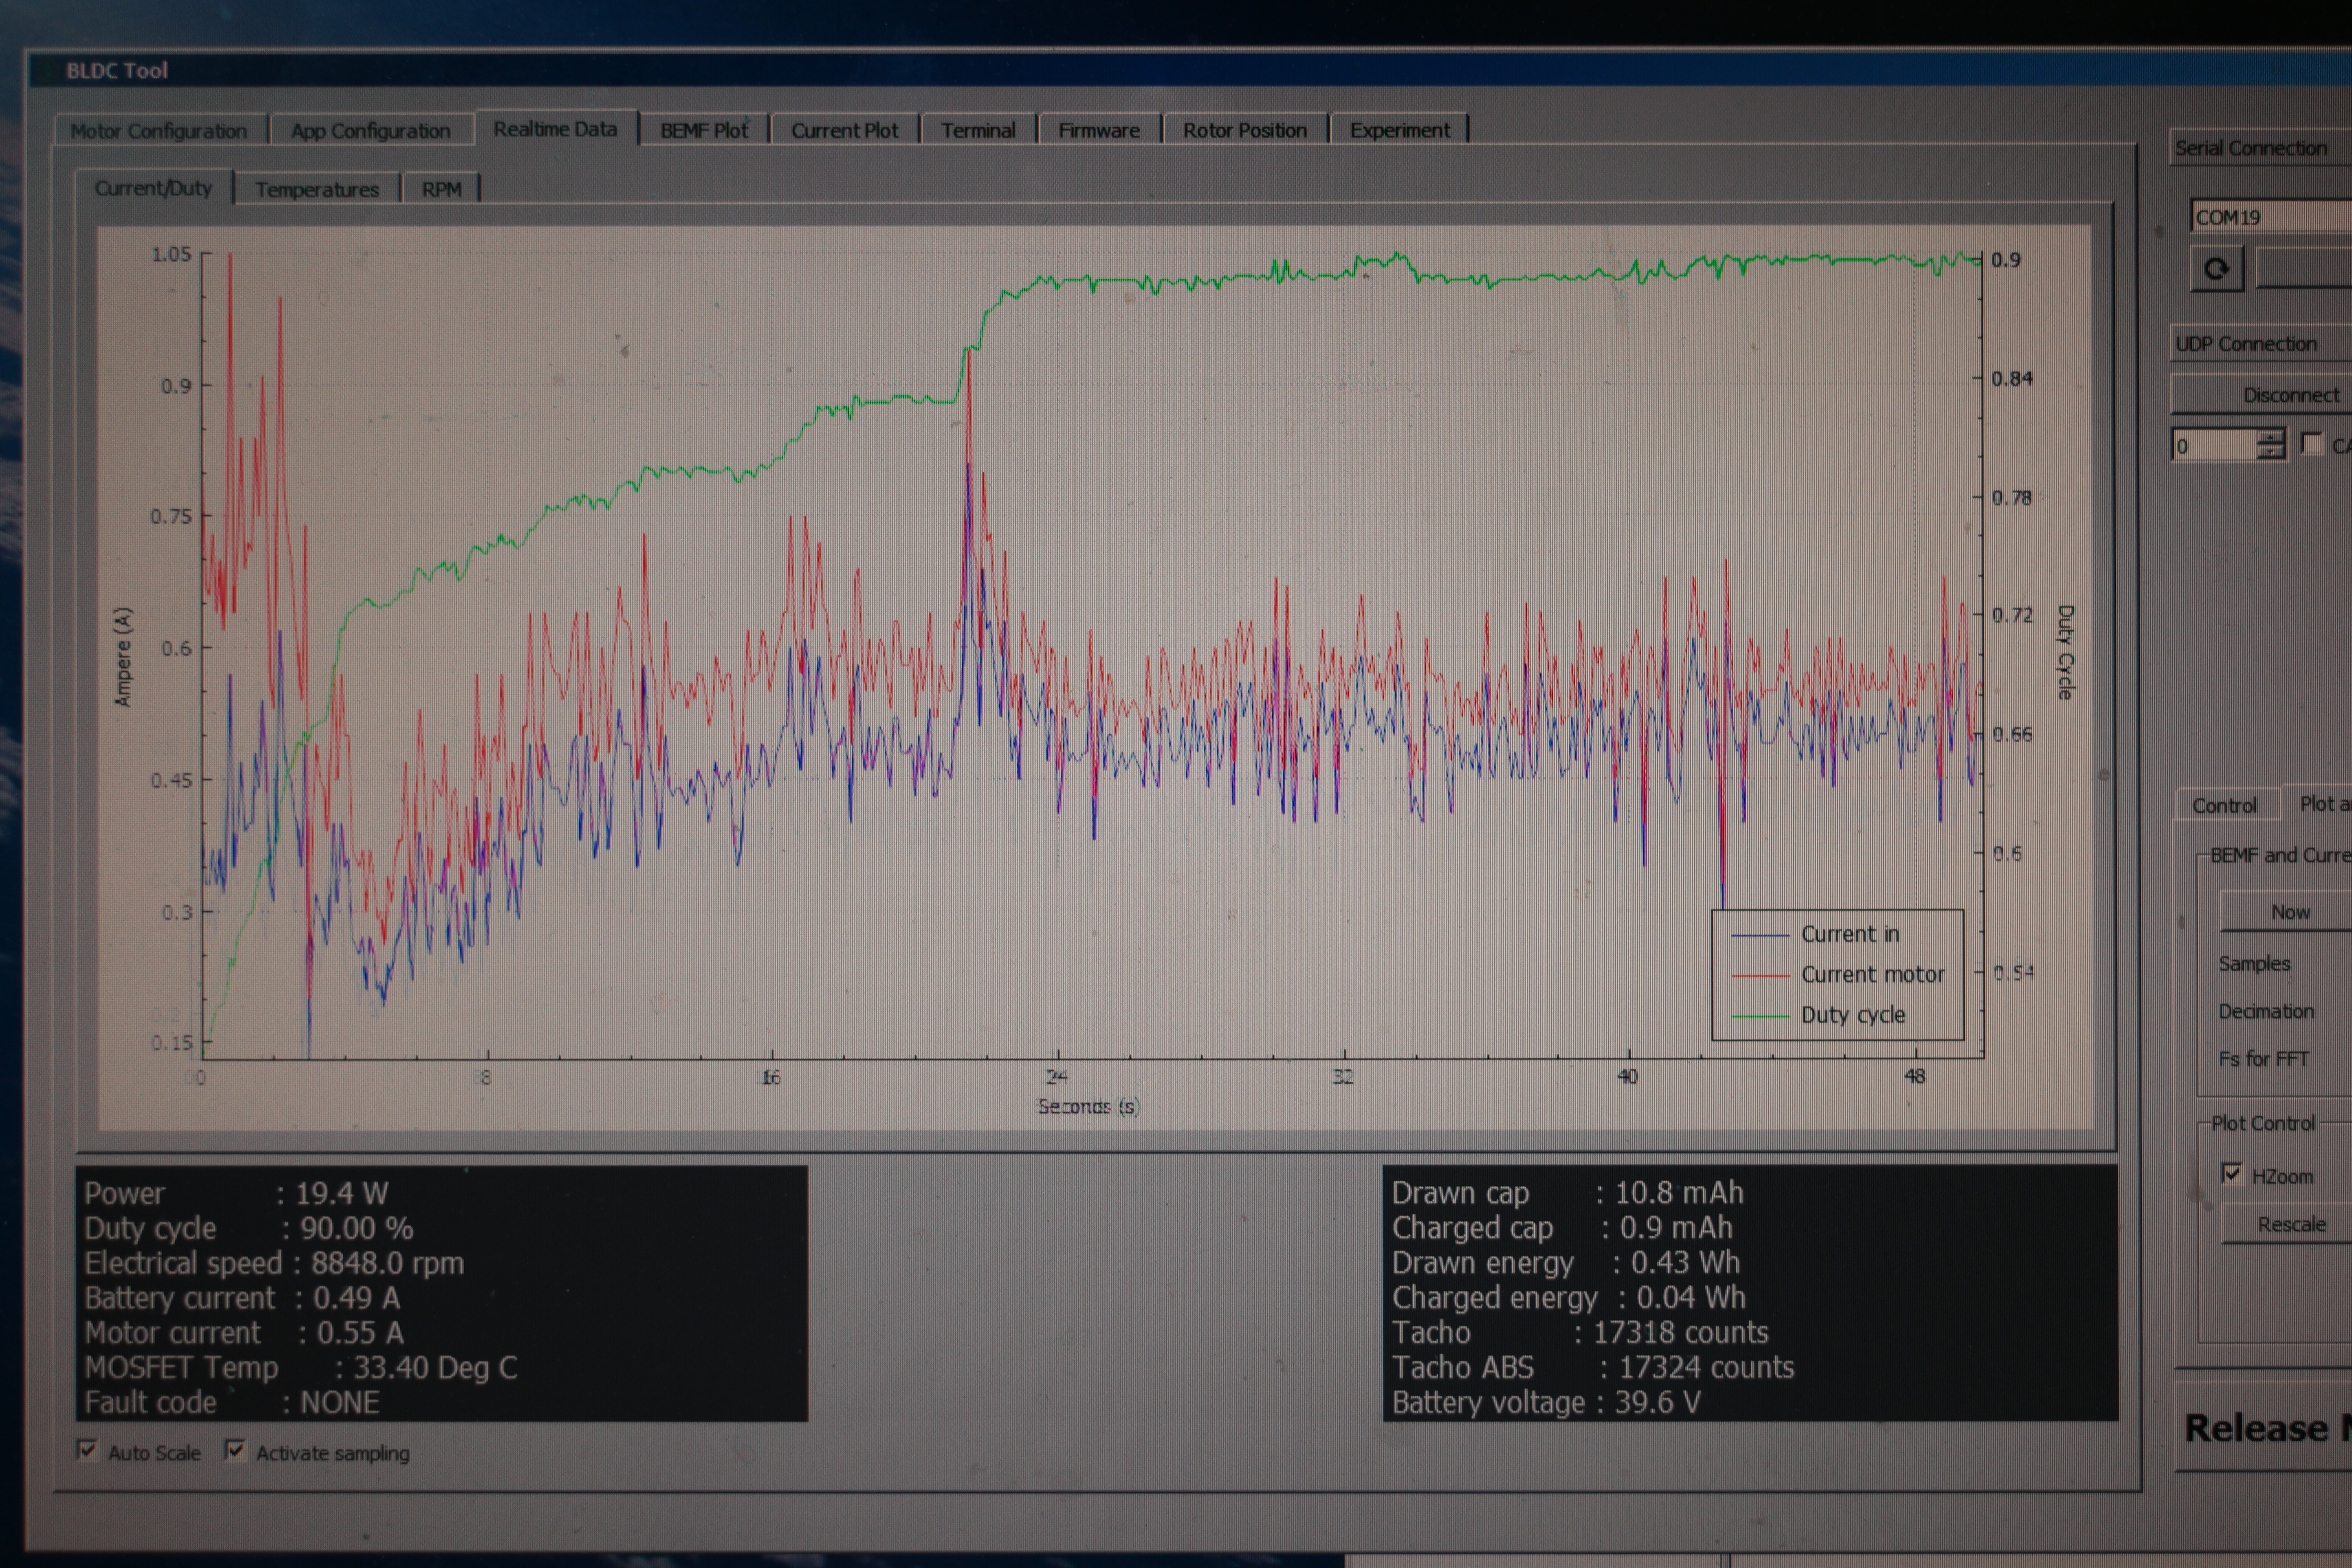
Some quick RPM testing, with the stock firmware settings on my VESC and a ~40v battery pack, i used a stroboscope to determine the wheel RPM at 'full' throttle. Note that this is no load un-tuned RPM. The hub motor came in at 625 RPM no-load at 48V. at 10" diameter, that's a 31.4" circumference or 18.5mph no-load. 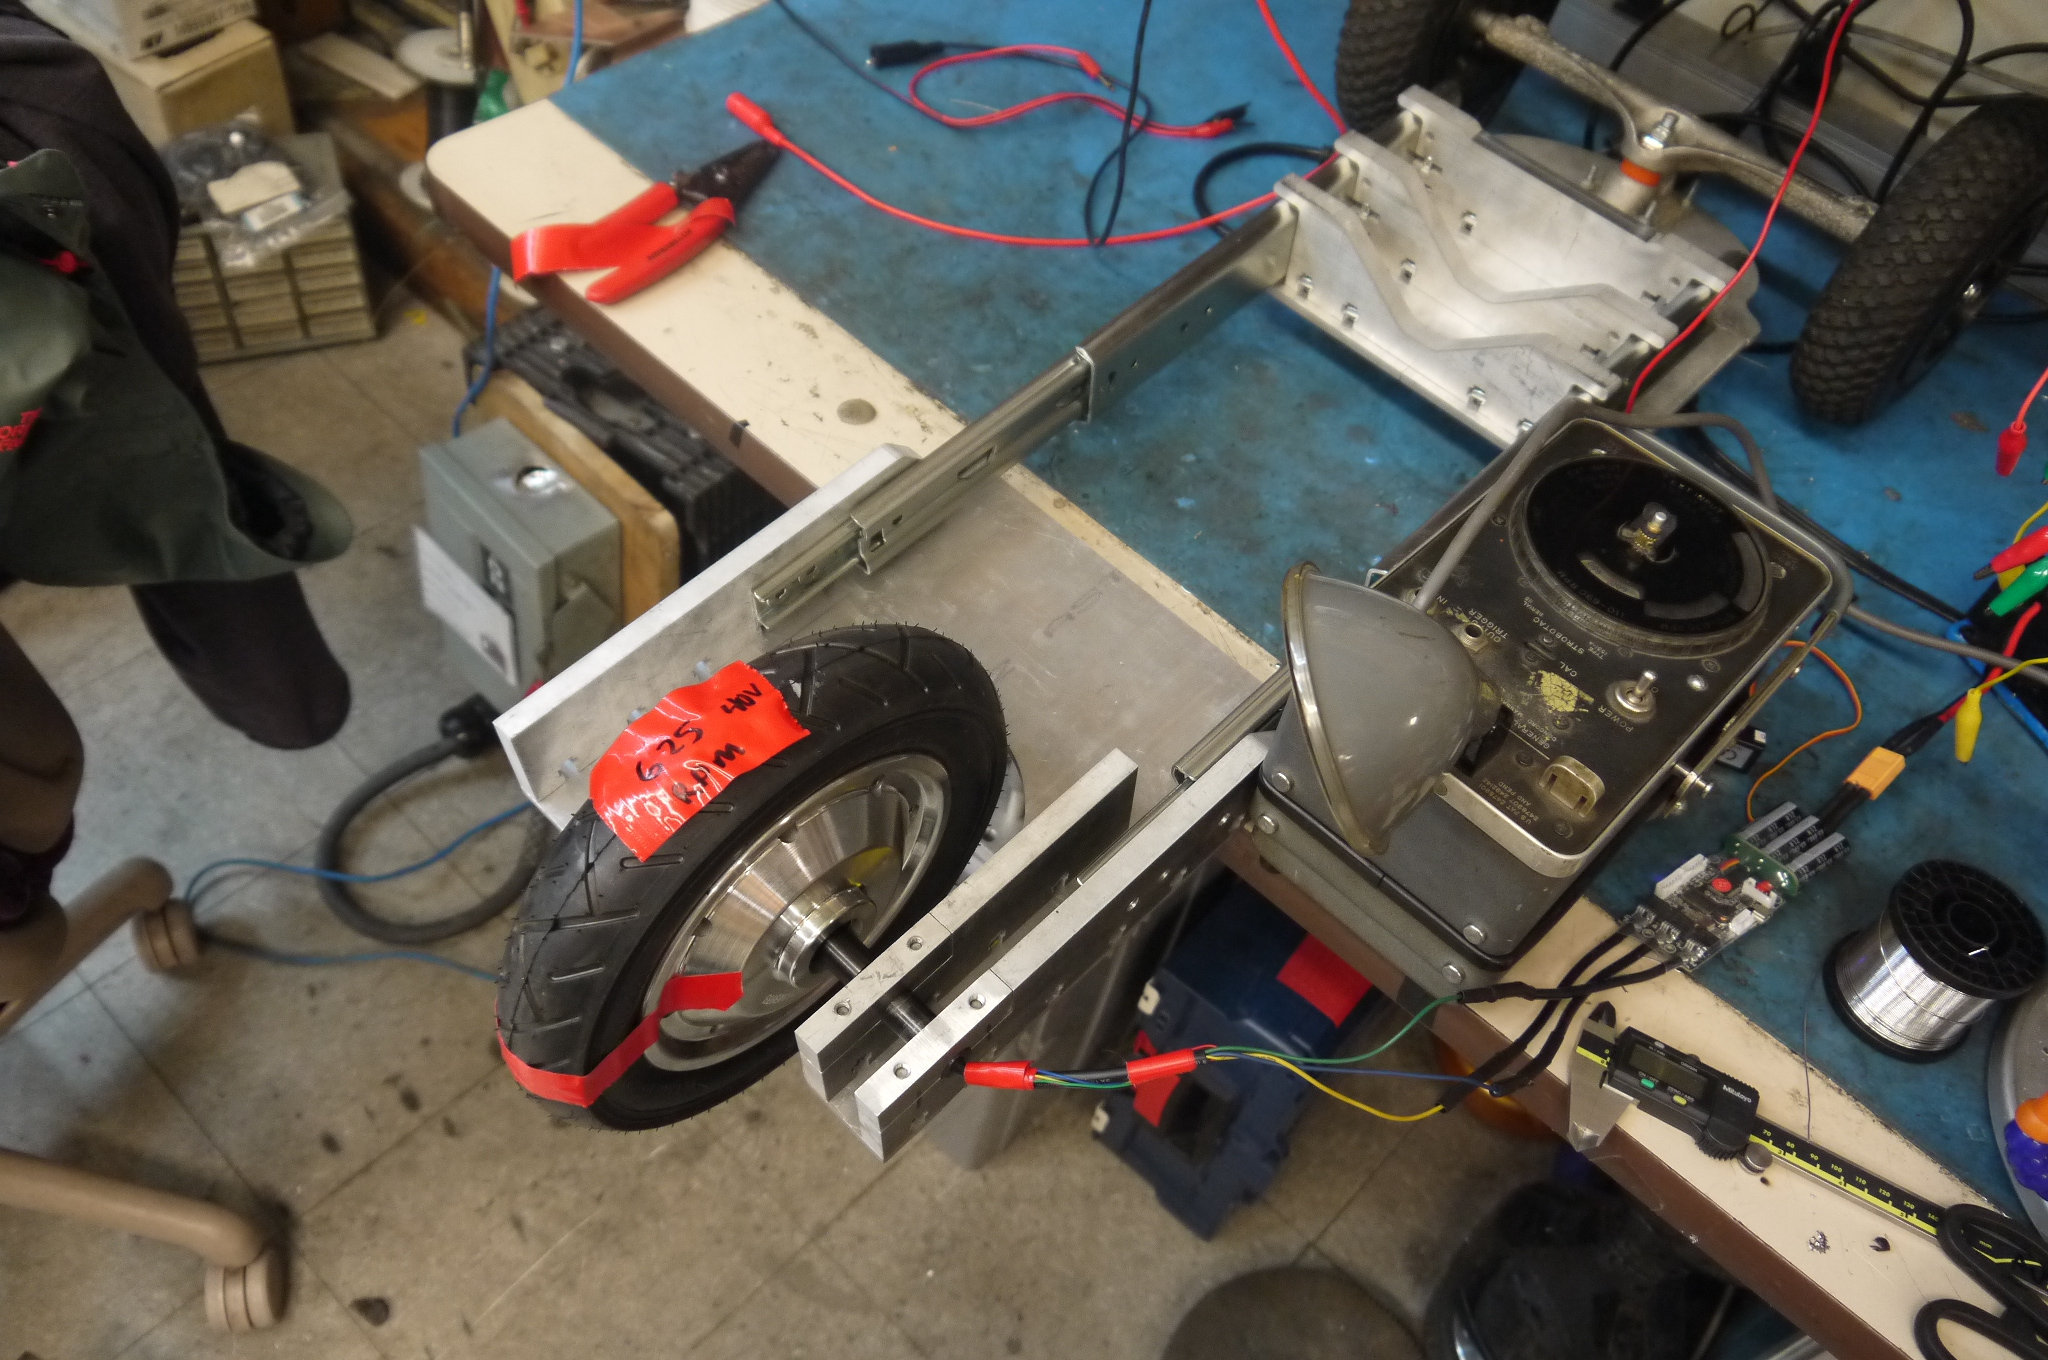
As this skateboard itself is on the small side, I opted for a tiny, relatively waterproof led solution. I found [link] and it seemed to fit the bill. It runs at 12v with an onboard dc/dc. It nominally pulls 800ma at 12v. I played around with spacing and determined mounted to the main board right behind the front trucks would work well. 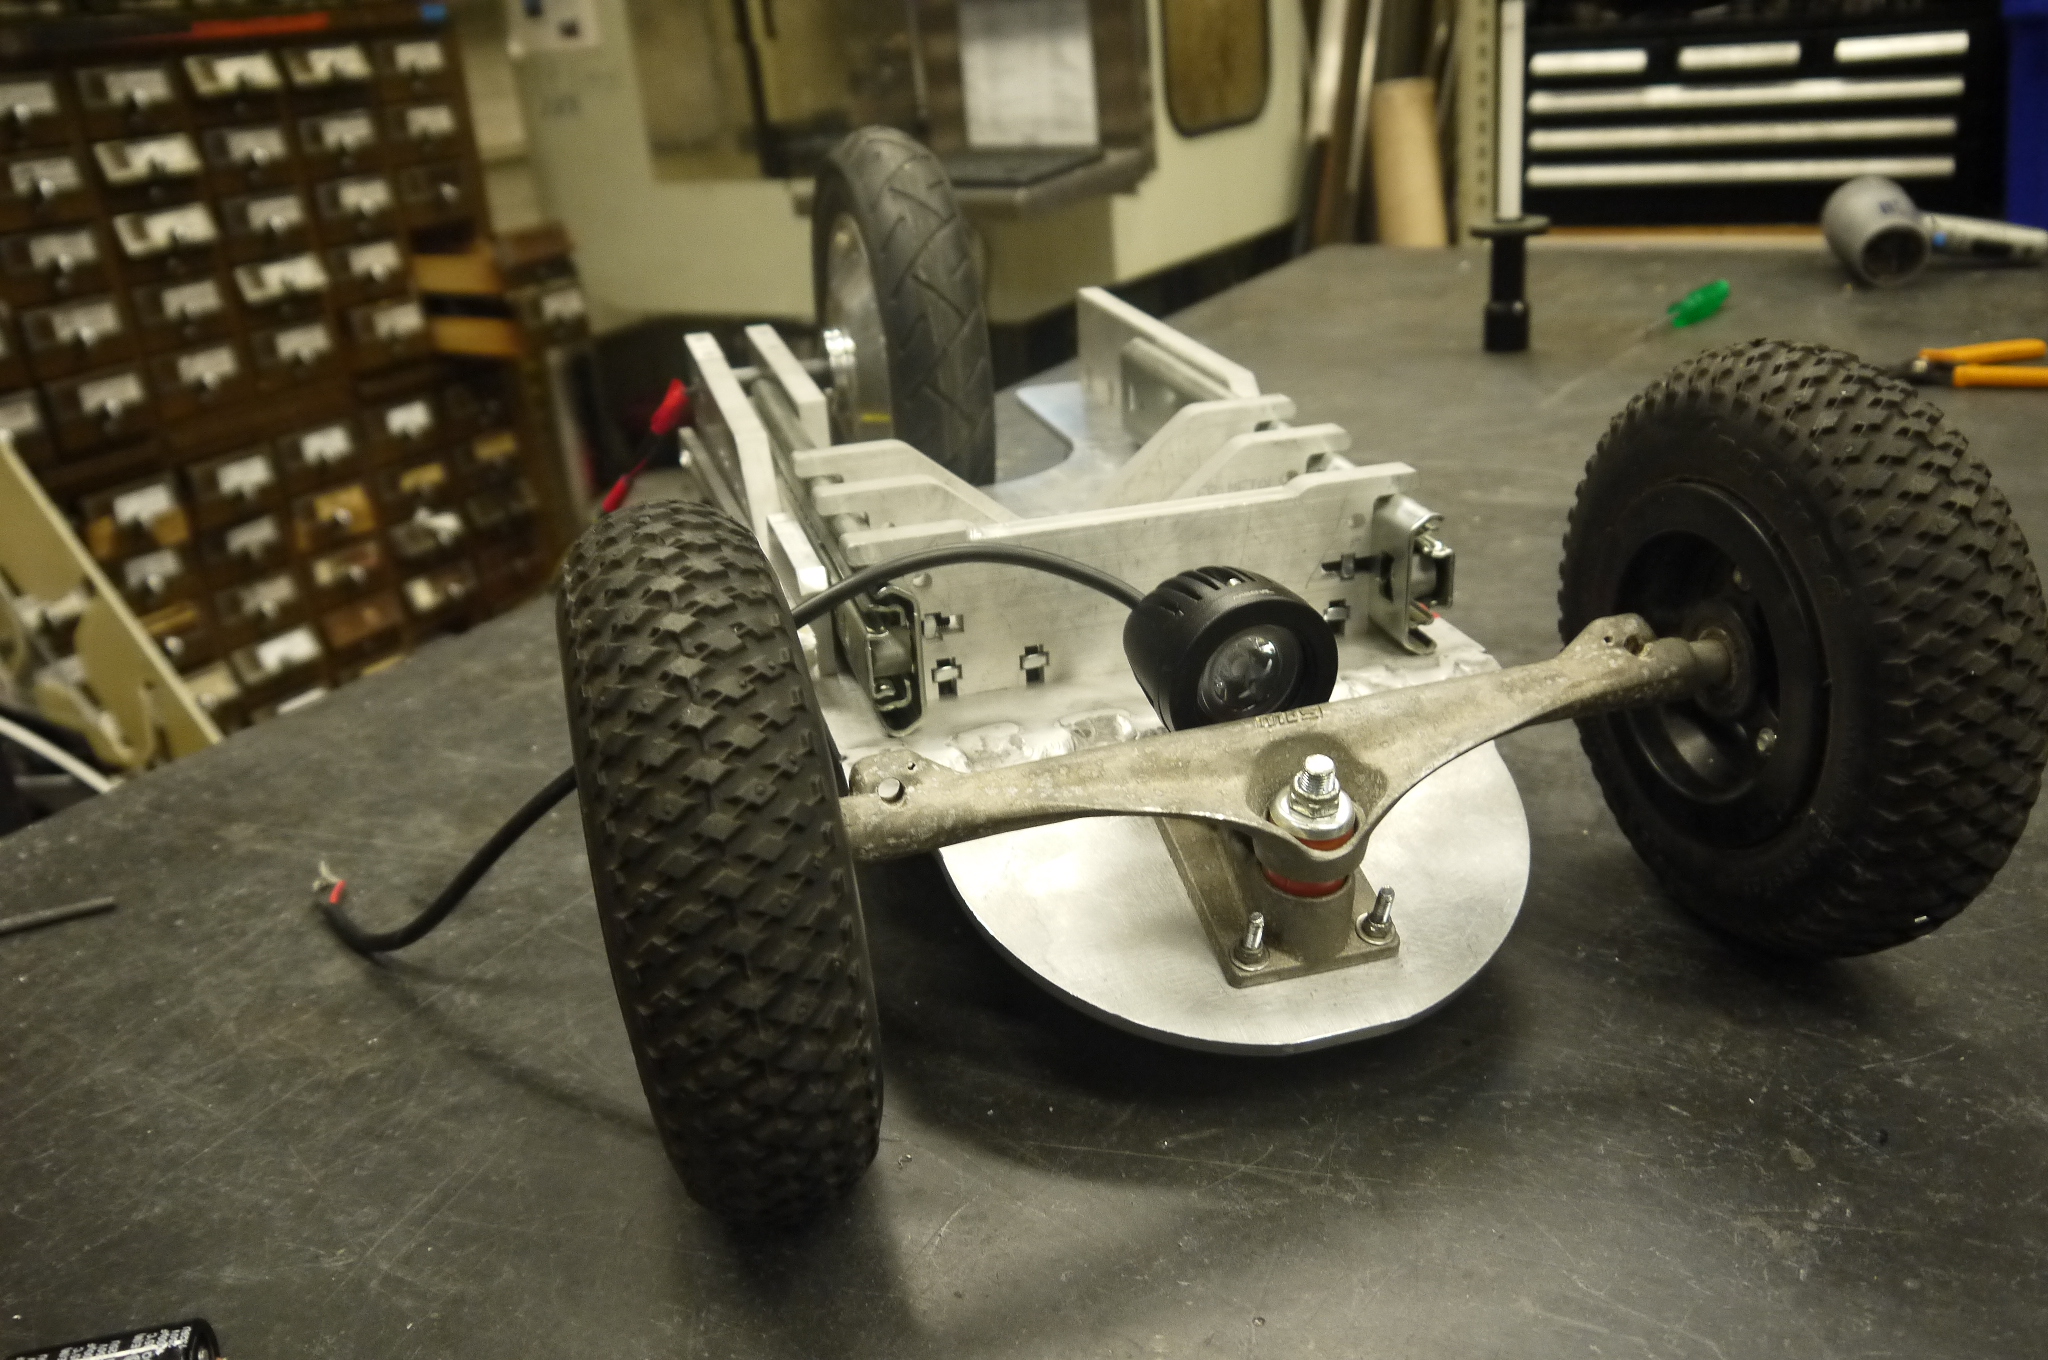
Testing out the headlightPlenty bright! now to have it hide in such a way that it does not stick out for under-board obstacles. 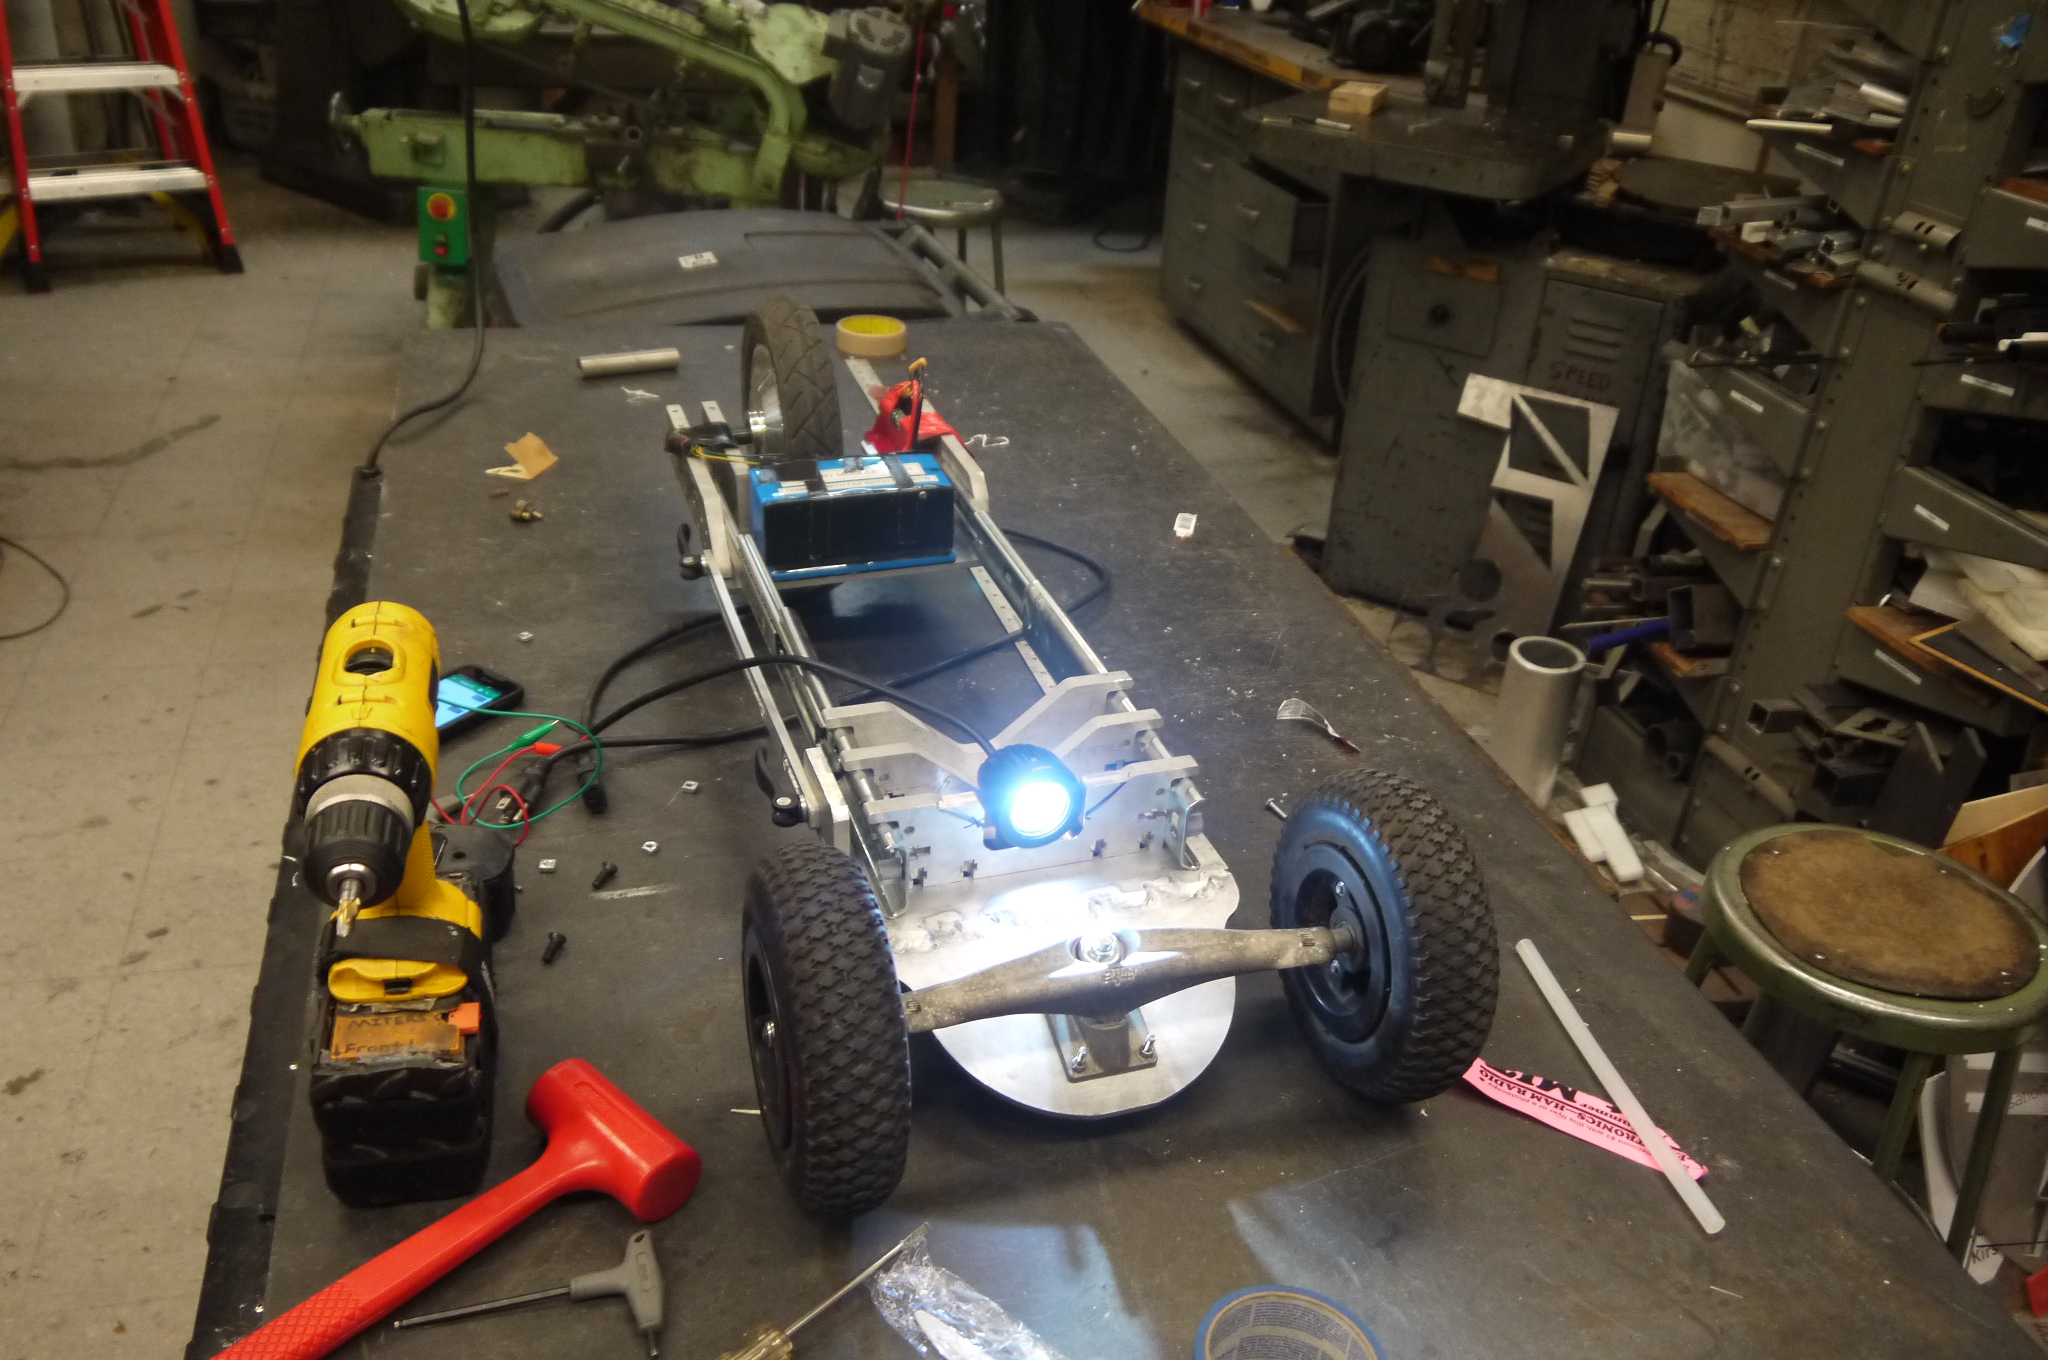

Some shots from the top-side of the skateboard with the light on in a well-lit room. 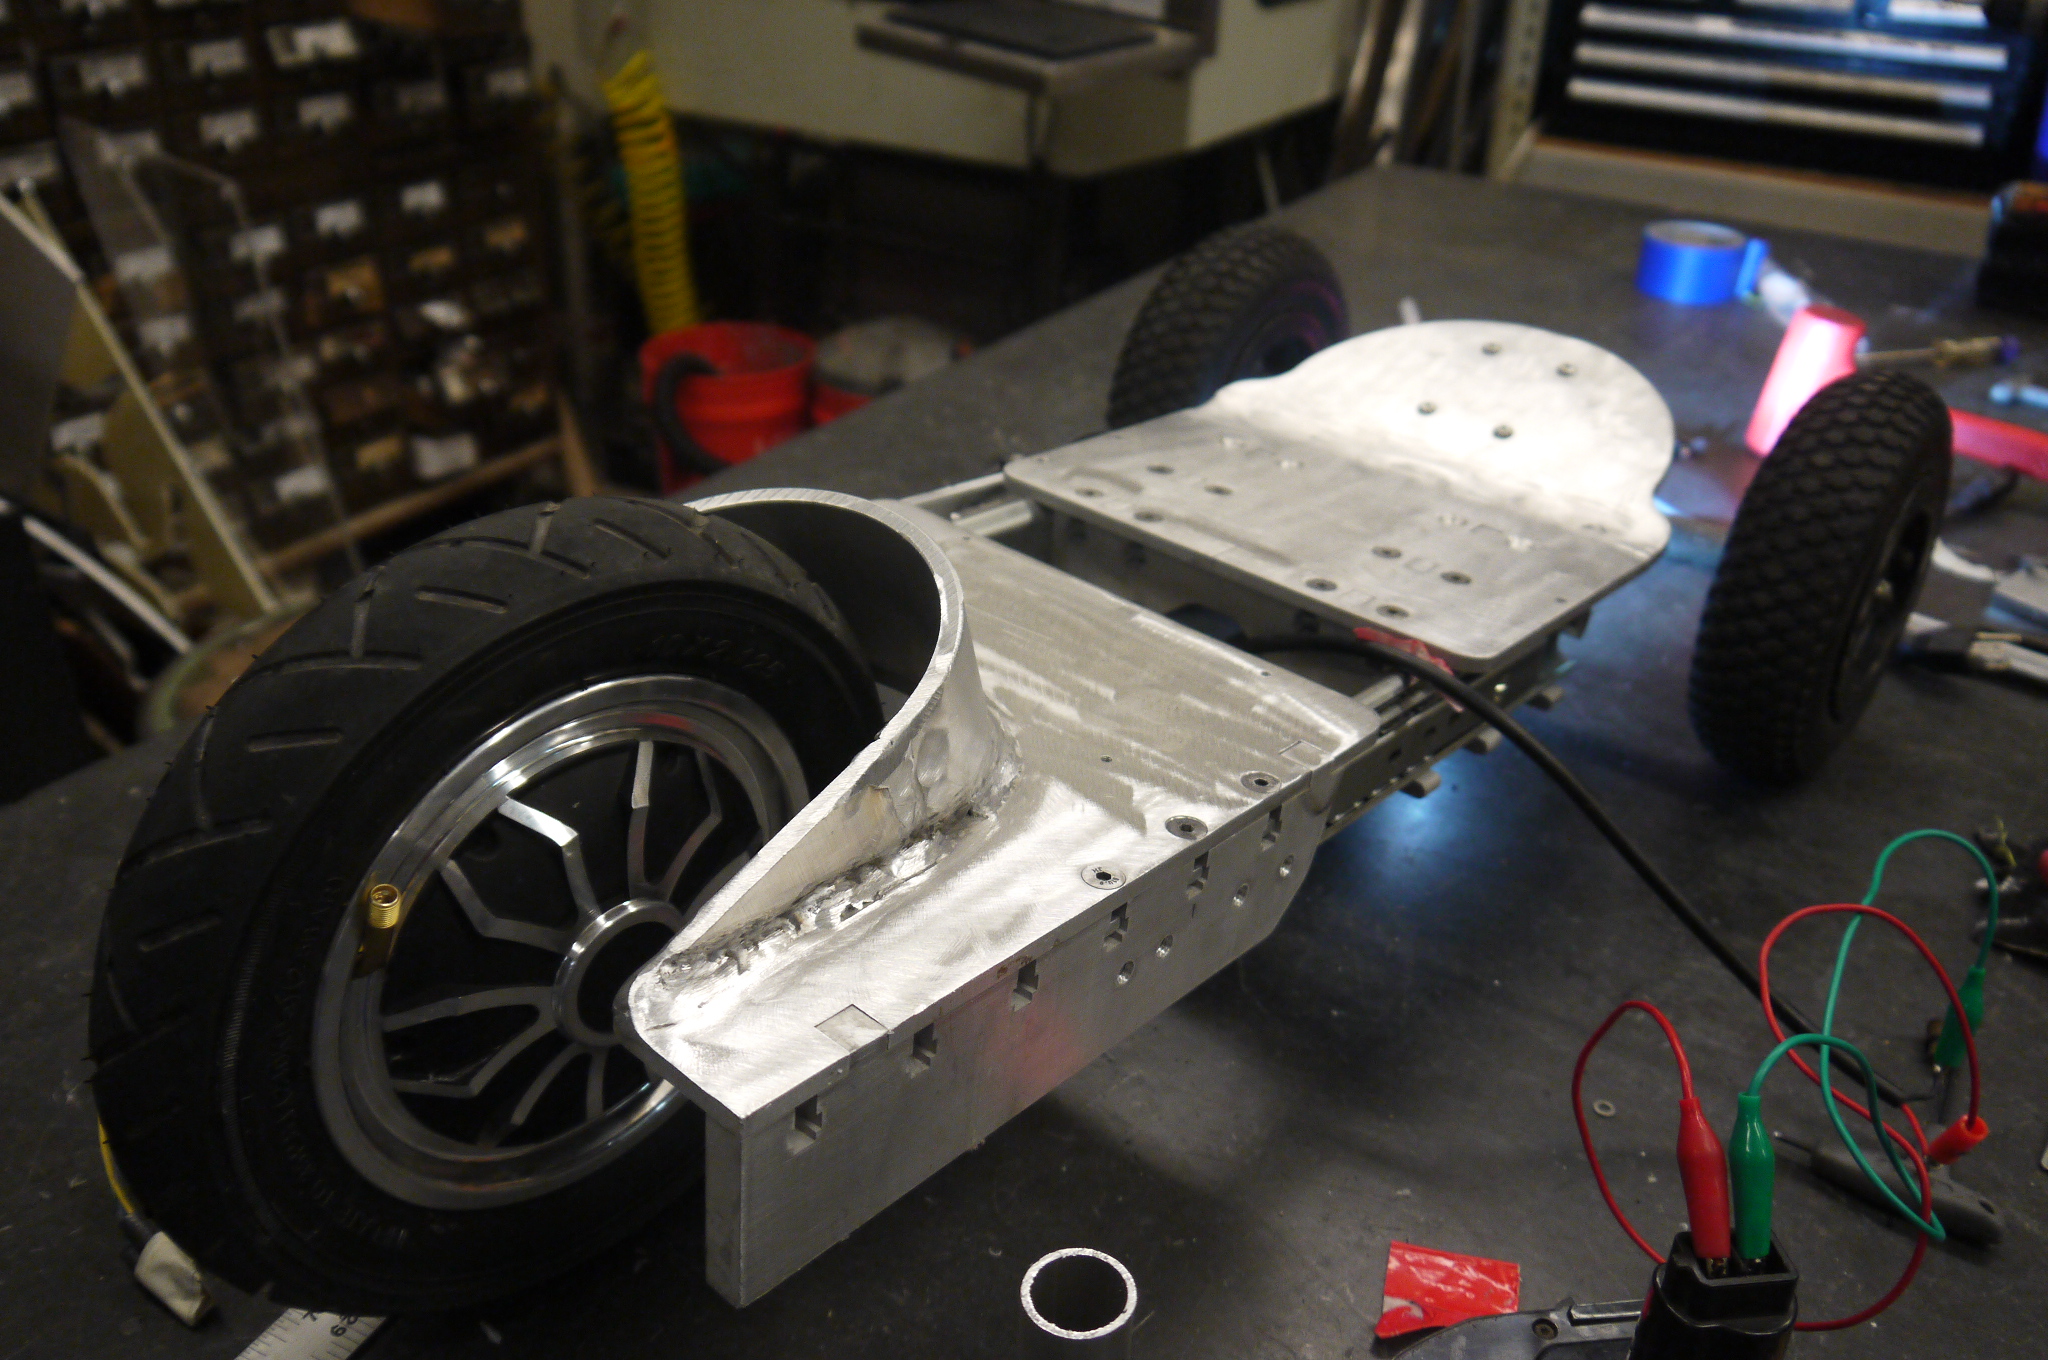
Making the drawer-slider cam-lock slider mechanisms. These are two waterjet parts with three screws holding them together. 
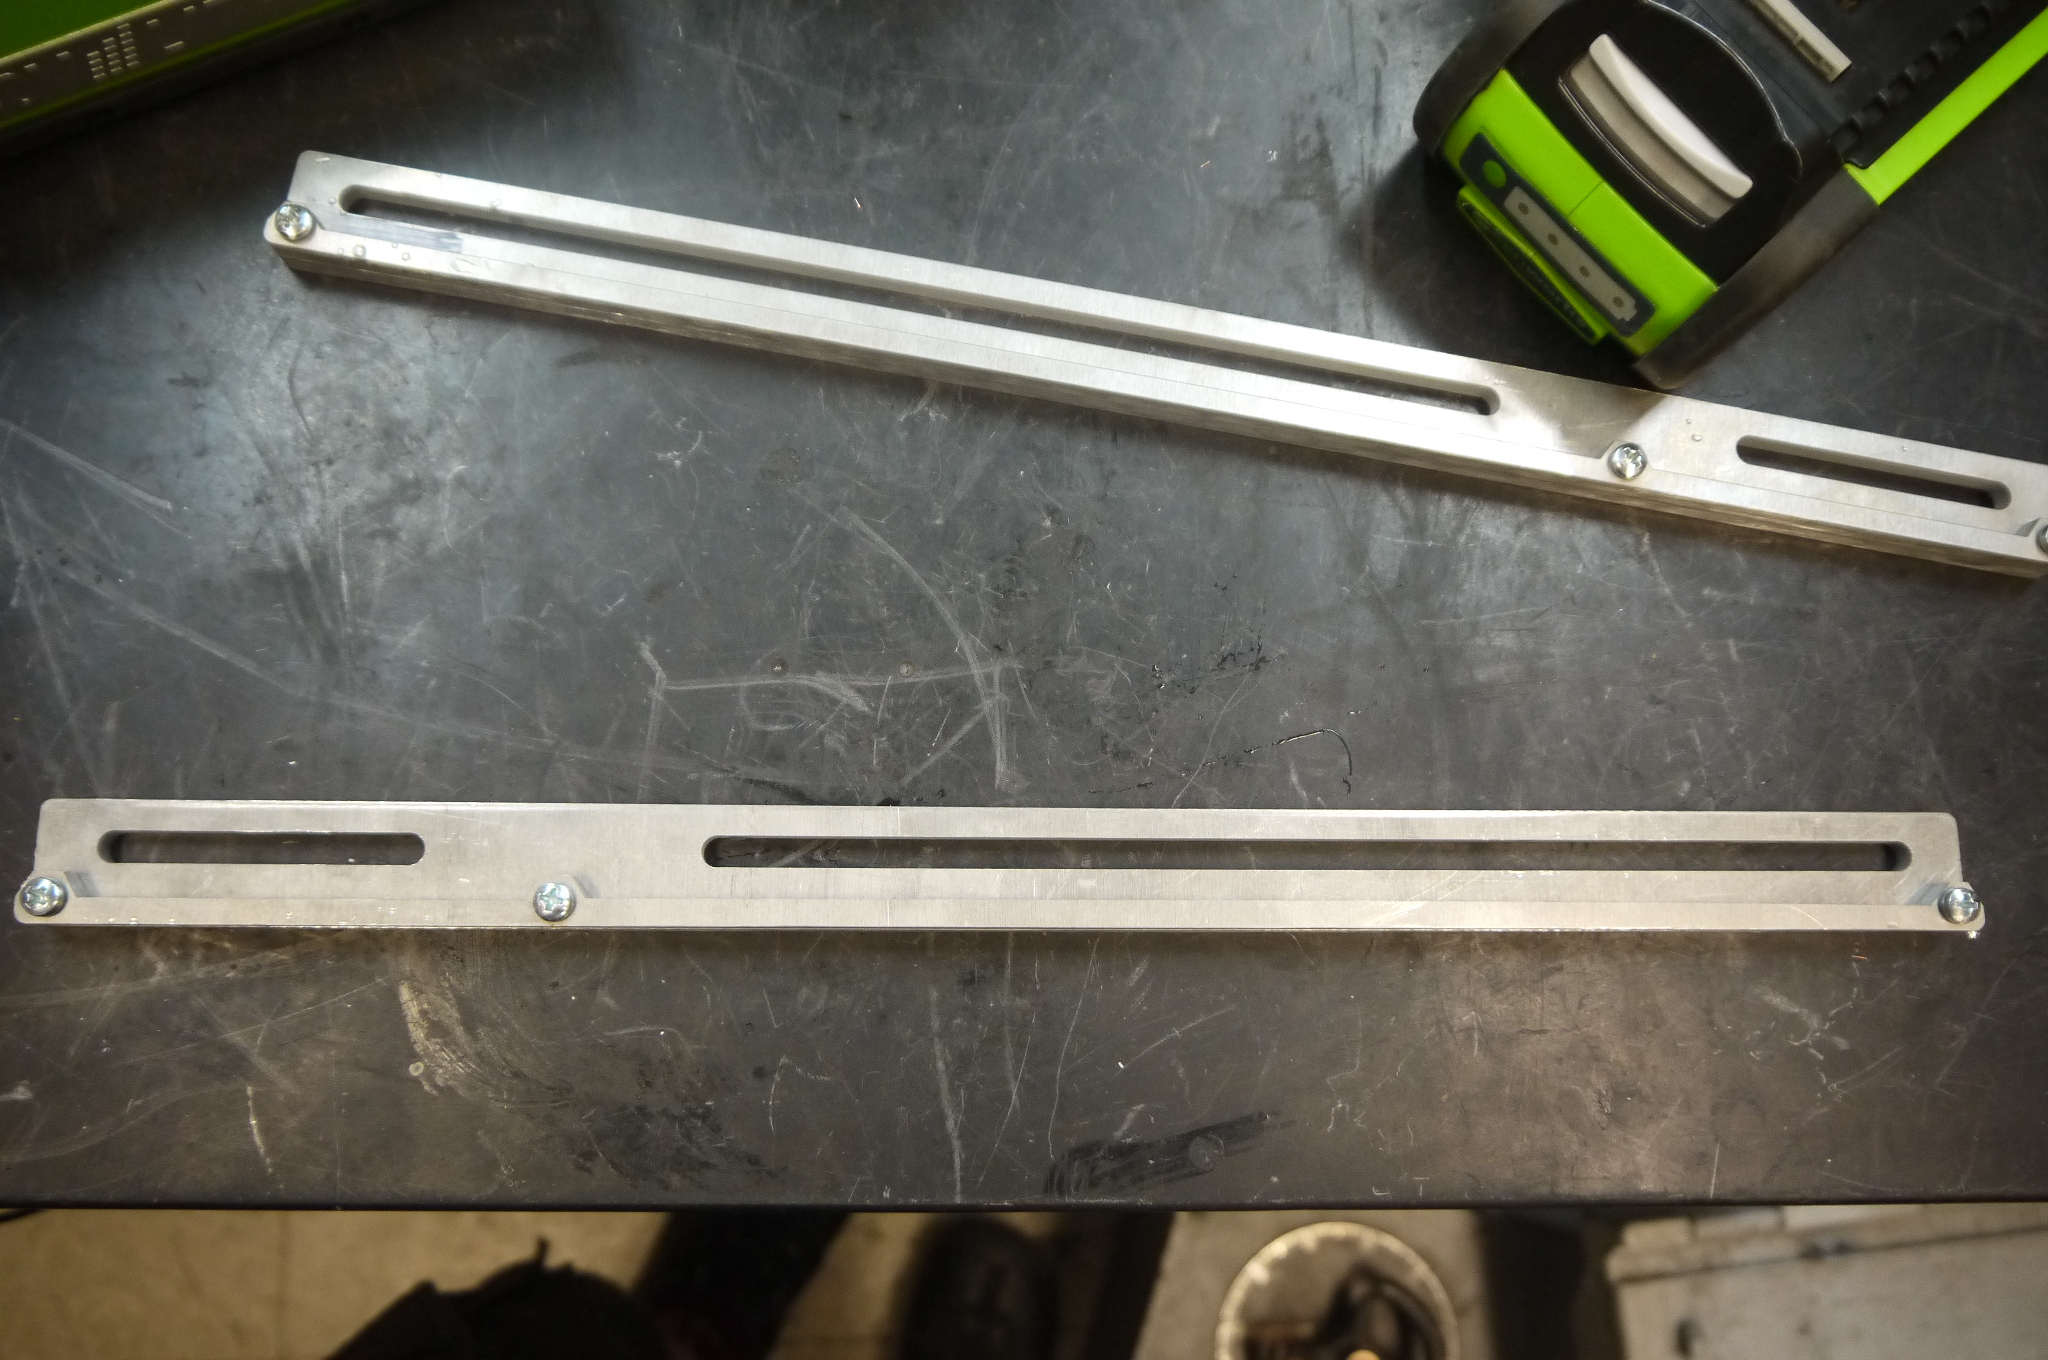
Mounting the cam-lock slider mechanisms and the underside of the skateboard. 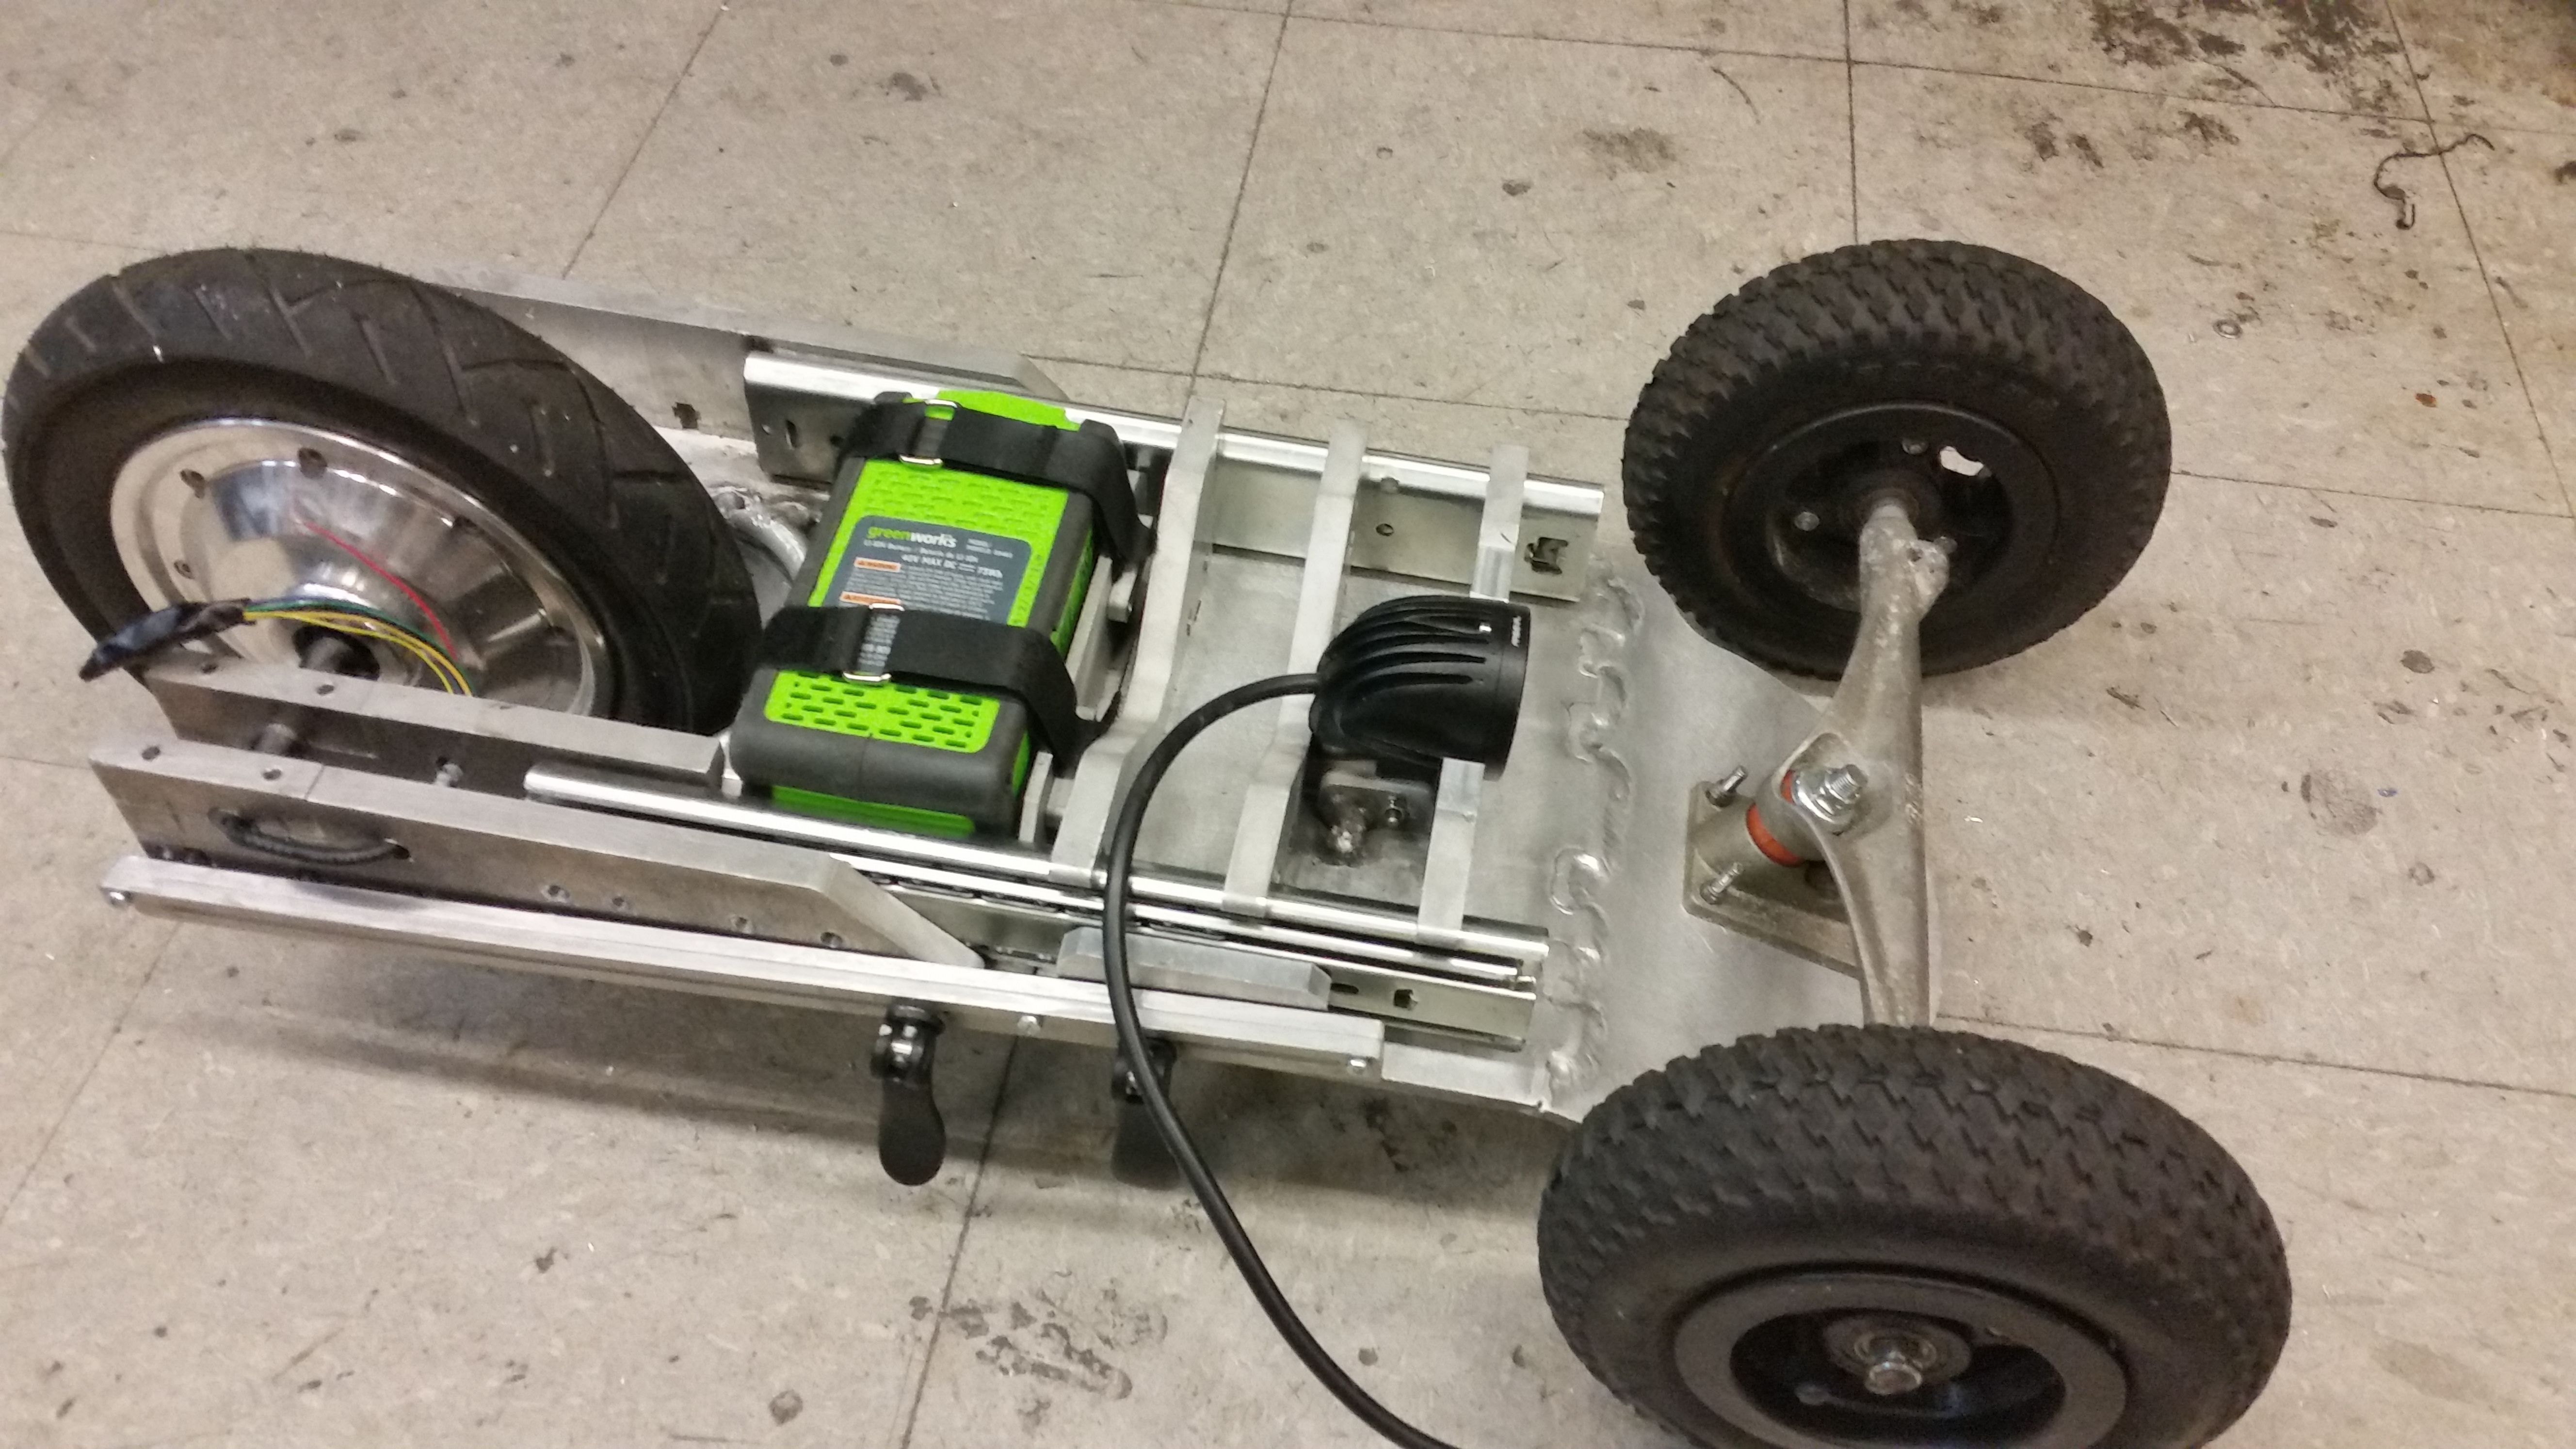
The present charging mechanism, removing the main battery and charging over the XT60 connector underneath. Shown far right is the 2AH vs the 4AH green works packs. 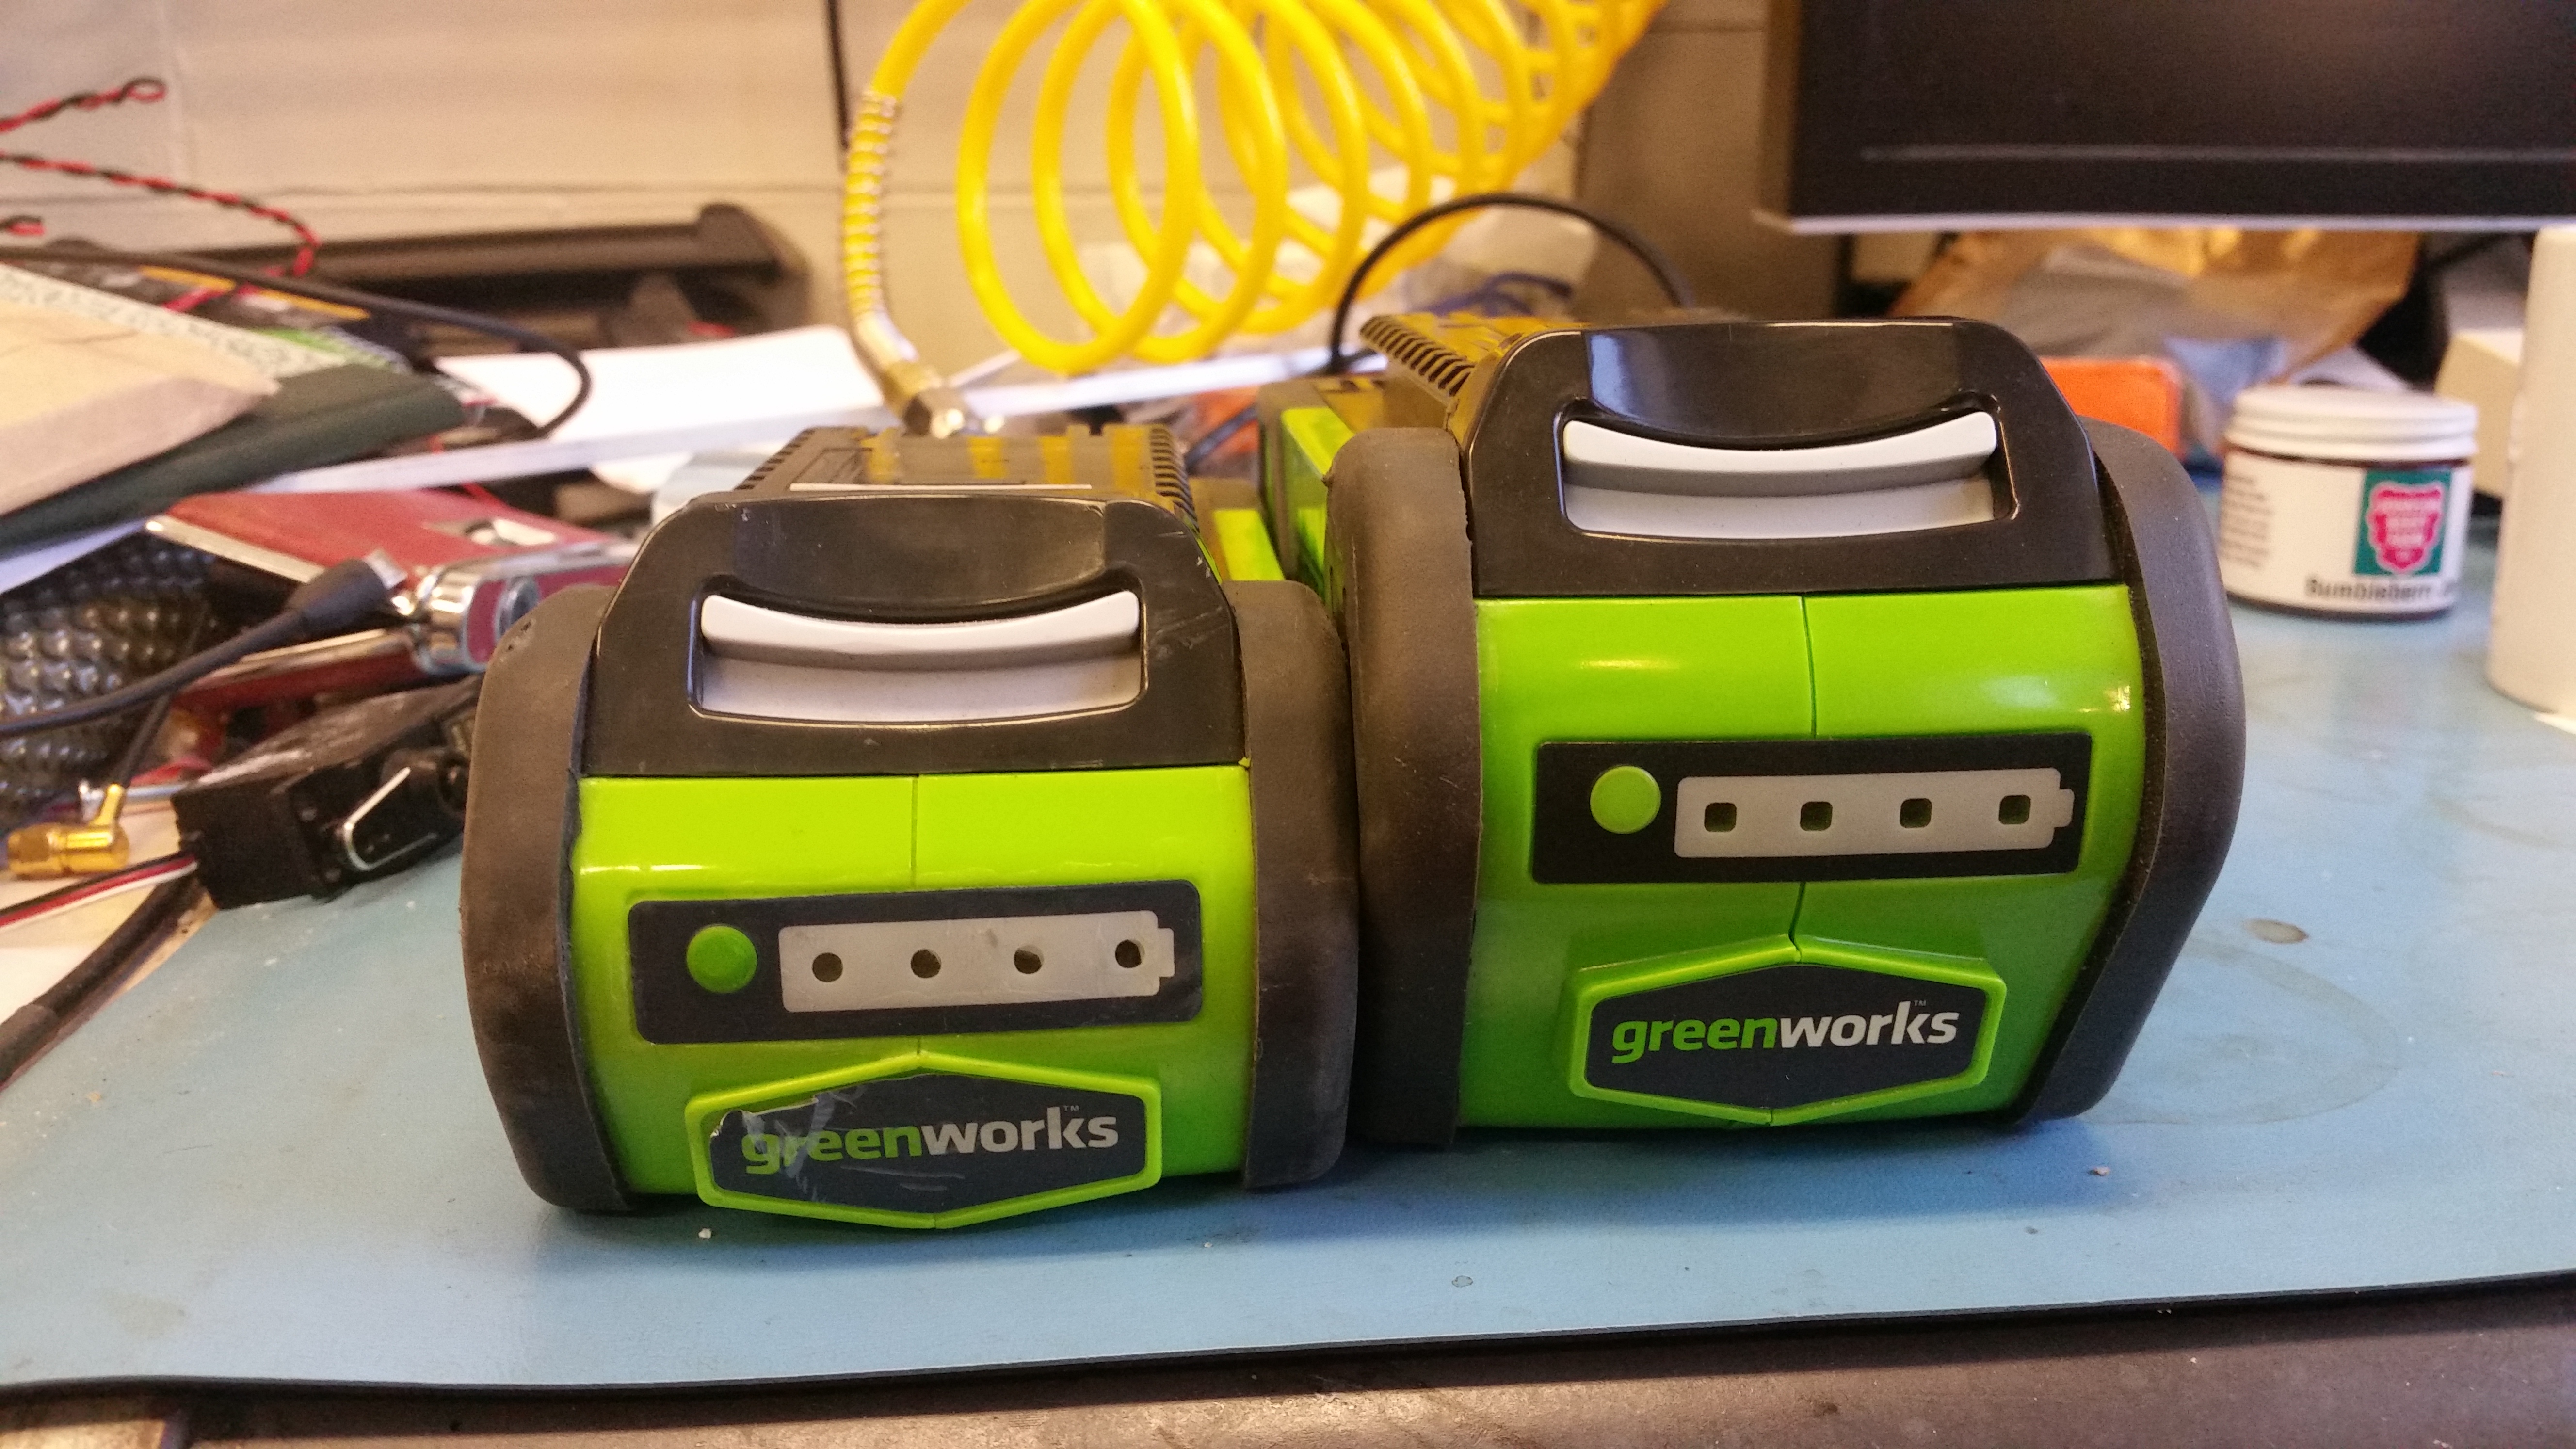
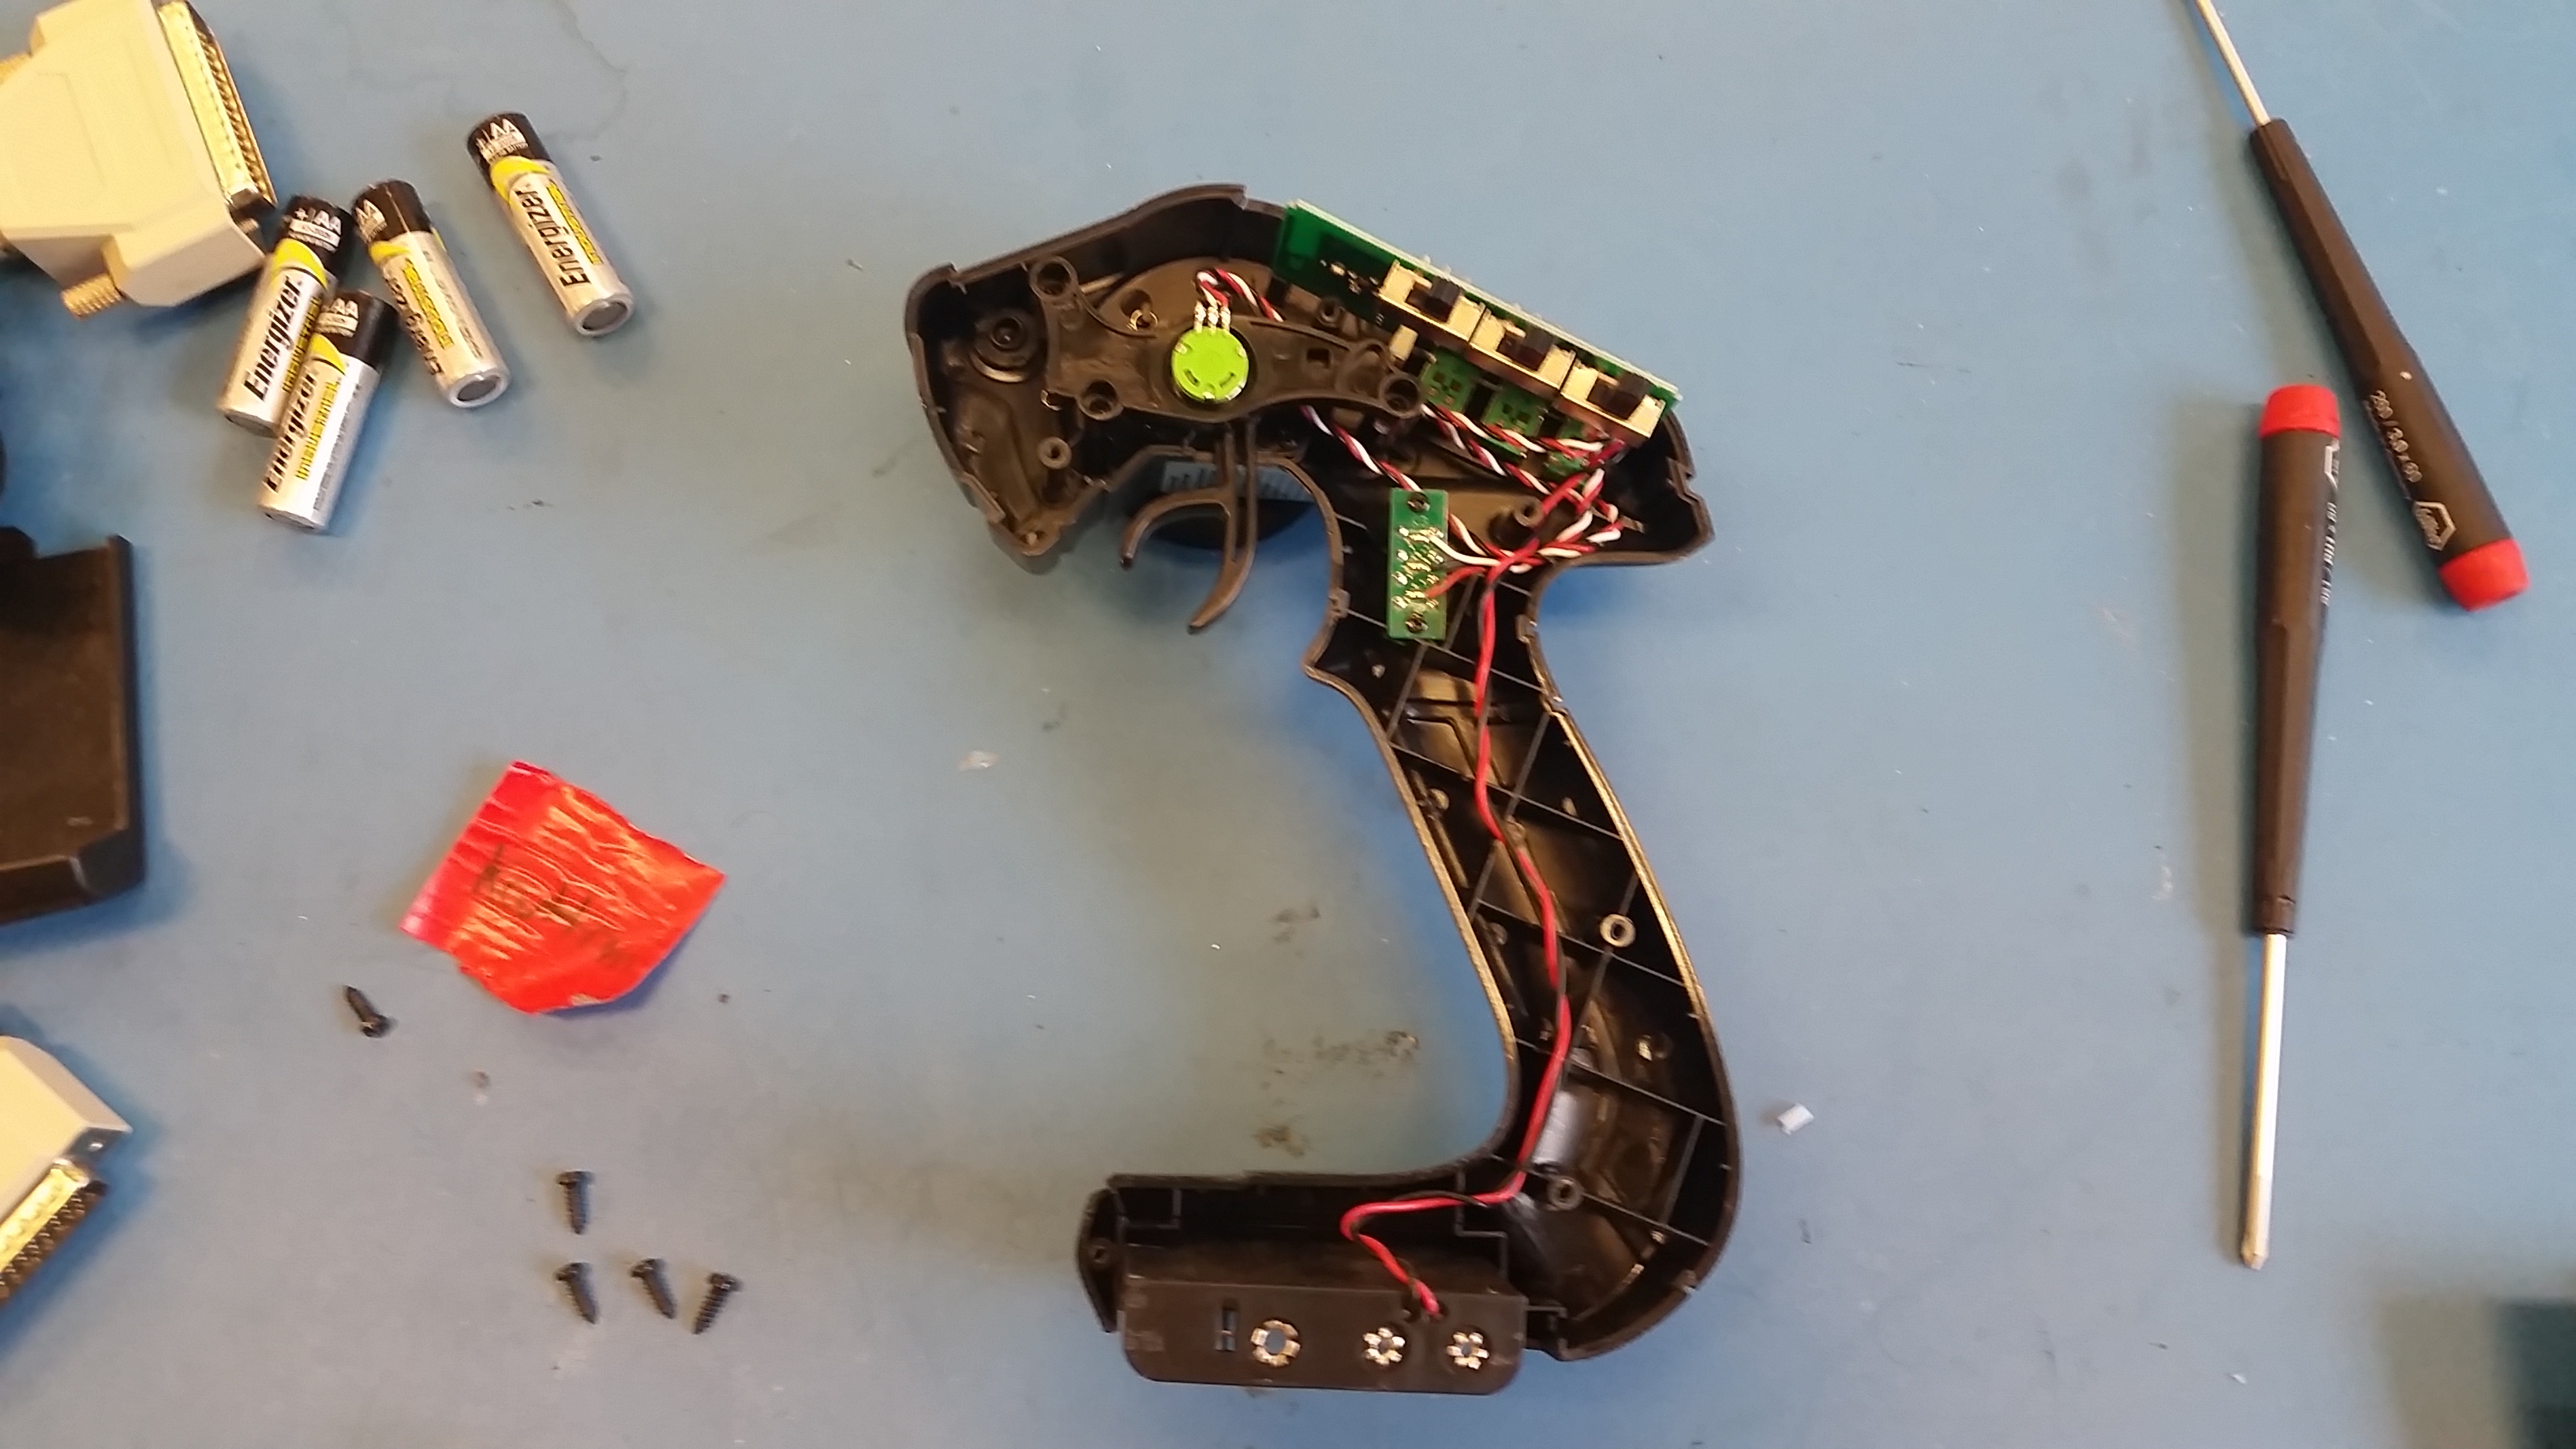
Adding some weatherproofing to the throttle assemblyThe transmitter of choice for the mountainslider is this Tactic TR326, purchased off eBay [link]. Its reasonably sized, runs off four AA cells and has three RC channels. The 'three channels' was fairly key to my plan of remote-controlled headlight. Its reasonably assembled , its structural integrity will be tested on trips and use of the board. Here's the innards of the controller, the whole thing comes apart with 5 Phillips screws. I expected a hall-effect driven throttle but was surprised to find a potentiometer-lever assembly. So now to water-resistant this thing we're going to need to isolate the rotating parts from the PCB and use a conformal coating material. 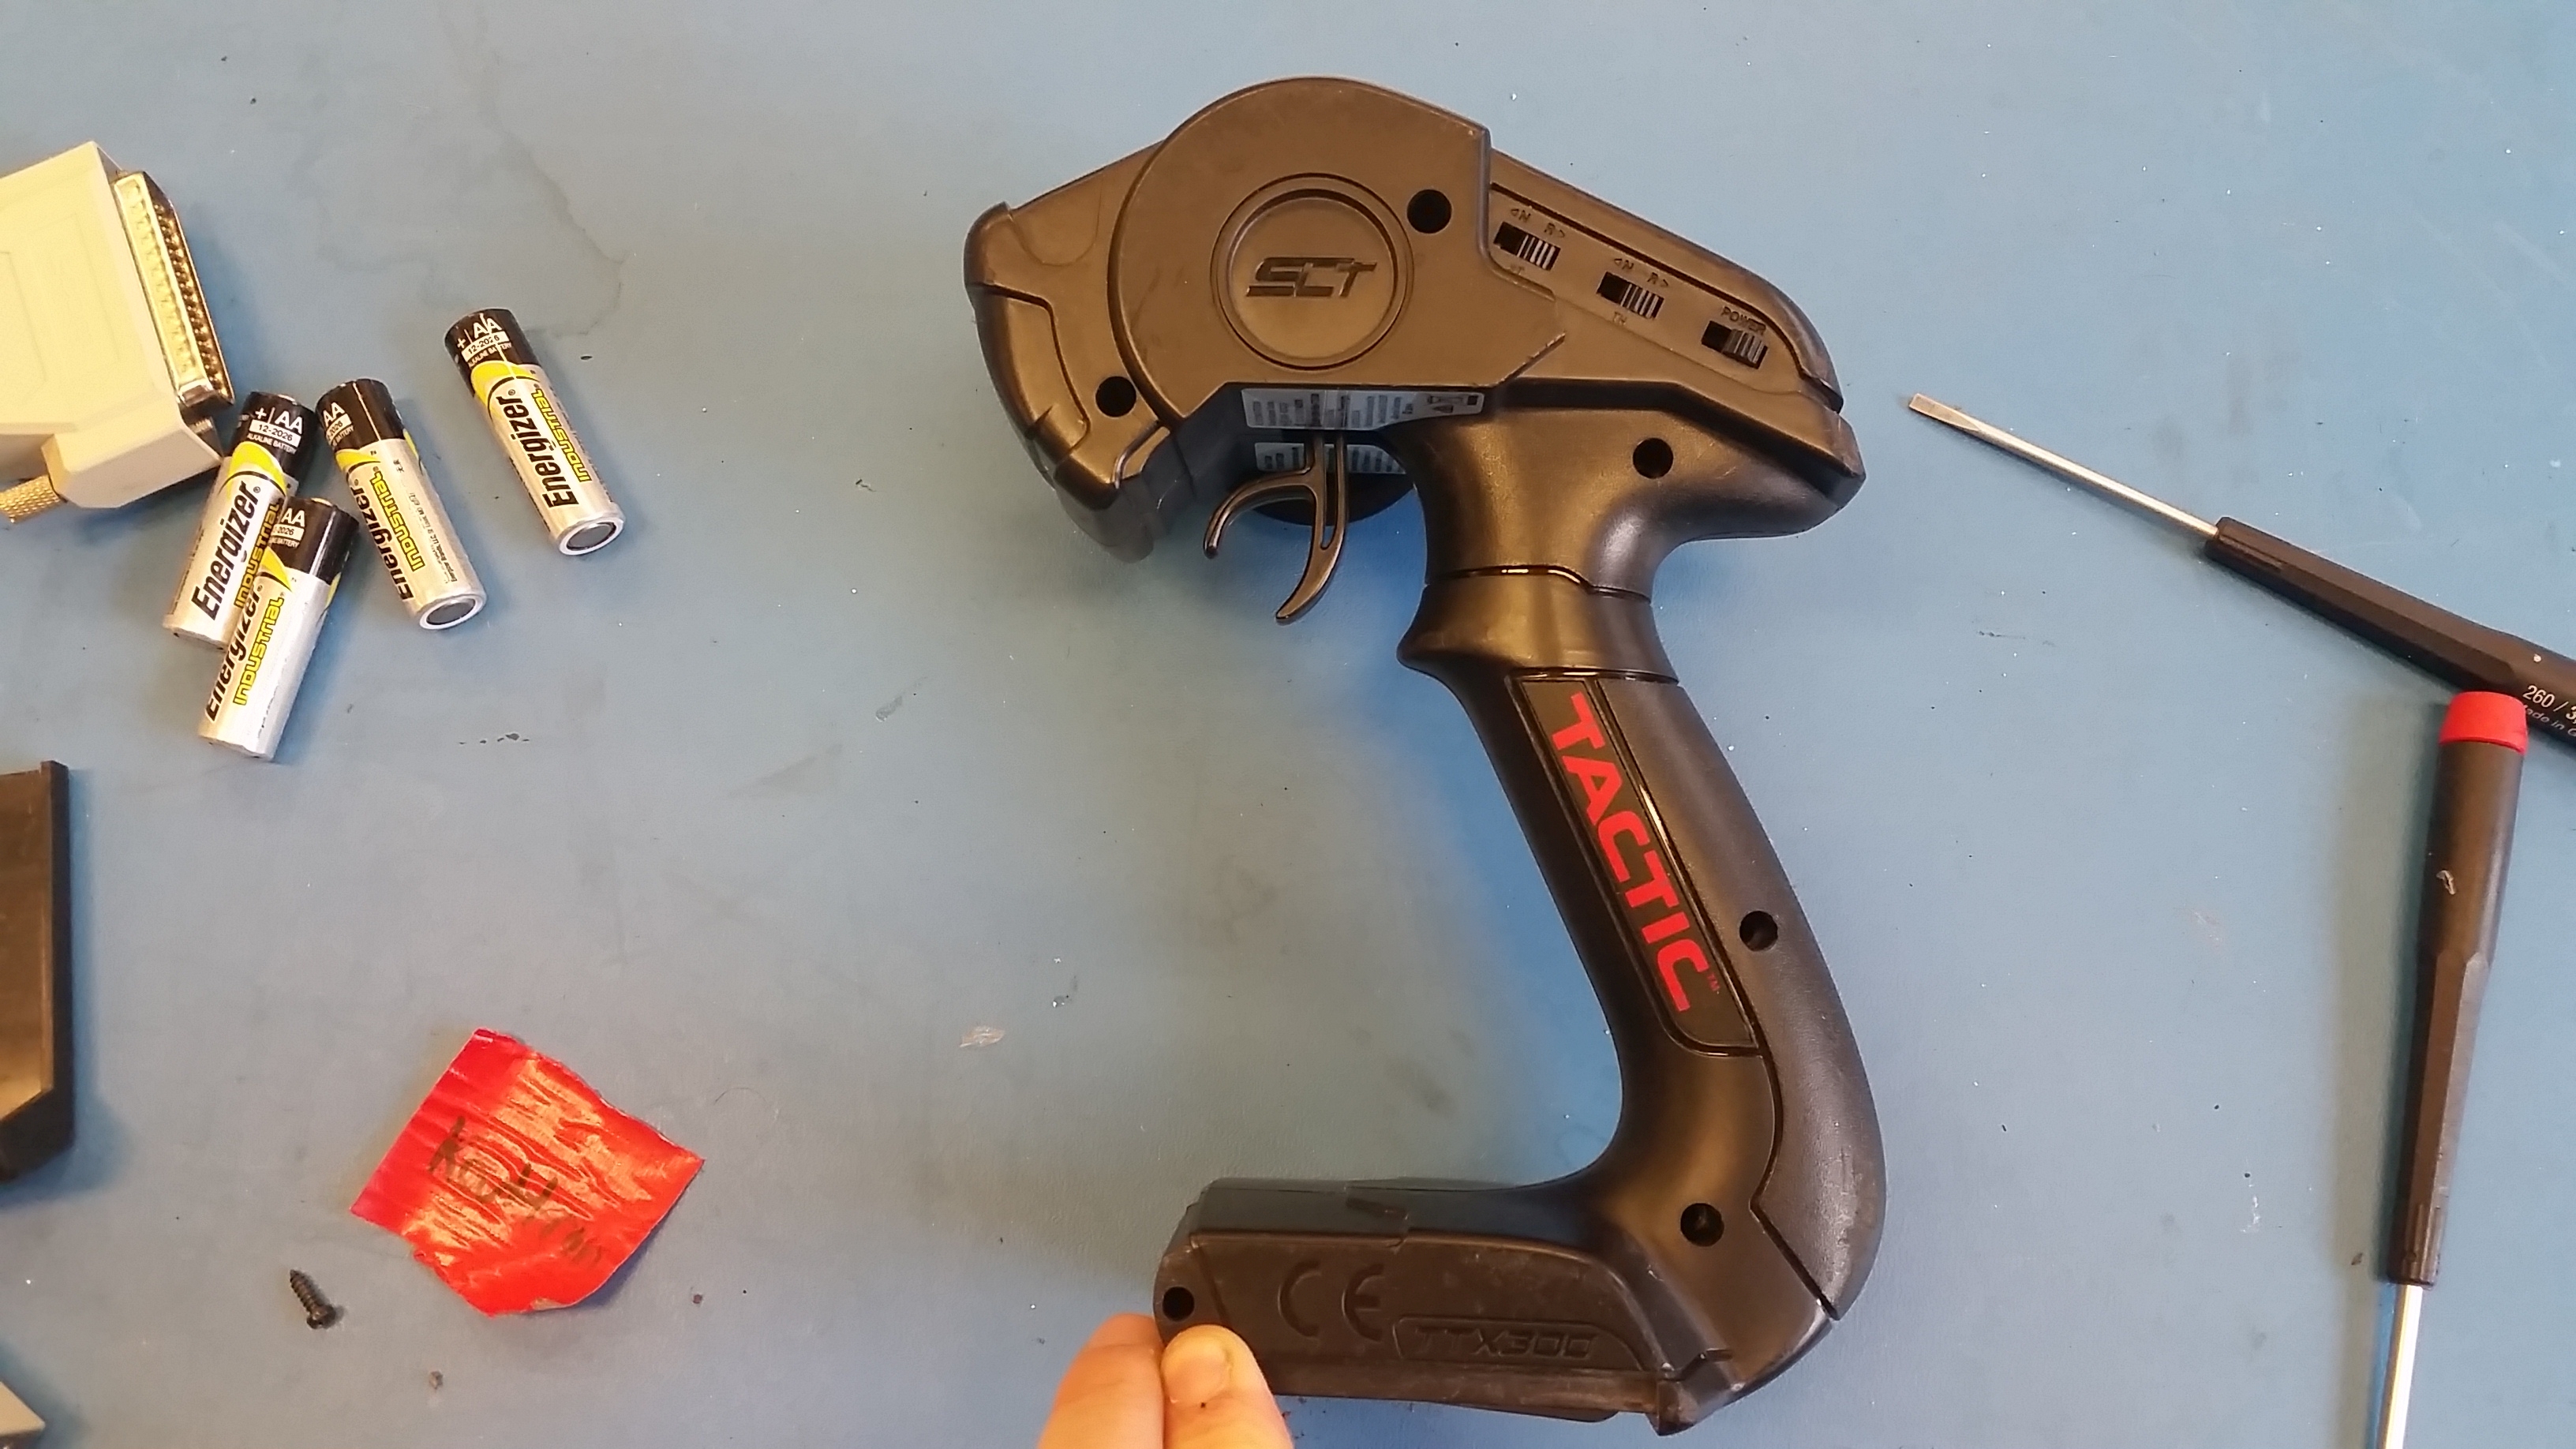
Lets take a look at the pcb. There are three switches and three potentiometers, along with some cable assemblies that go off board to the throttle-steering potentiometers. Its fairly key to 'way over tape' the switch assemblies as portions of the back and front are exposed and any of the spray will cause them to stick and no longer function correctly. To a similar extent the adjustment pots also needed covering. Masking tape did quite well to keep these covered. 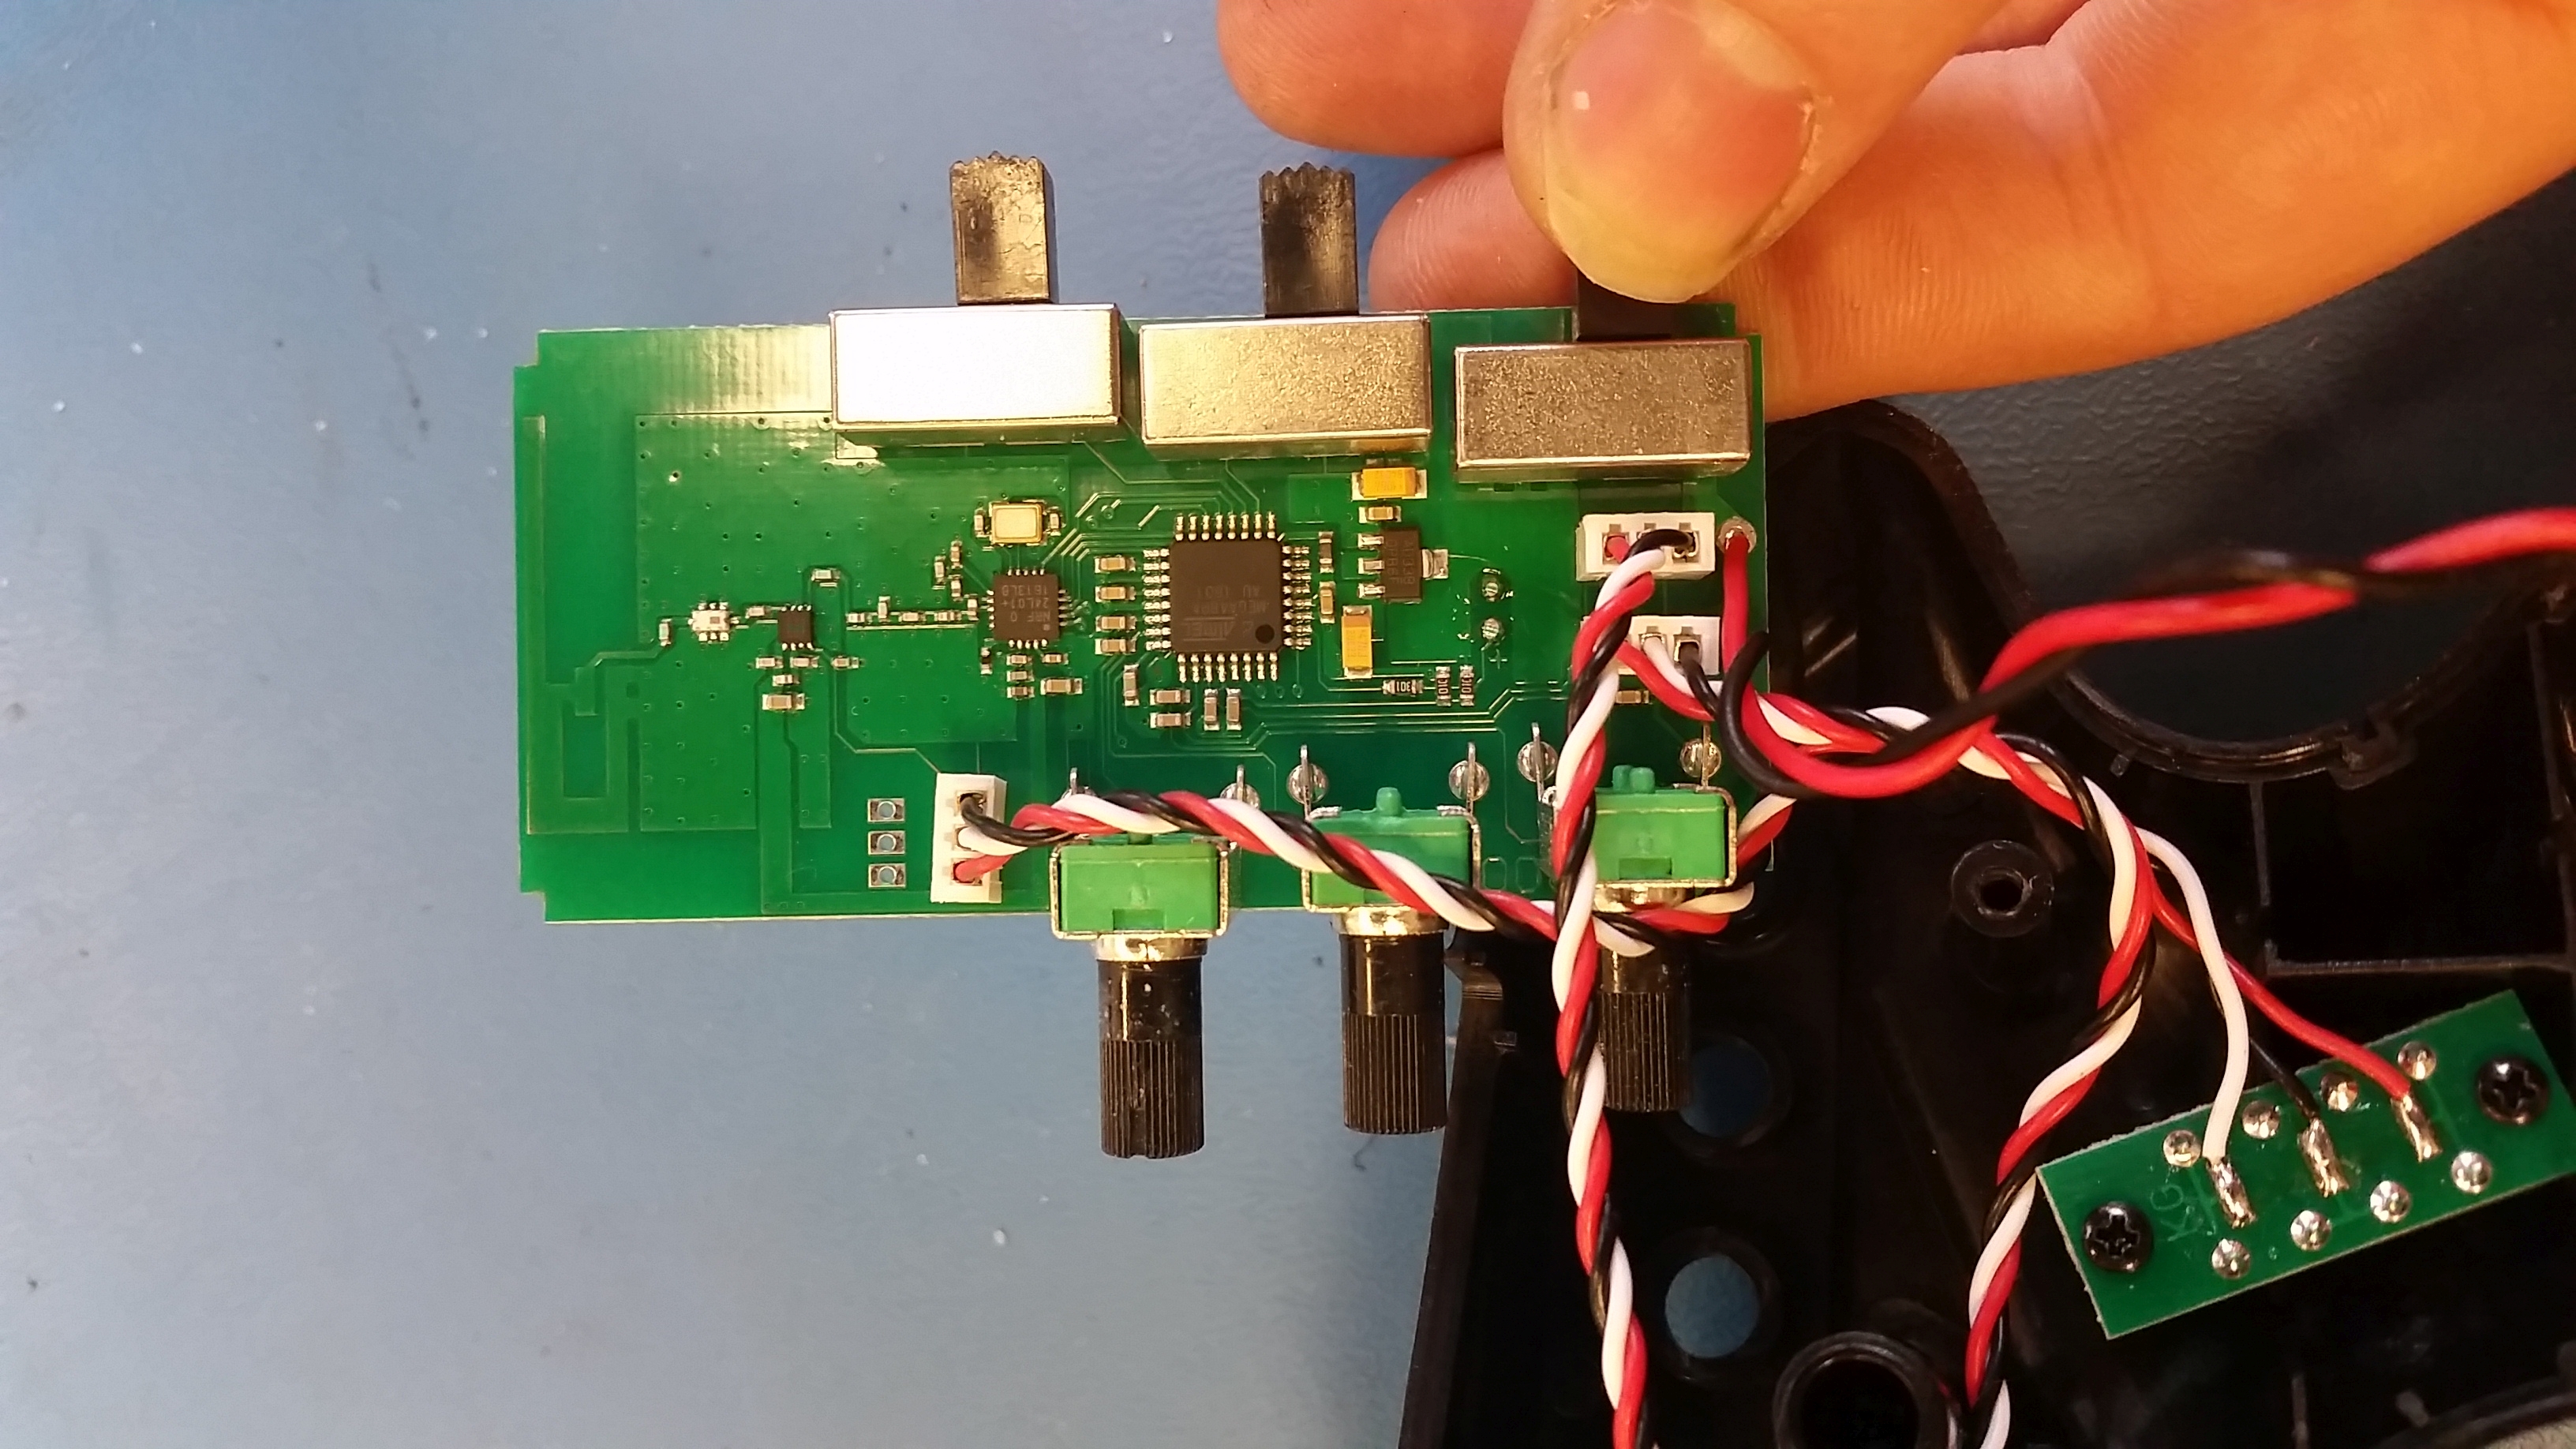
THE SPRAYI used an acrylic conformal spray coating. I highly recommend TECHSPRAY as it sprays well, coats fantastically and yet it comes off in an ethanol bath. It gets better, its visible under UV light so its not difficult to check which spots were covered and which were not. 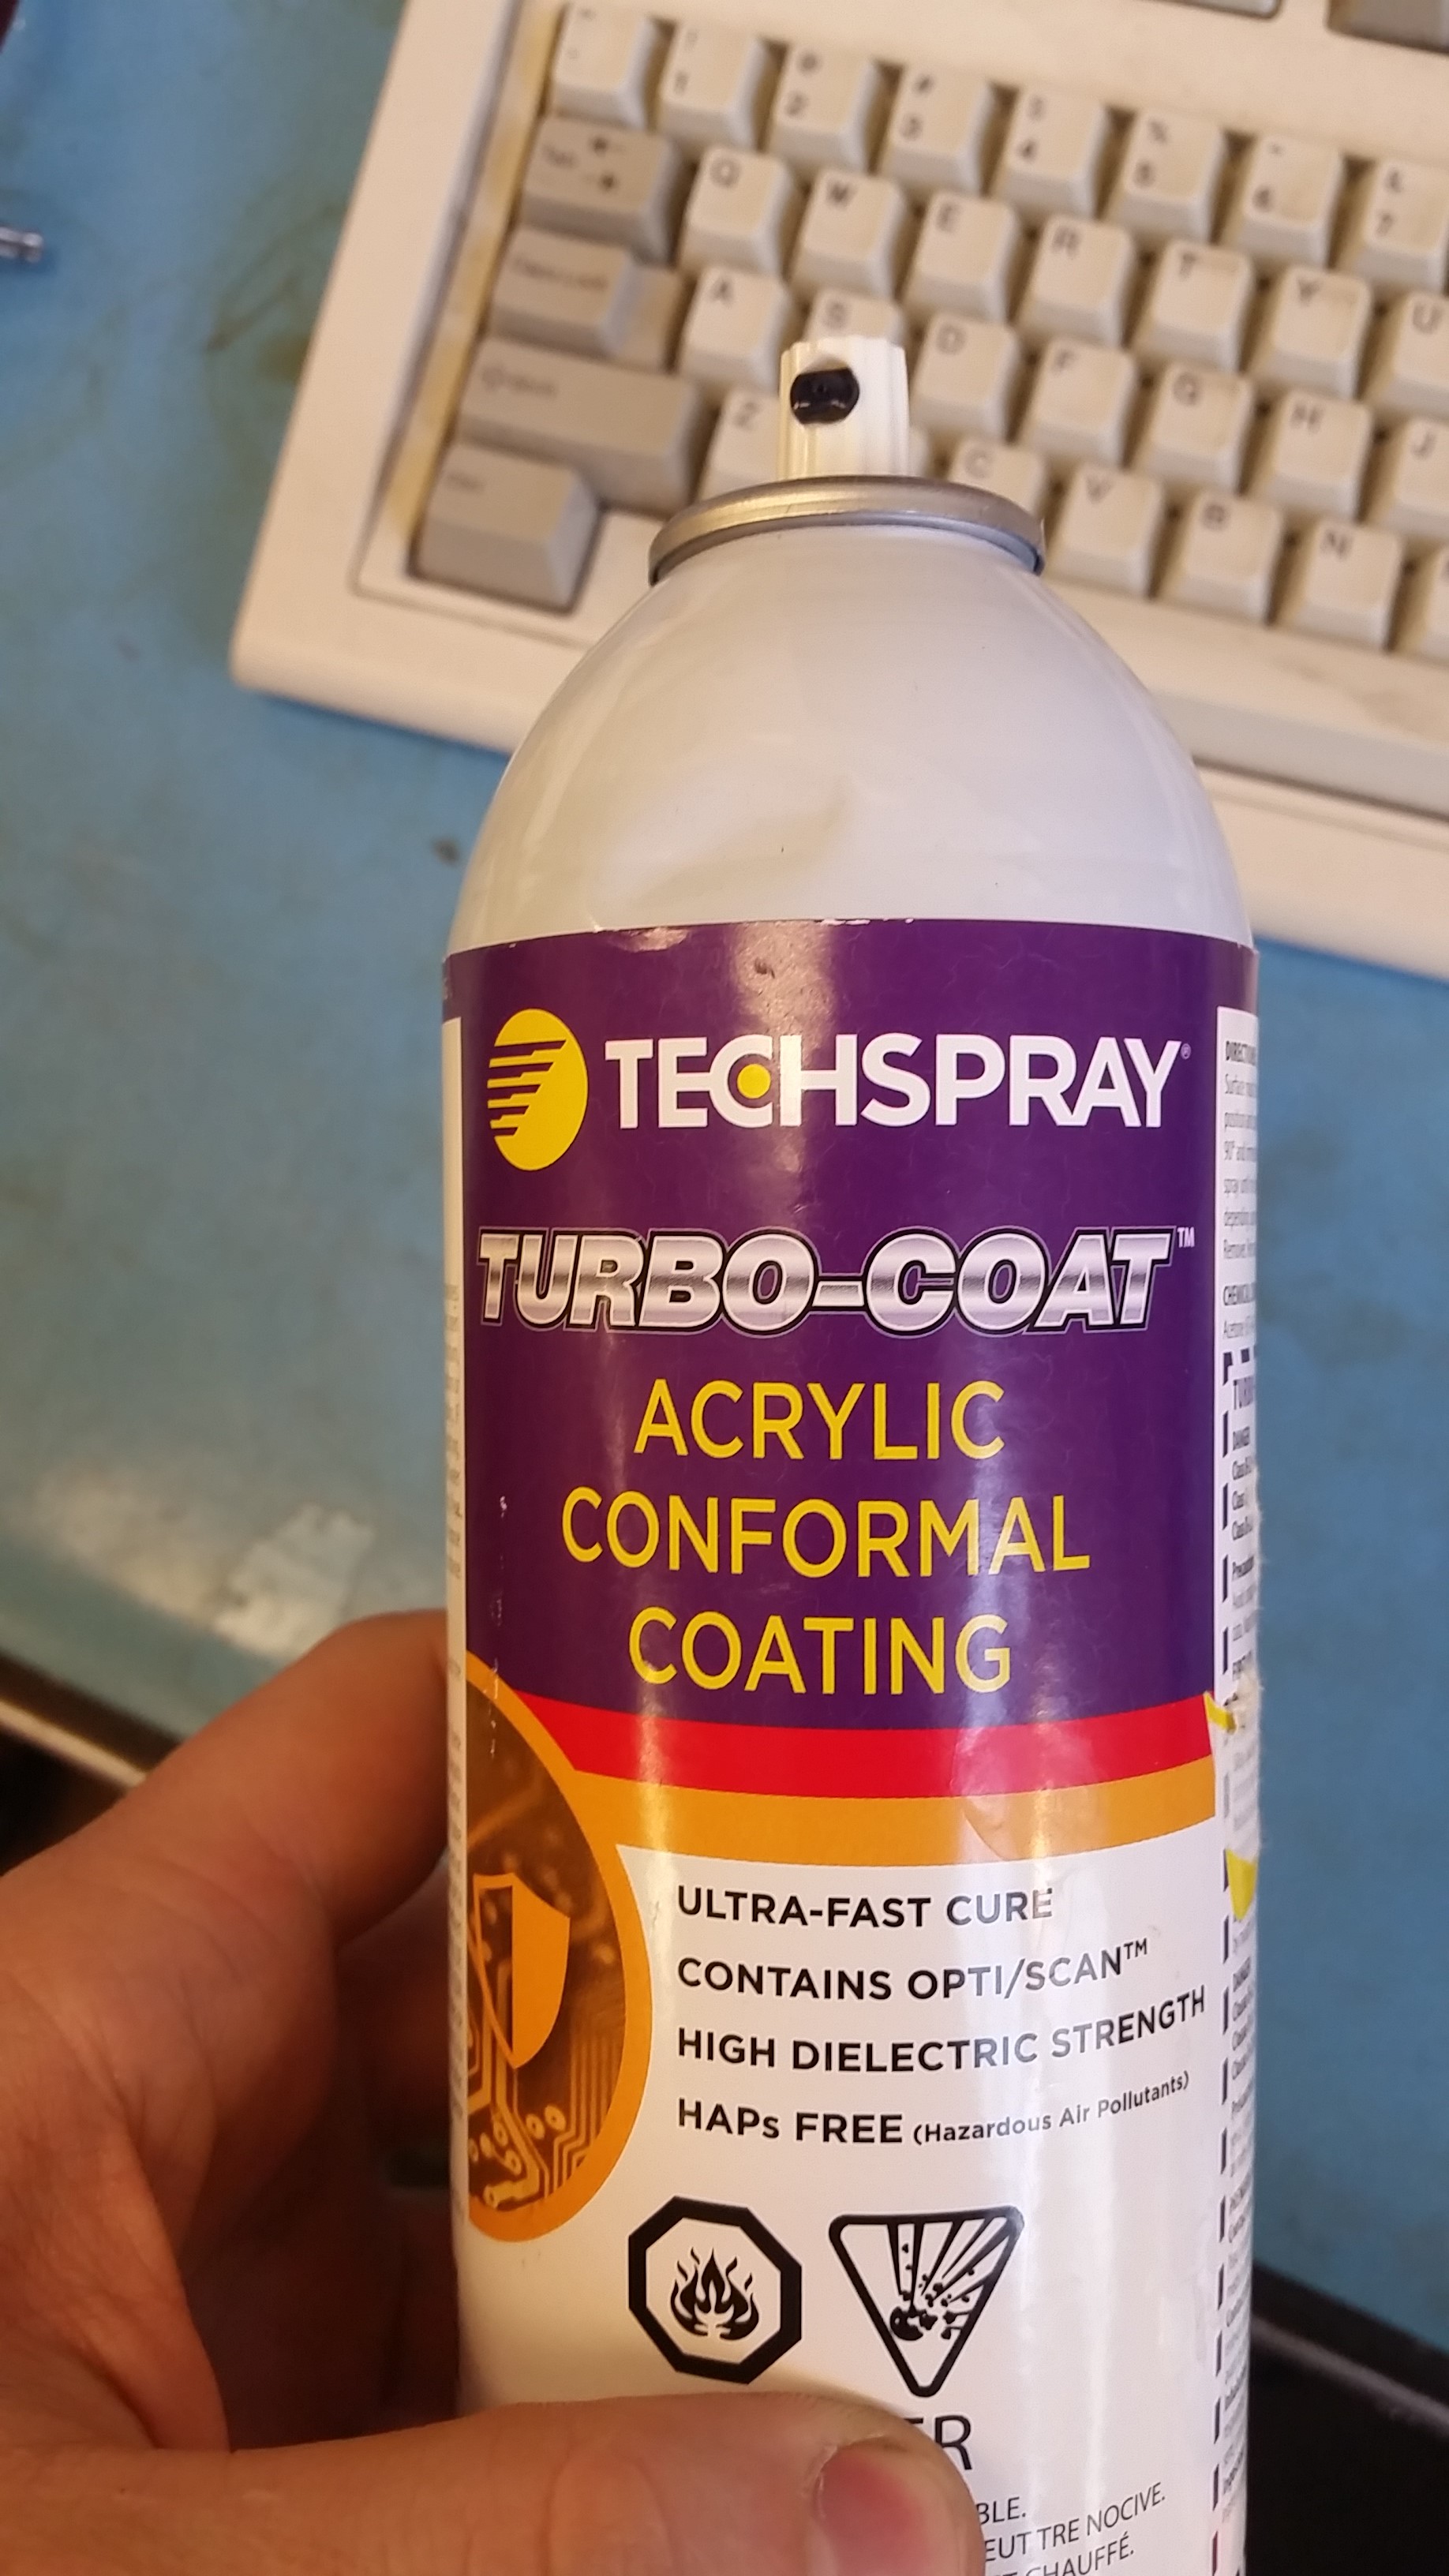
A few notes about conformal coating:Its really key to remove surface contaminants as well as do the coating in a non-humid environment. I found that a quick cleaning in isoproply using a grounded brush worked really well. After allowing it to evaporate off, I spray-coated one side of the board, returned in 15 minutes, coated the second side and anxiously waited to test the remote. Lo and behold, it still worked, the range was the same and now I should be fine riding in a light mist 
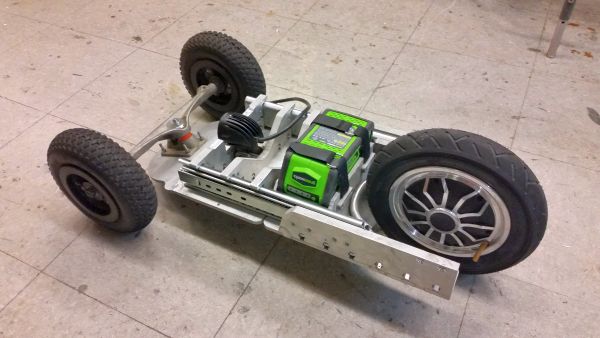
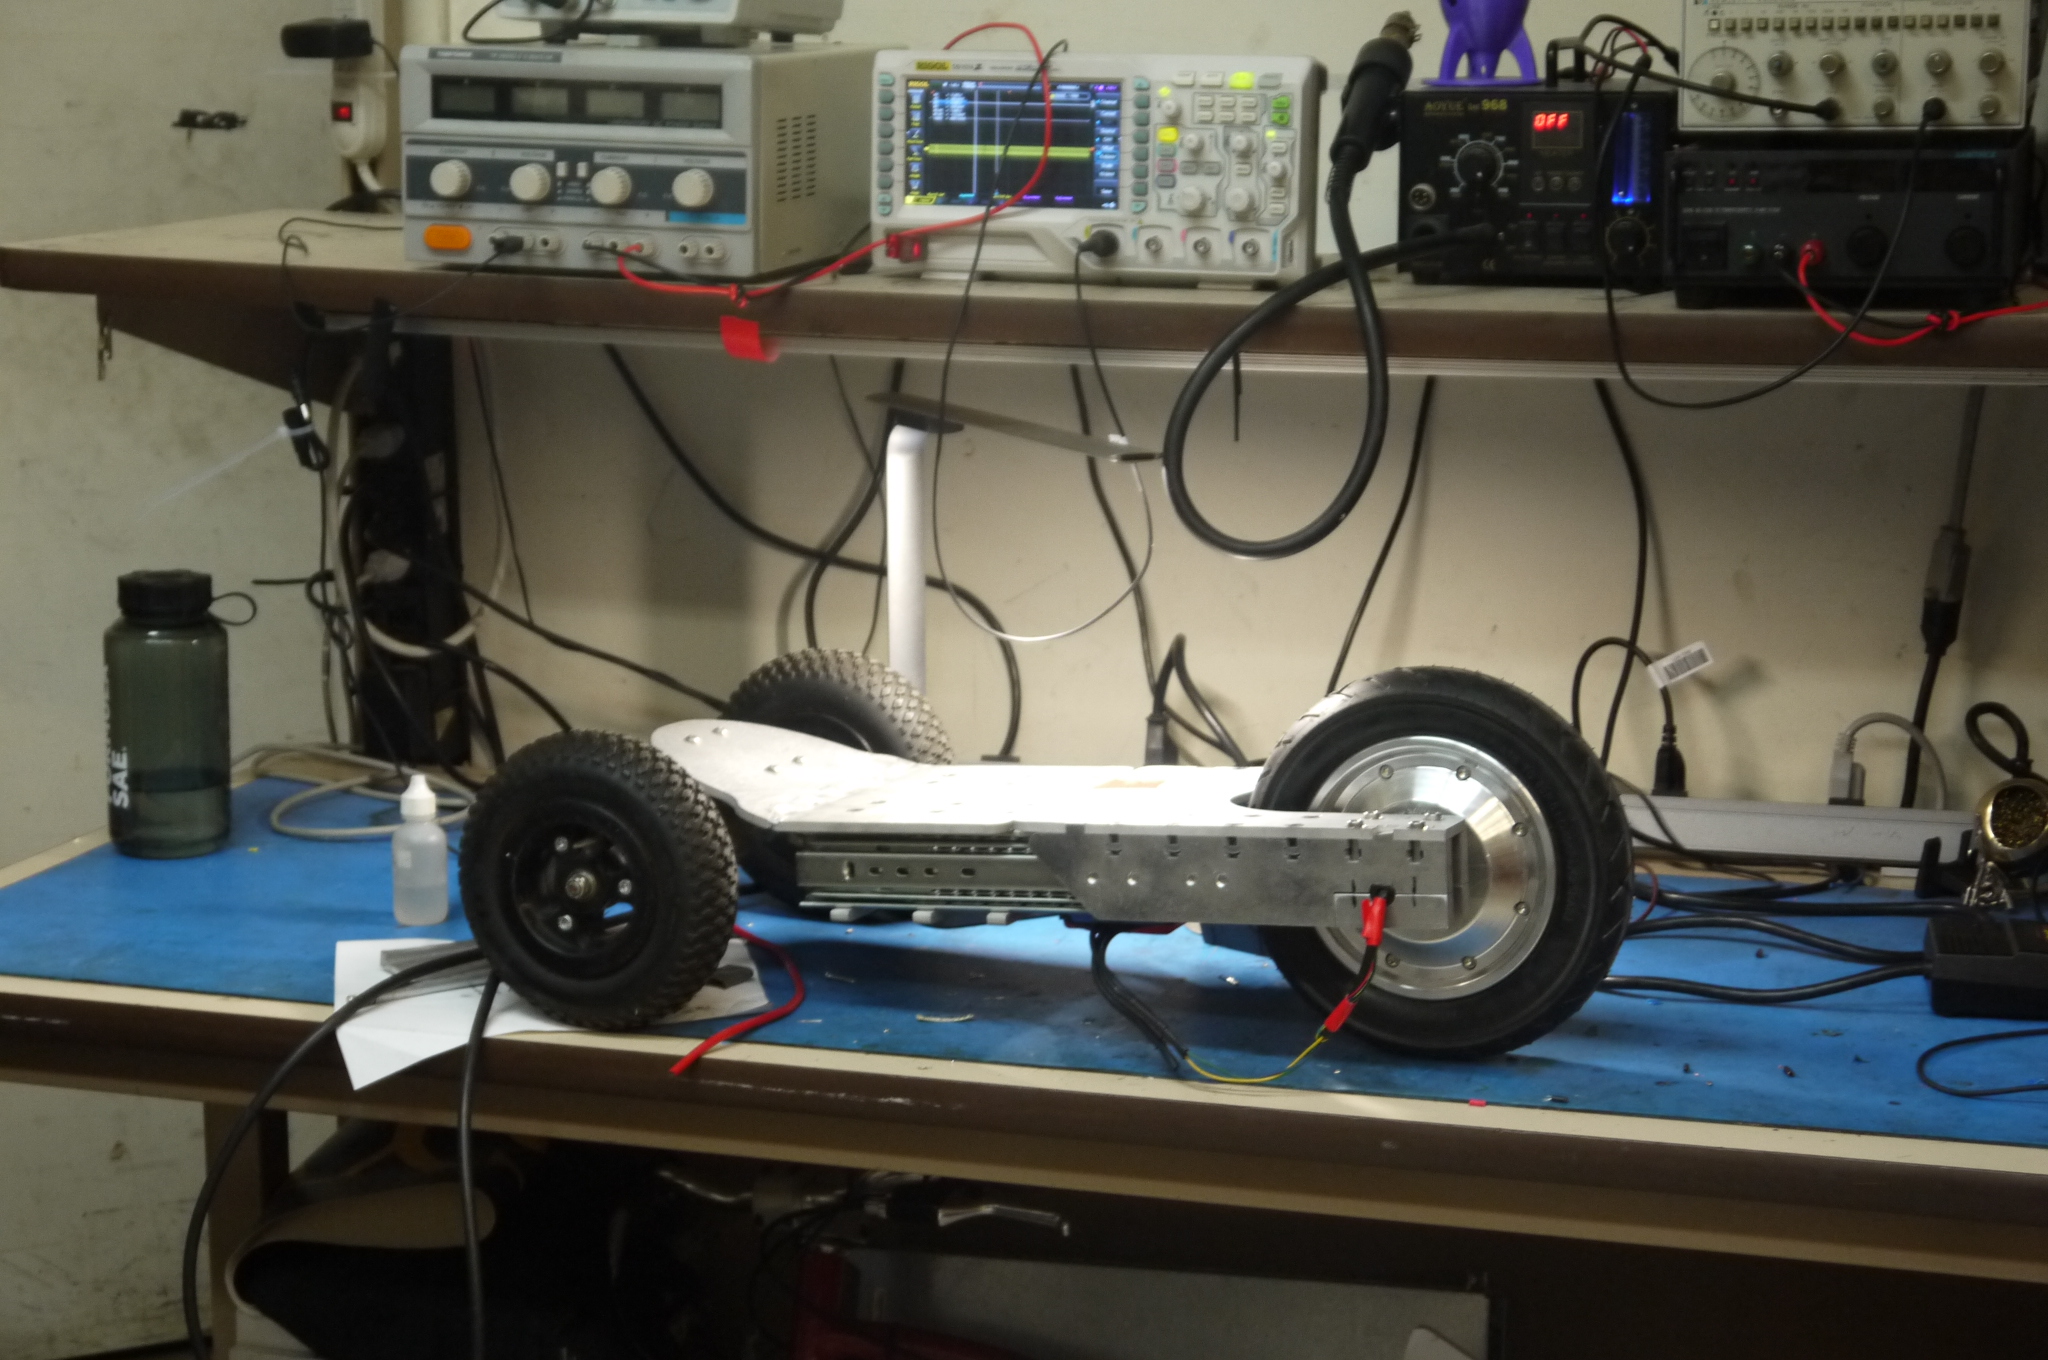
Mechanicals Ready (cam-locks not shown)Its pretty darn adorable in MINI-MODE. 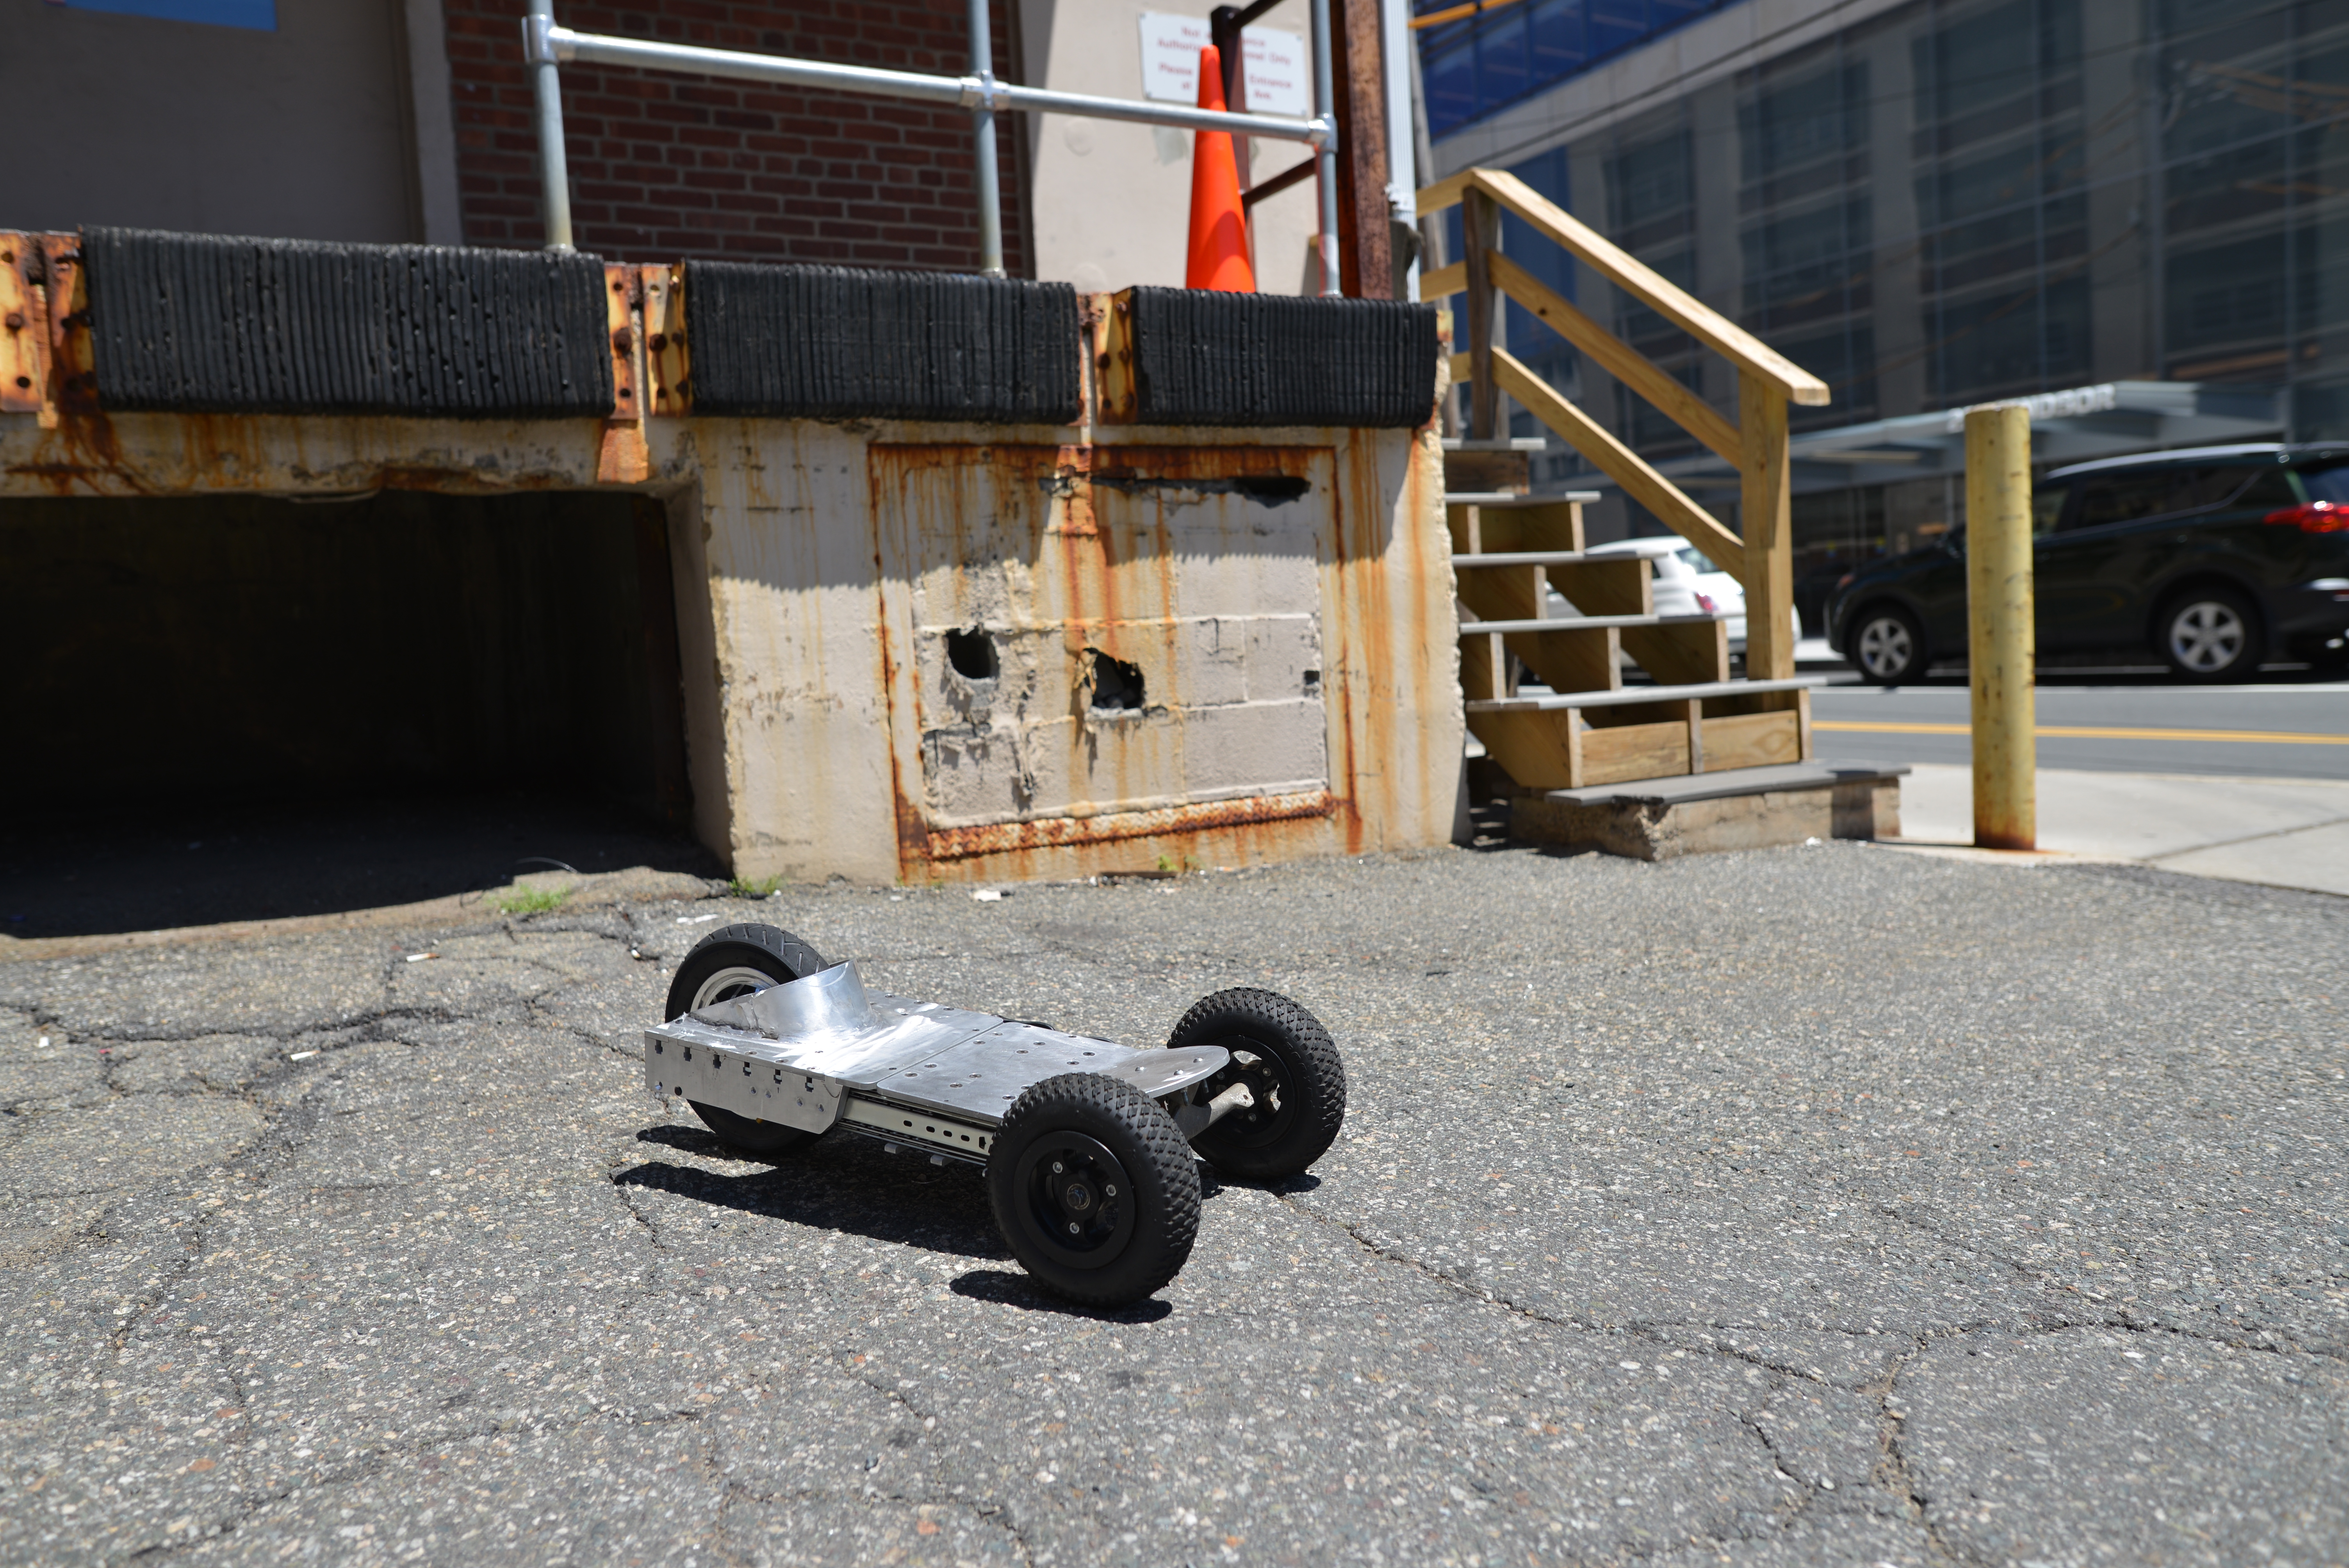

Expanded to full size. 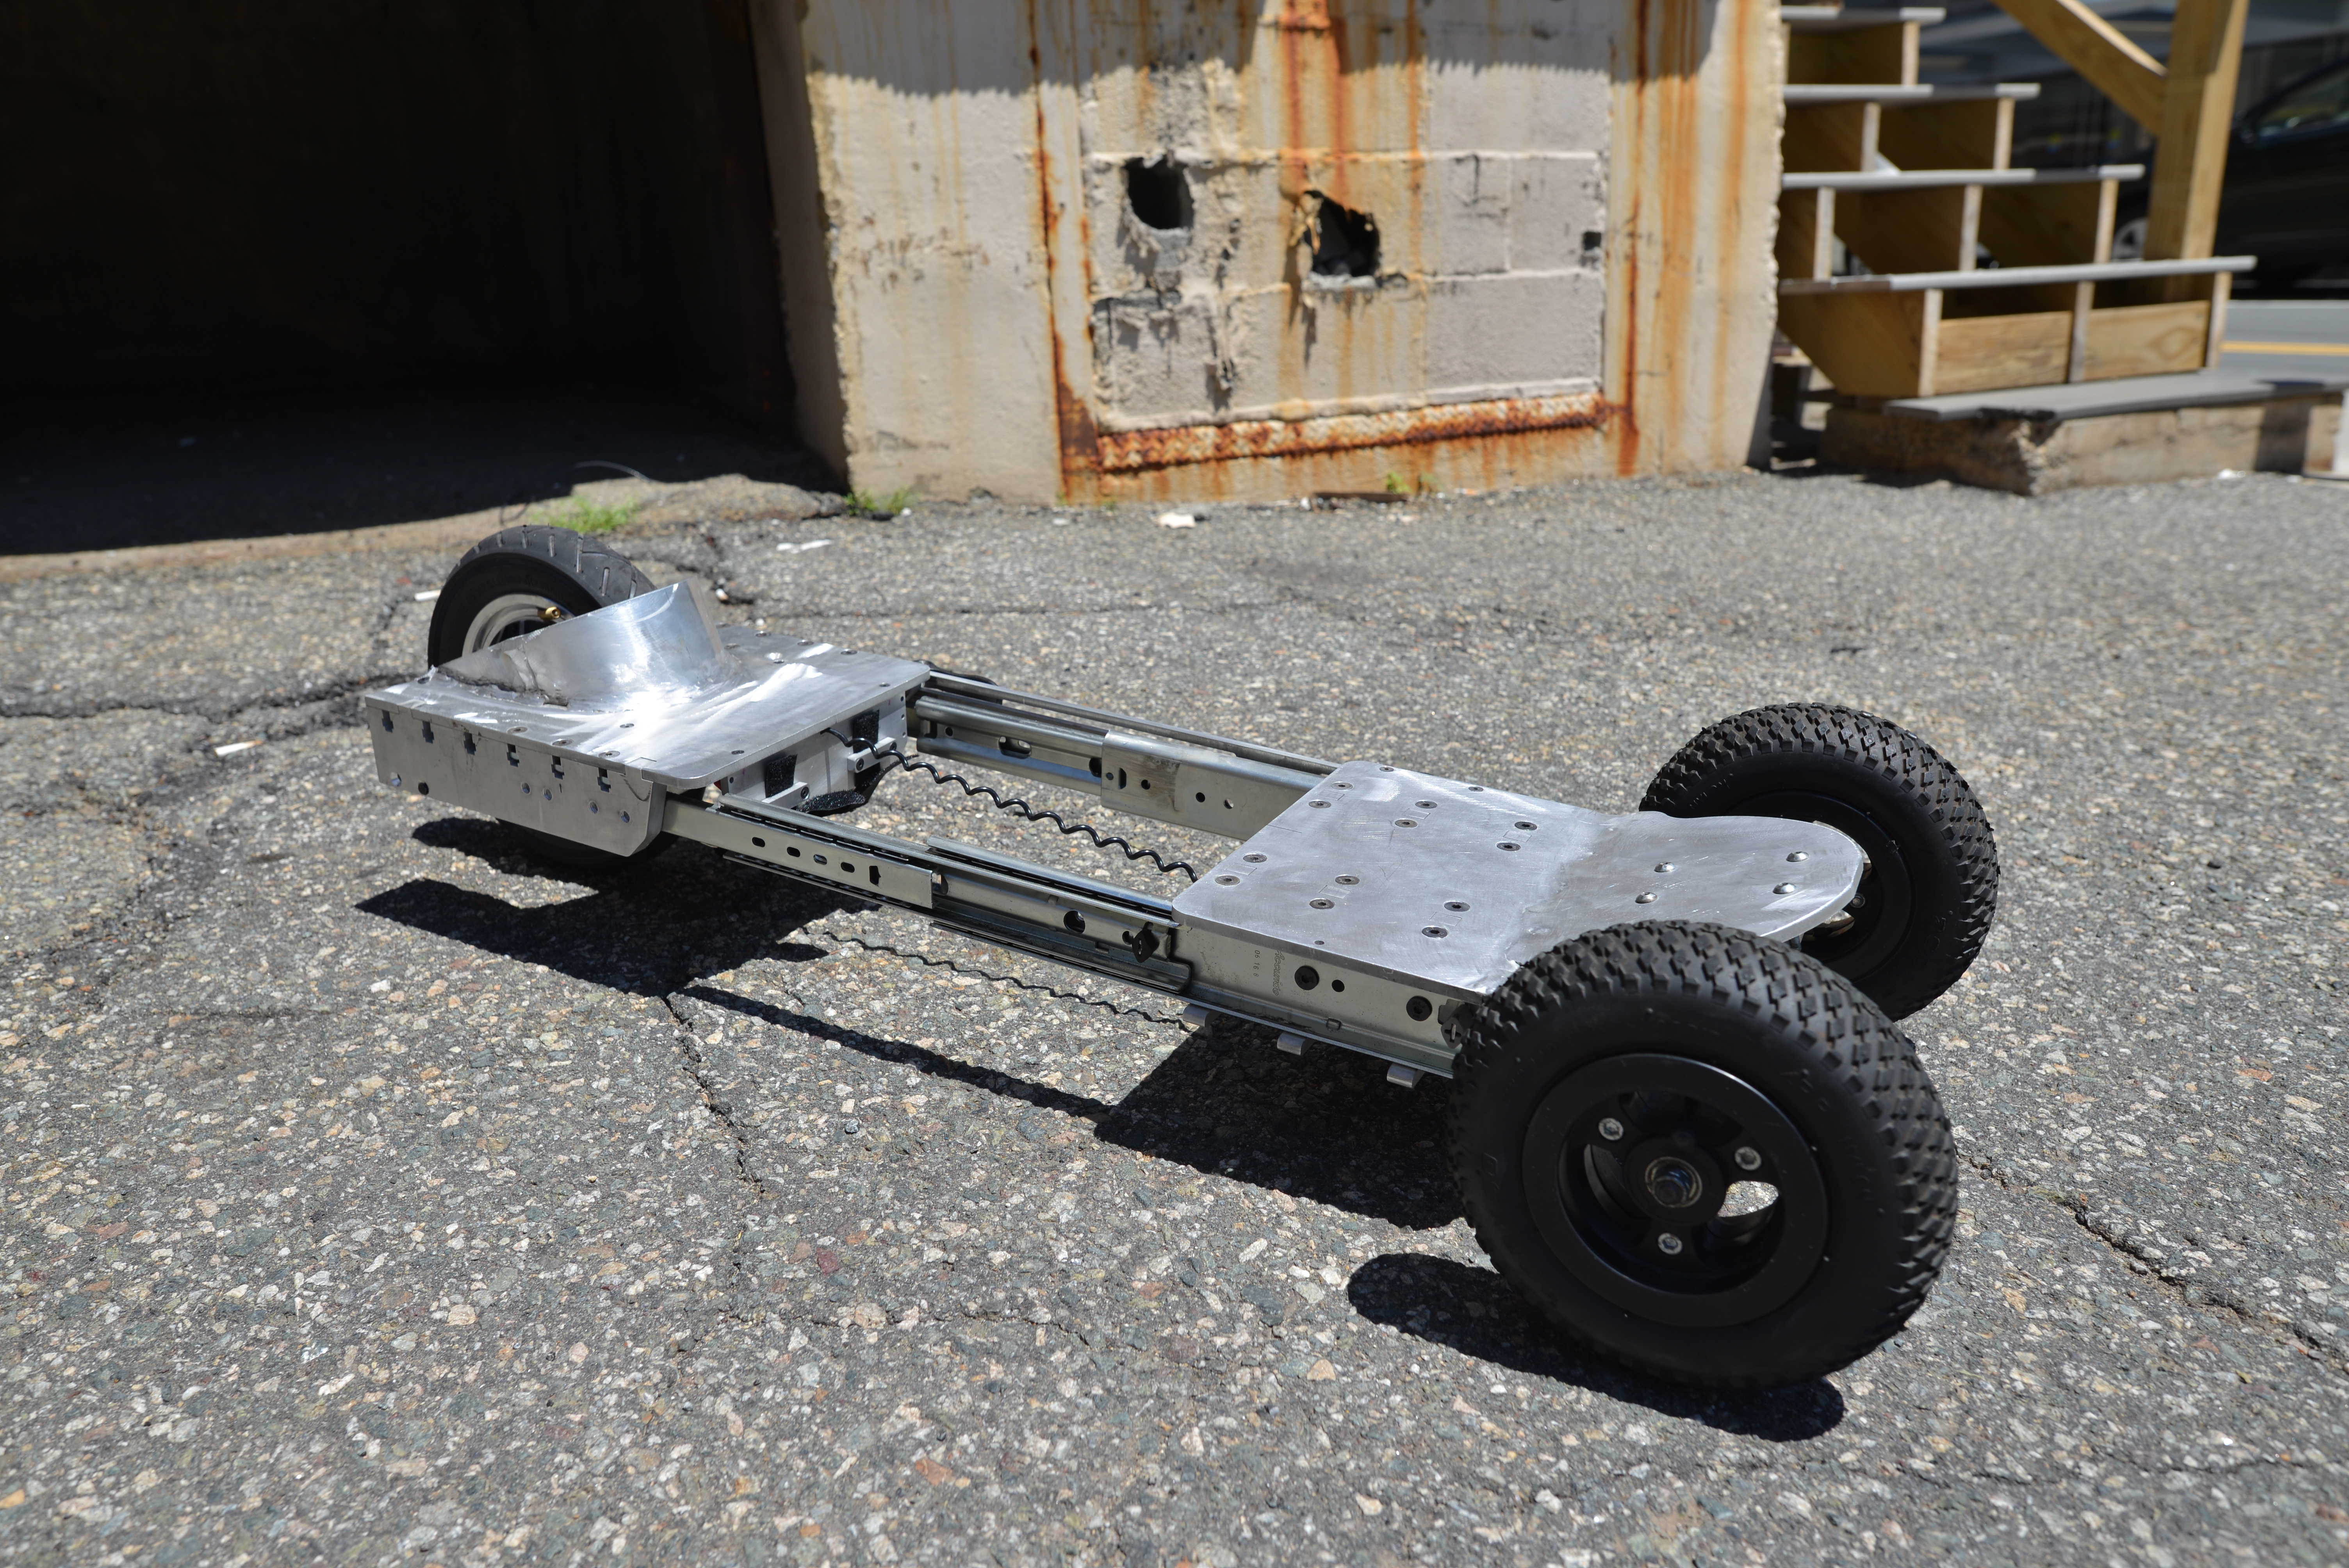

Long or Short its SHINY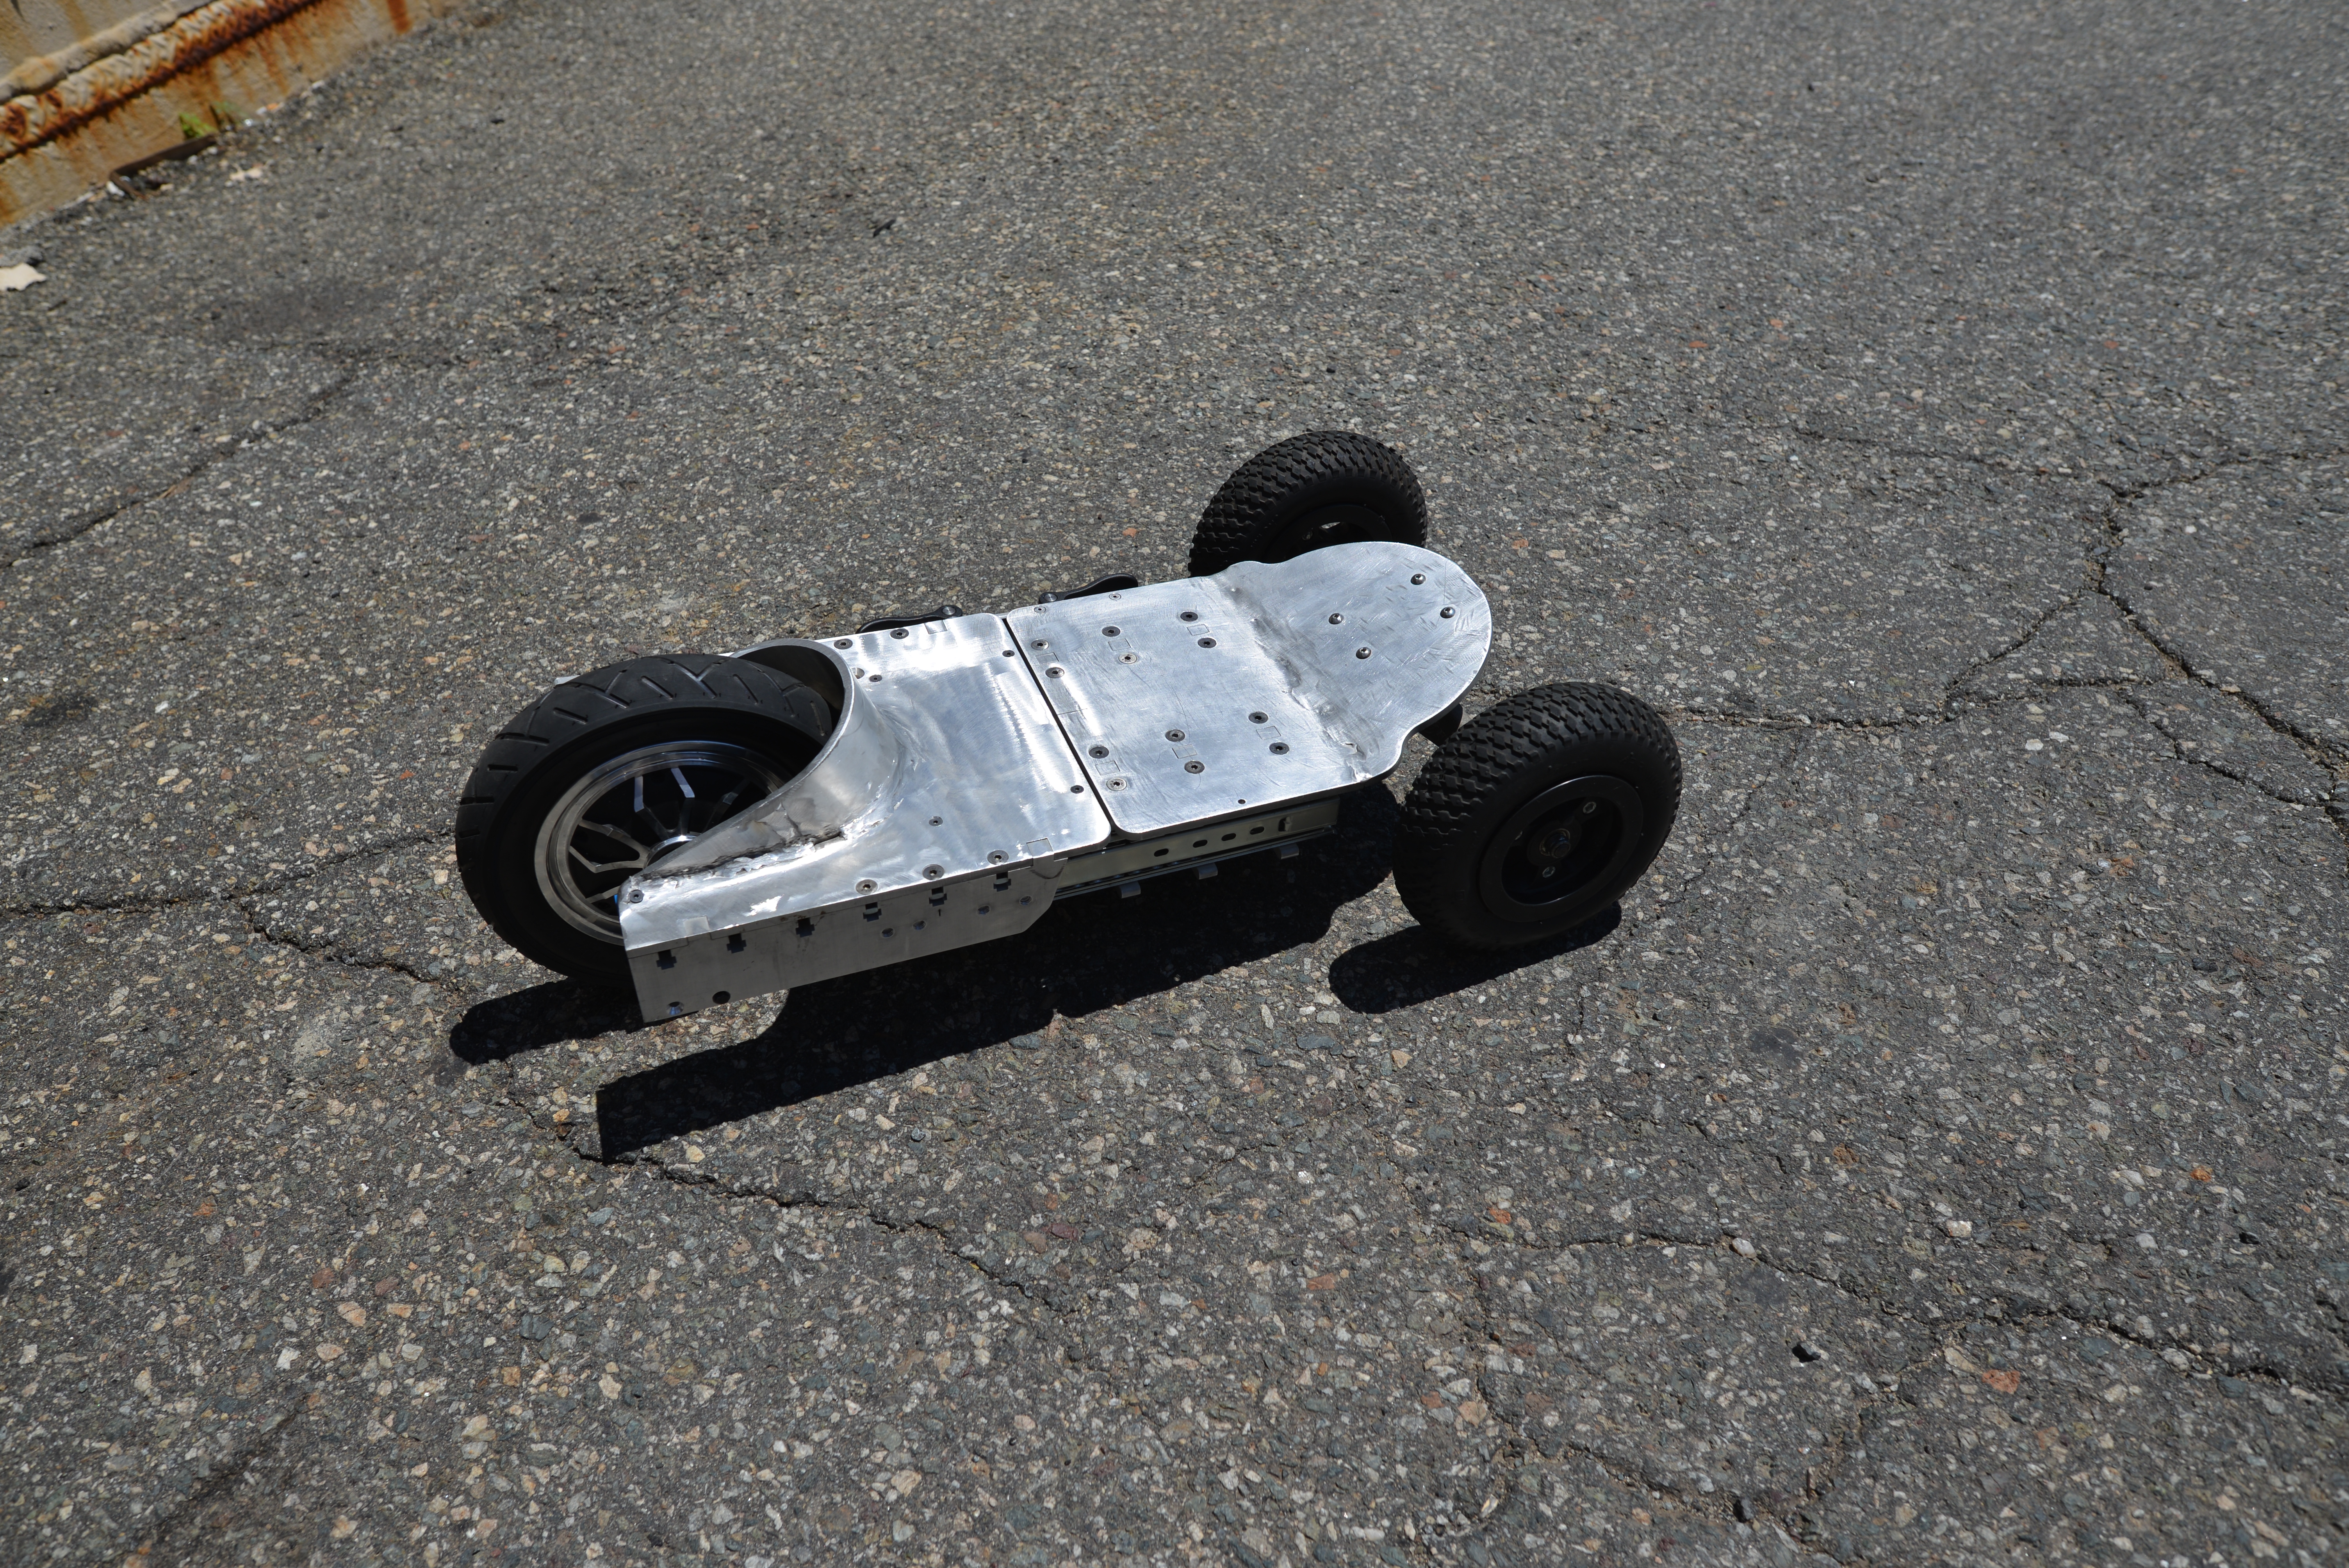
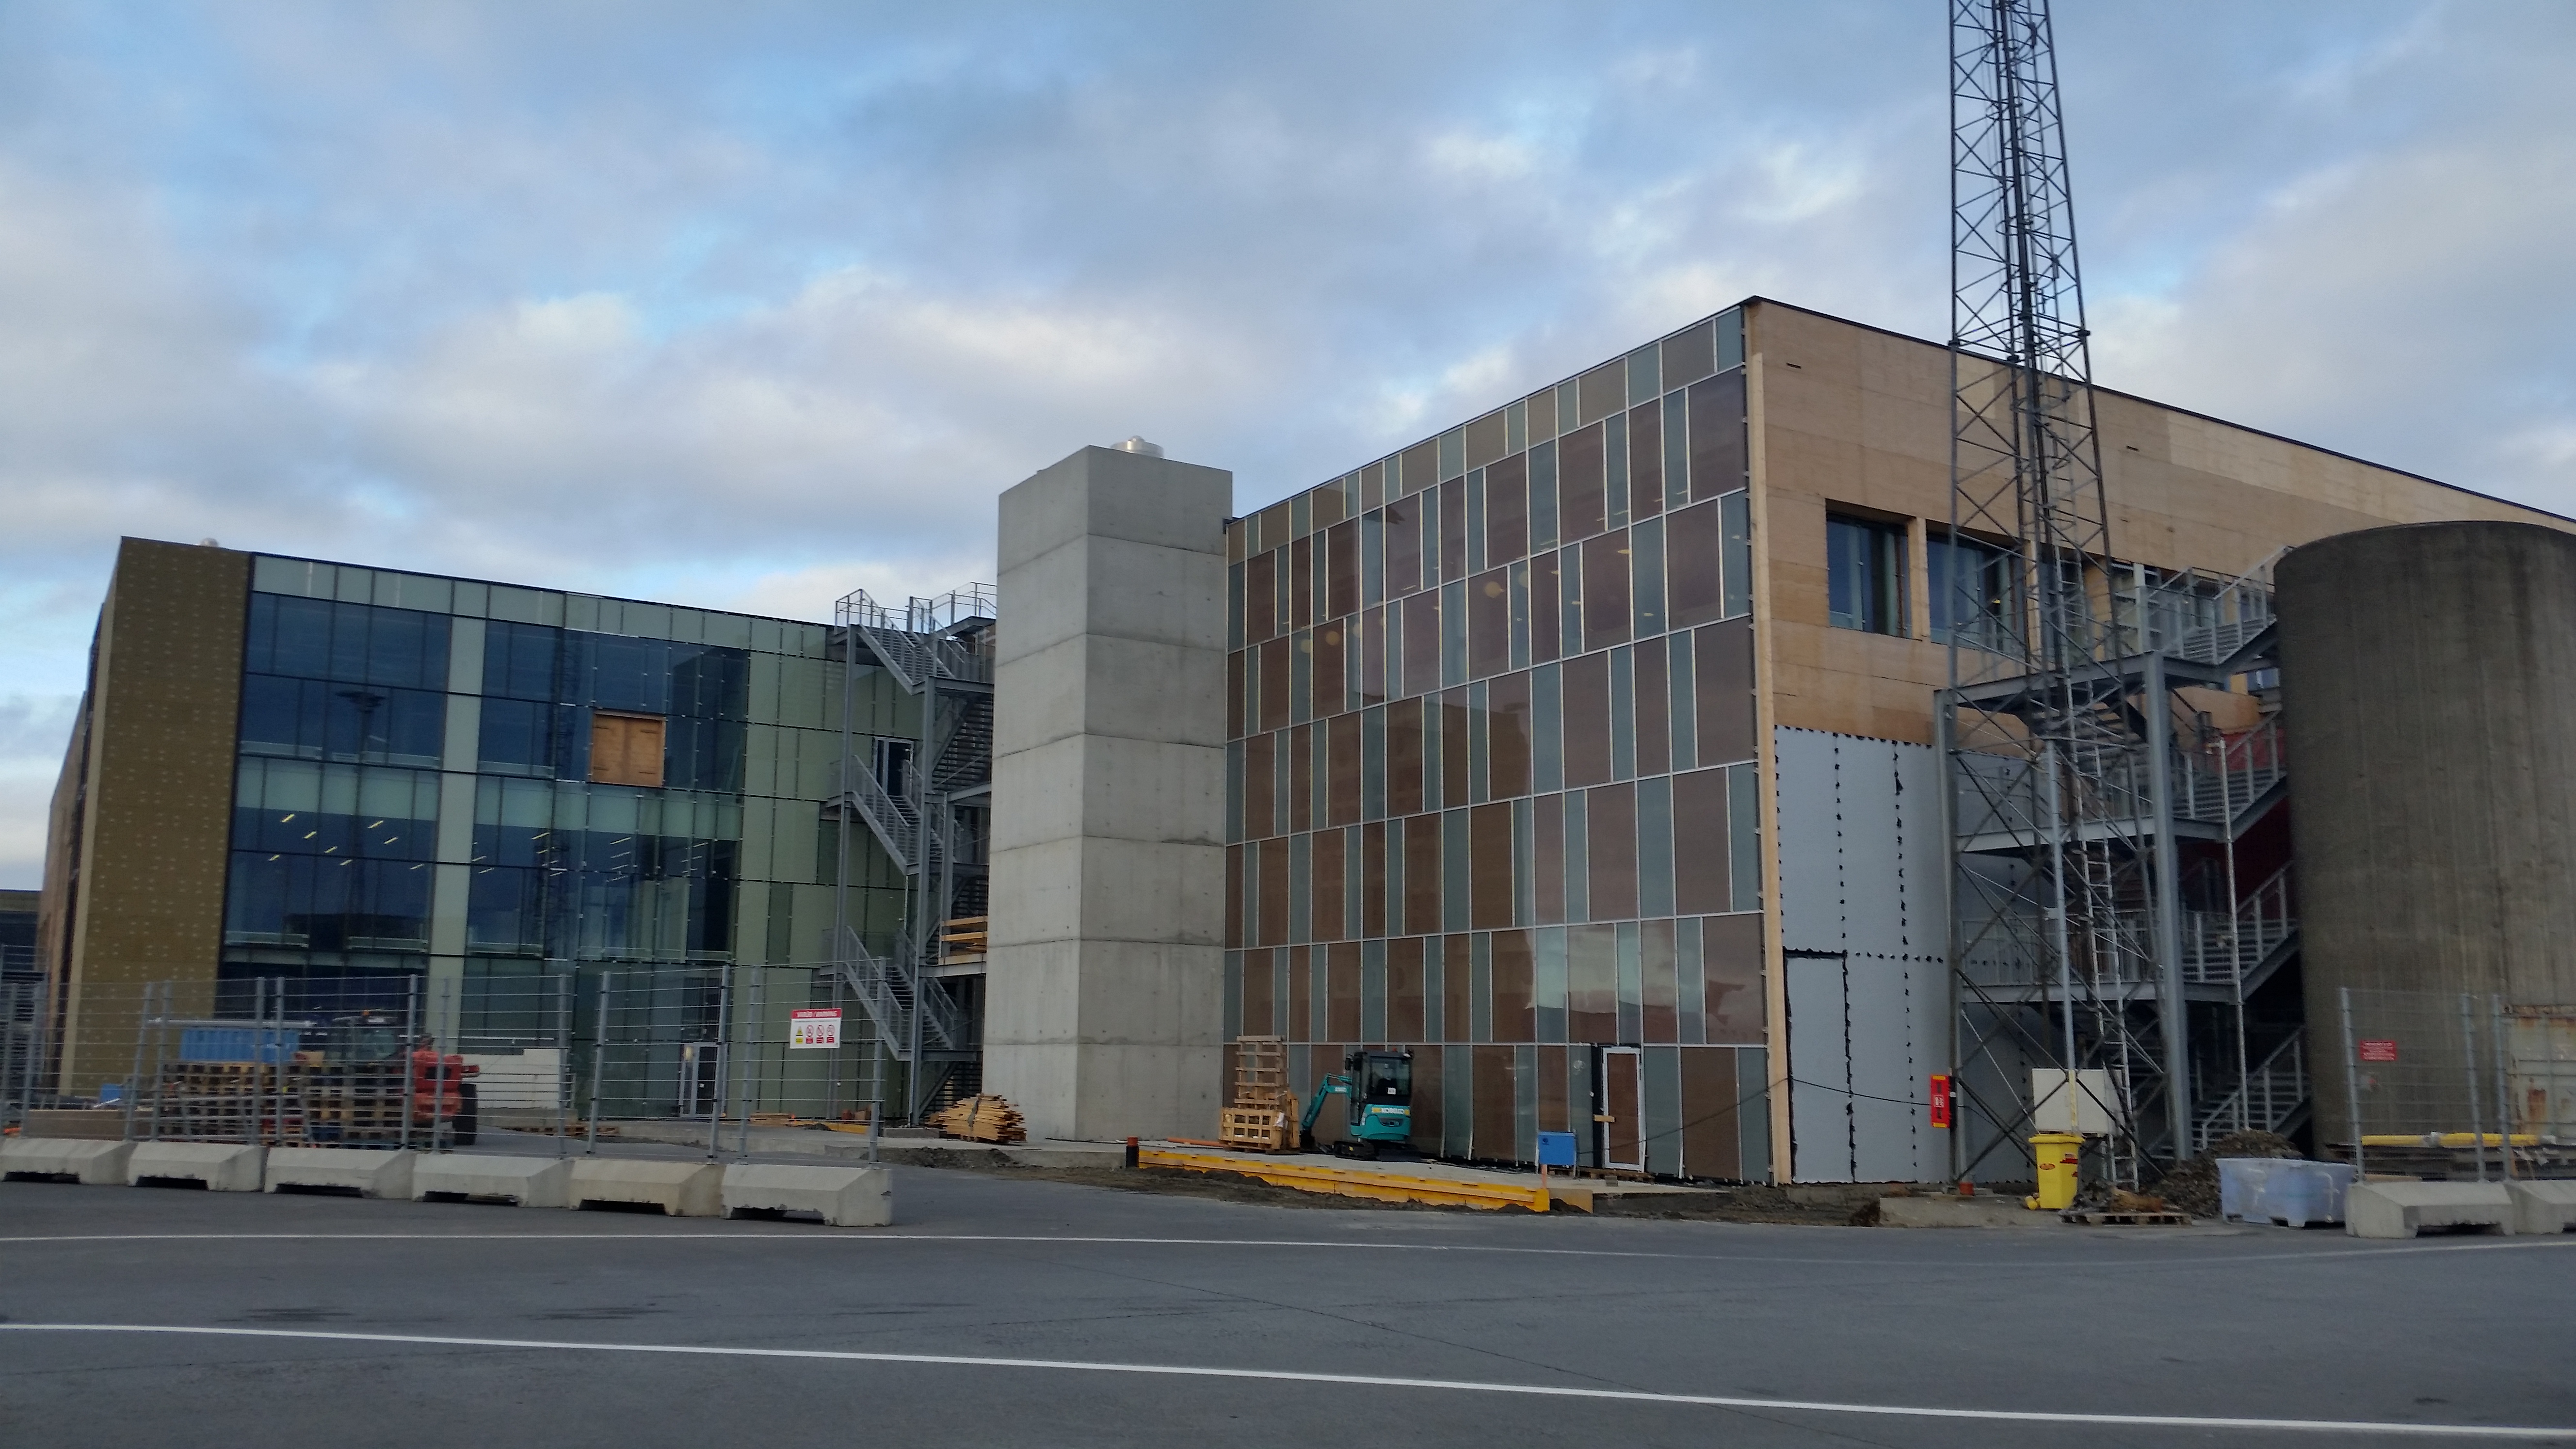
Mountainslider OVERSEAS [Germany & Munich AHOY]
Here's some meandering thru Munich, I was having issues with an older generation go pro not quite behaving, but all around it was an excellent experience. Charging in the wild, meeting curious people and getting fancy coffee. The board worked phenomenally well, and resulted in some great conversations and chase from a local meter maid. I had an upcoming business trip to Germany, and even though a majority of the time was scheduled for 'sciencing', there were early mornings and late evenings open, along with a full spare day, The skateboard flew as checked luggage from Boston Logan (BOS) to Munich Germany(MUC), via Rejavic Iceland (KEF). I was anxious at Logan, but after a pat-down and some information, the board (and my clothes) traveled as gate-checked luggage. 
The battery itself flew with me as carry-on luggage in a backpack. Note this battery is the 2AH greenworks GMAX 40V battery. This pack comes in at 73wh, which, is around 3 miles of range. This is unfortunately limited due to the TSA travel requirements in the states. Nominally <100wh is fine to fly with as a carry on (ex: laptop), and the option for a <160 wh battery is allowed, depending on airline. To play it safe I only brought along my 73wh pack. 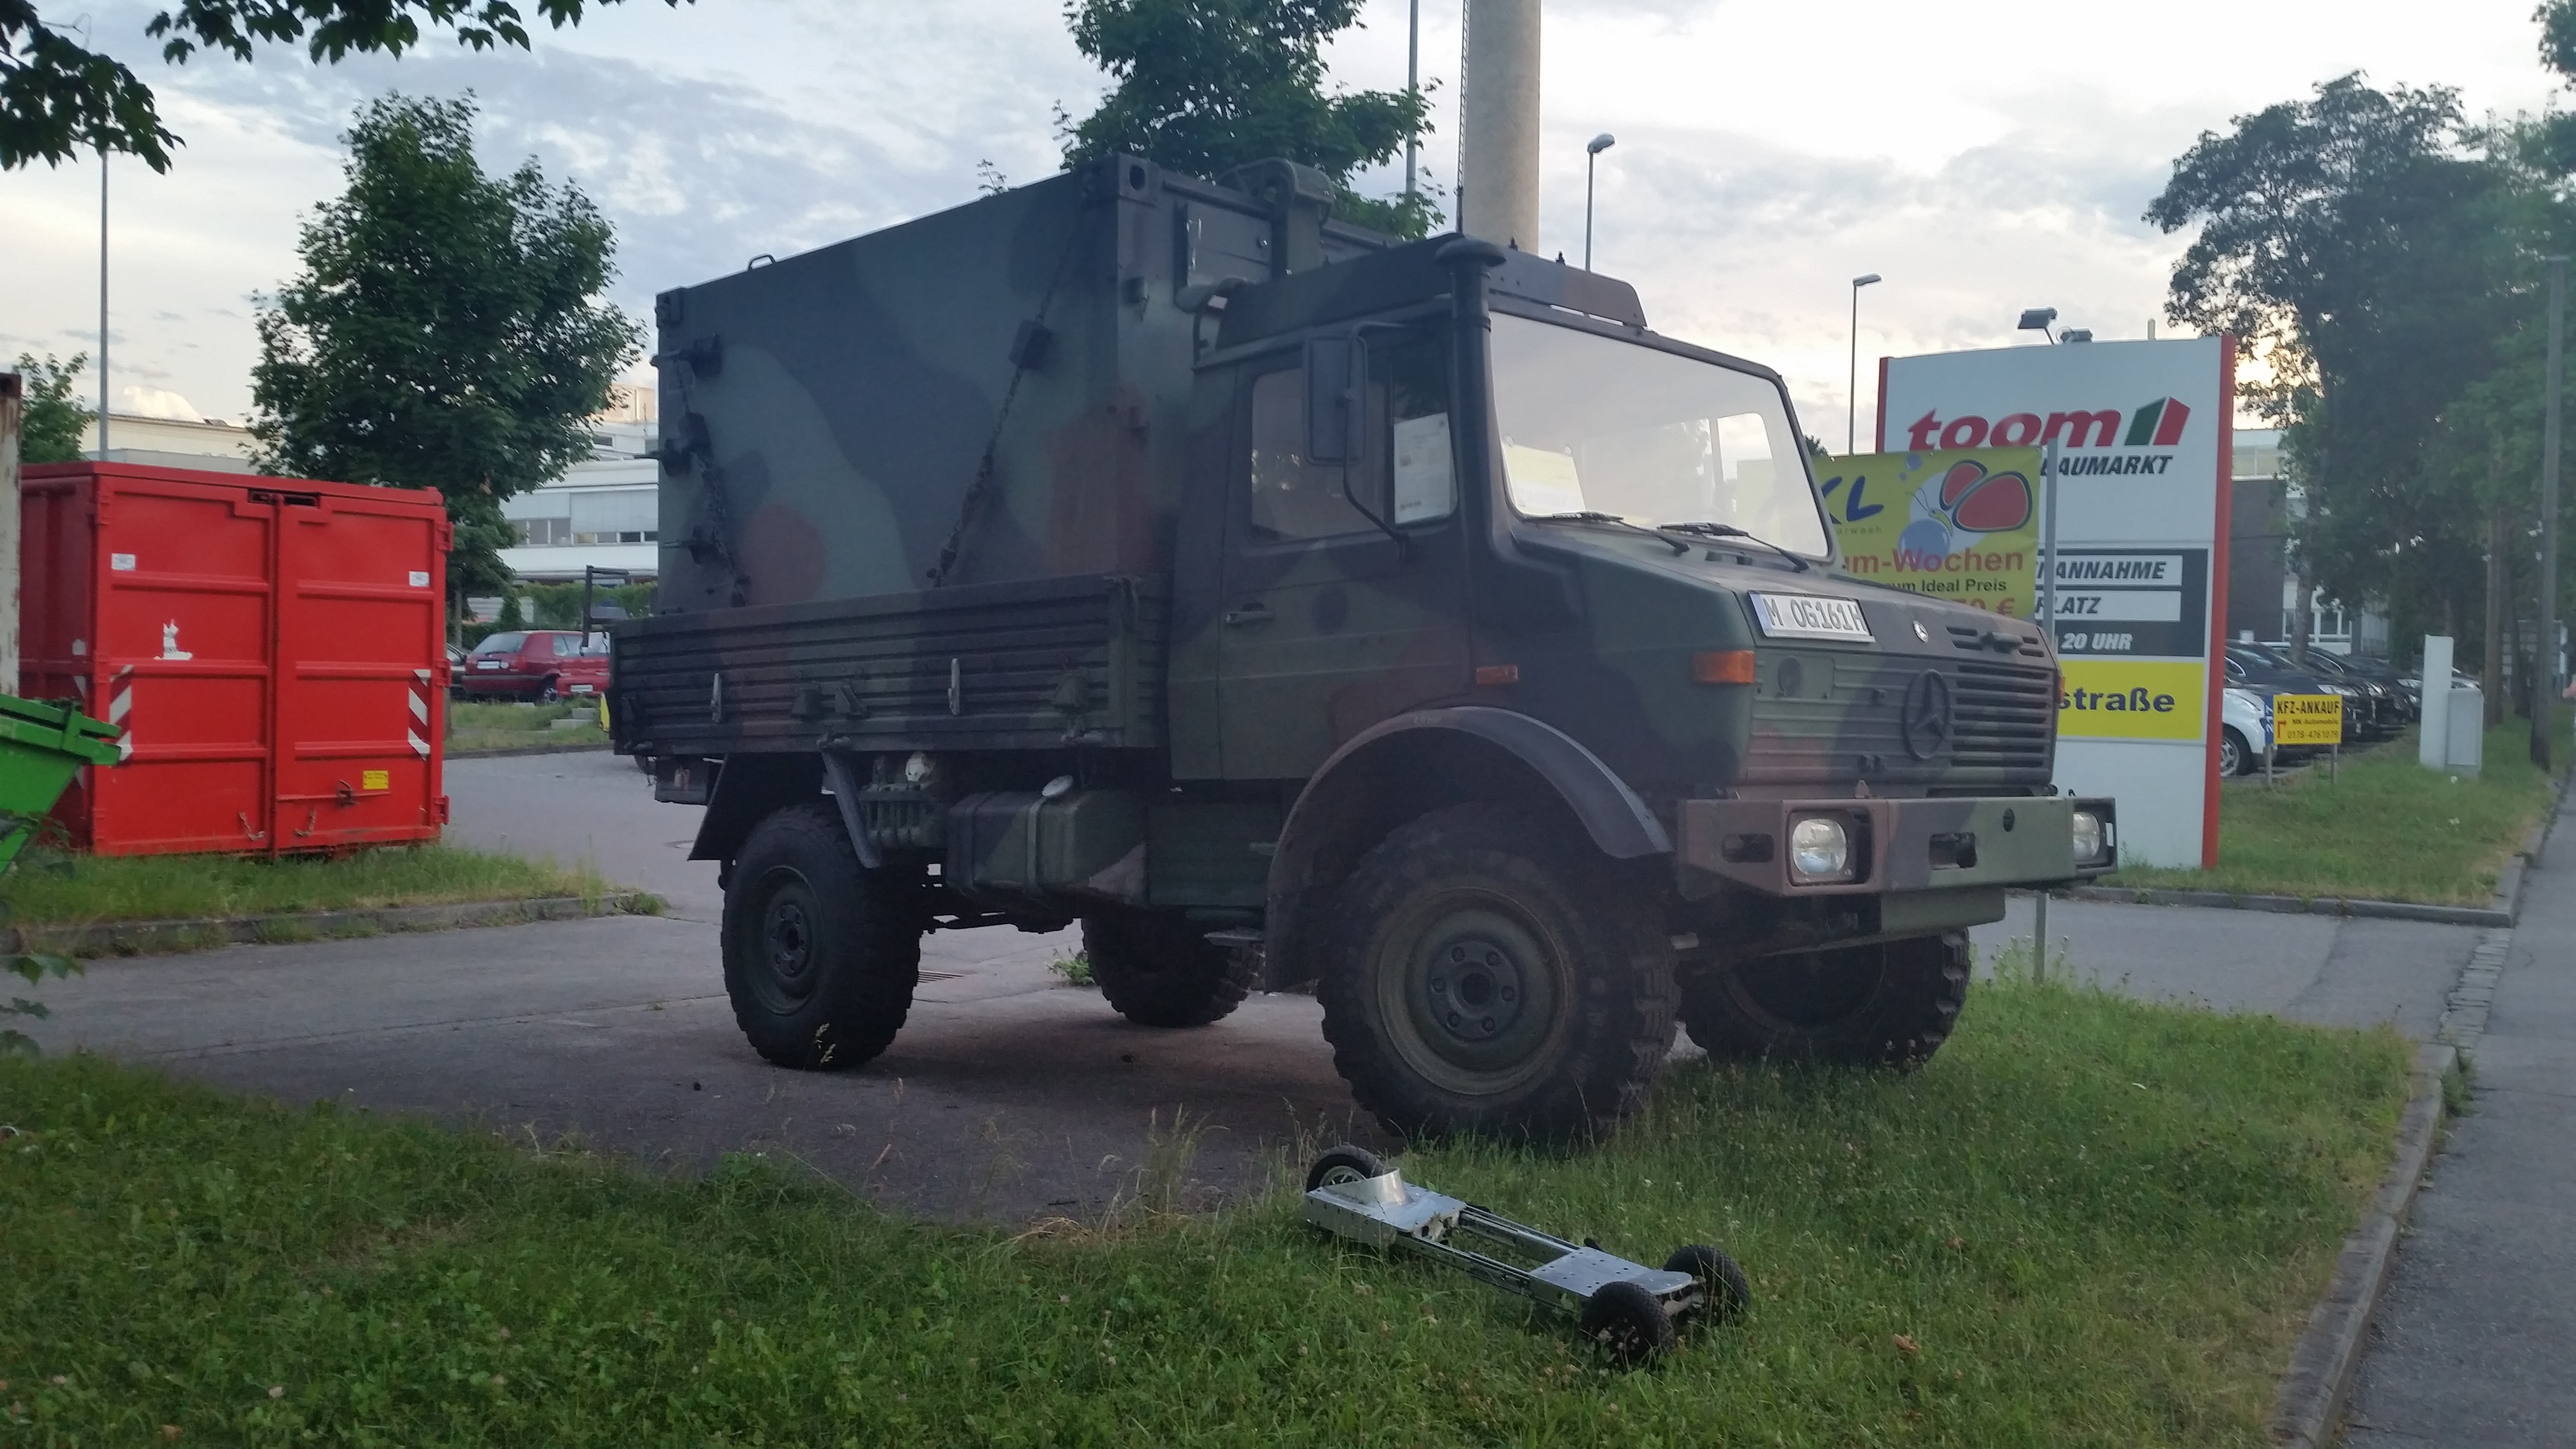
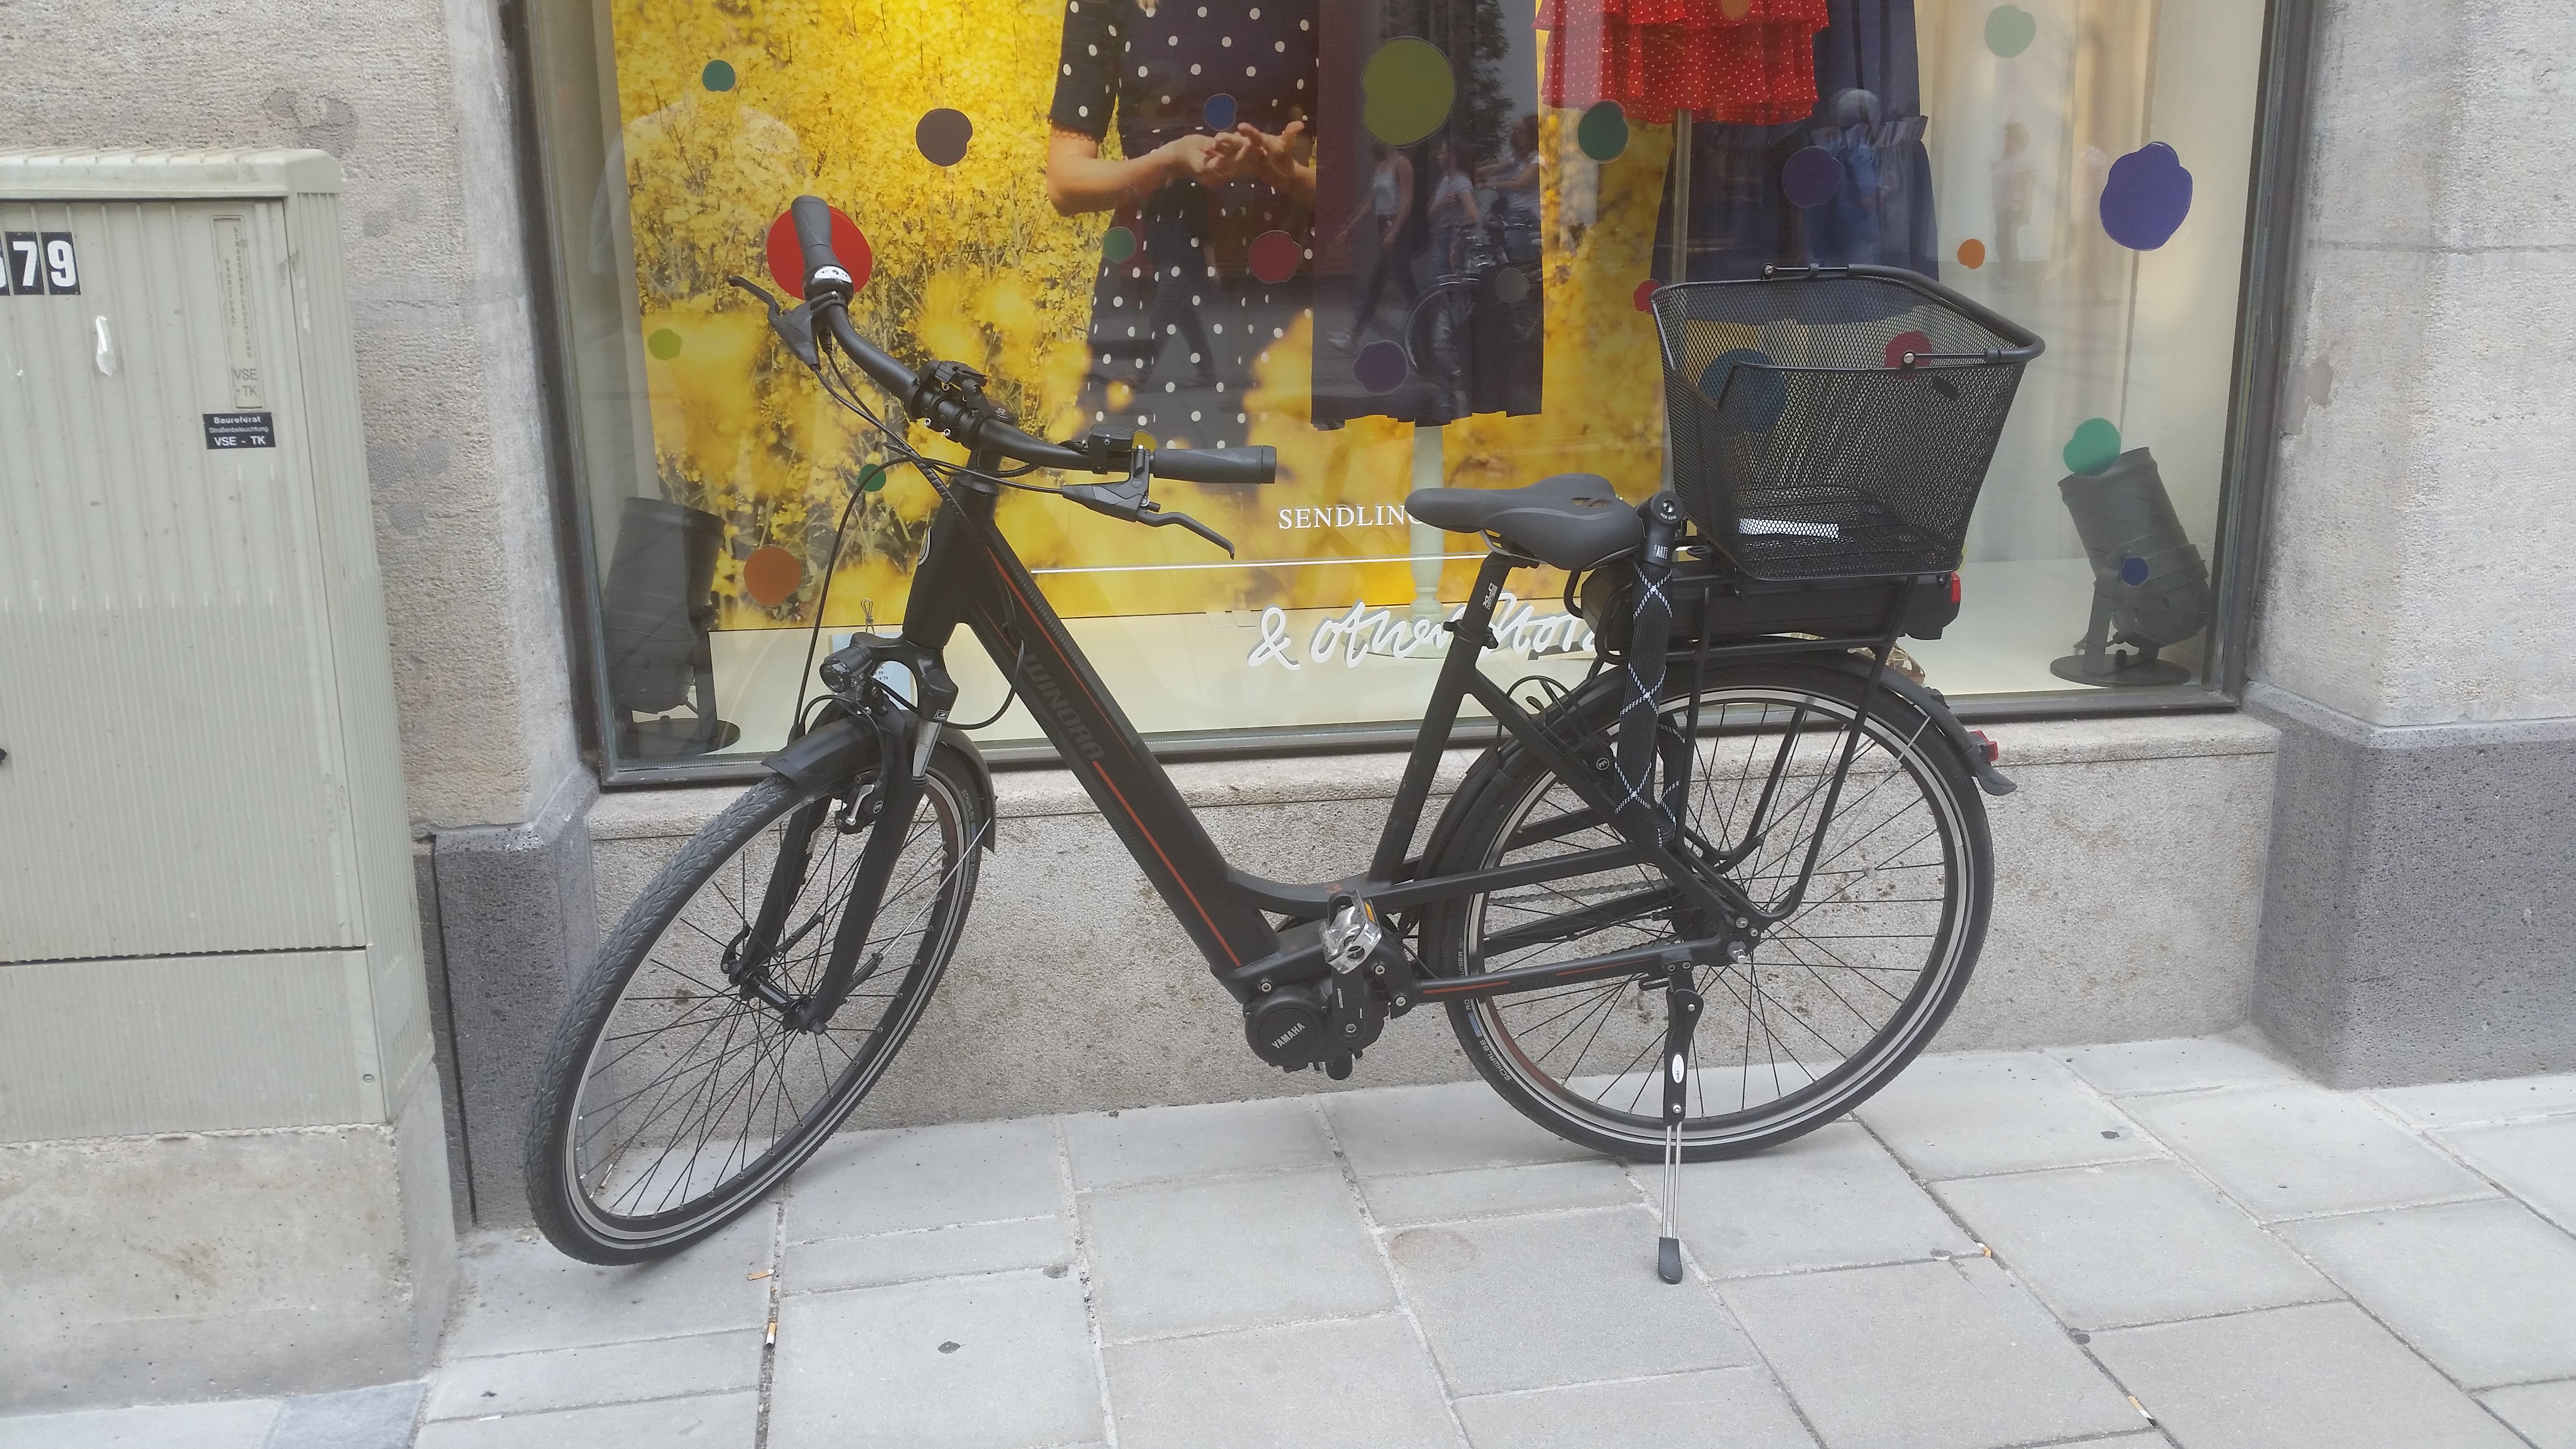
Some notes about Germany:There were very few electric-things in Munich, I spotted 3 electric bikes over the course of the week, one with a rear-crystalte hub motor and two of these WINOAA bikes in separate locations. I spoke with a few local folks, and curiously electric bikes are a topic of debate. Munich in particular has an absurd number of cyclists. The elderly were early adopters of electrical assist, and as a result e-bikes are bizarrely associated with the old / elderly. 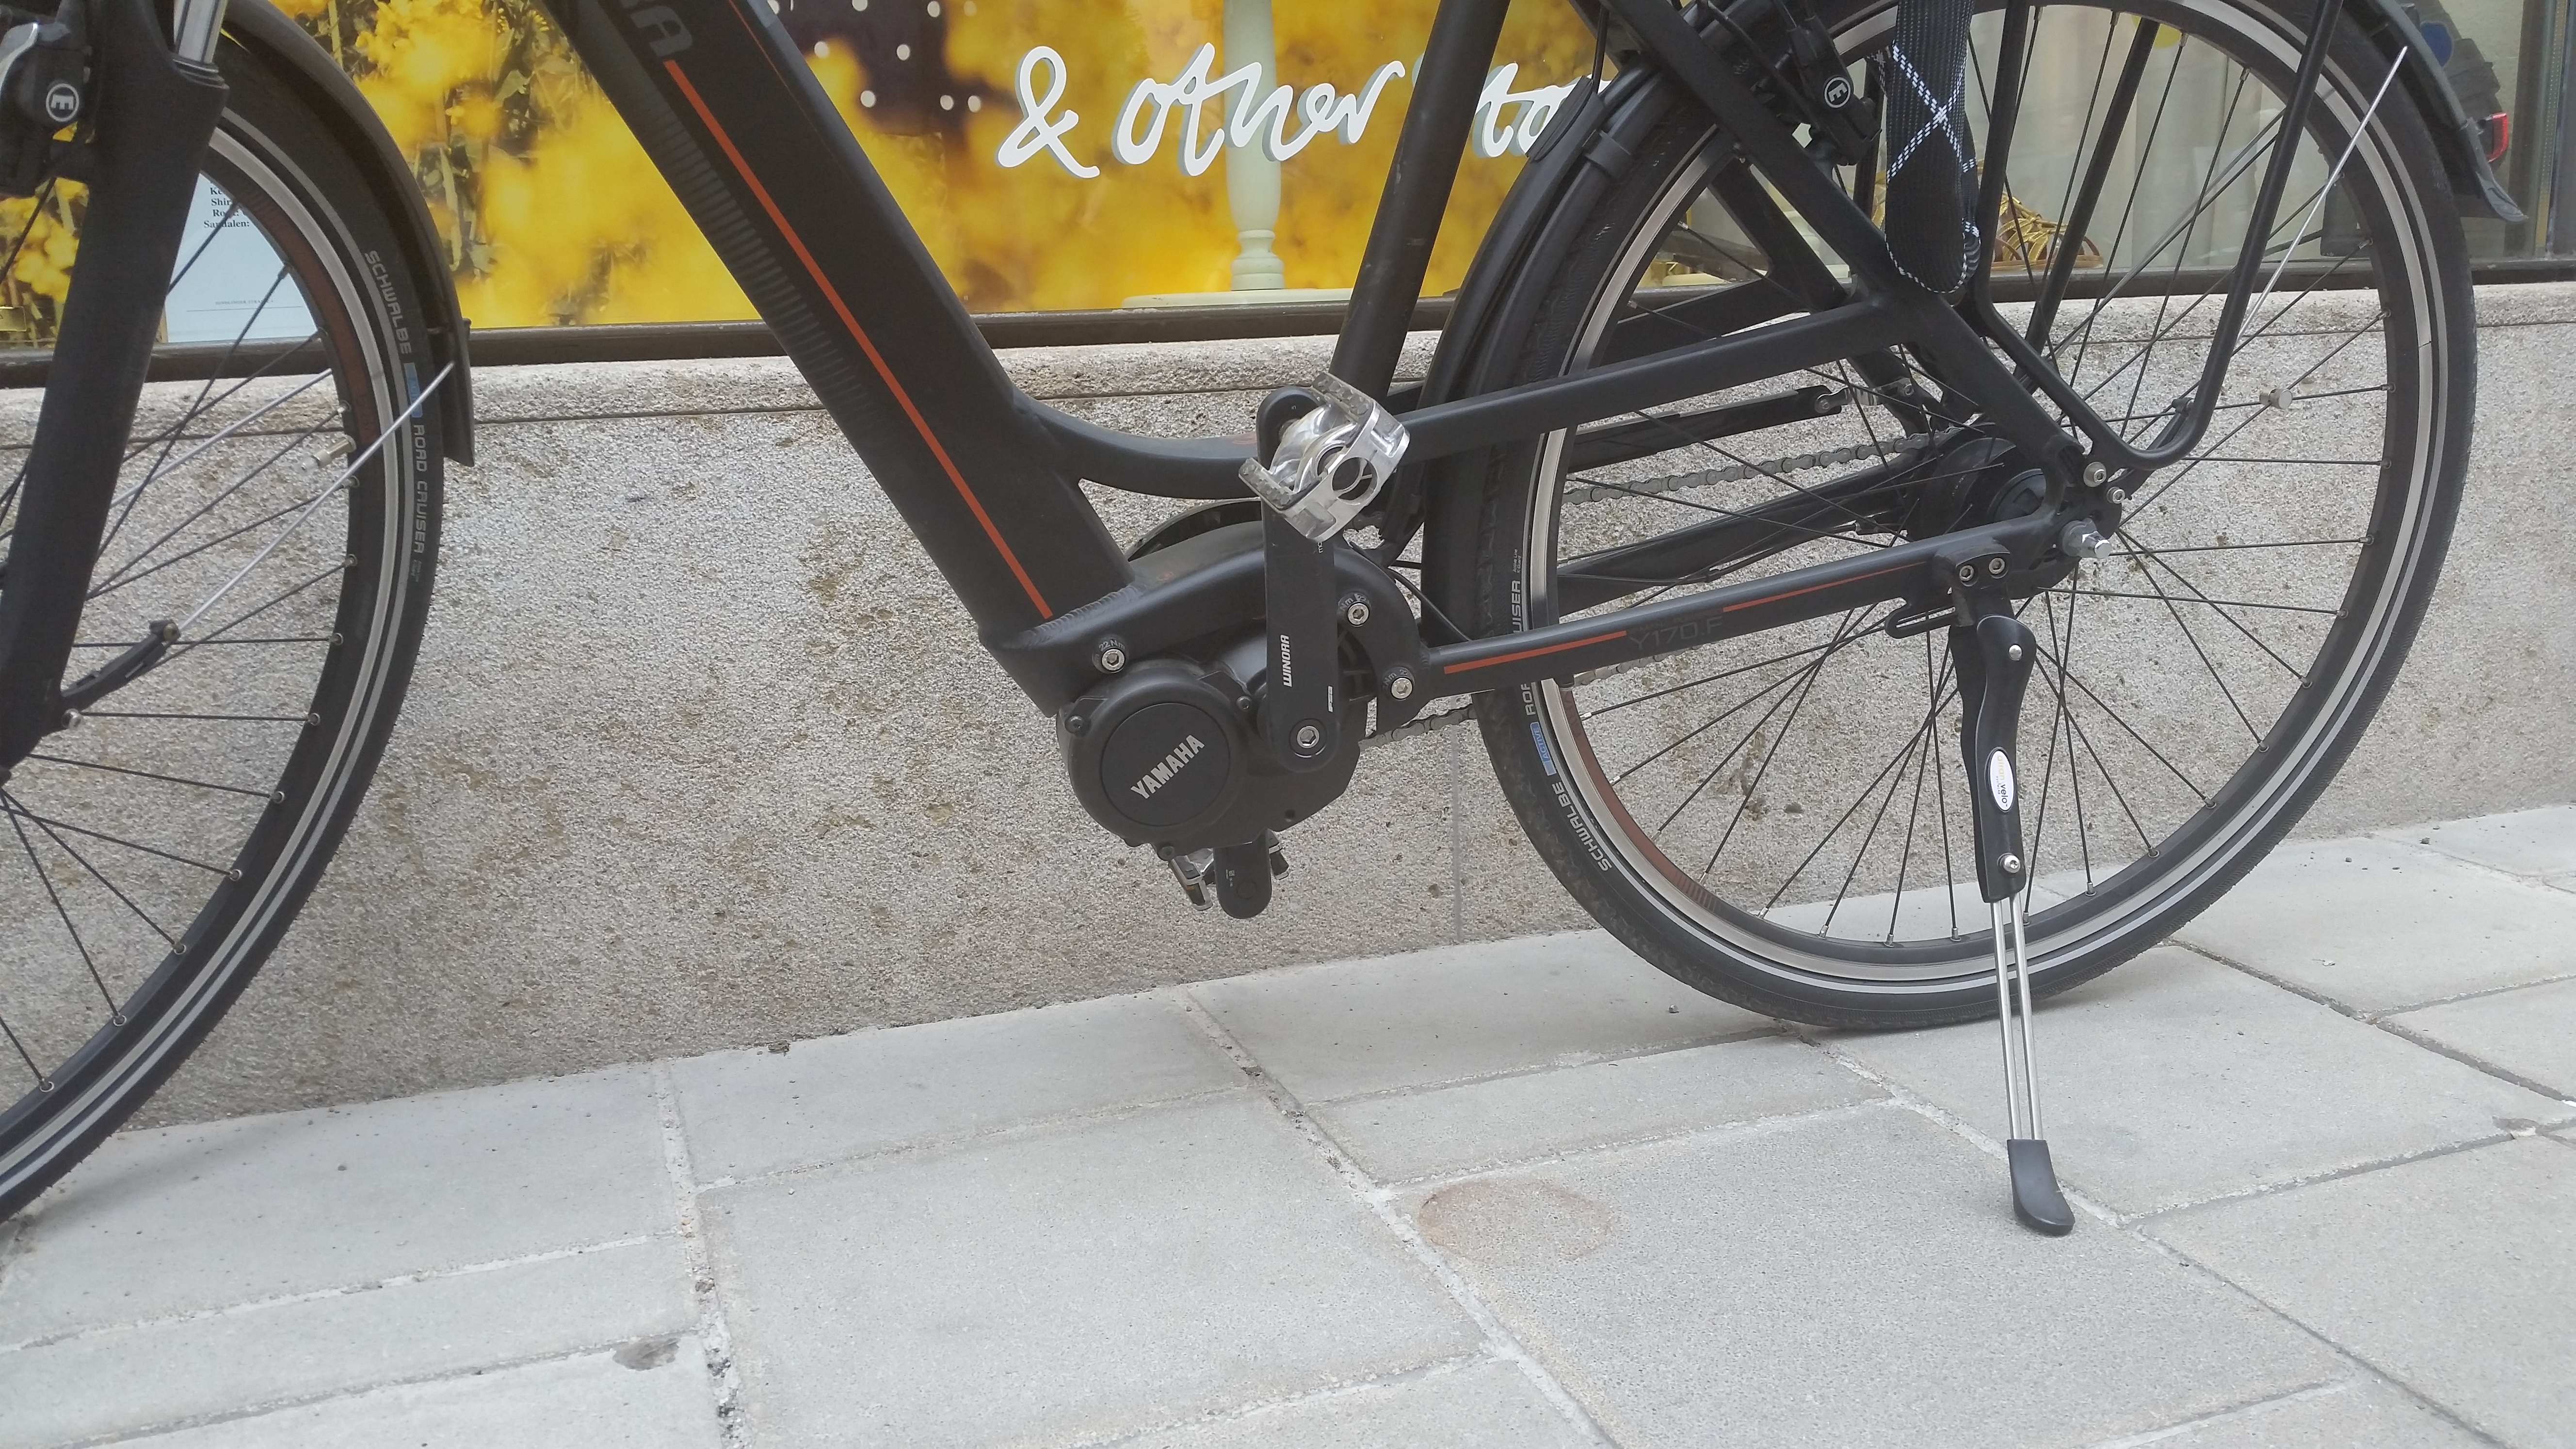
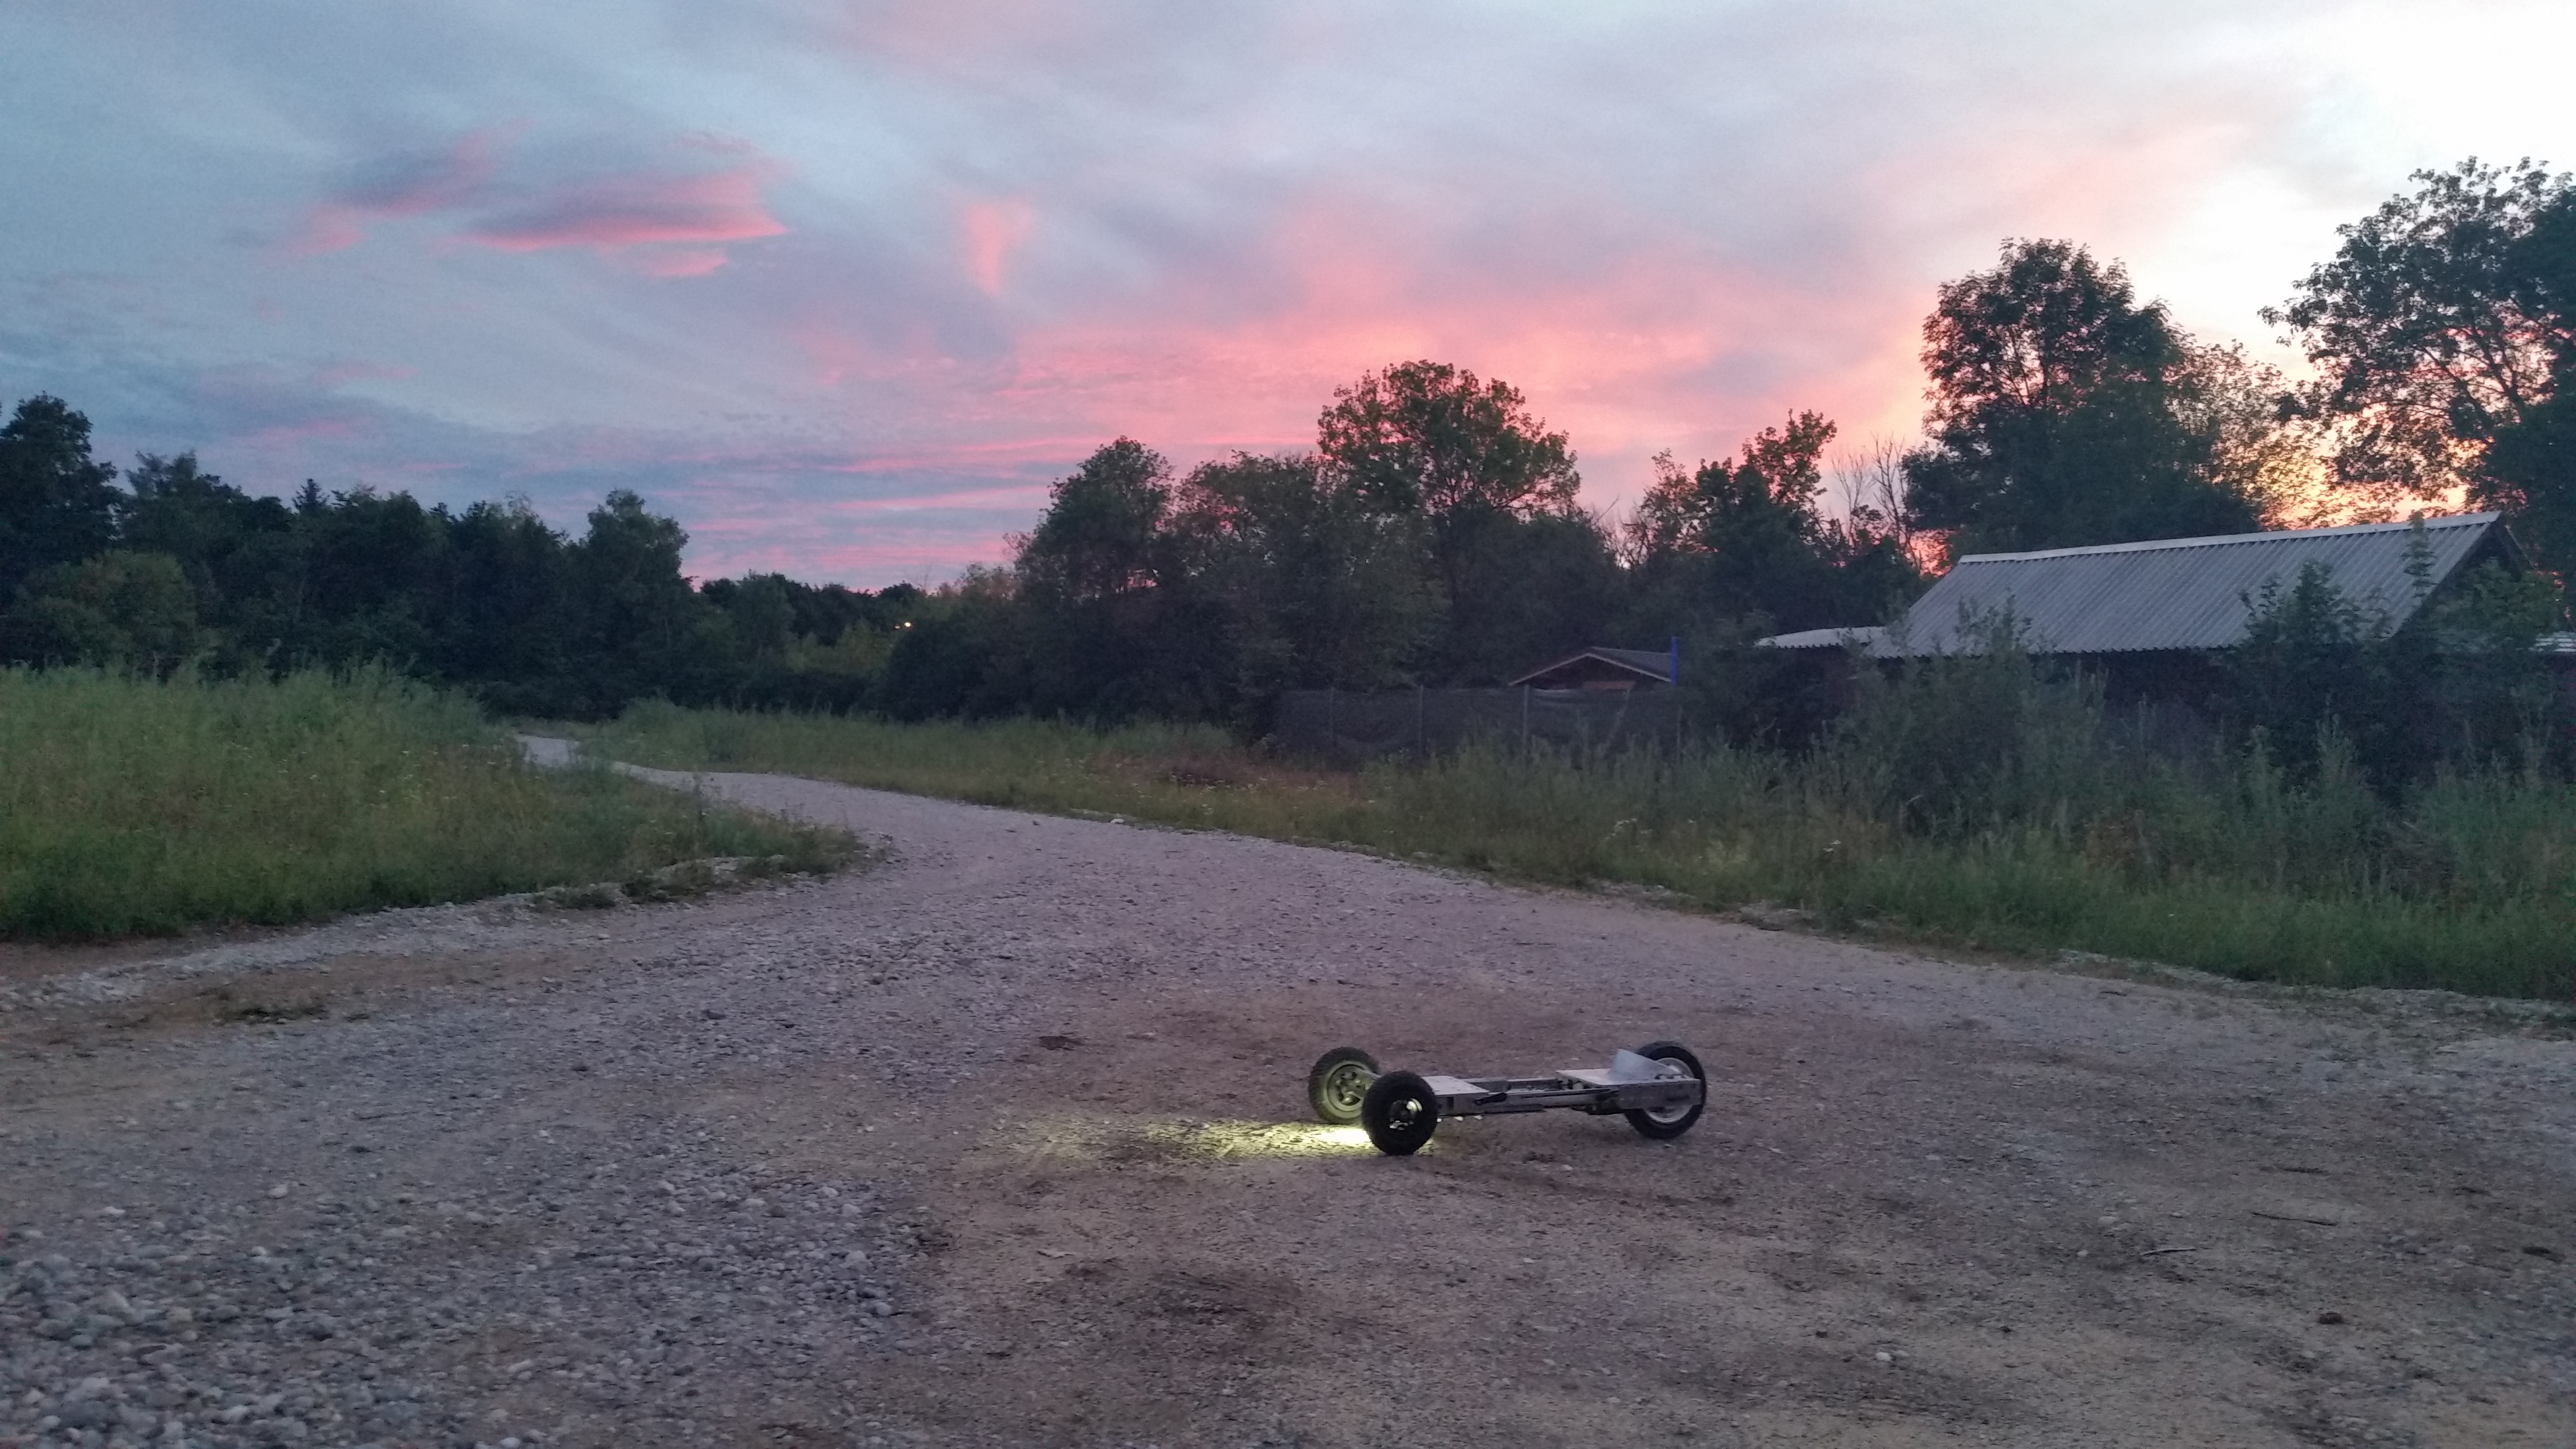
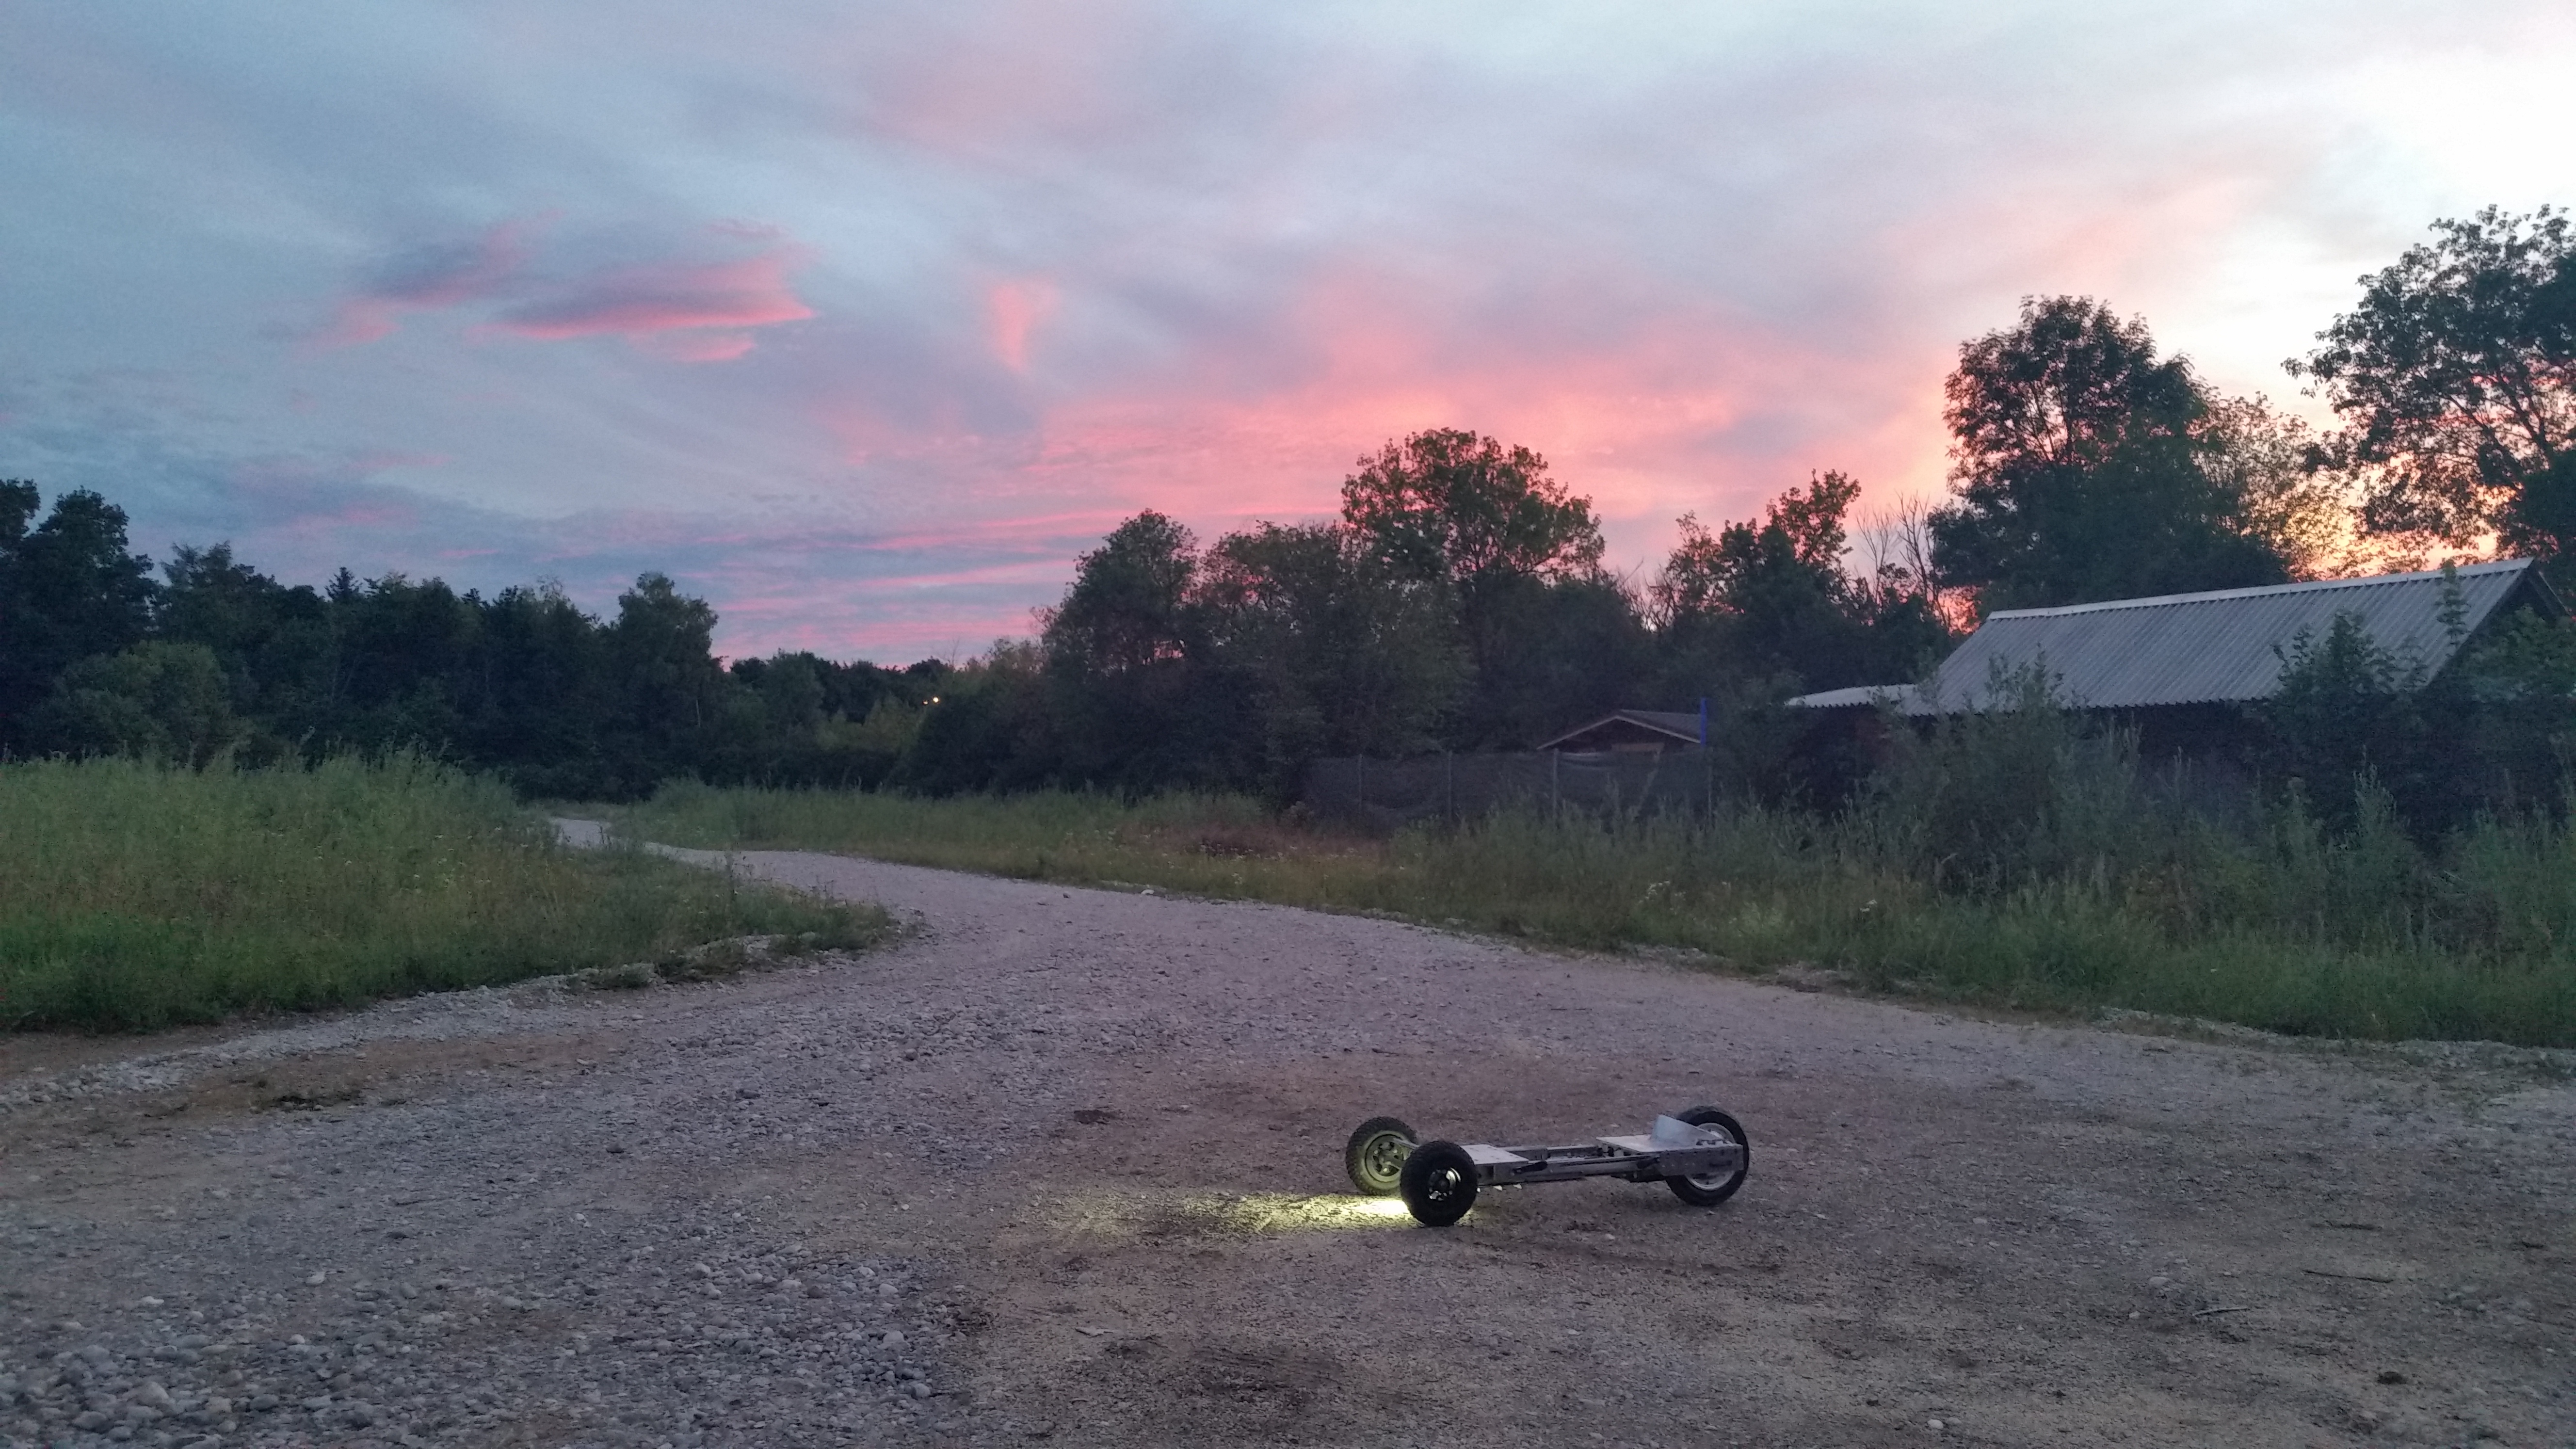
First ride in the FatherlandI was lucky, the first evening was beautiful, I was fortunate to find some small trails nearby and headed off into the sunset. Comically this was the first actual distance test of the skateboard. The under-body headlight worked great. Gravel and dirt paths were relatively easy to navigate and only became an issue when they turned into unpacked sand. 
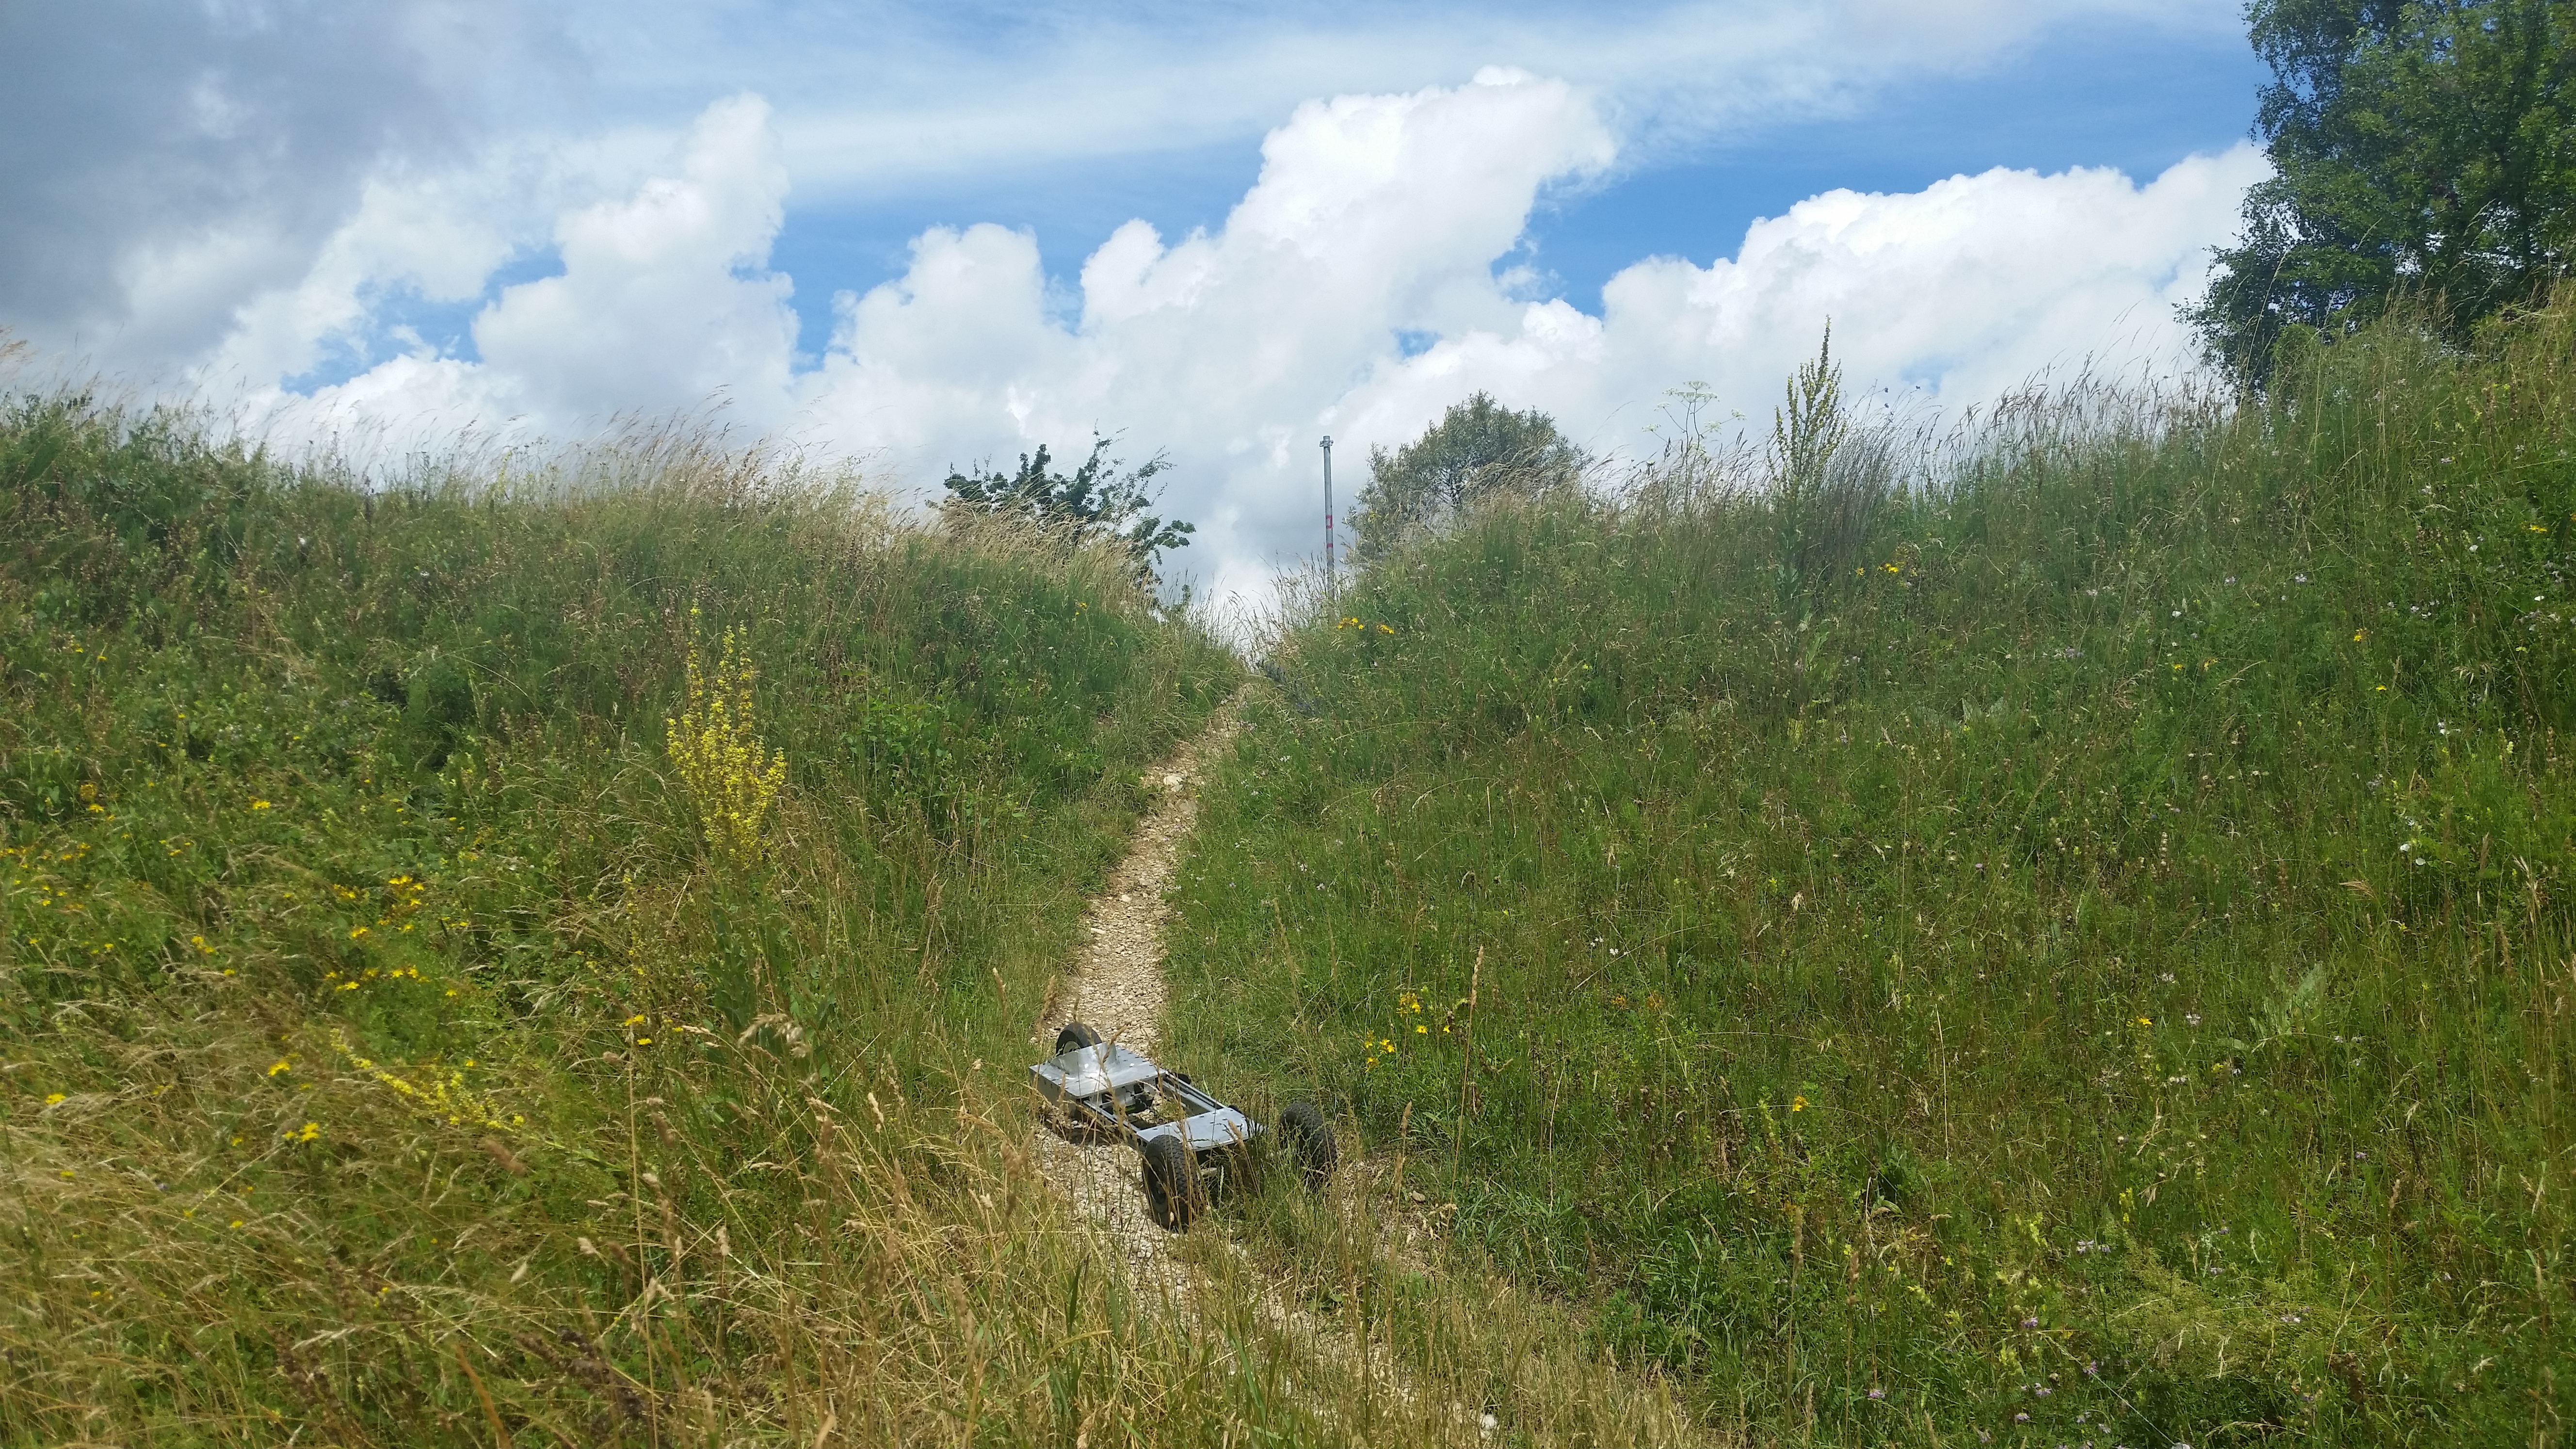
Serioulsy this country is beautifulI continued my expeditions further and further out from home-base. The board handled exceedingly well. I found myself a bit anxious with the limited range, so, for the sake of saving some coulombs, I hiked up serious hills with the board slung over my back. I made a temporary strap using 'backpack p-cord', while this worked, a flat strap would have been a bit more comfortable. 
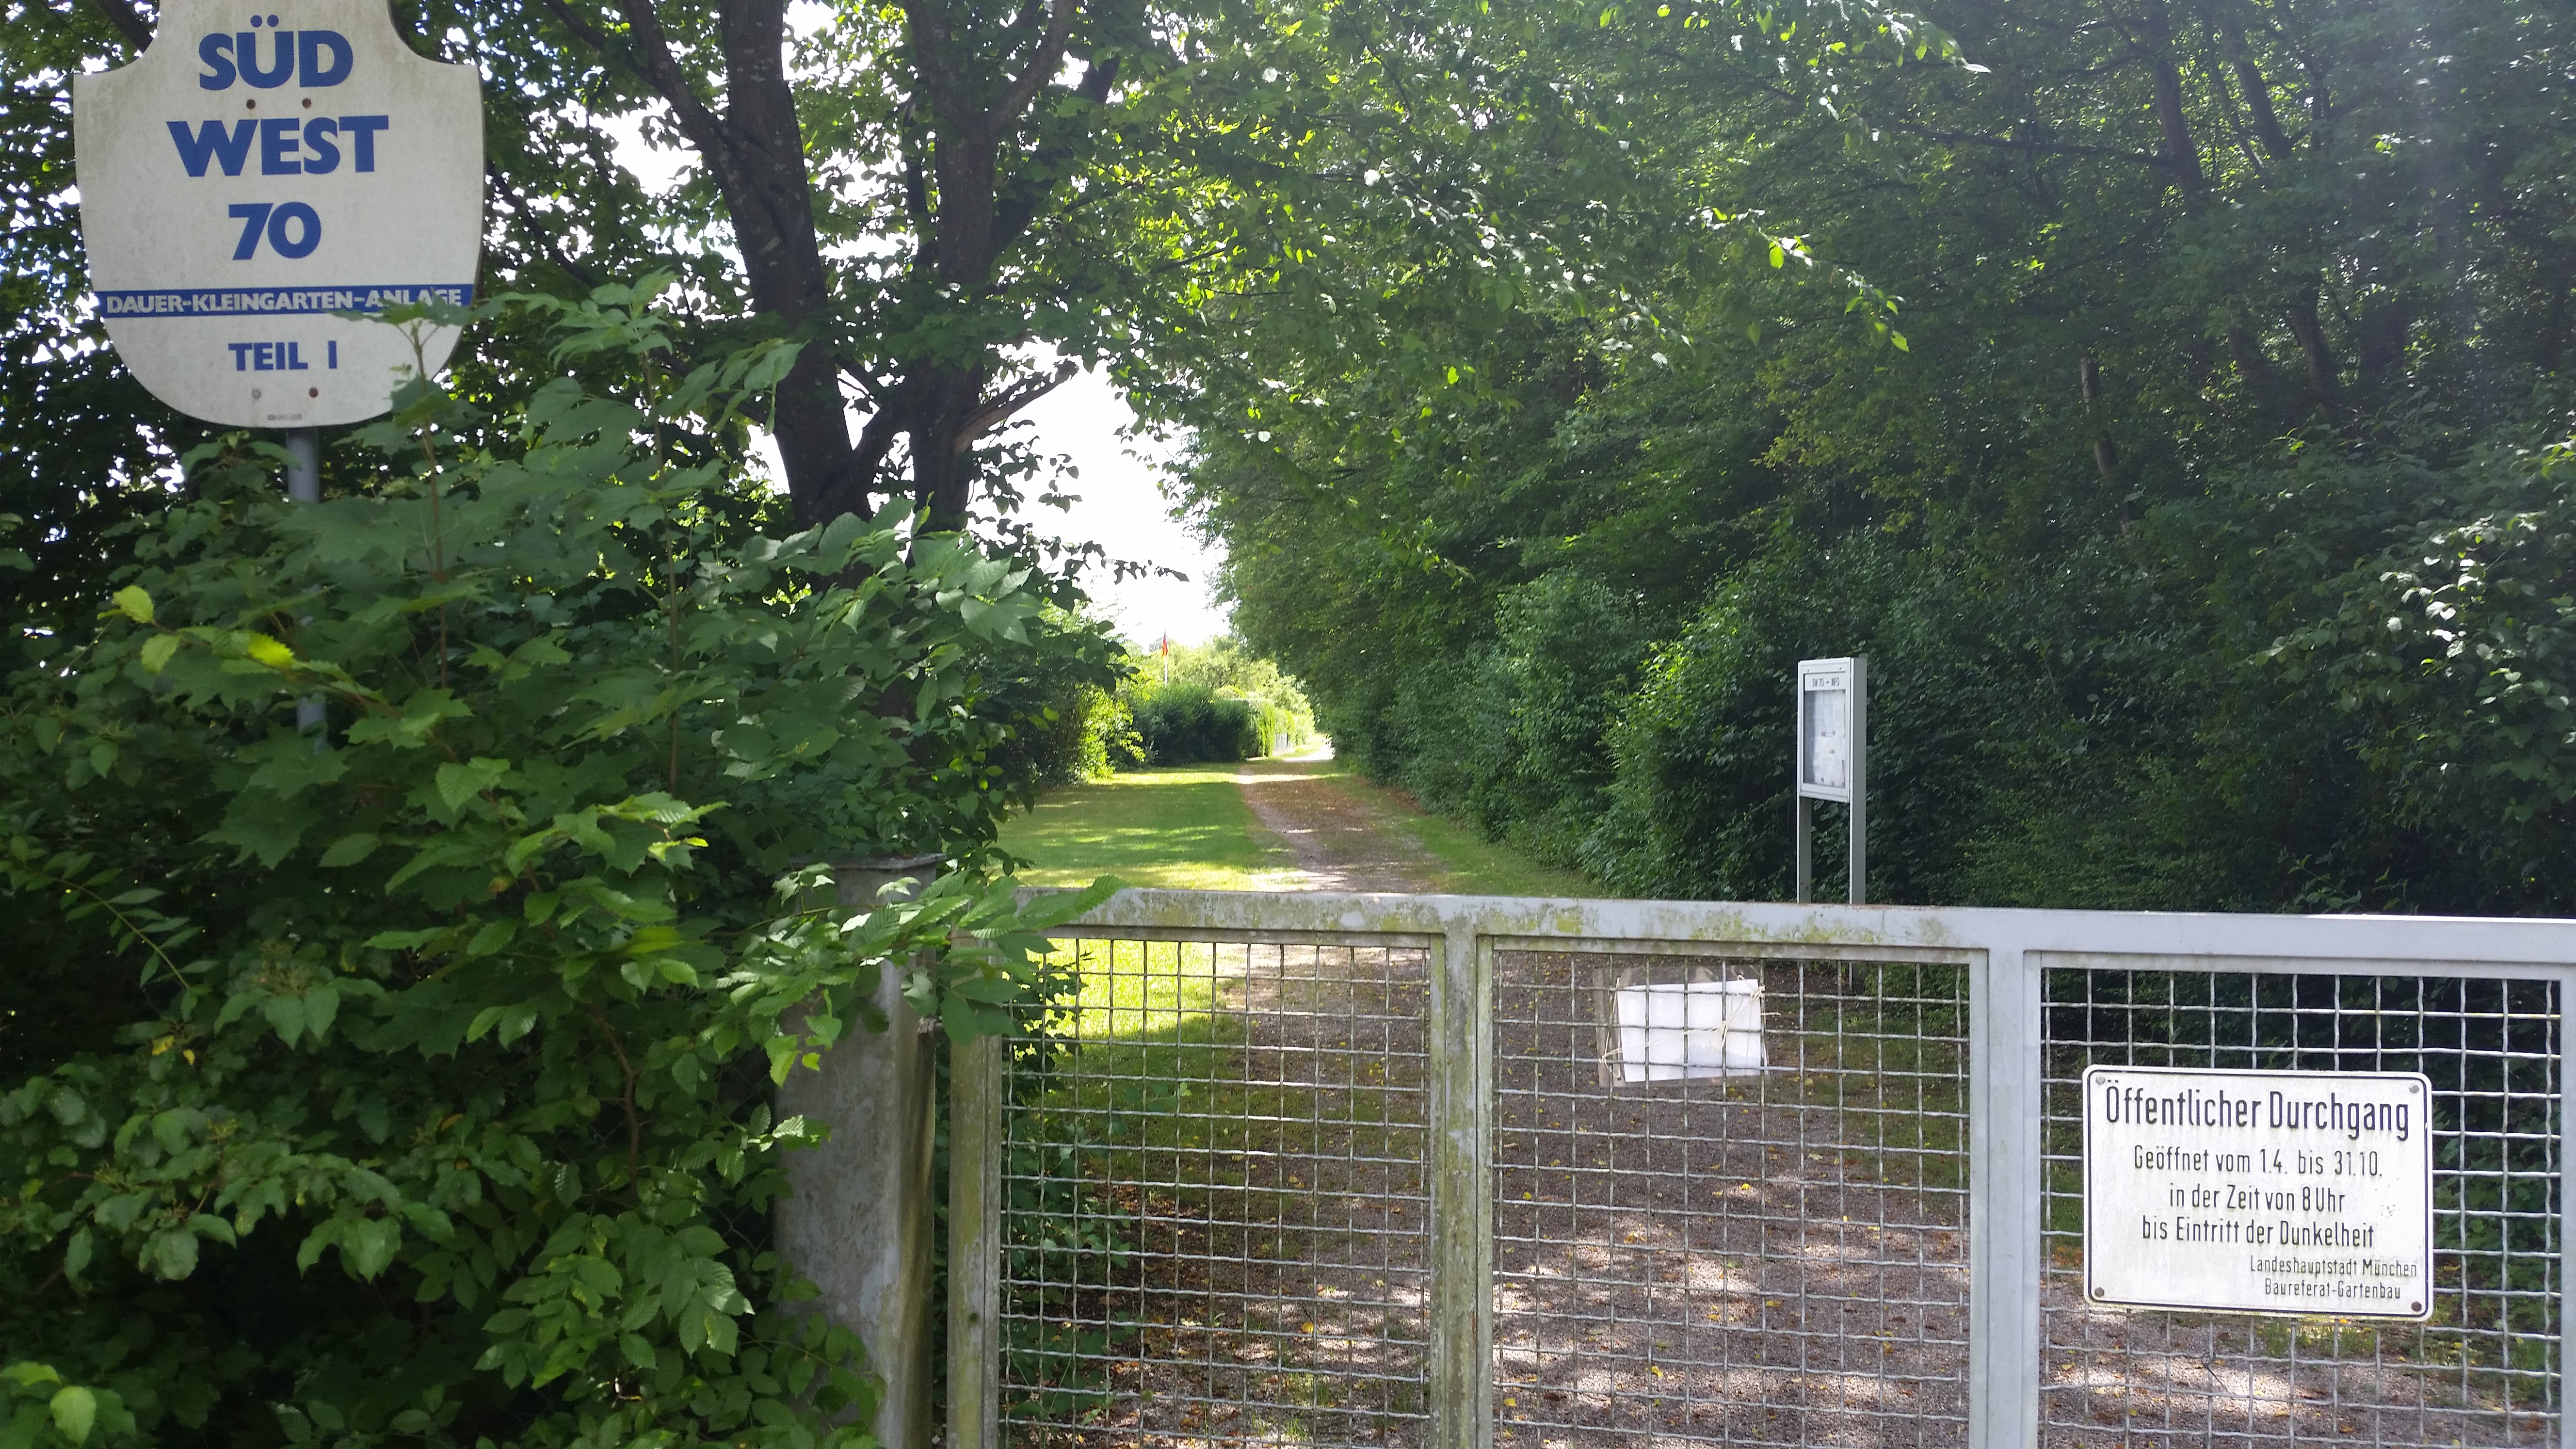
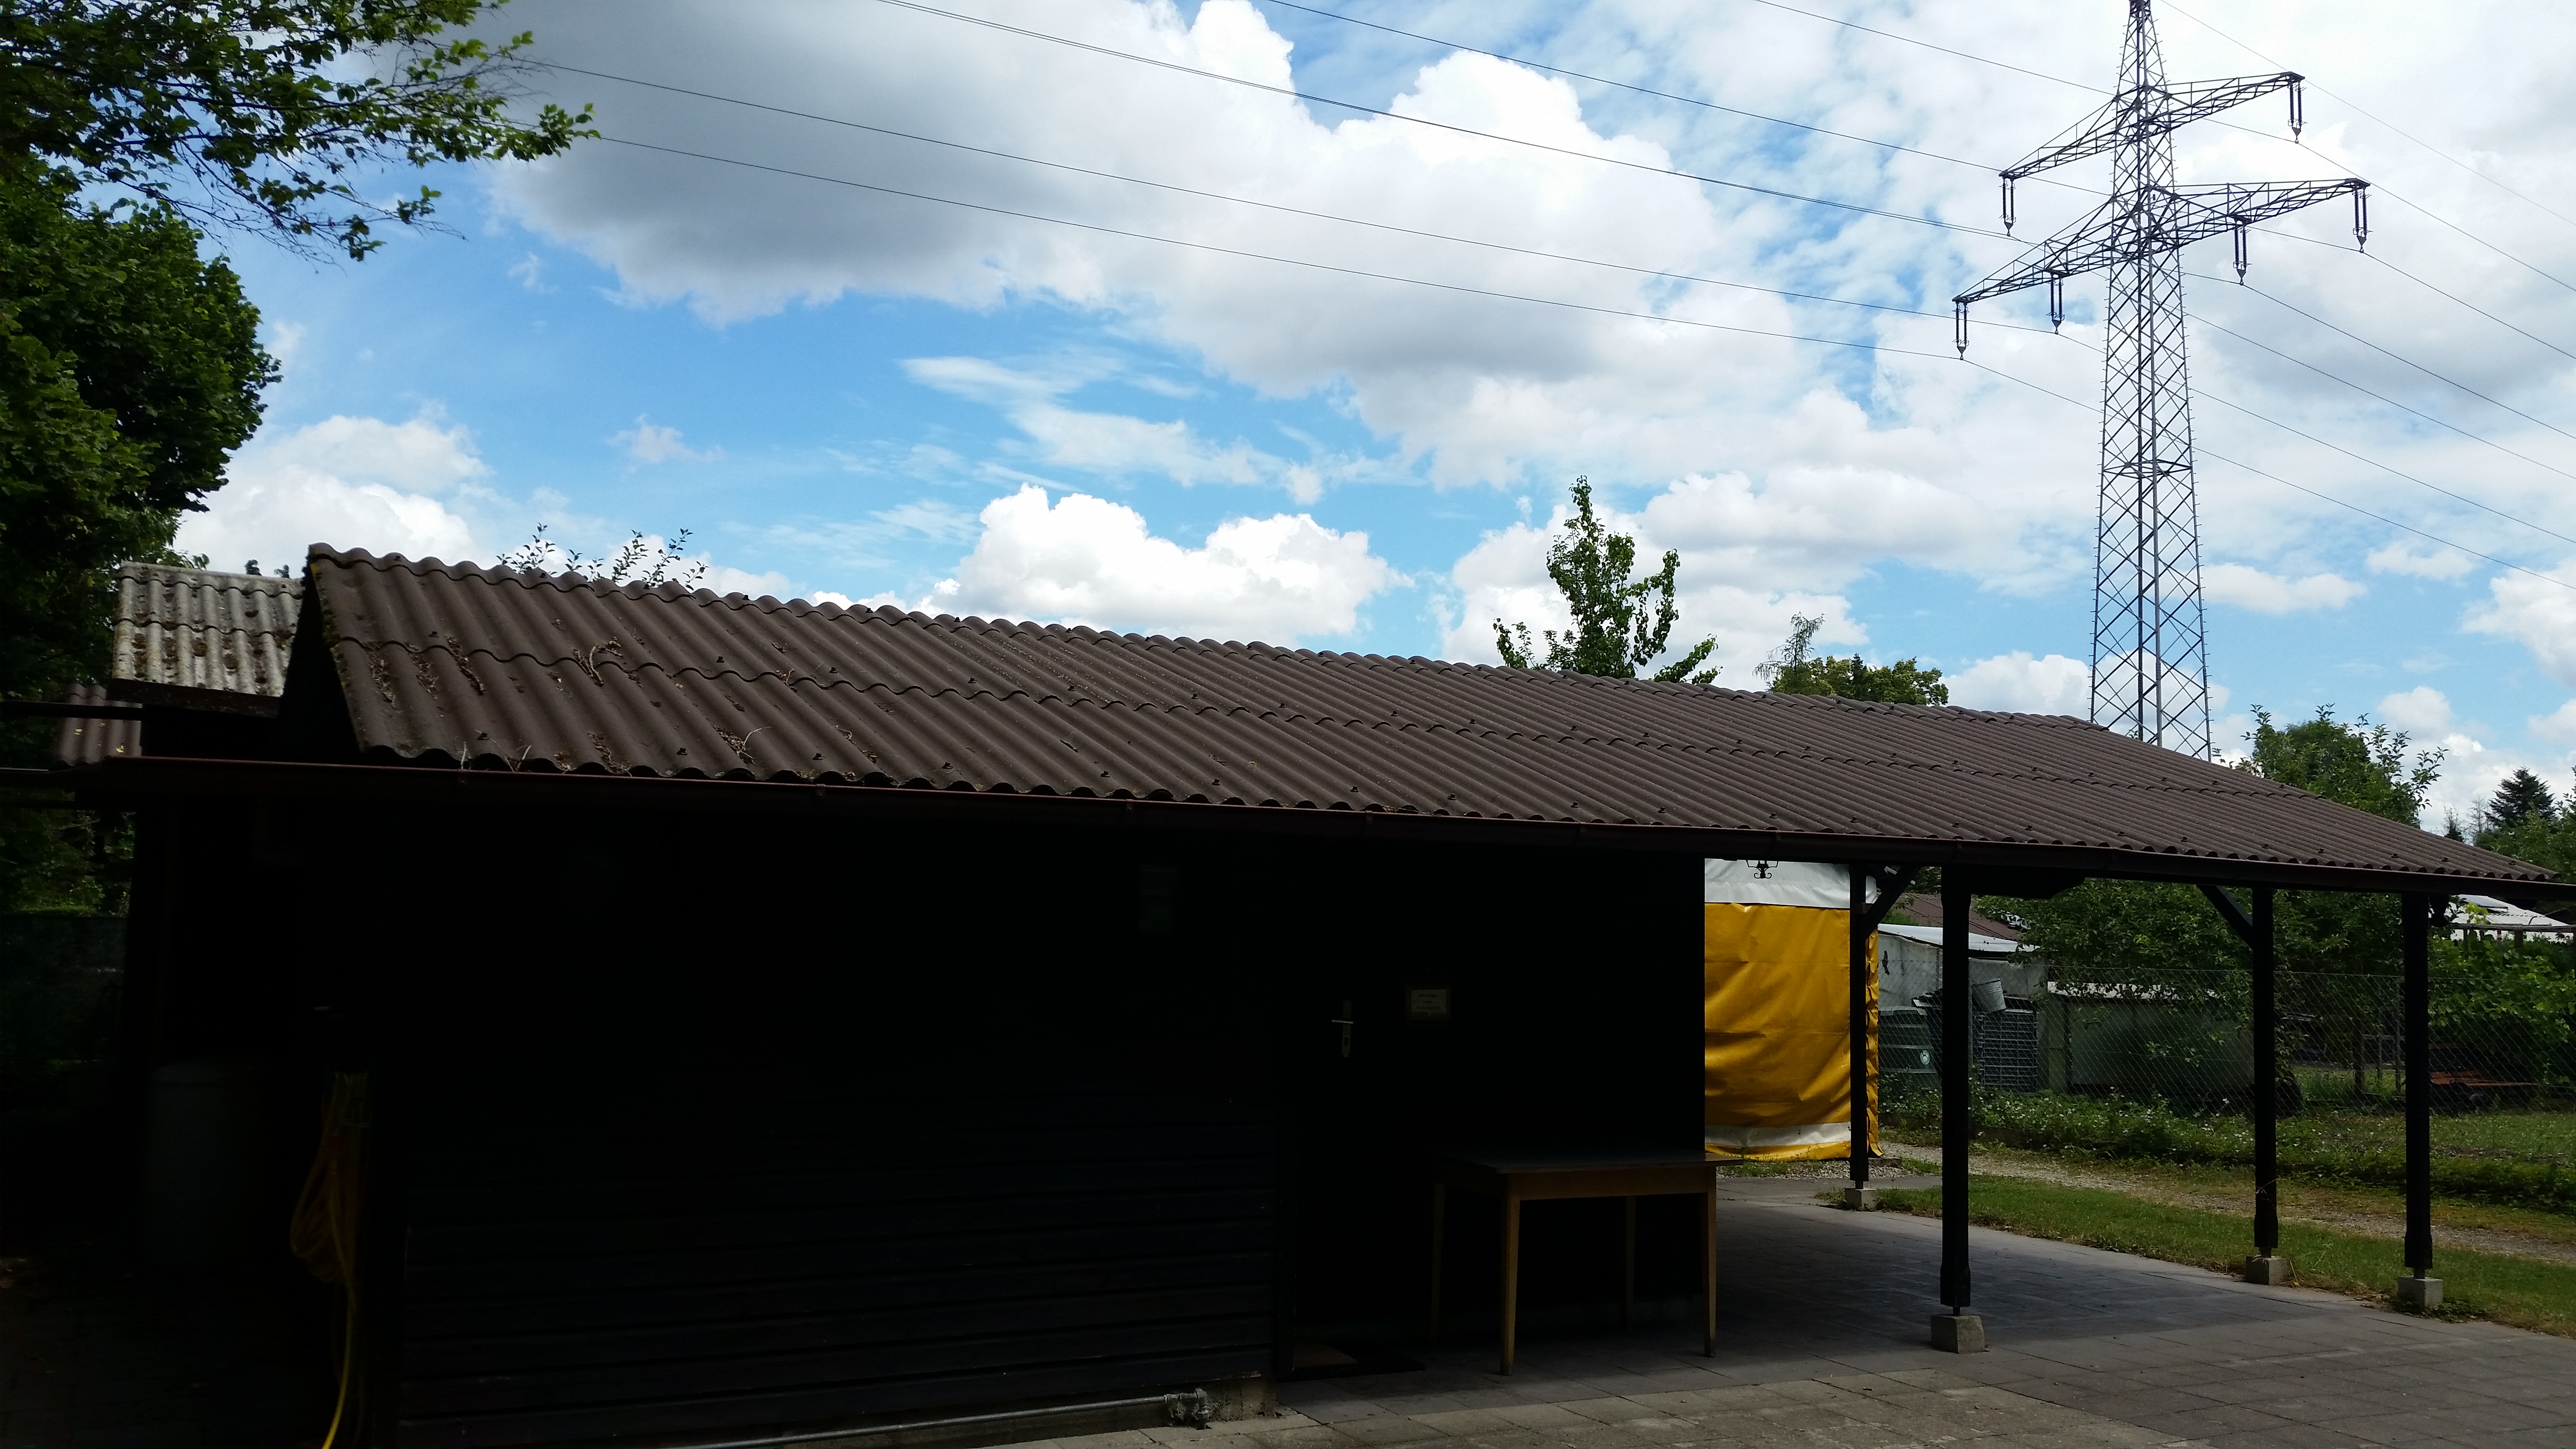
A misbehaving GoProI hadn't thought ahead to bring adhesive gopro mounts, so I was a bit creative with tape and elastic headbands. Unfortunately this gopro (hero 2) started exhibiting faults. Between 40 seconds and 3 minutes, the camera would restart and corrupt the file it was synthesizing. This was a bit frustrating but effort was taken to make the best of the situation. Will sort out the camera/card issue when back in the states. Public PathsThere were a number of these small paths for walking (maybe for small carts?). They made for excellent mountainboarding as they cut between parts of outlying towns and were relatively unpopulated. Most extended a few kilometers and met up with more urban areas, making really neat offroad short-cuts. 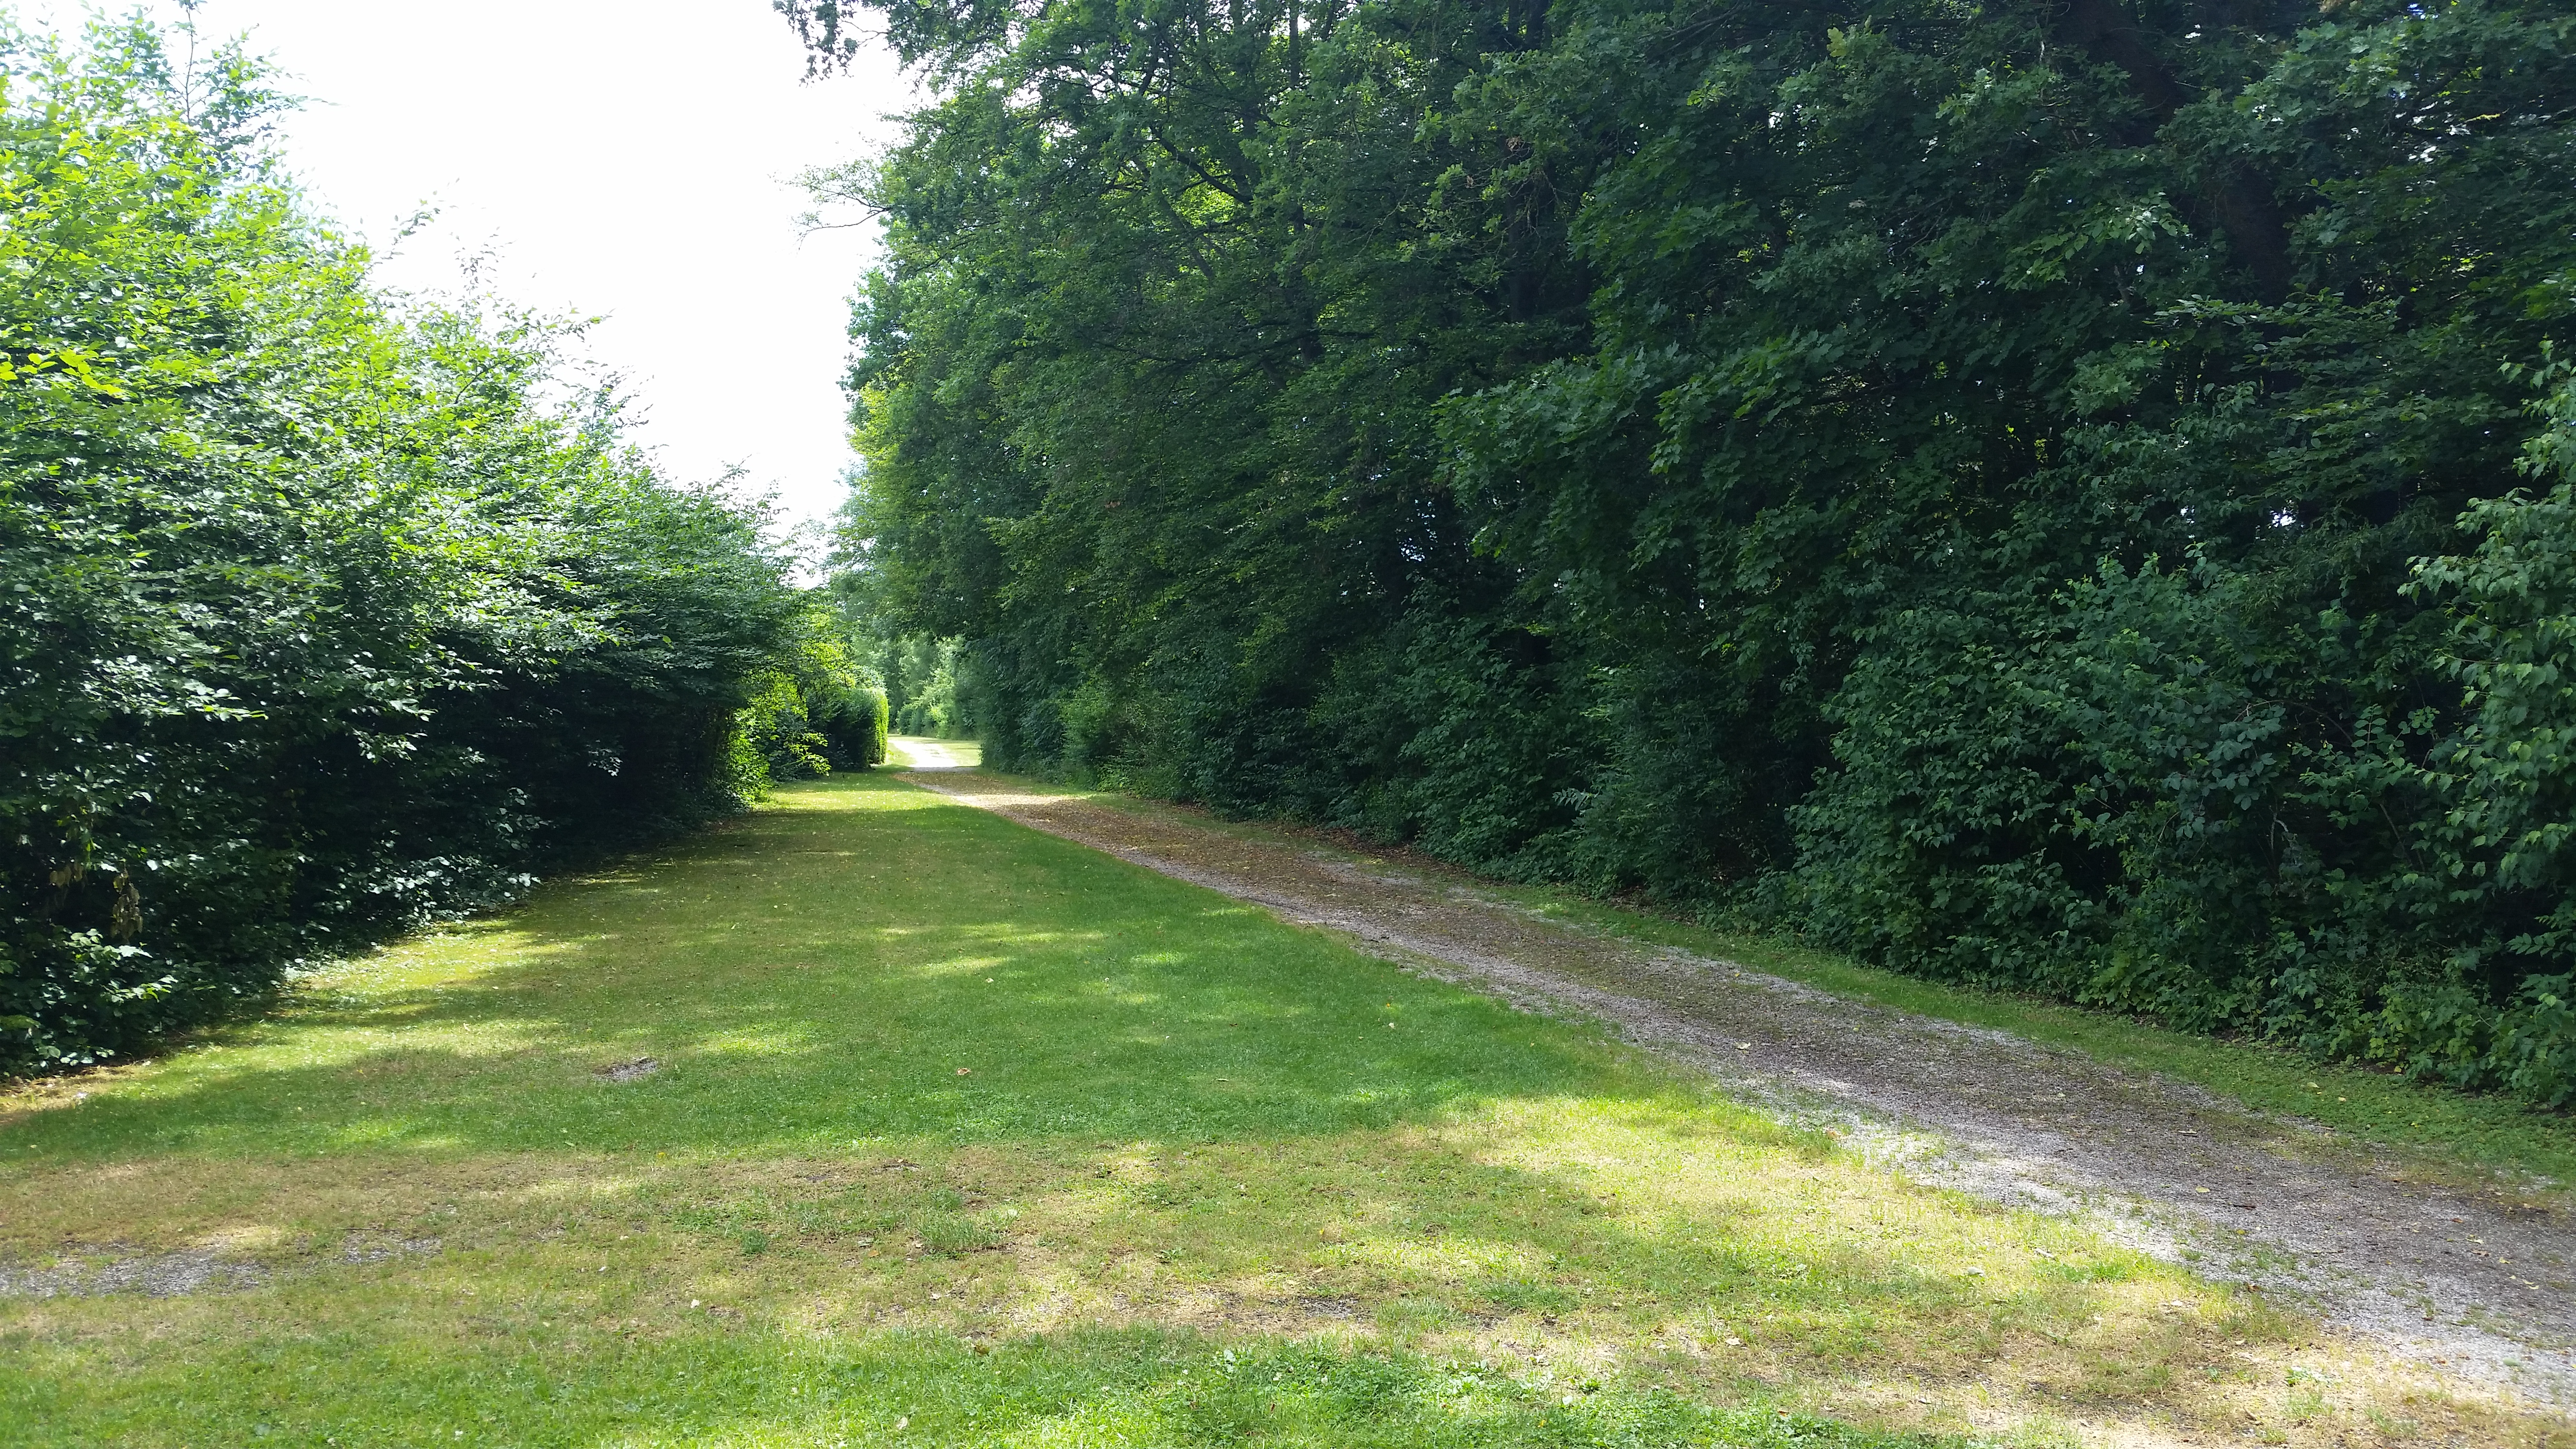
Recharging
My first 'I'm out of joules' moment happened at one of these small public paths. I snooped around for outlets and found a convenient one hiding in an information? cabin. QUITE EXCELLENT TIMING. Unfortunately all four external outlets were disconnected :/ 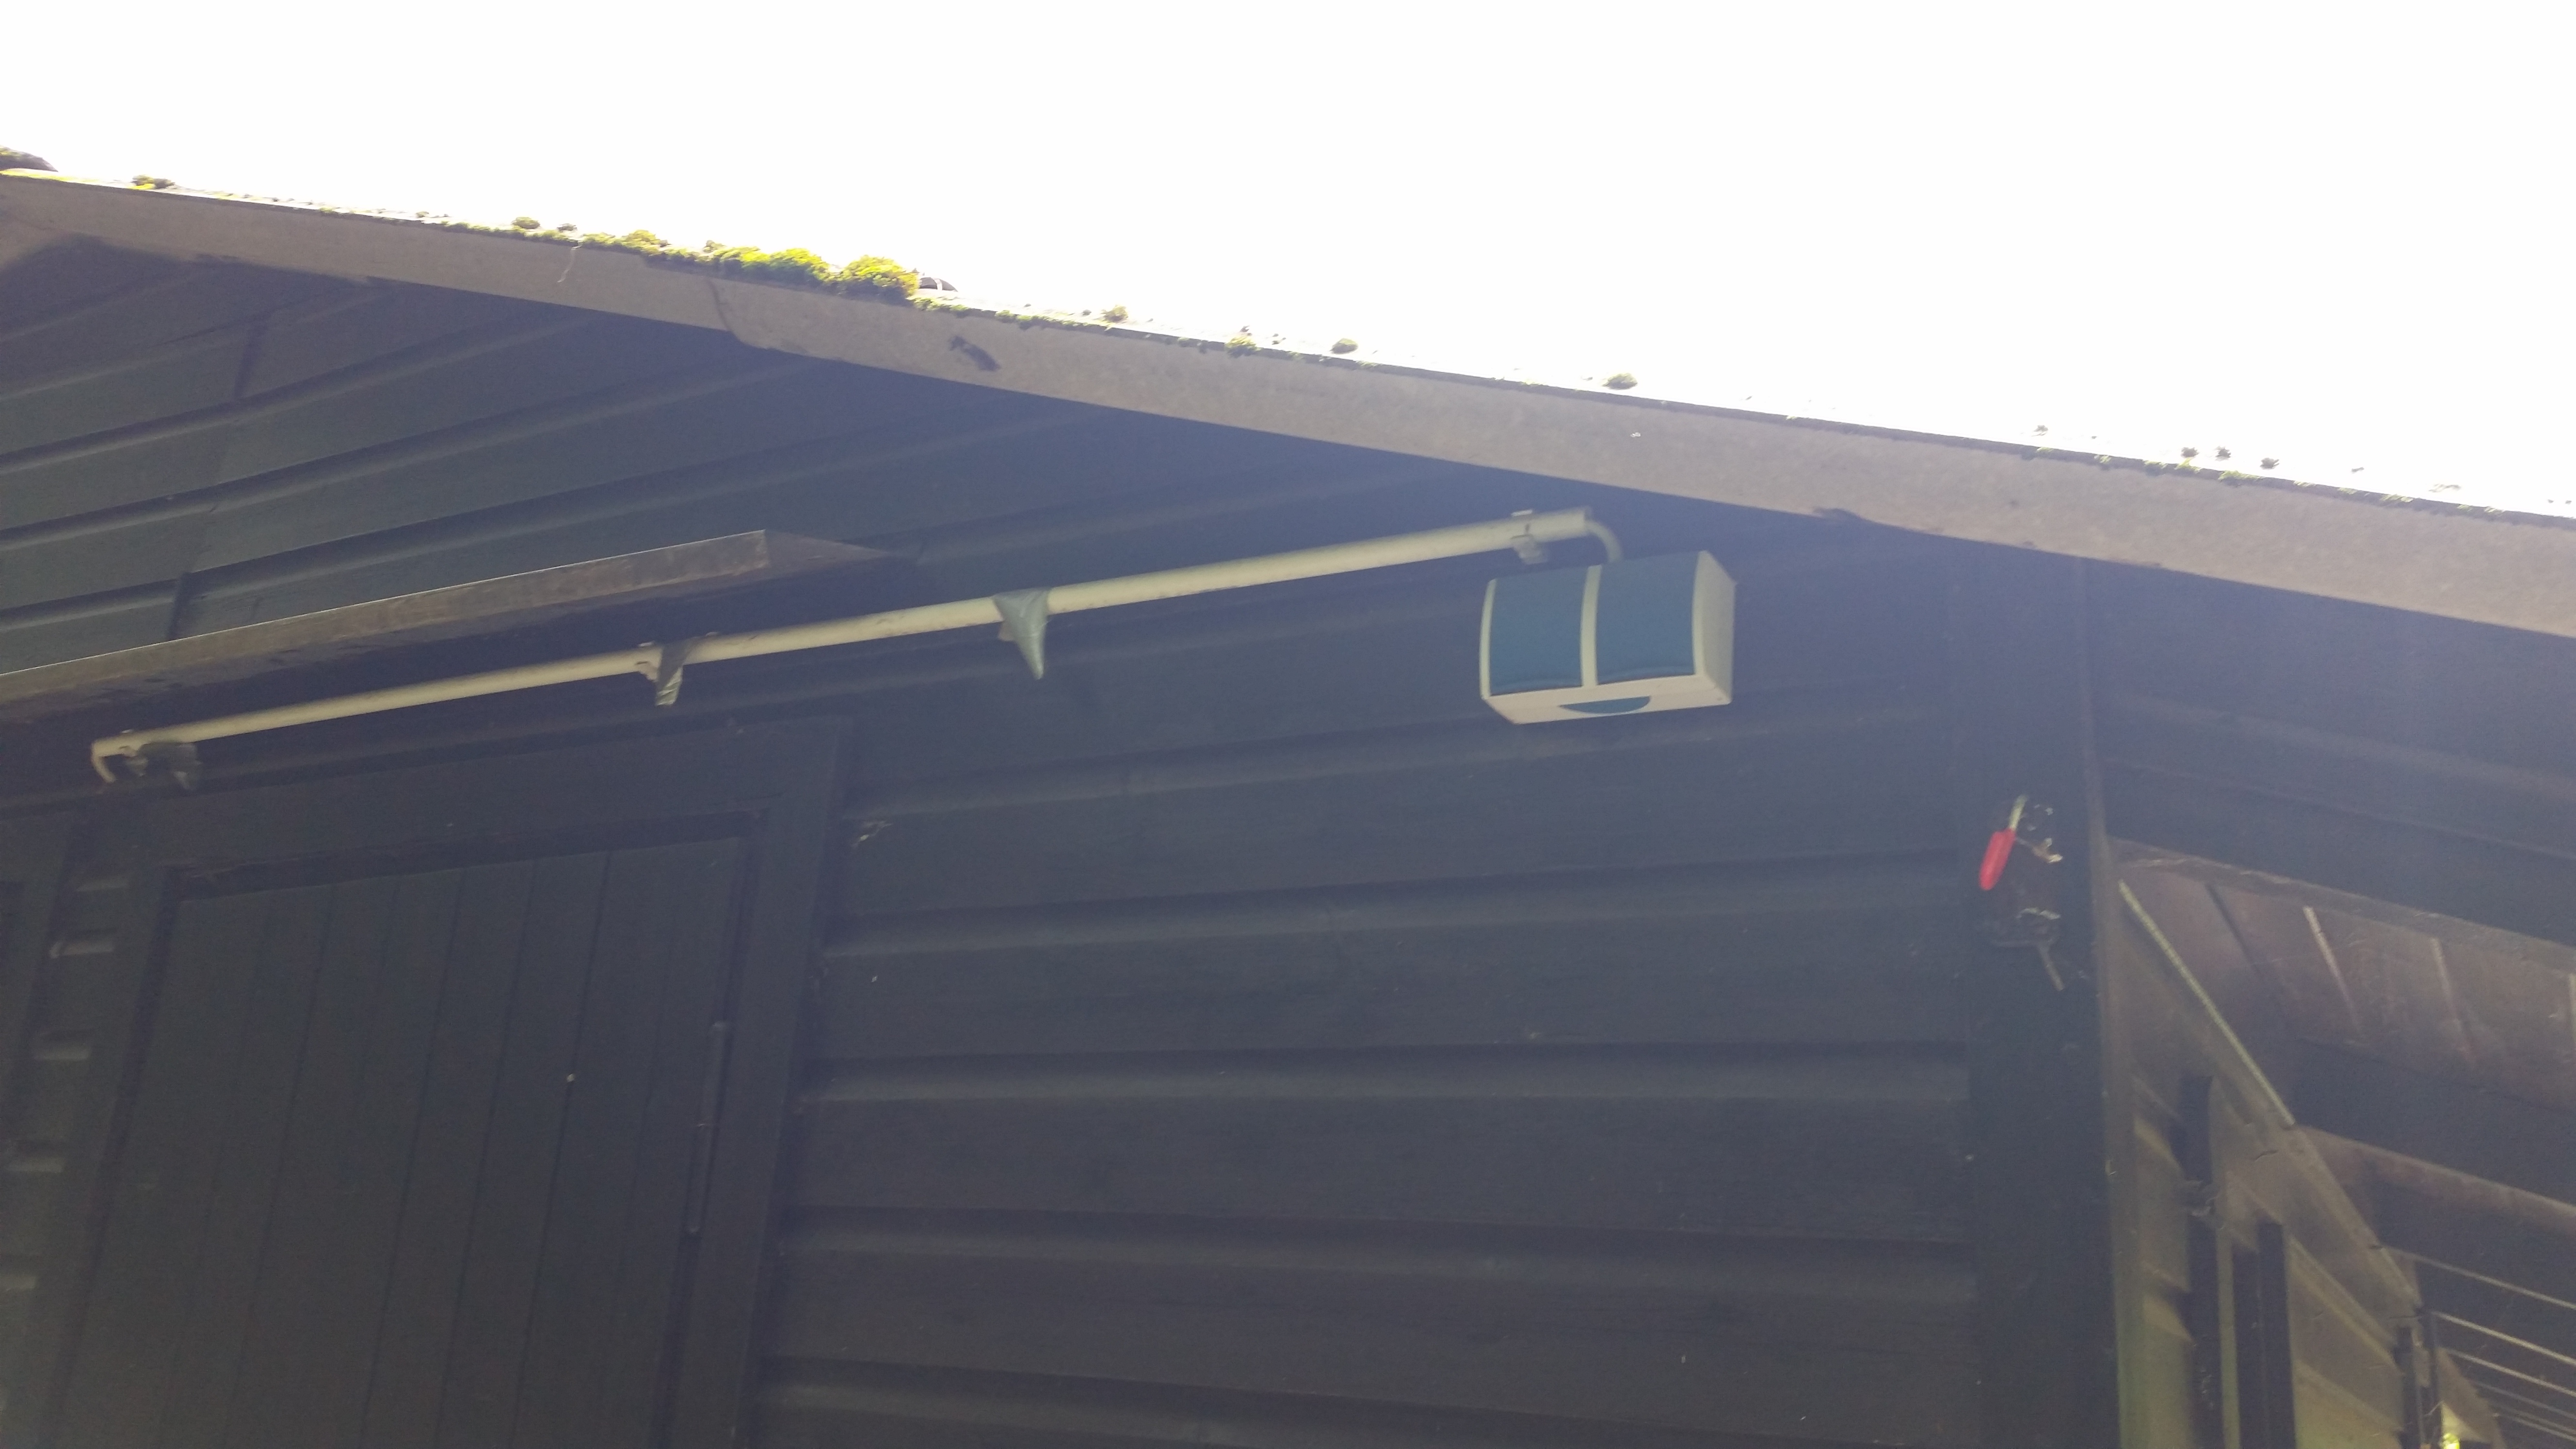
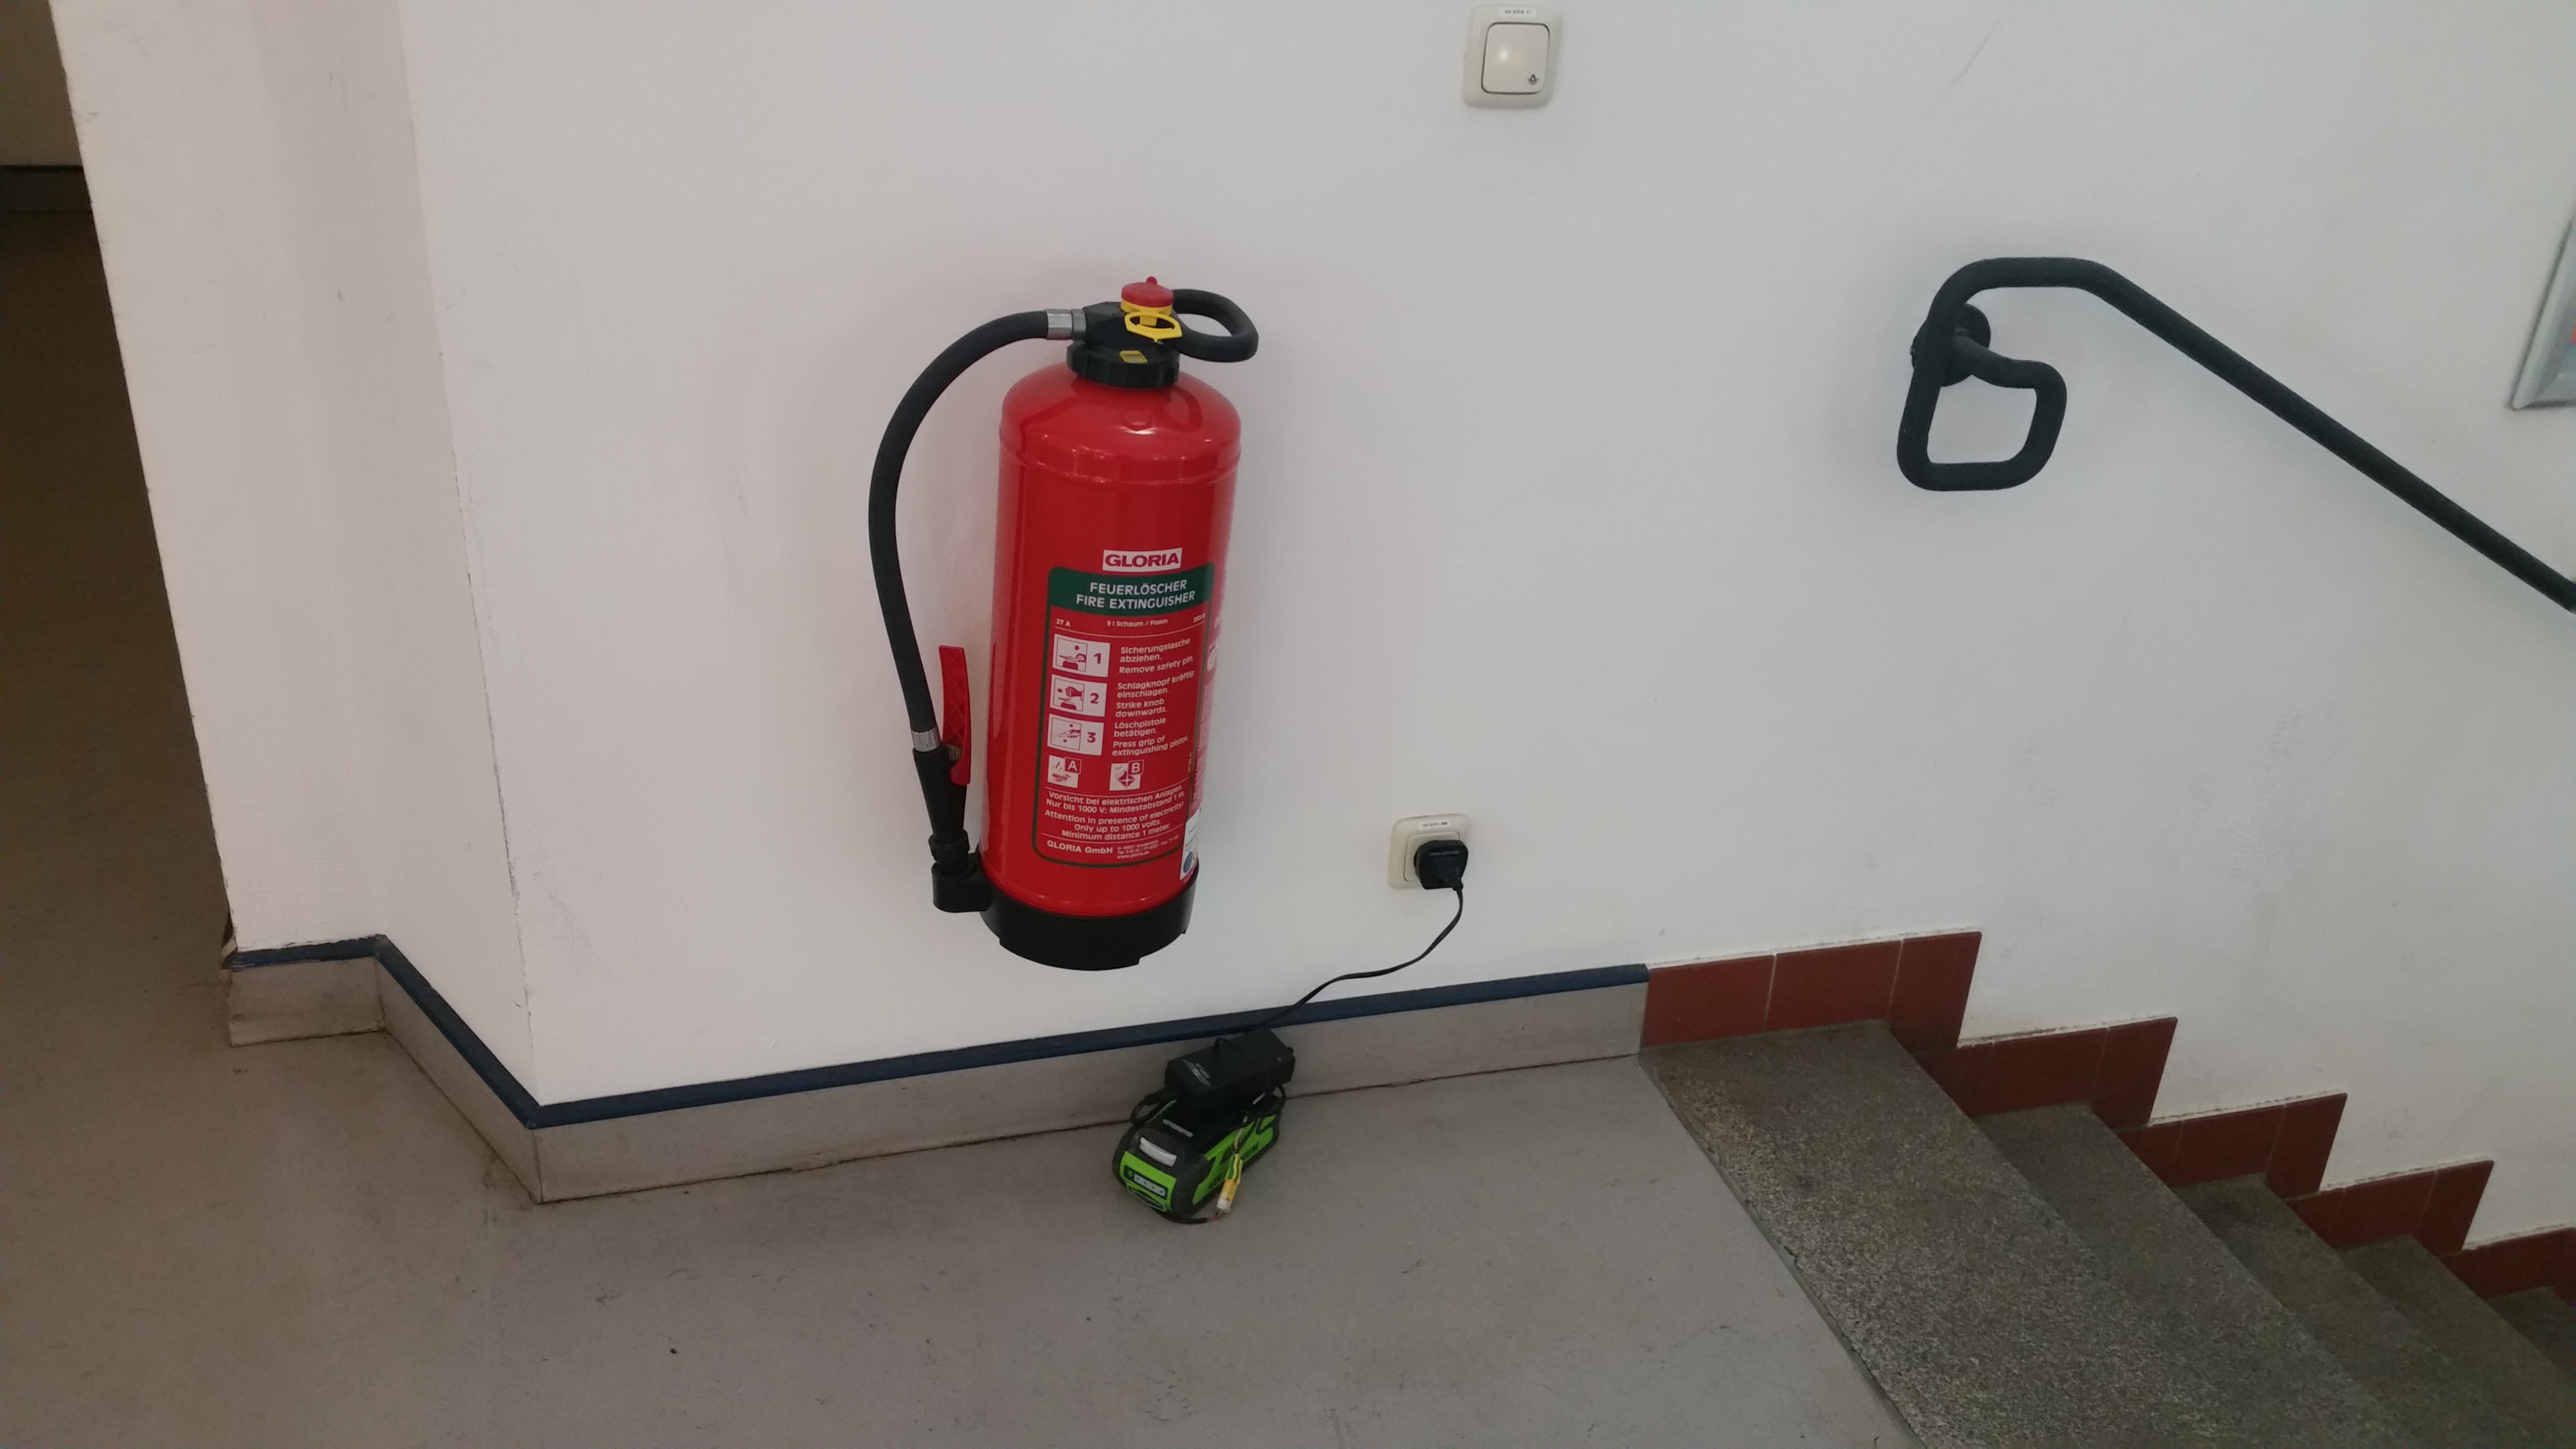
EDUROAM?So at the time I did not have access to the internet on my phone, nor cell coverage. While hiking around with a 24 lb aluminum contraption, my phone buzzed with a new email. I was A BIT PERPLEXED. As it turned out I was near an educational institution that had eduroam implemented. I walked over, was greeted by a German DLAB-Jack doppleganger, found an outlet and sat in a lobby, with my skateboard battery and charger hiding next to a fire extinguisher. ~1h to fully recharge... 
Yaay EspressoI spent the next 10 minutes catching up on emails, and then spoke with the nice folks at the campus coffee shop. I had some potent espresso while waiting for a skateboard to recharge, all in a country that I didn't speak a bit of the language in. Quite good. I contemplated my range estimations and figured out why I was coming up short. The 2AH pack was 10S1P 18650, and I was pulling something like ~20 amps while accelerating. The cell impedance was starting to add up, and I was fairly heavily abusing the pack. Continuing that logic, the 4AH version of this pack should have more than double the range of the 2AH pack, as the pack impedance should be lower. I also made some observations, a proper 'strap' that somehow lived in the board but could come out for carrying it about would be great. 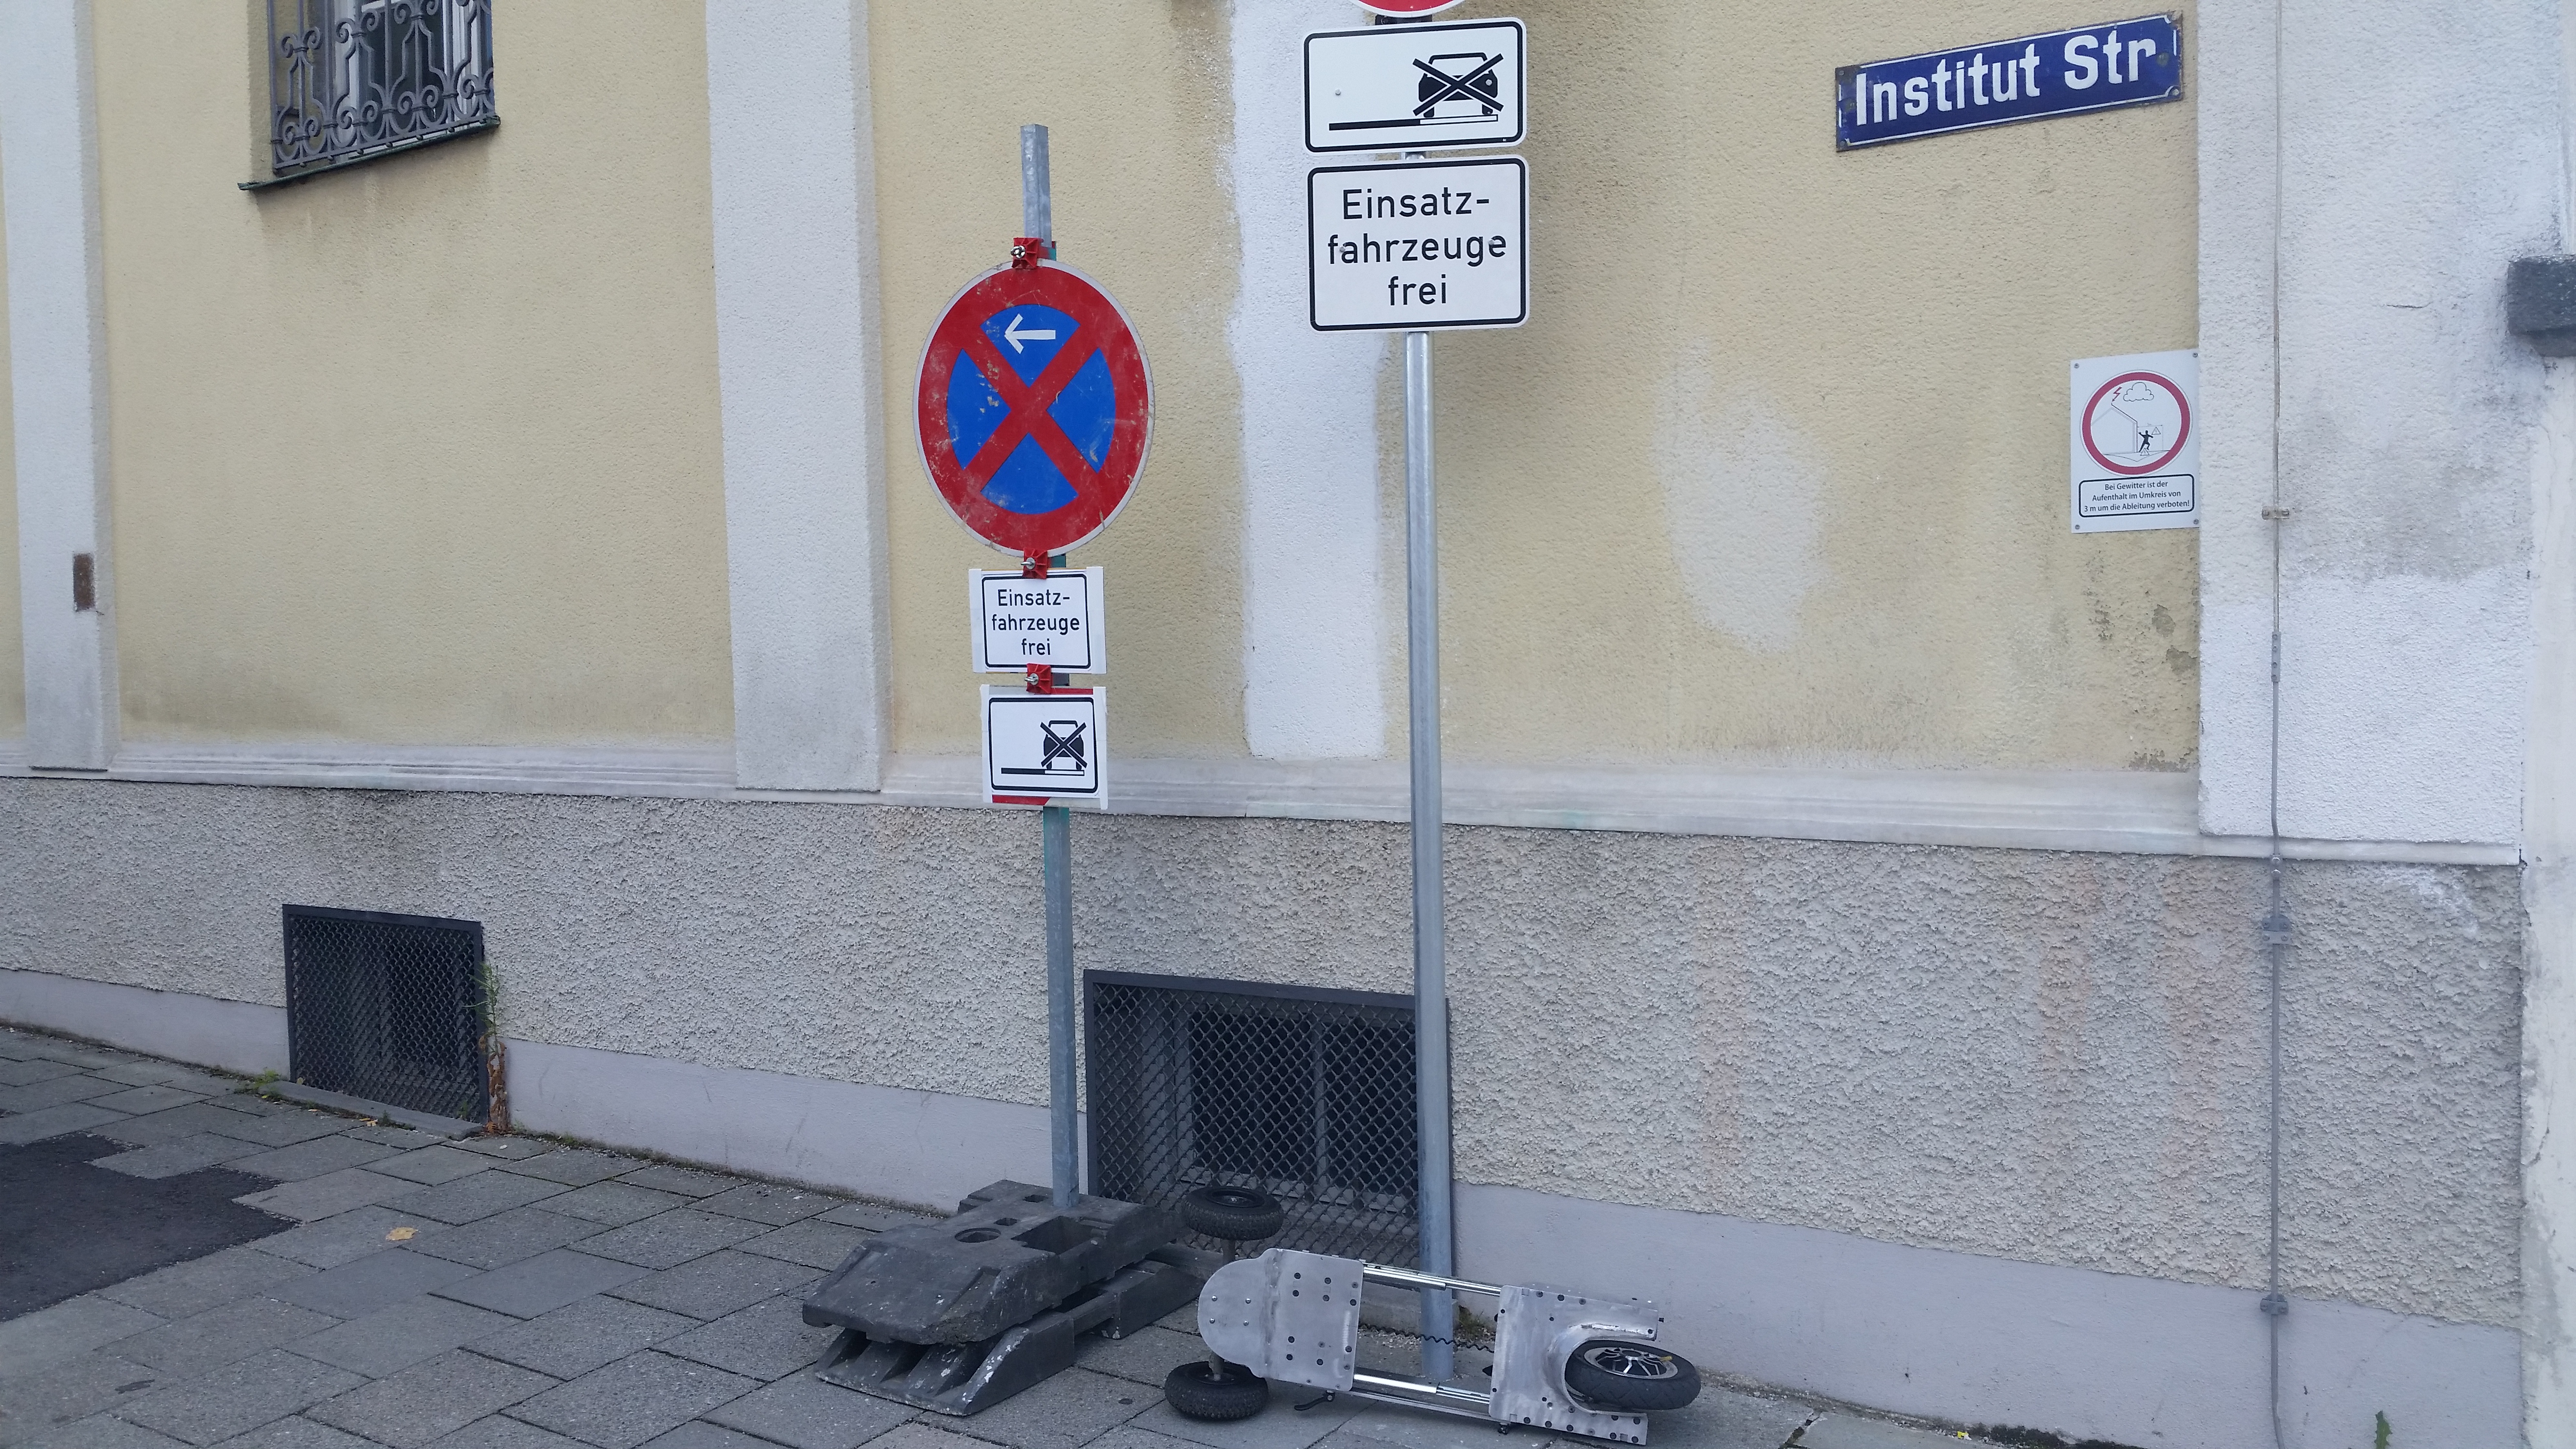

After some european electrons I had an epiphany, what if i had the option of buying an extended pack nearby? I used the collegiate WiFi waves to hunt down the location of a hobby store. 2 Miles, not bad. With helmet and cell phone map, I zoomed off into the ether. It was a very nice shop, but geared more towards smaller things. I asked about LIPOS and pointed at the skateboard, I asked if he had any 5-S packs, but unfortunately there were only a few tiny 3S packs in stock. I borrowed some electrons for a while and continued on to a nearby park path. 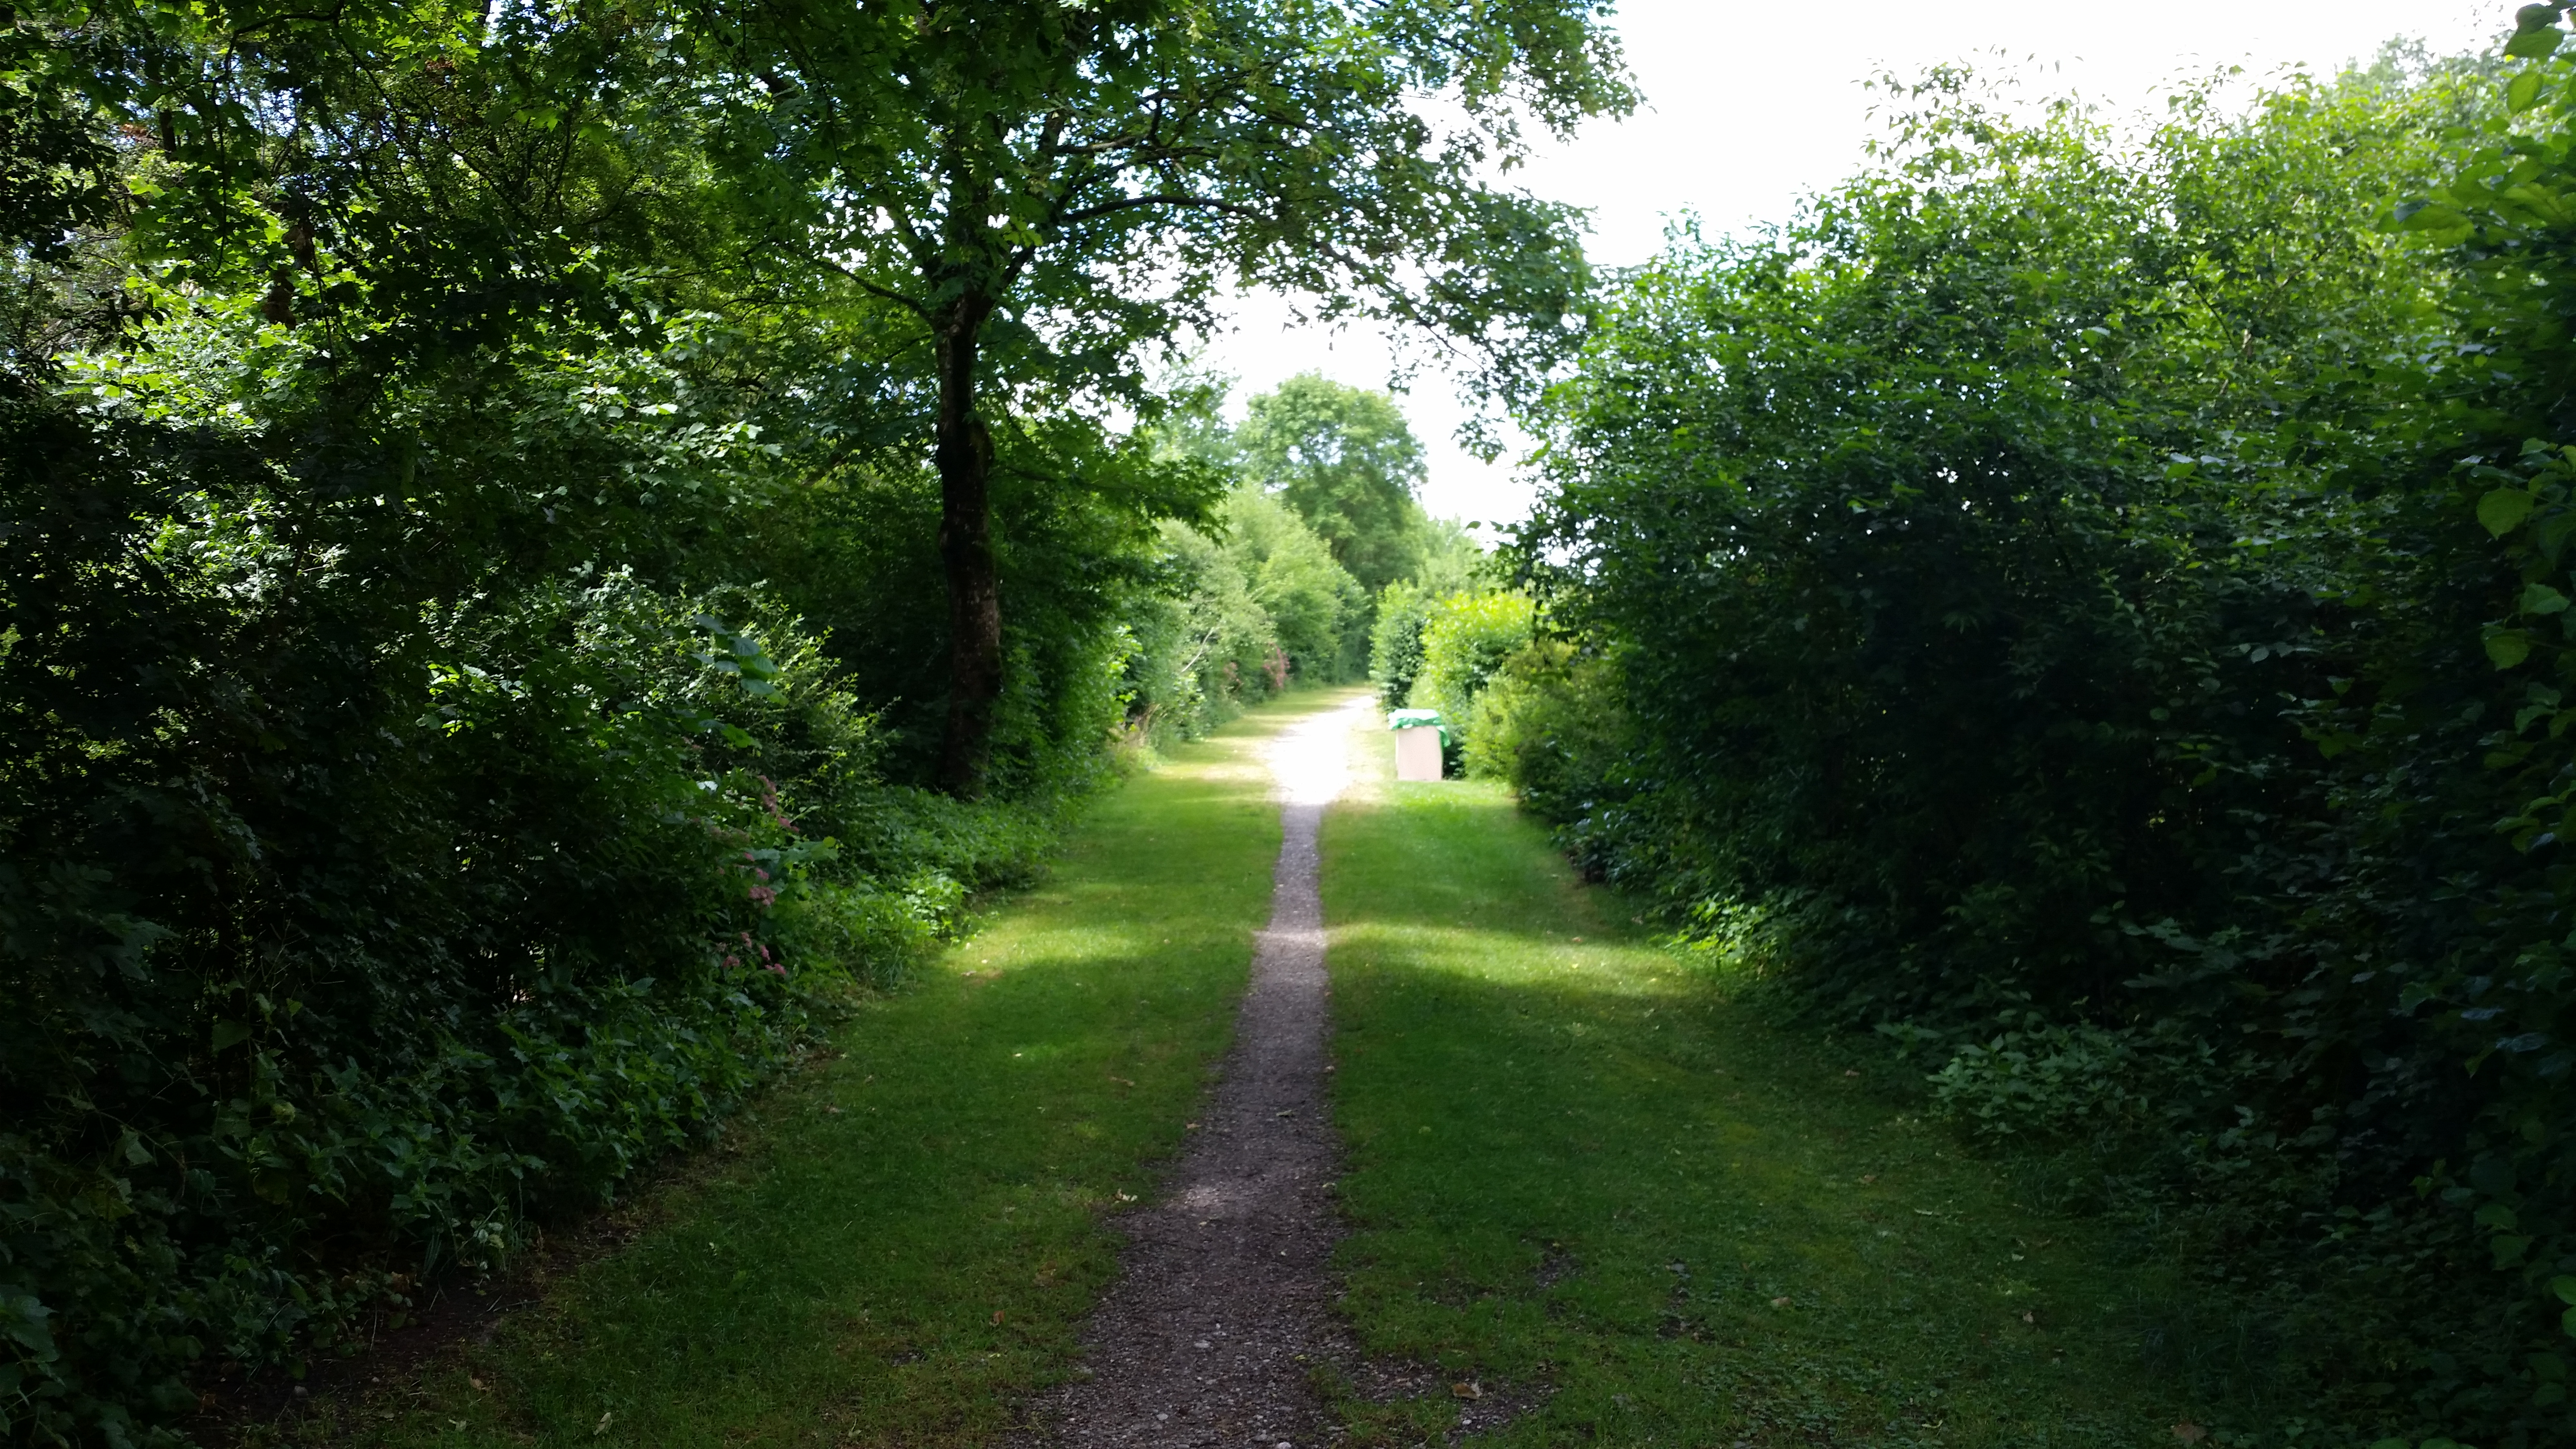
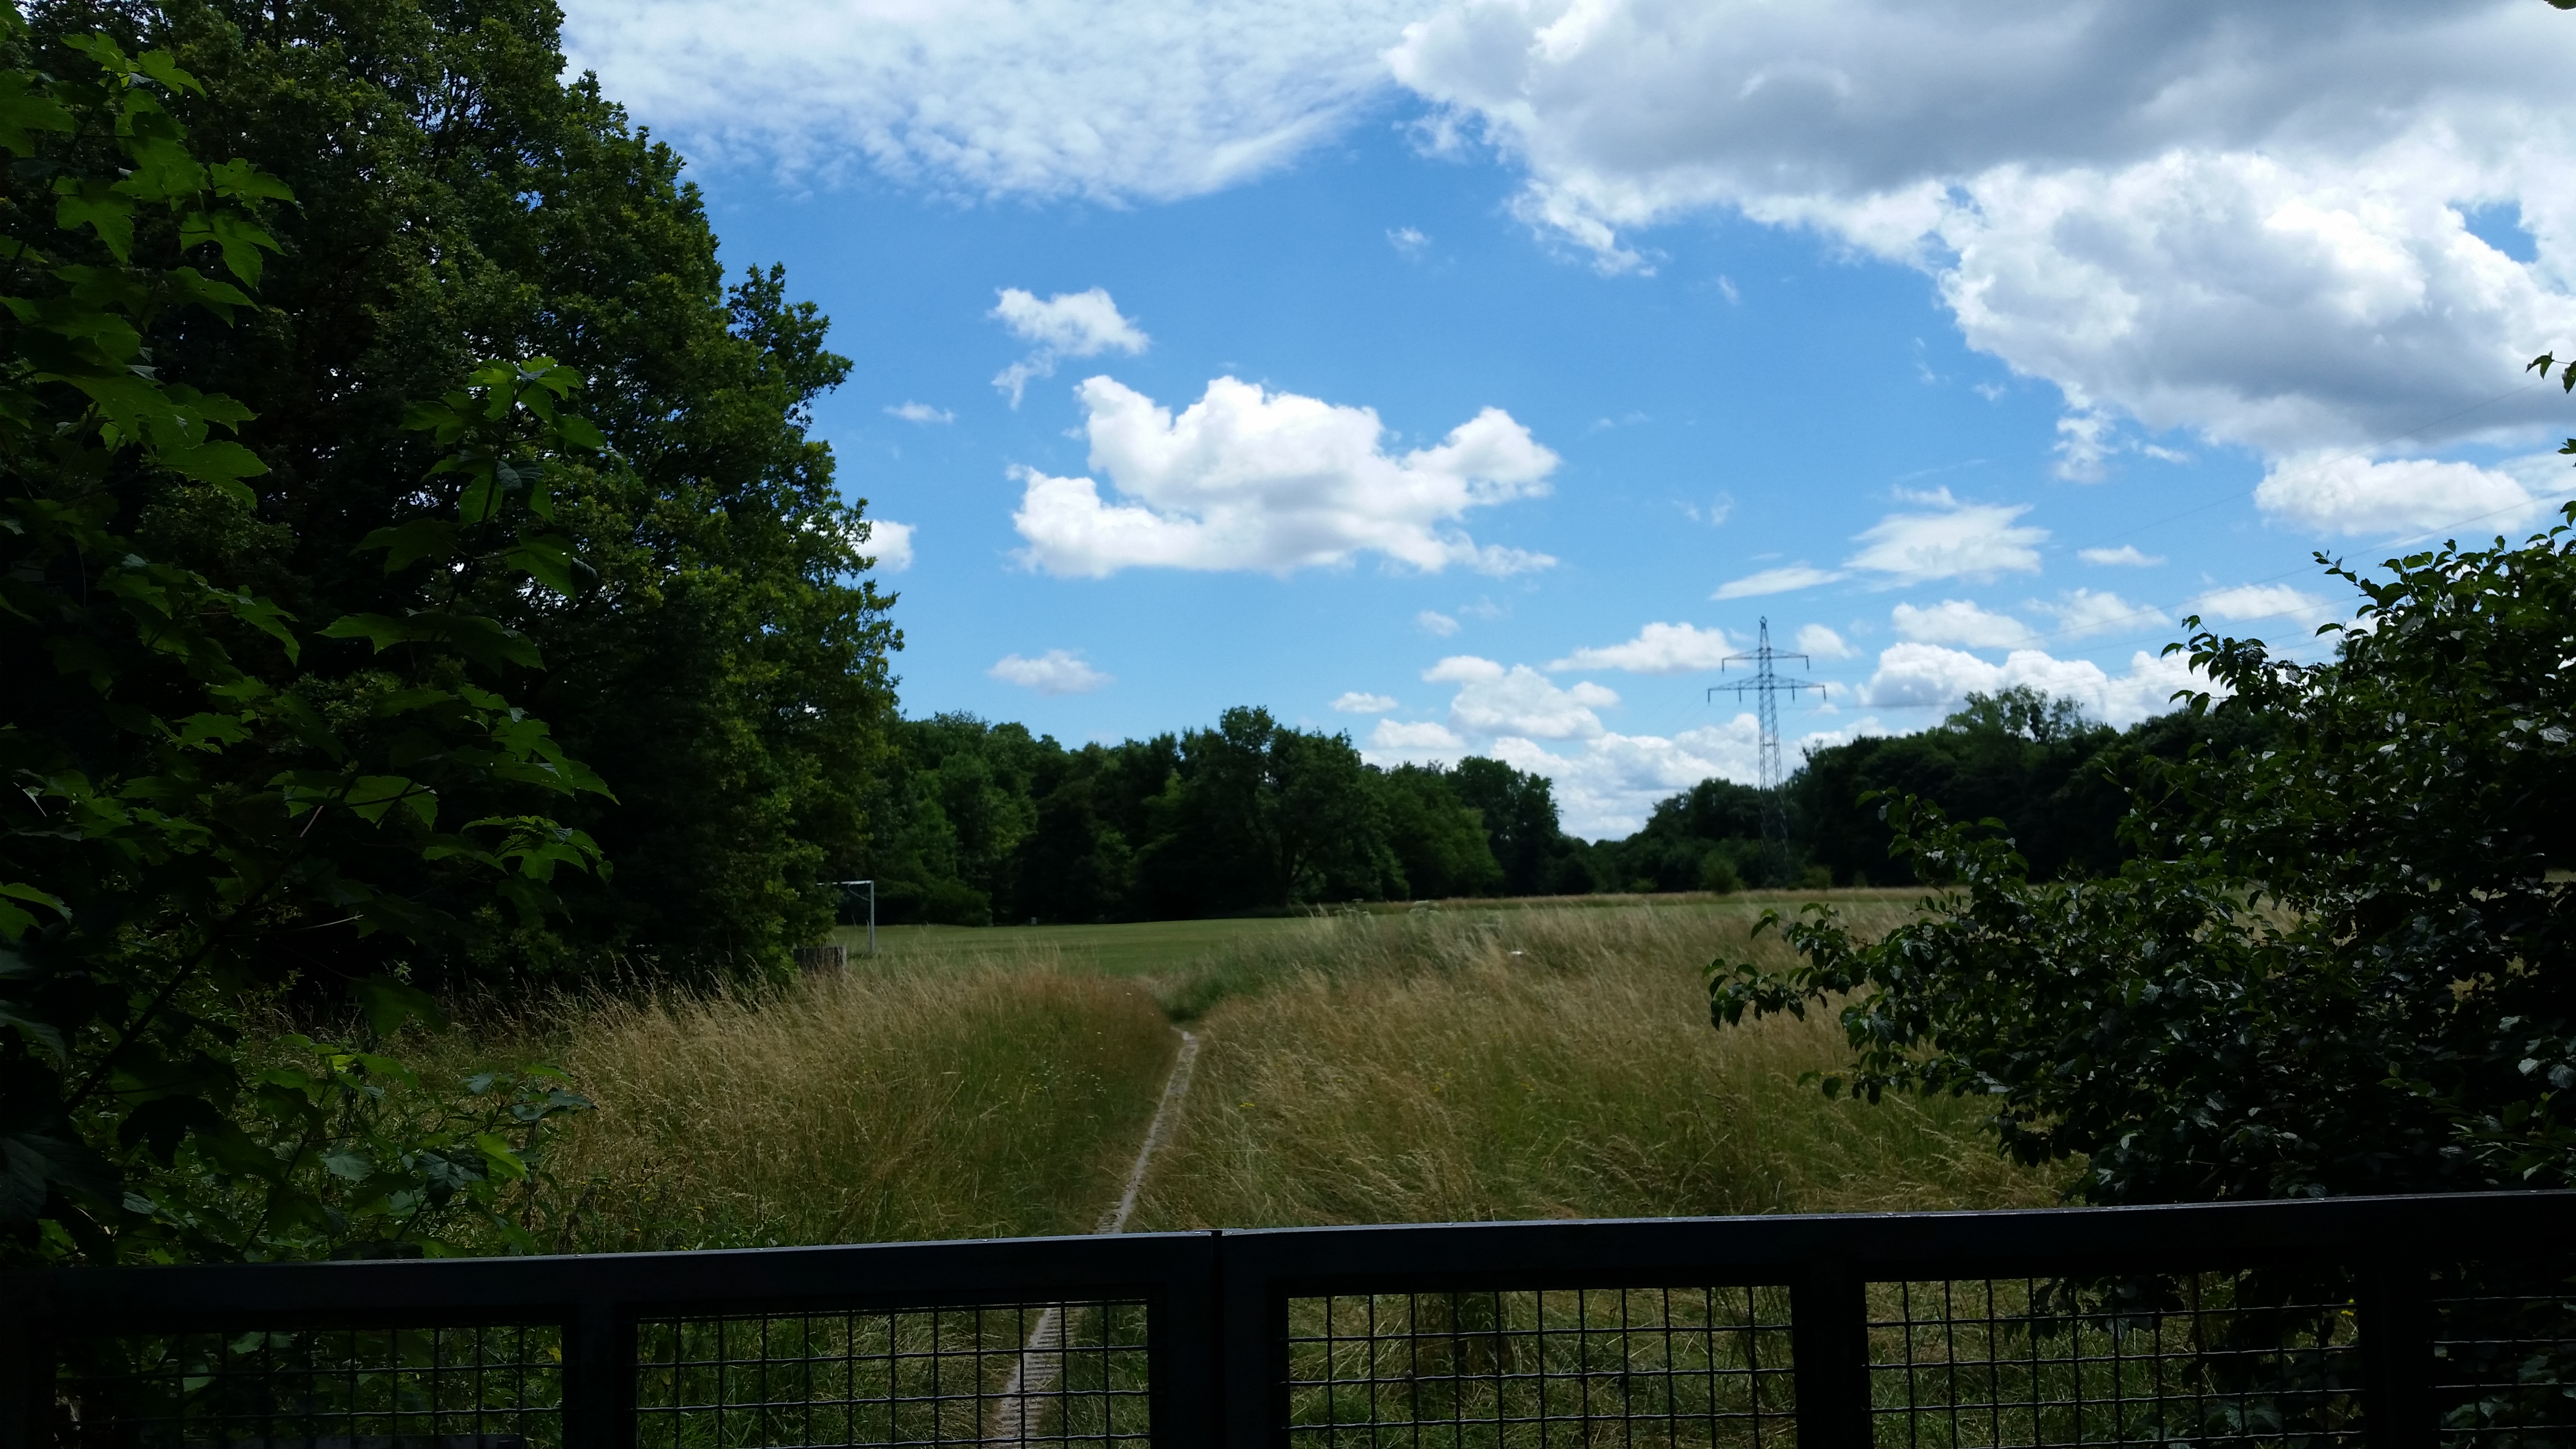
Have I mentioned that this place is beautiful?The 'random path through the woods' doesn't really happen in the states, at least not to the same extent. Both of these looked fairly heavily worn by bicycles, and keeping the rear-motor-wheel centered on the dirt patch worked well for traction. There's sufficient clearance on the board presently for it to handle dense grass and a reasonable trail. This worked out way better than I expected. 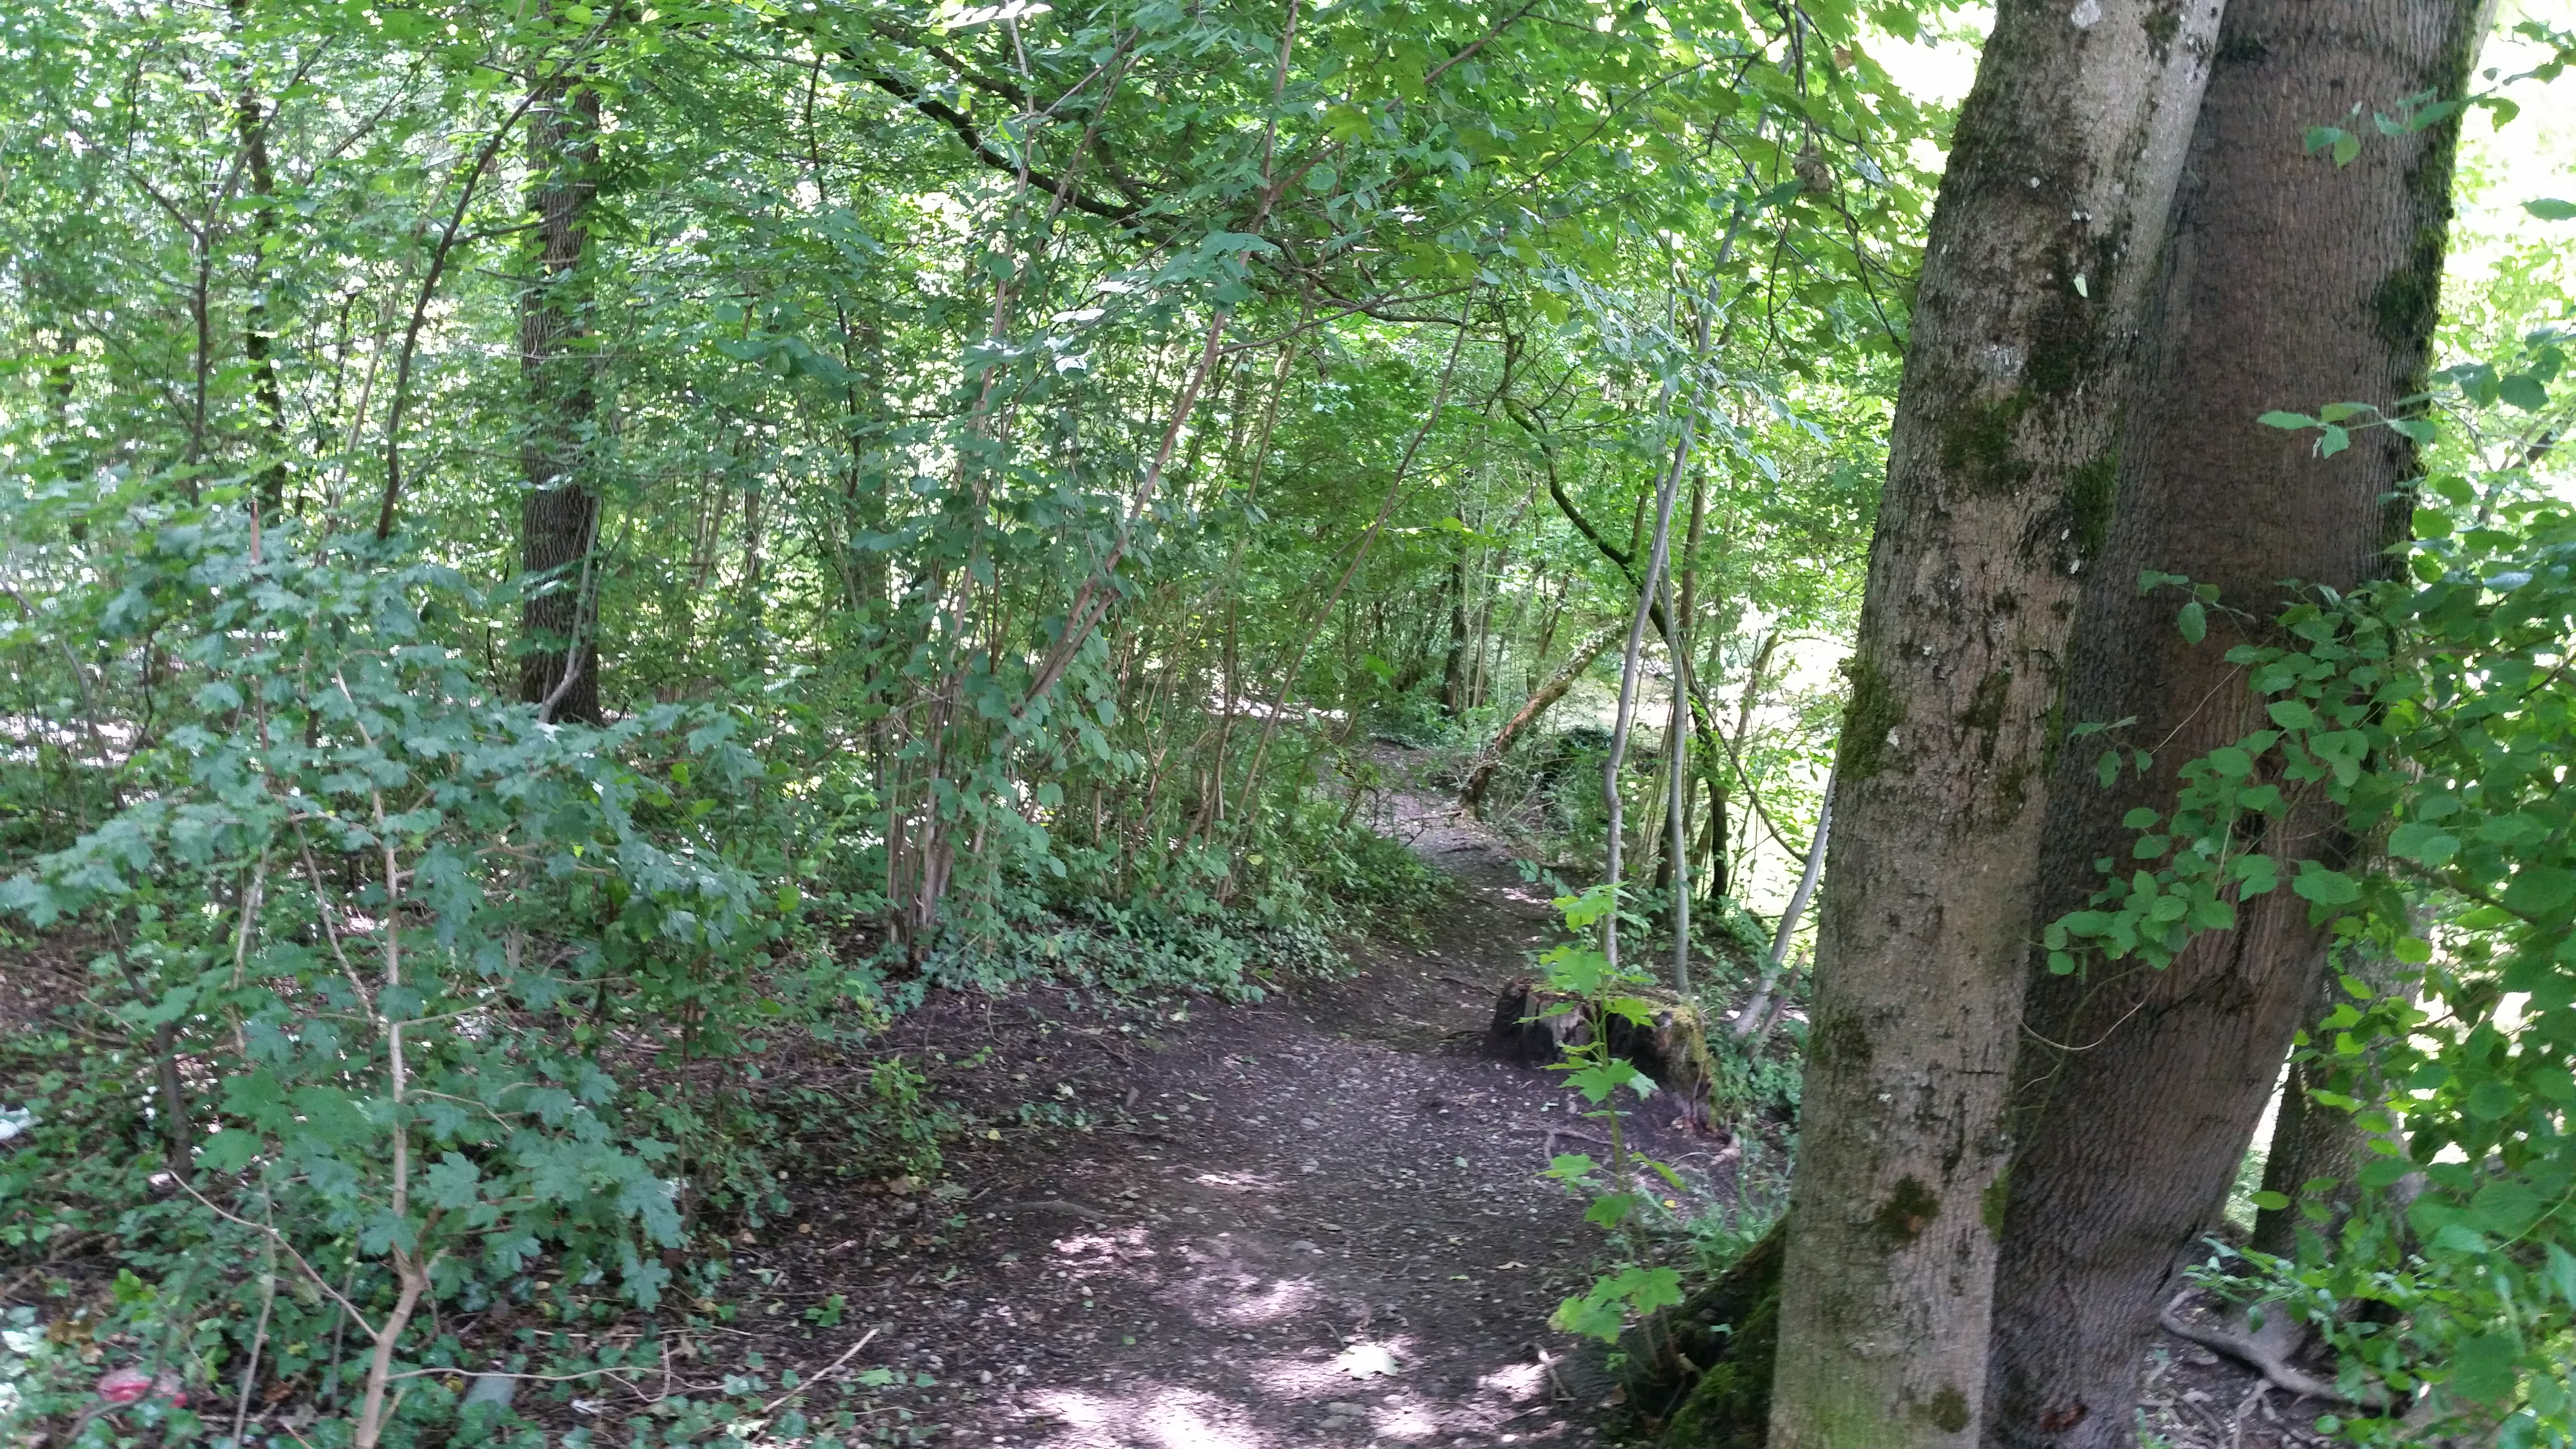
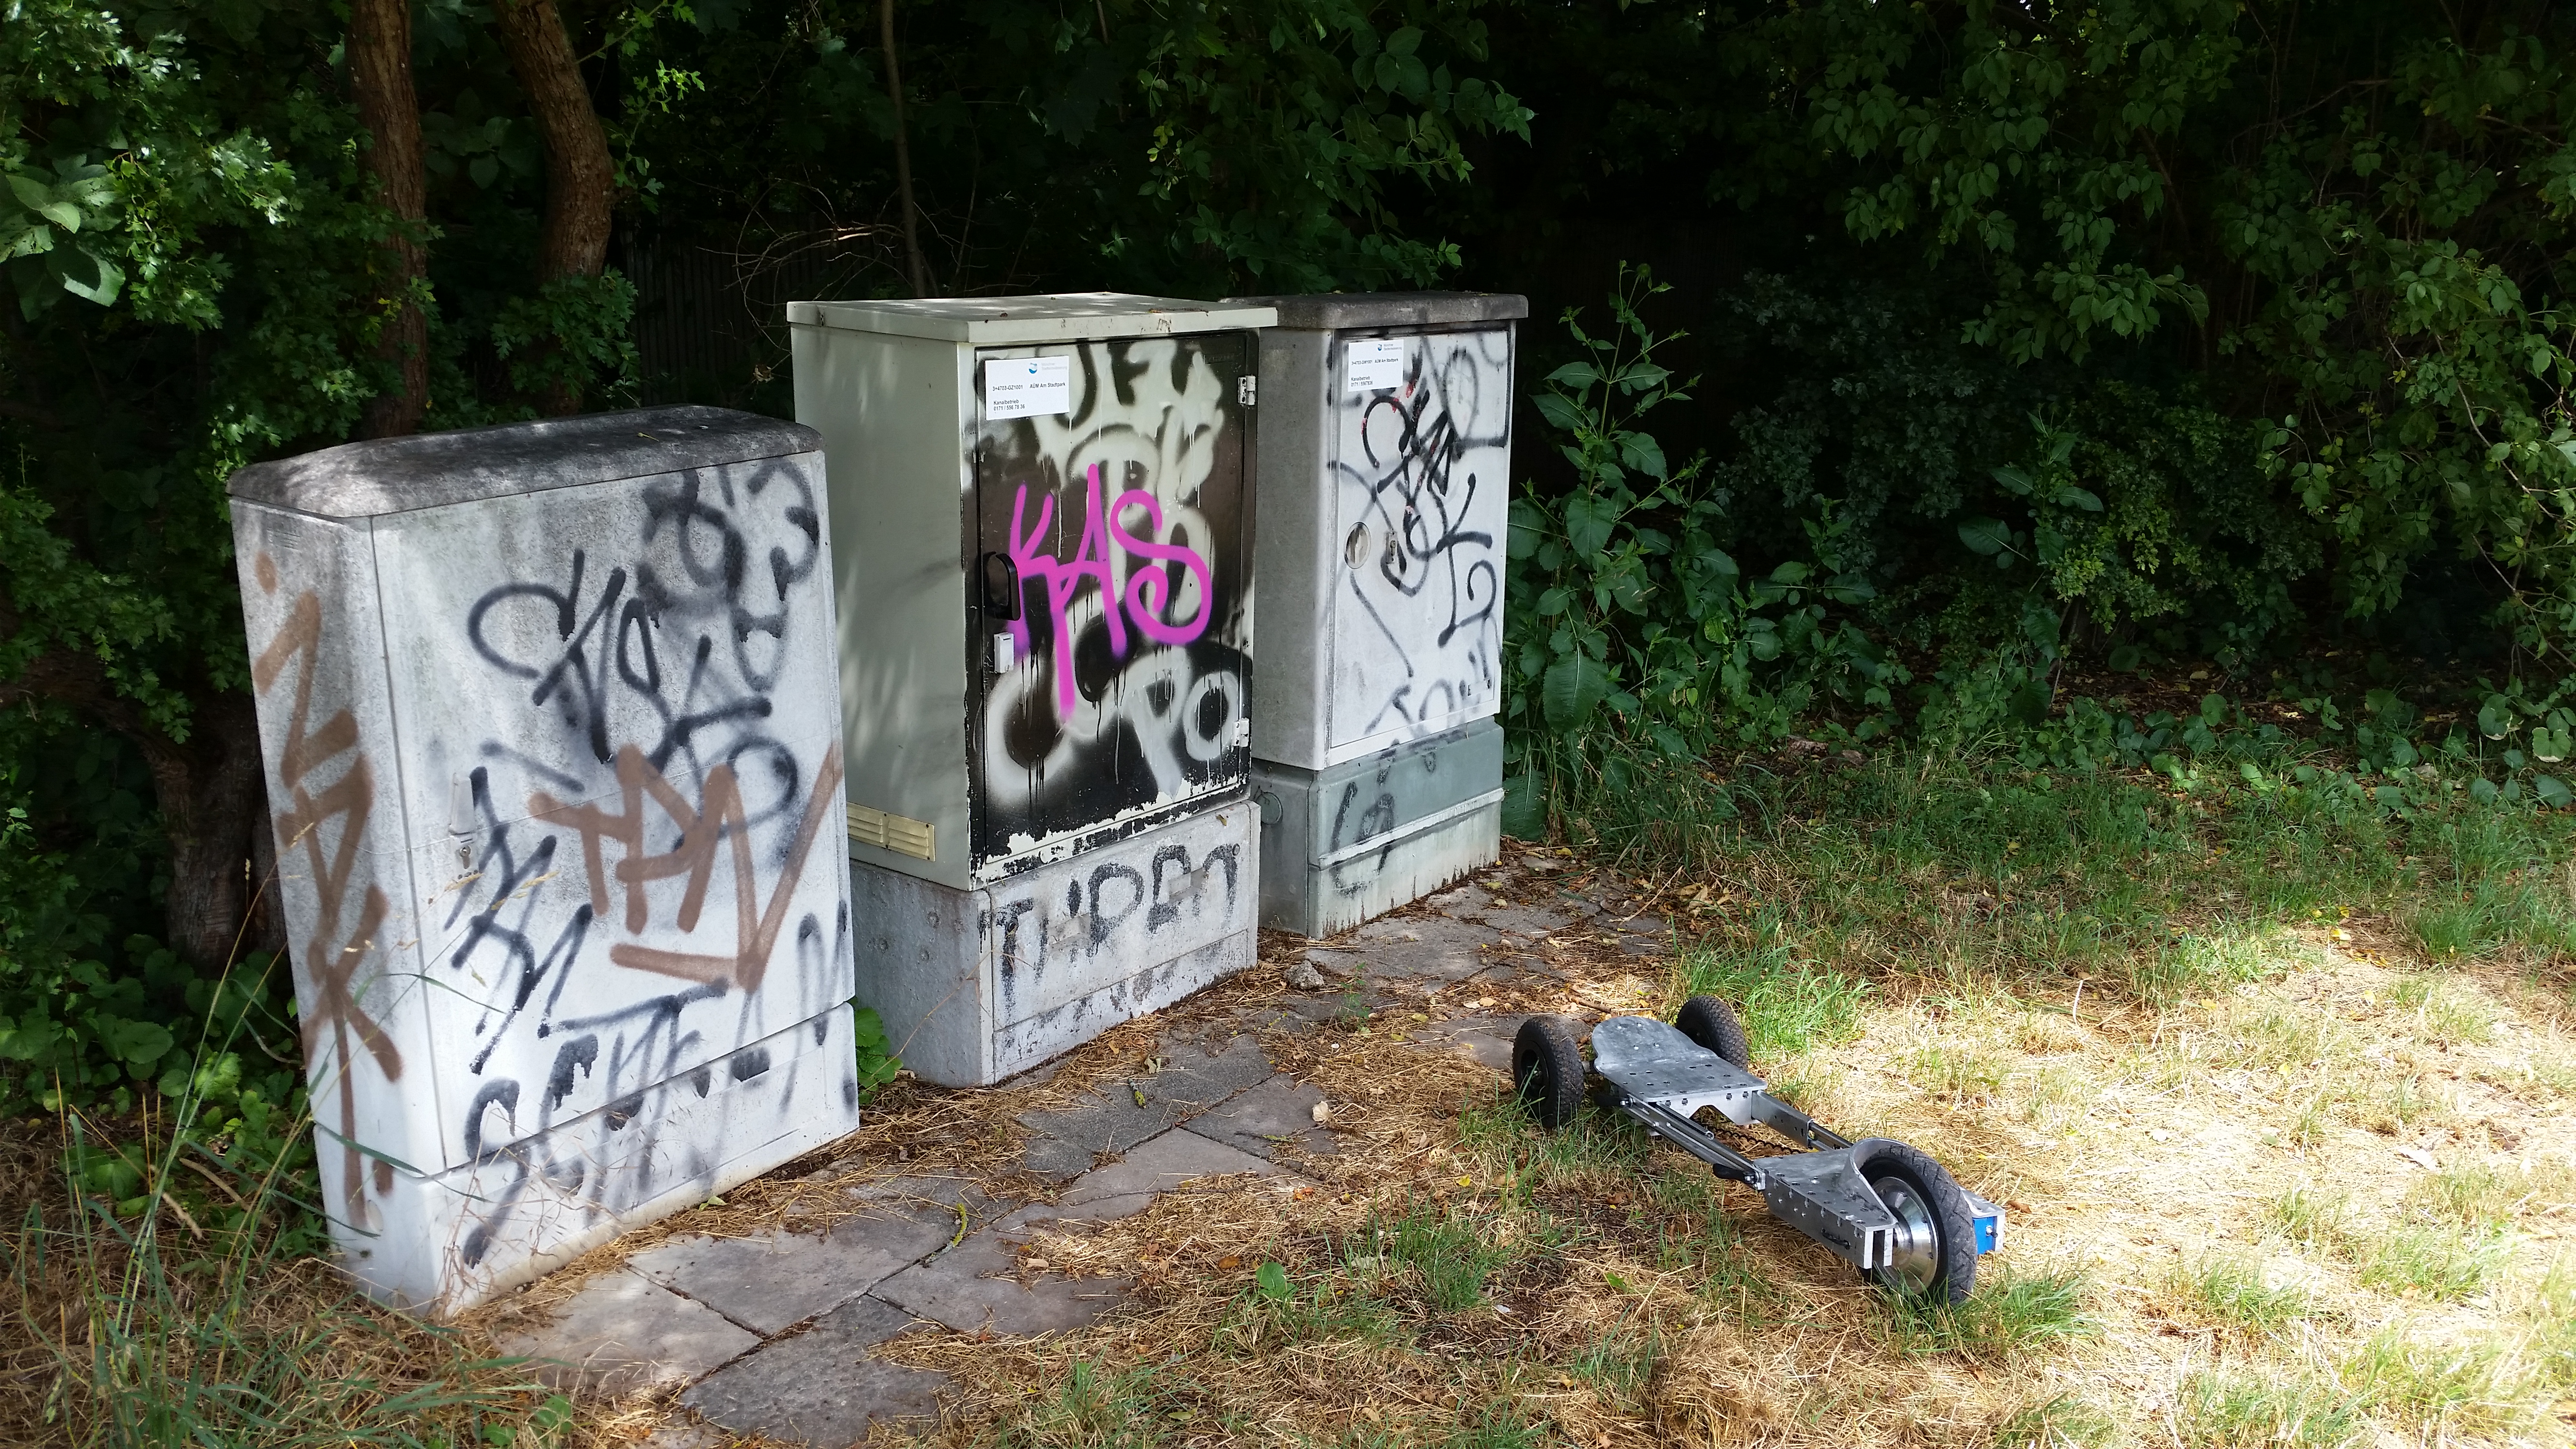
Not before long I was again hunting for juice. These were hiding out in a field, but unfortunately locked. Fairly certain two were telecom, fortunately one had a service port with (measured) ~230 vac (thanks backpack-multimeter). After some adapter-ing I was back to acquiring joules and watching nature, sitting on a skateboard. 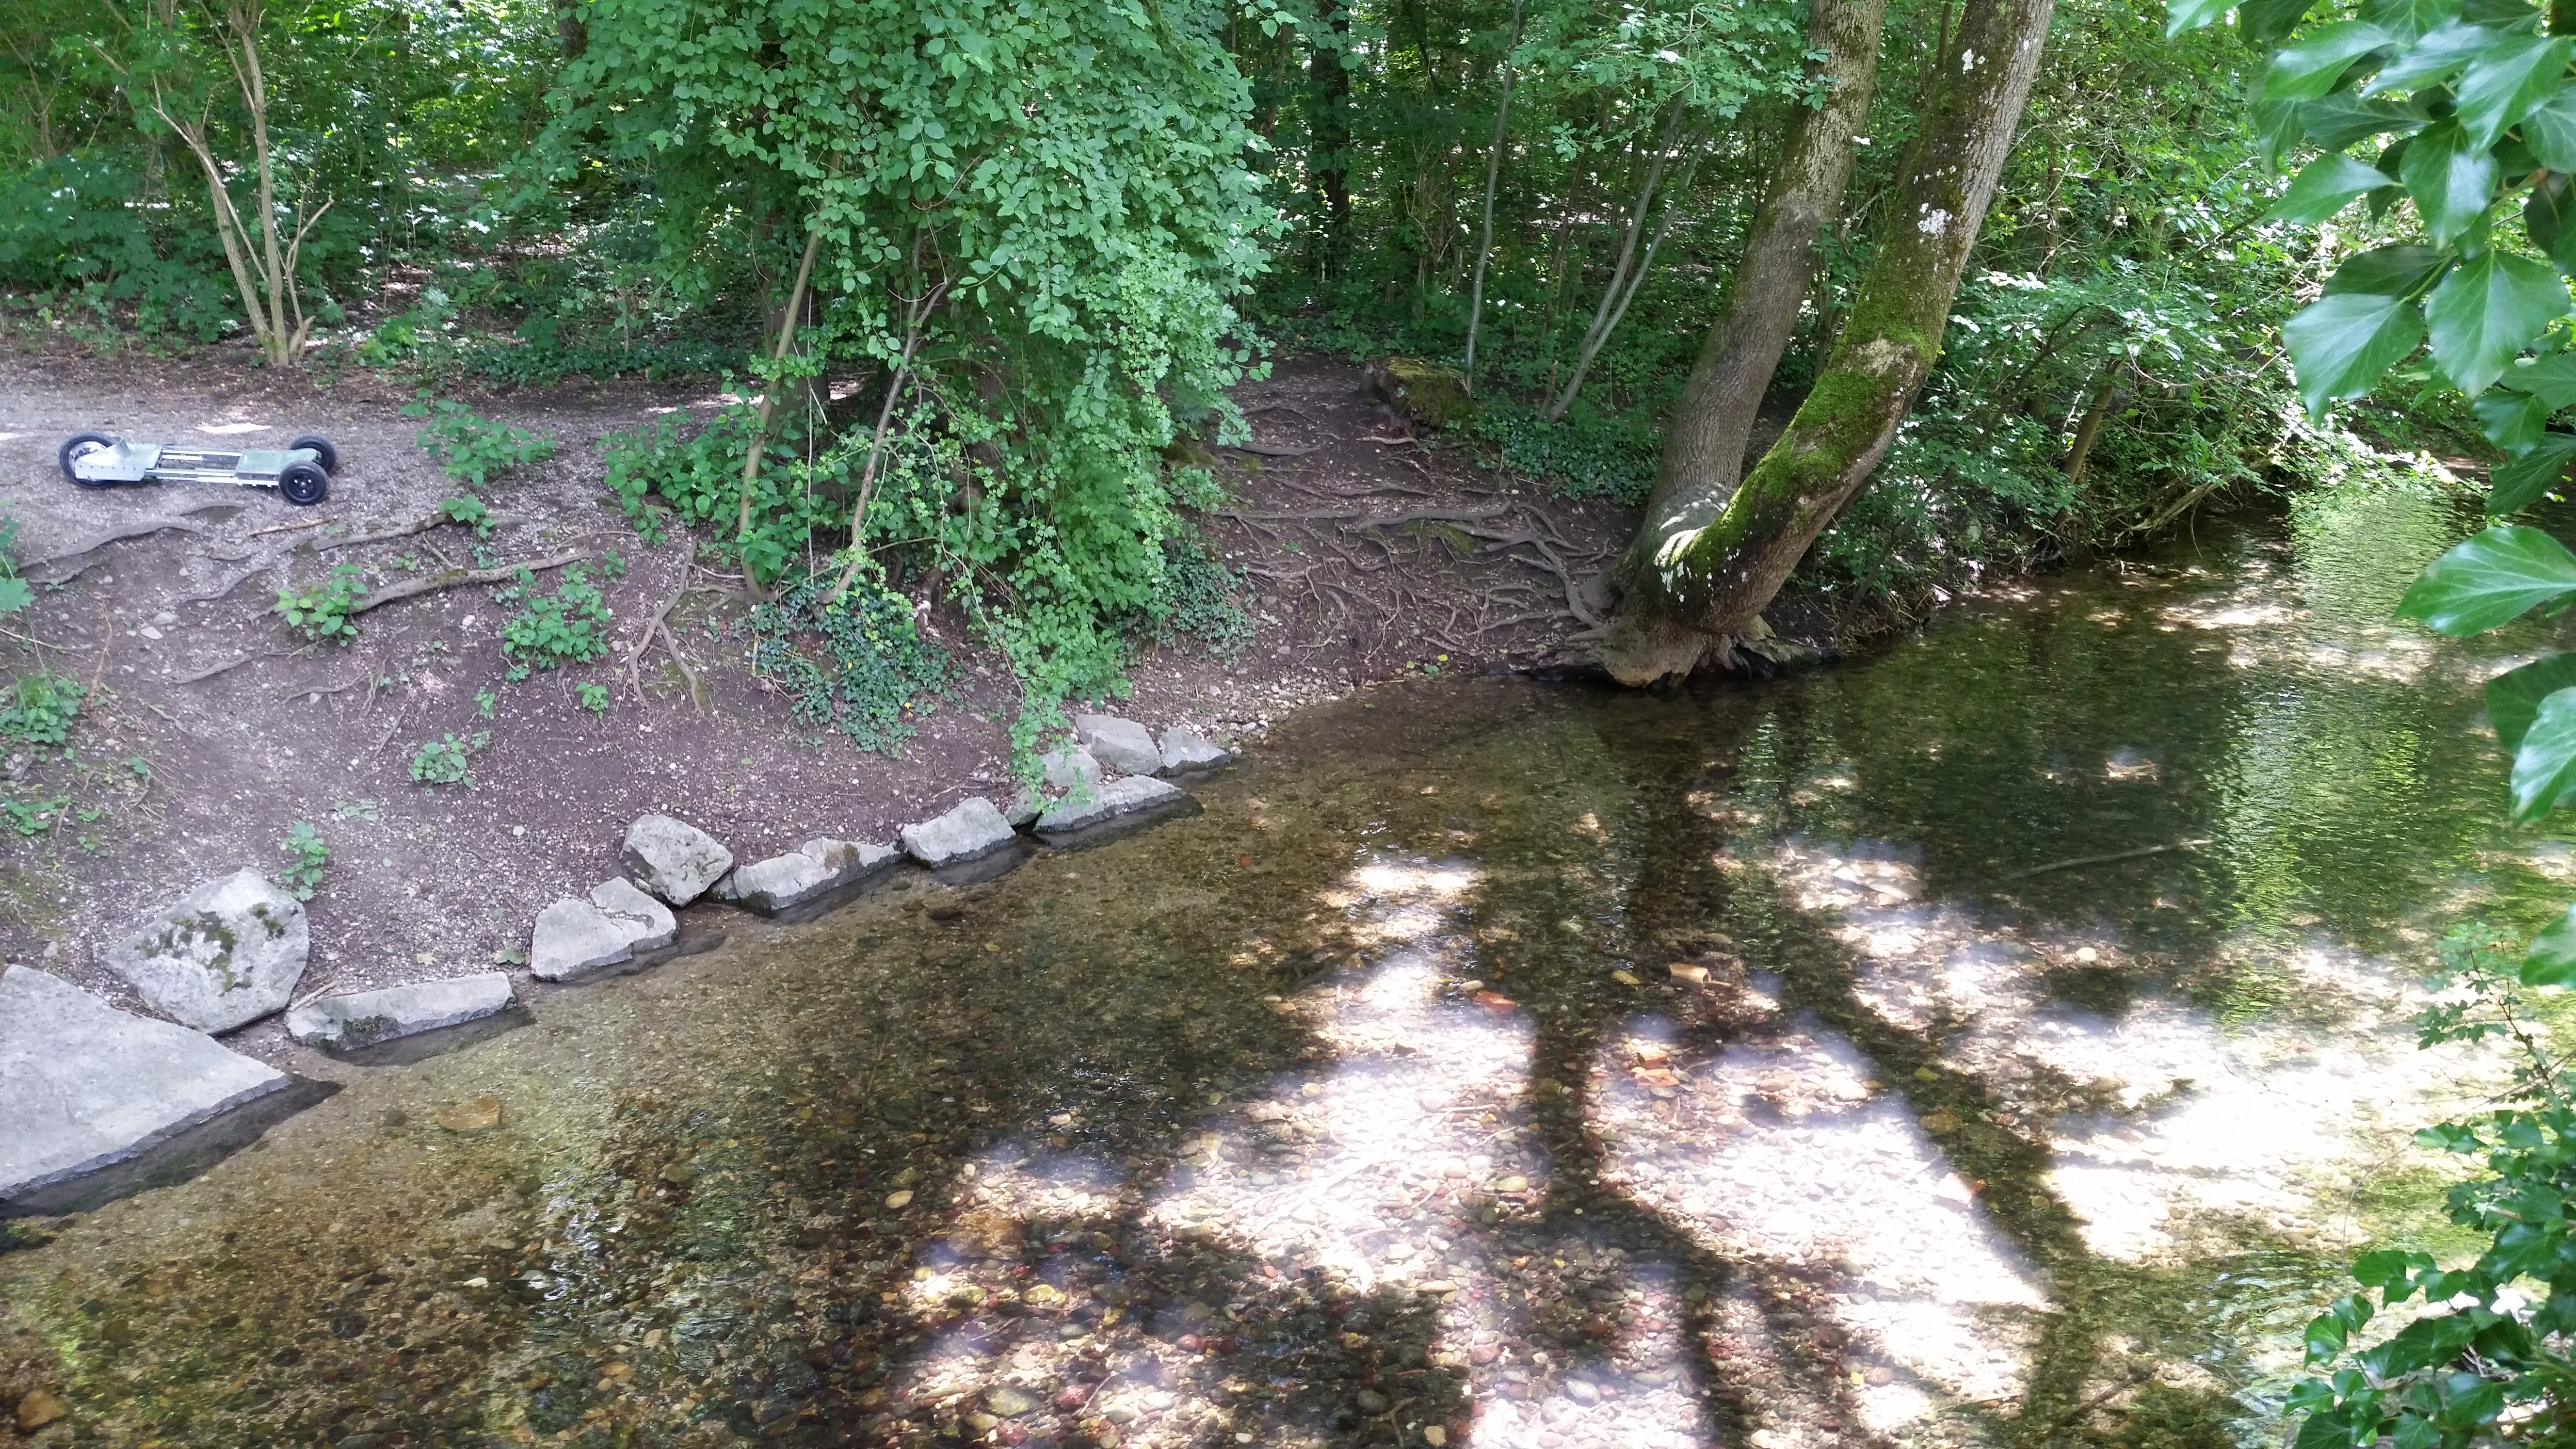

Rivers and trailsThere was a brook running thru nearby, and for the sake of 'its wicked hot' I splashed about in it. Shortly after I headed back to get my battery and charger. Really wish I brought a higher capacity charger, lessons learned. 
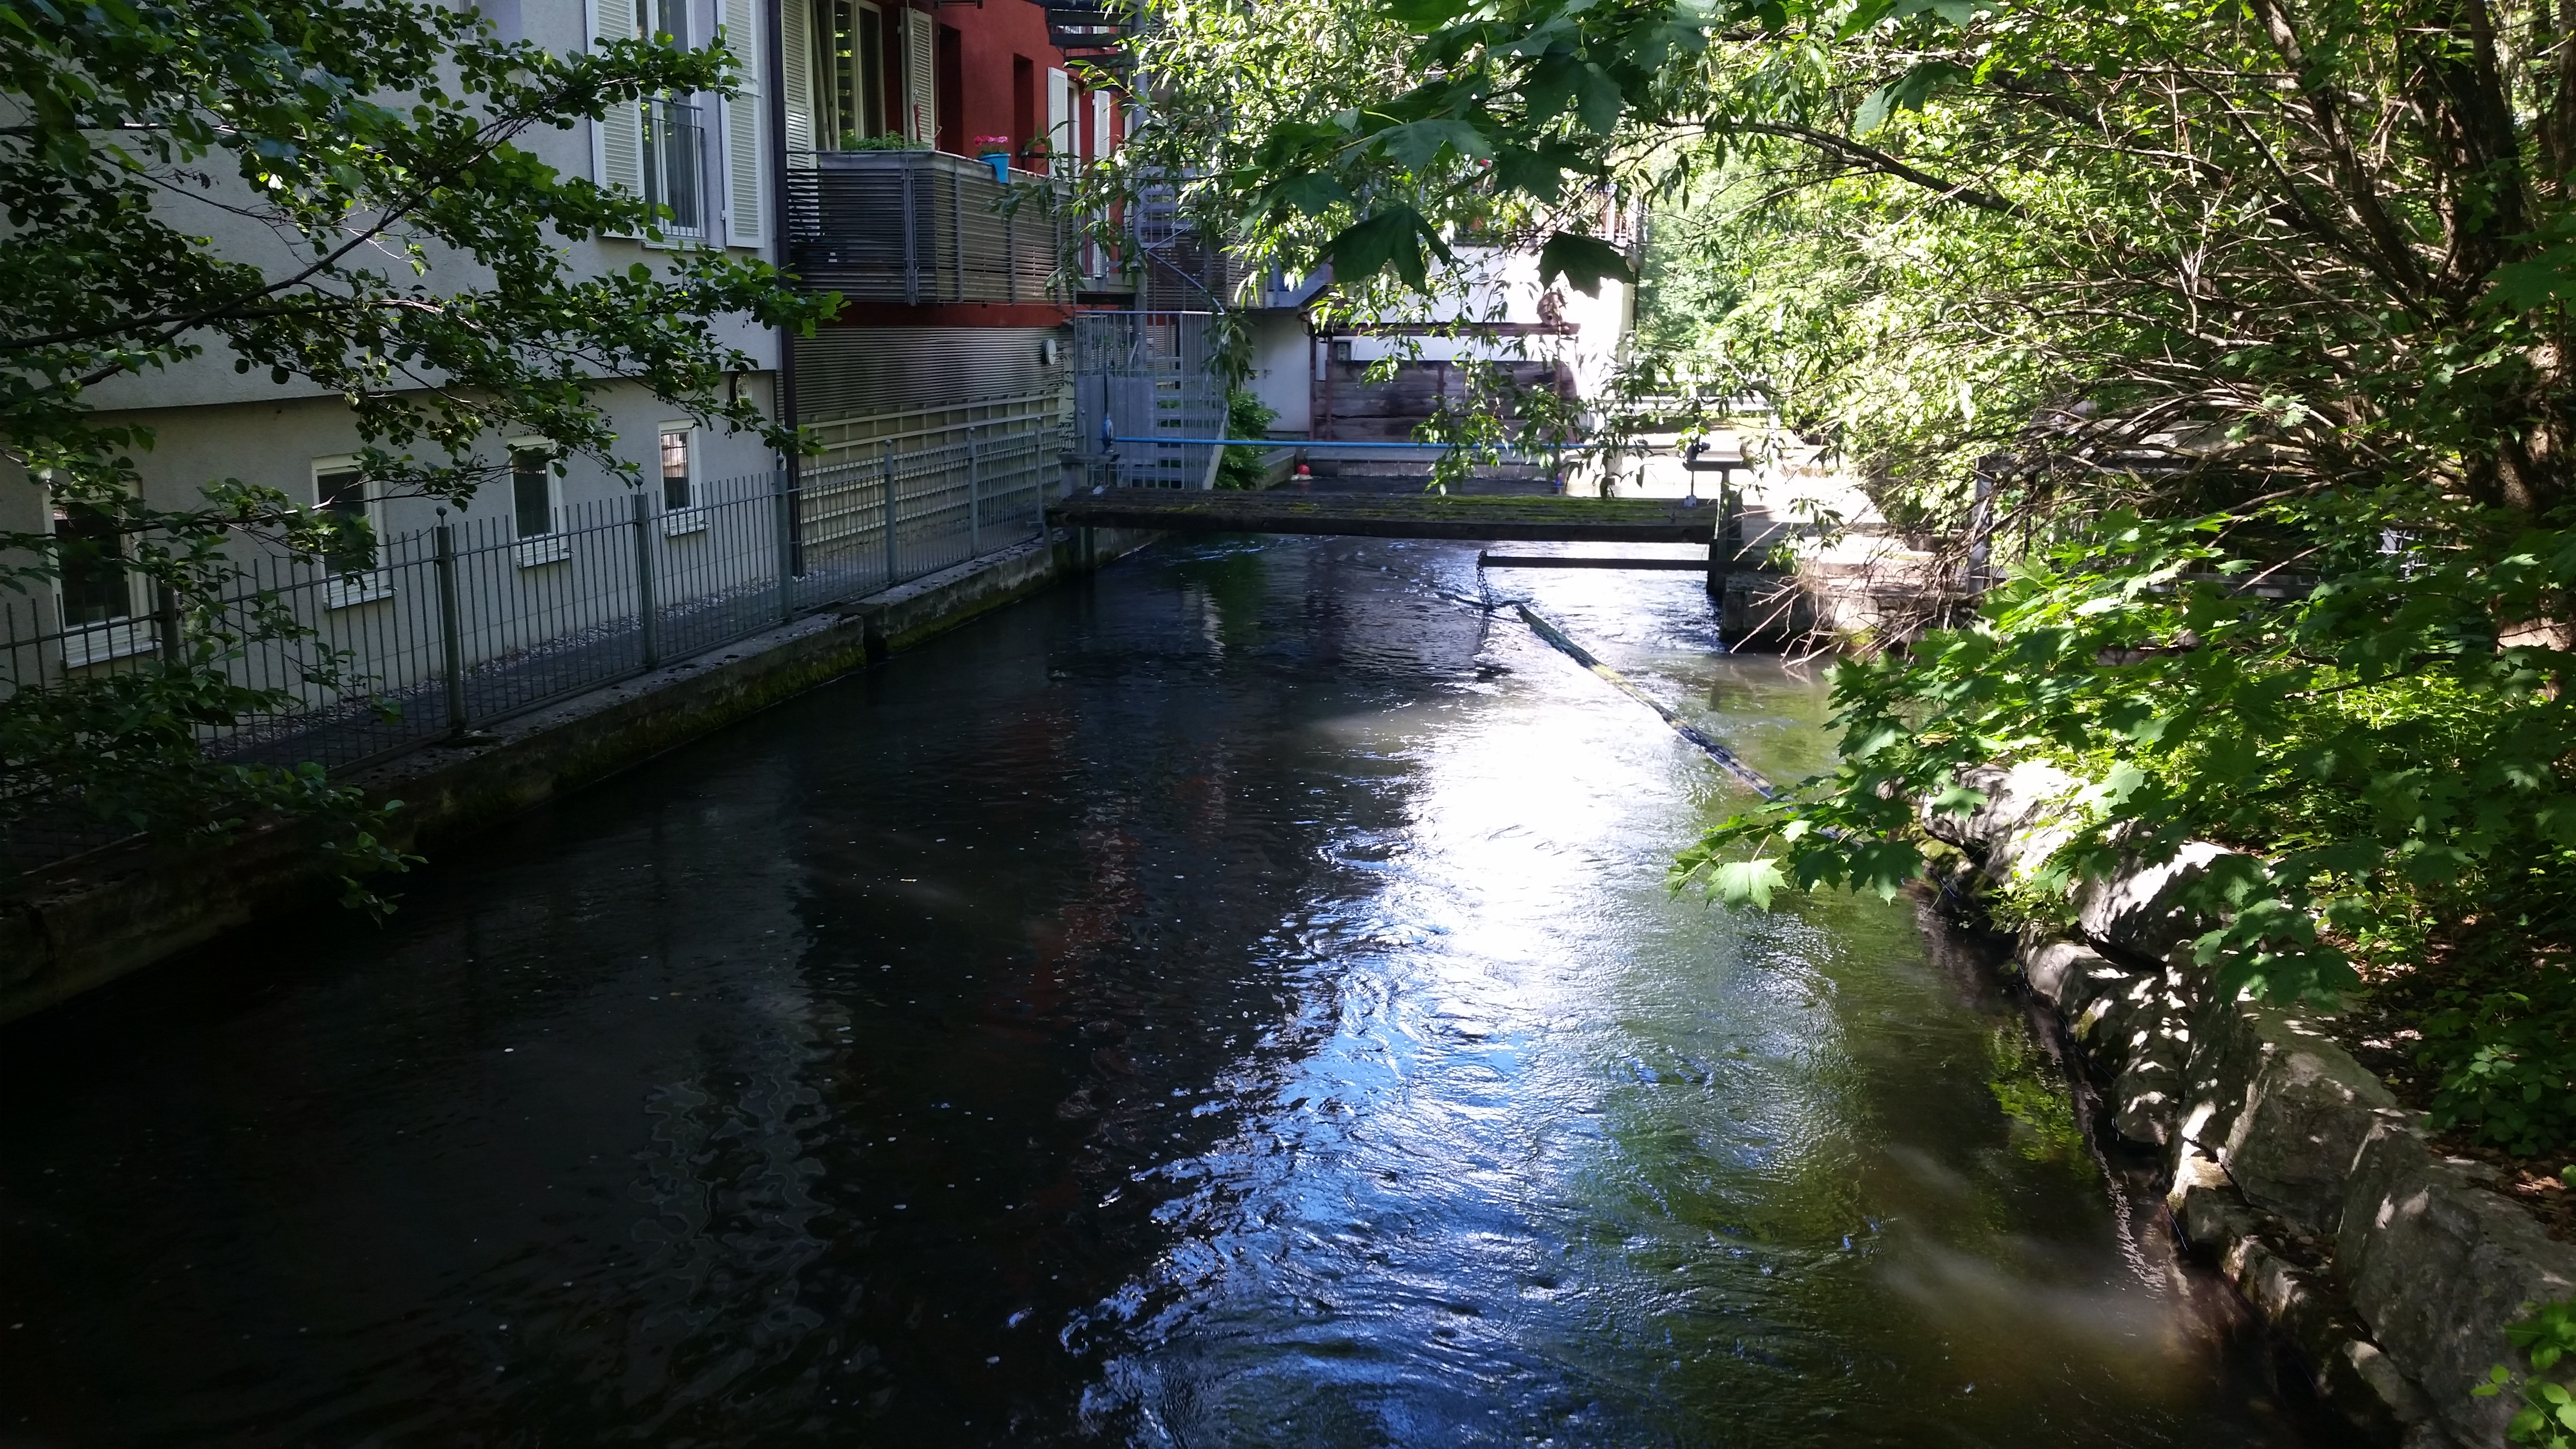
Following the water back to the townI followed some muddy grass paths and the water back to town chewing through the remnants of my recently acquired electrons. The gravel and soft grass totally helped chew through electrons effectively :P 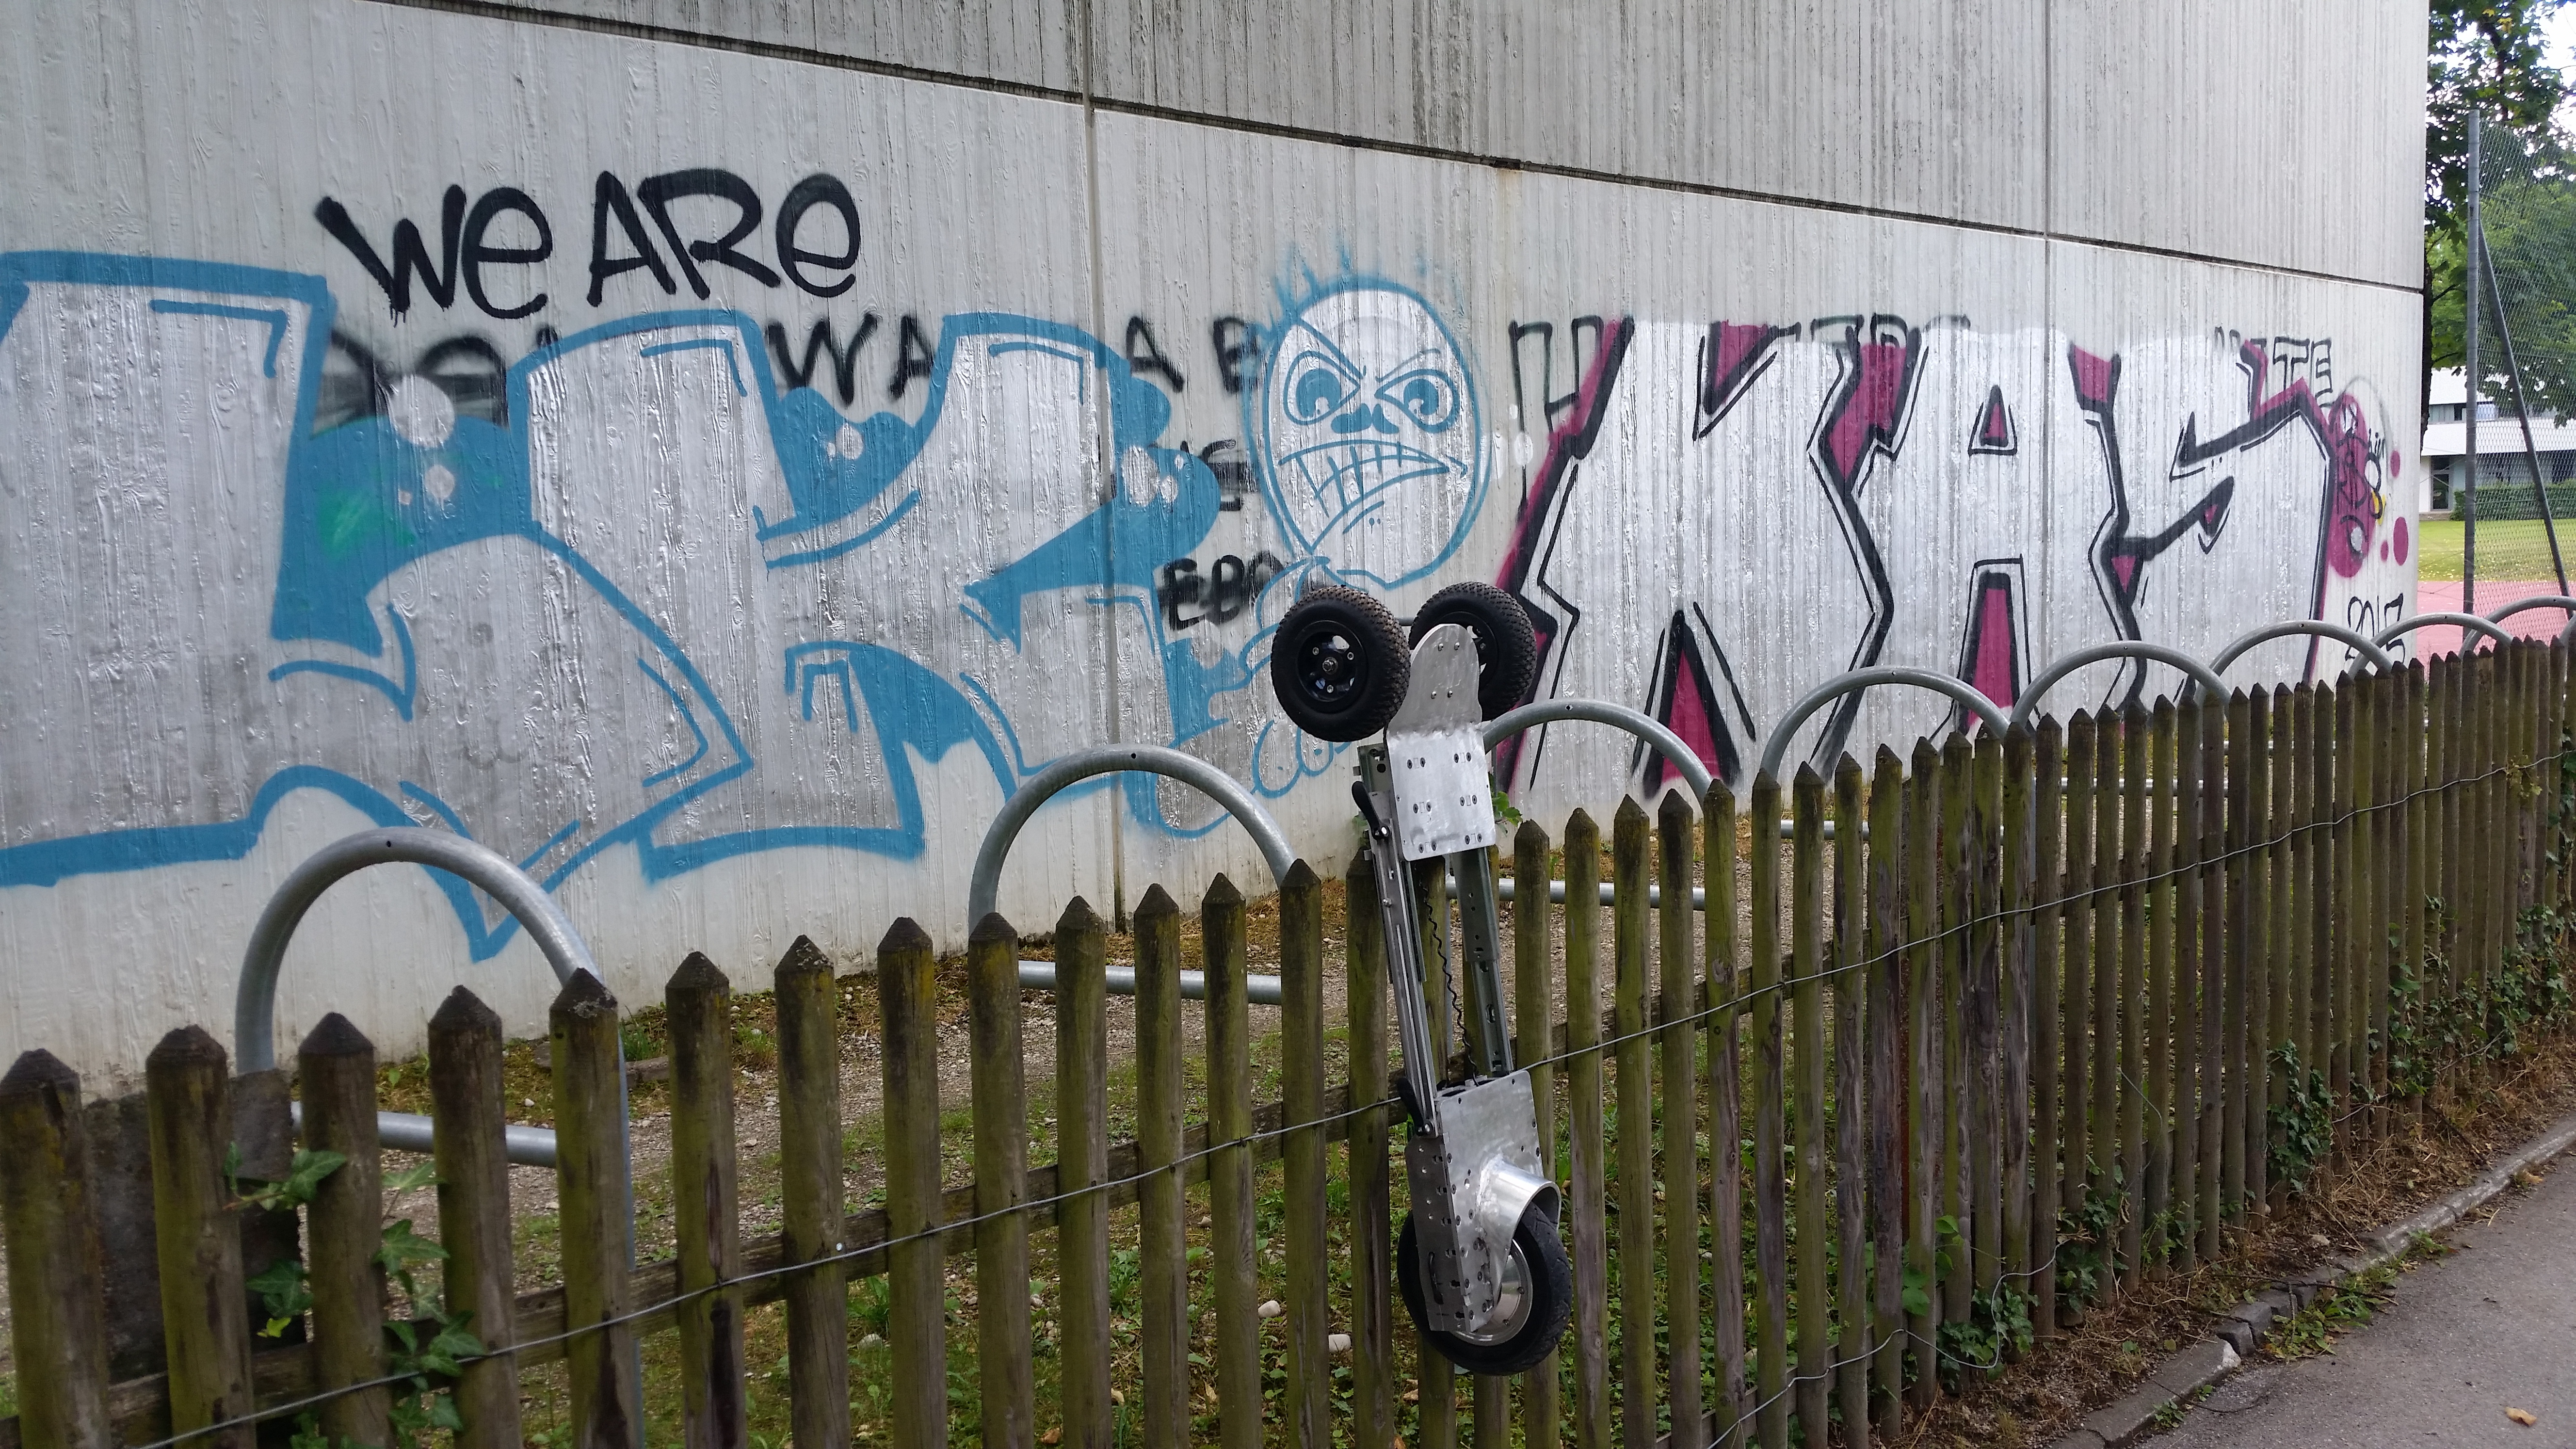

I hiked to a nearby tennis court and acquired some more electrons. By the 3rd recharge cycle I was starting to really kick myself for not bringing a higher capacity charger I recently built. I started thinking about what this trip would have been like pre-flight restrictions. A couple 160 wh batteries and a 320w charger would have really extended the amount of land I could've explored, but given the amount of free-time I had it worked out well. 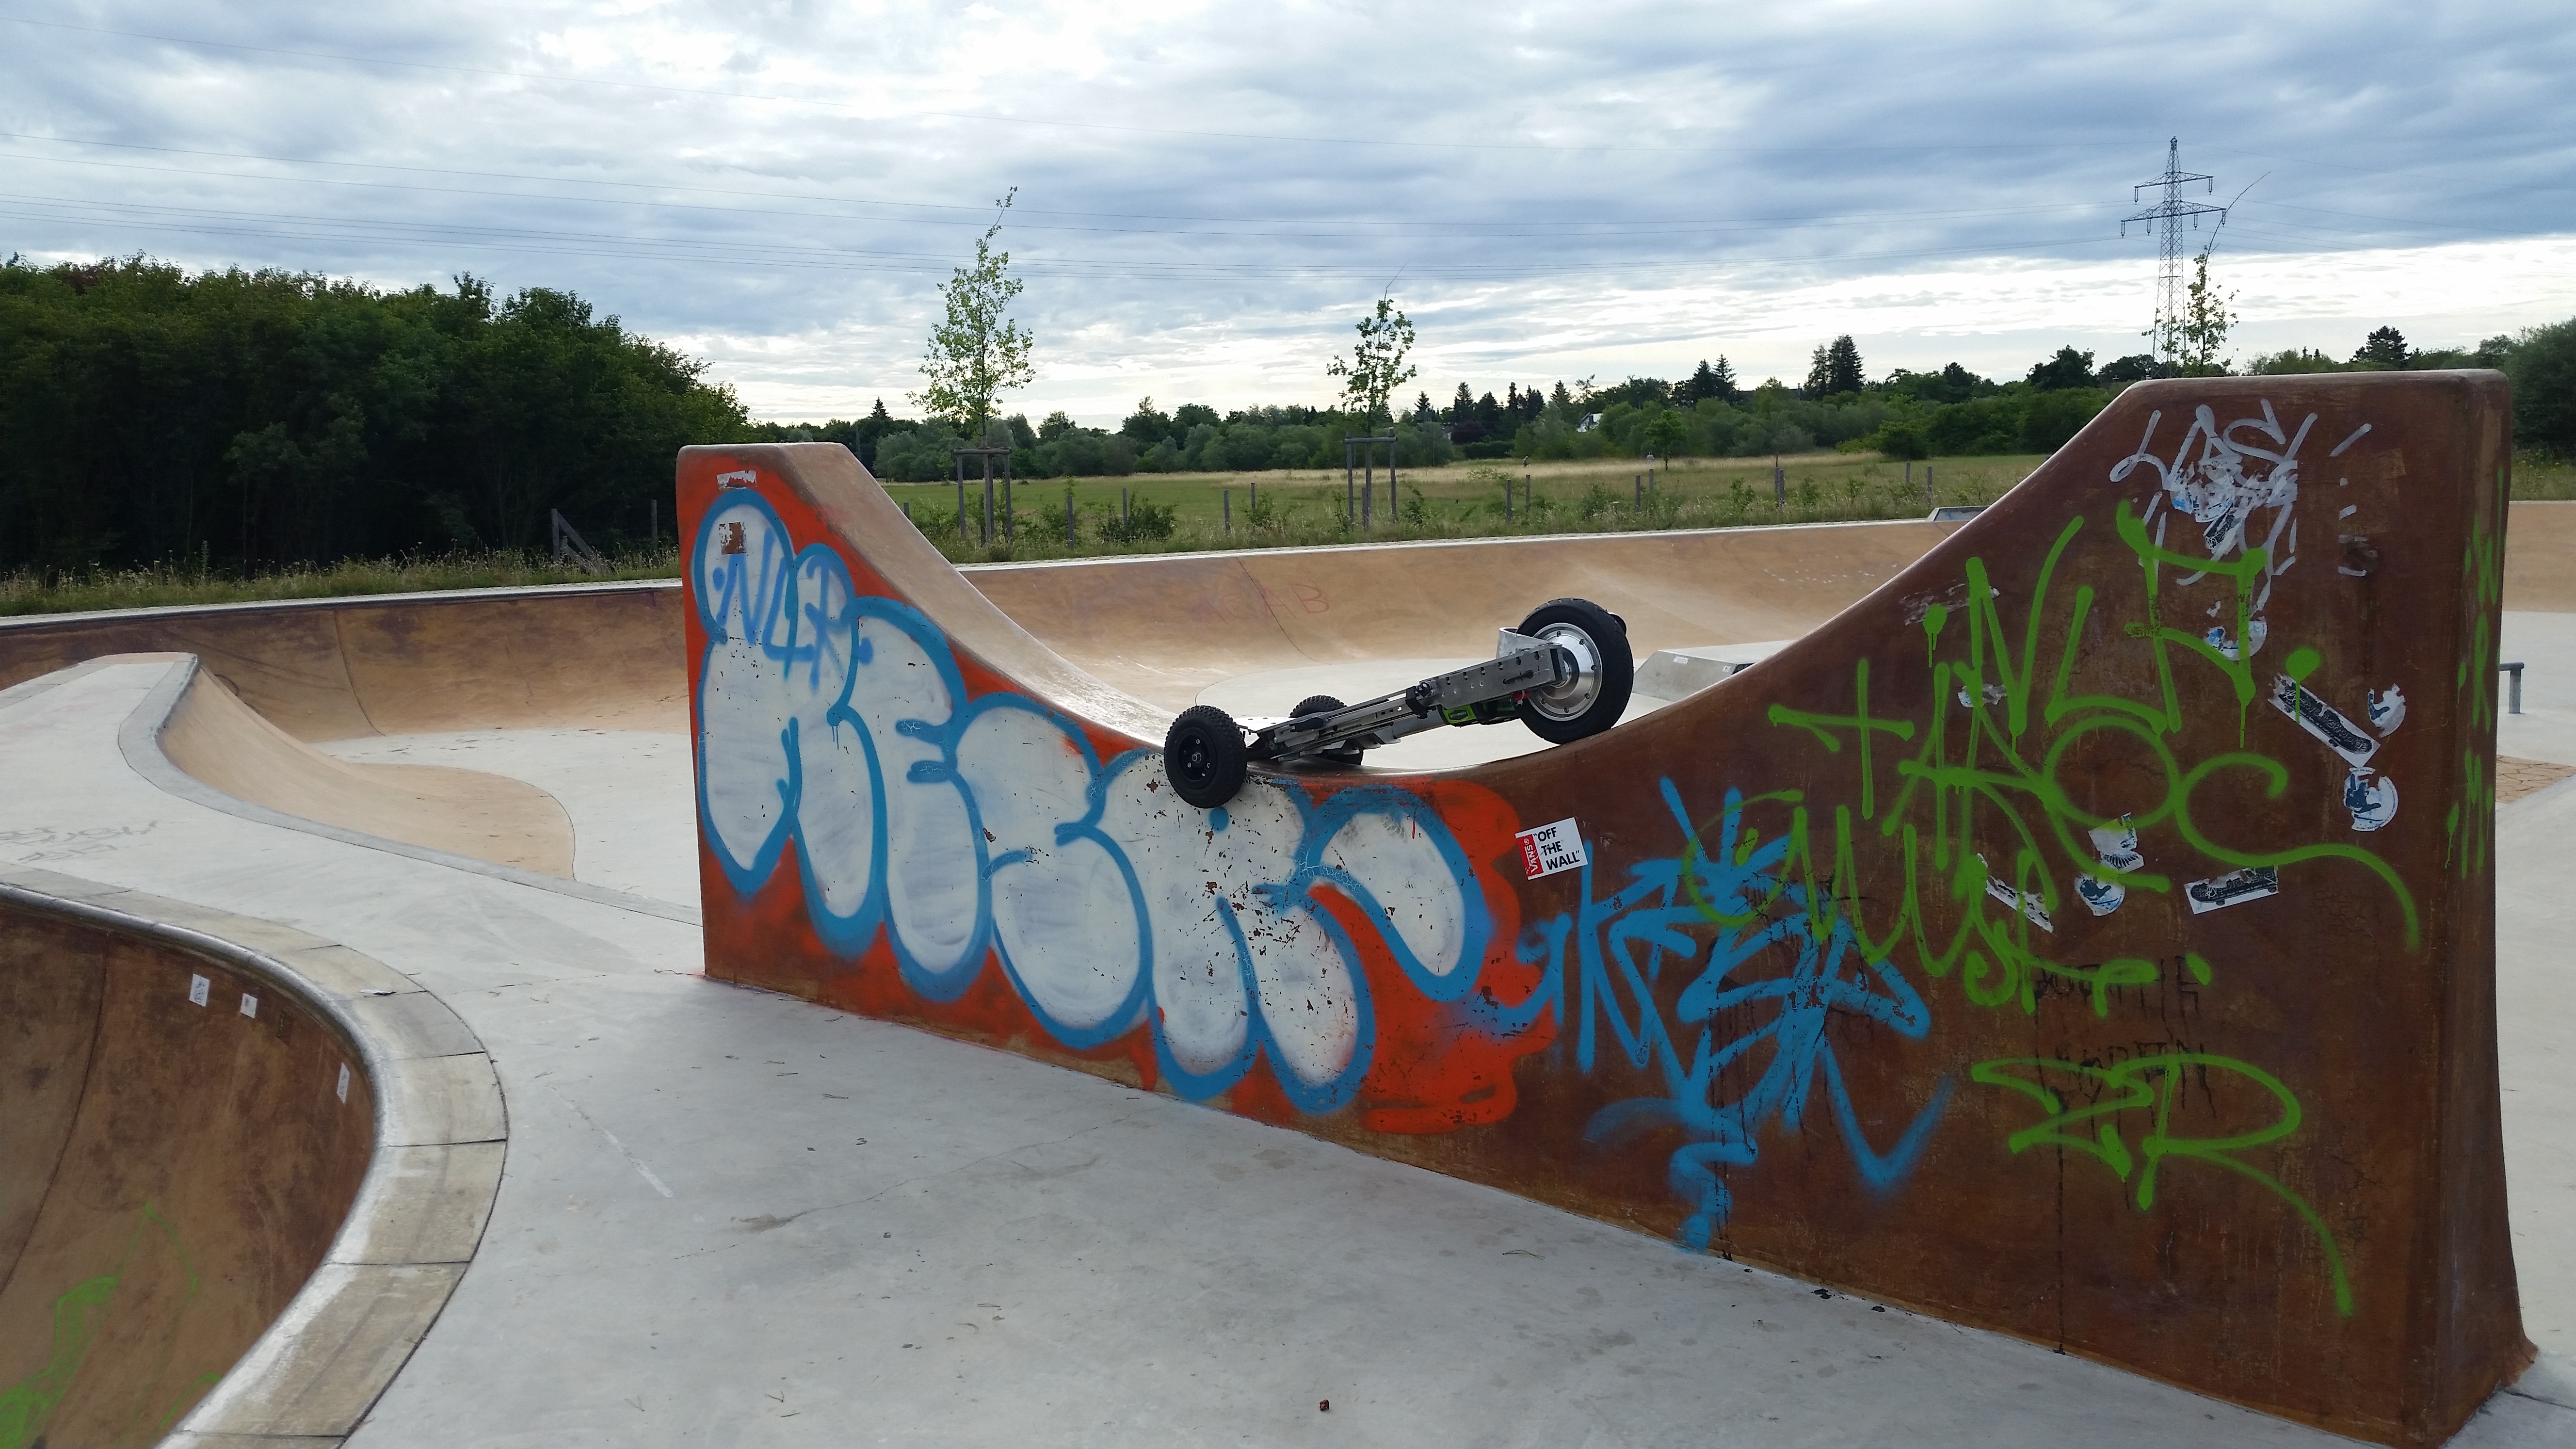
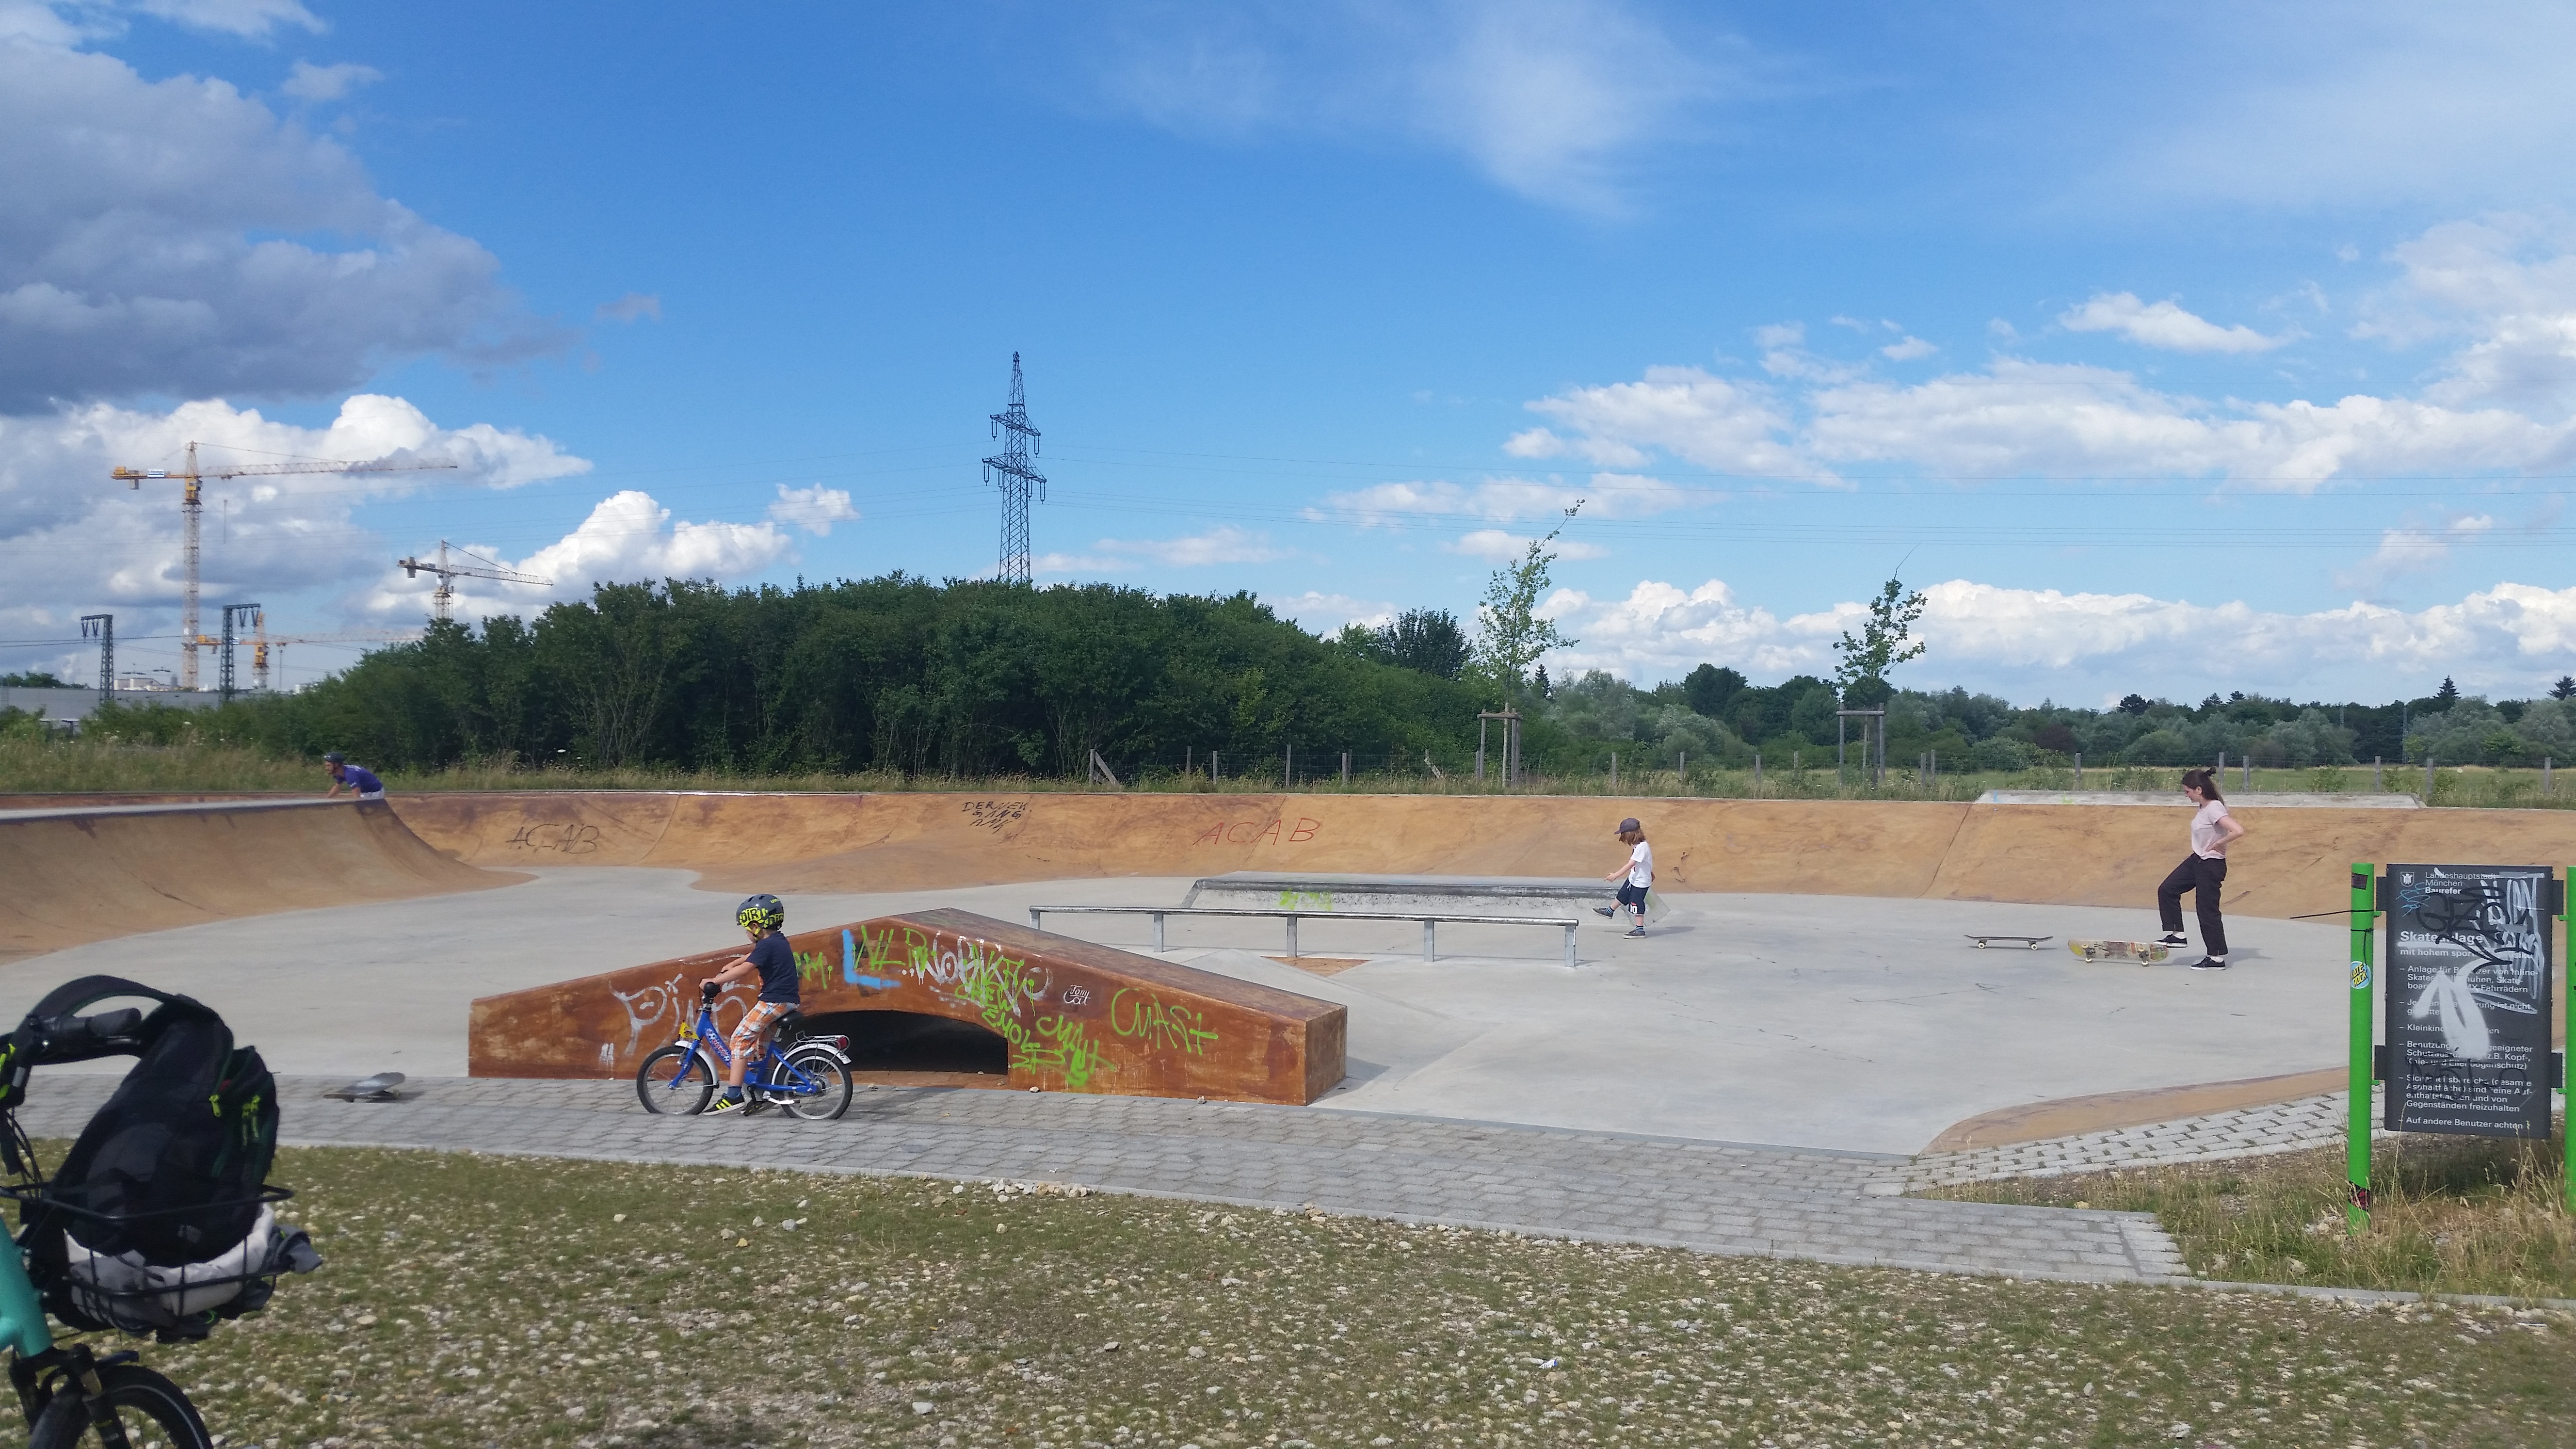
Skateboard ParkIn my wanderings back to home base, I ran across a skate park. Nestled away off a side road. 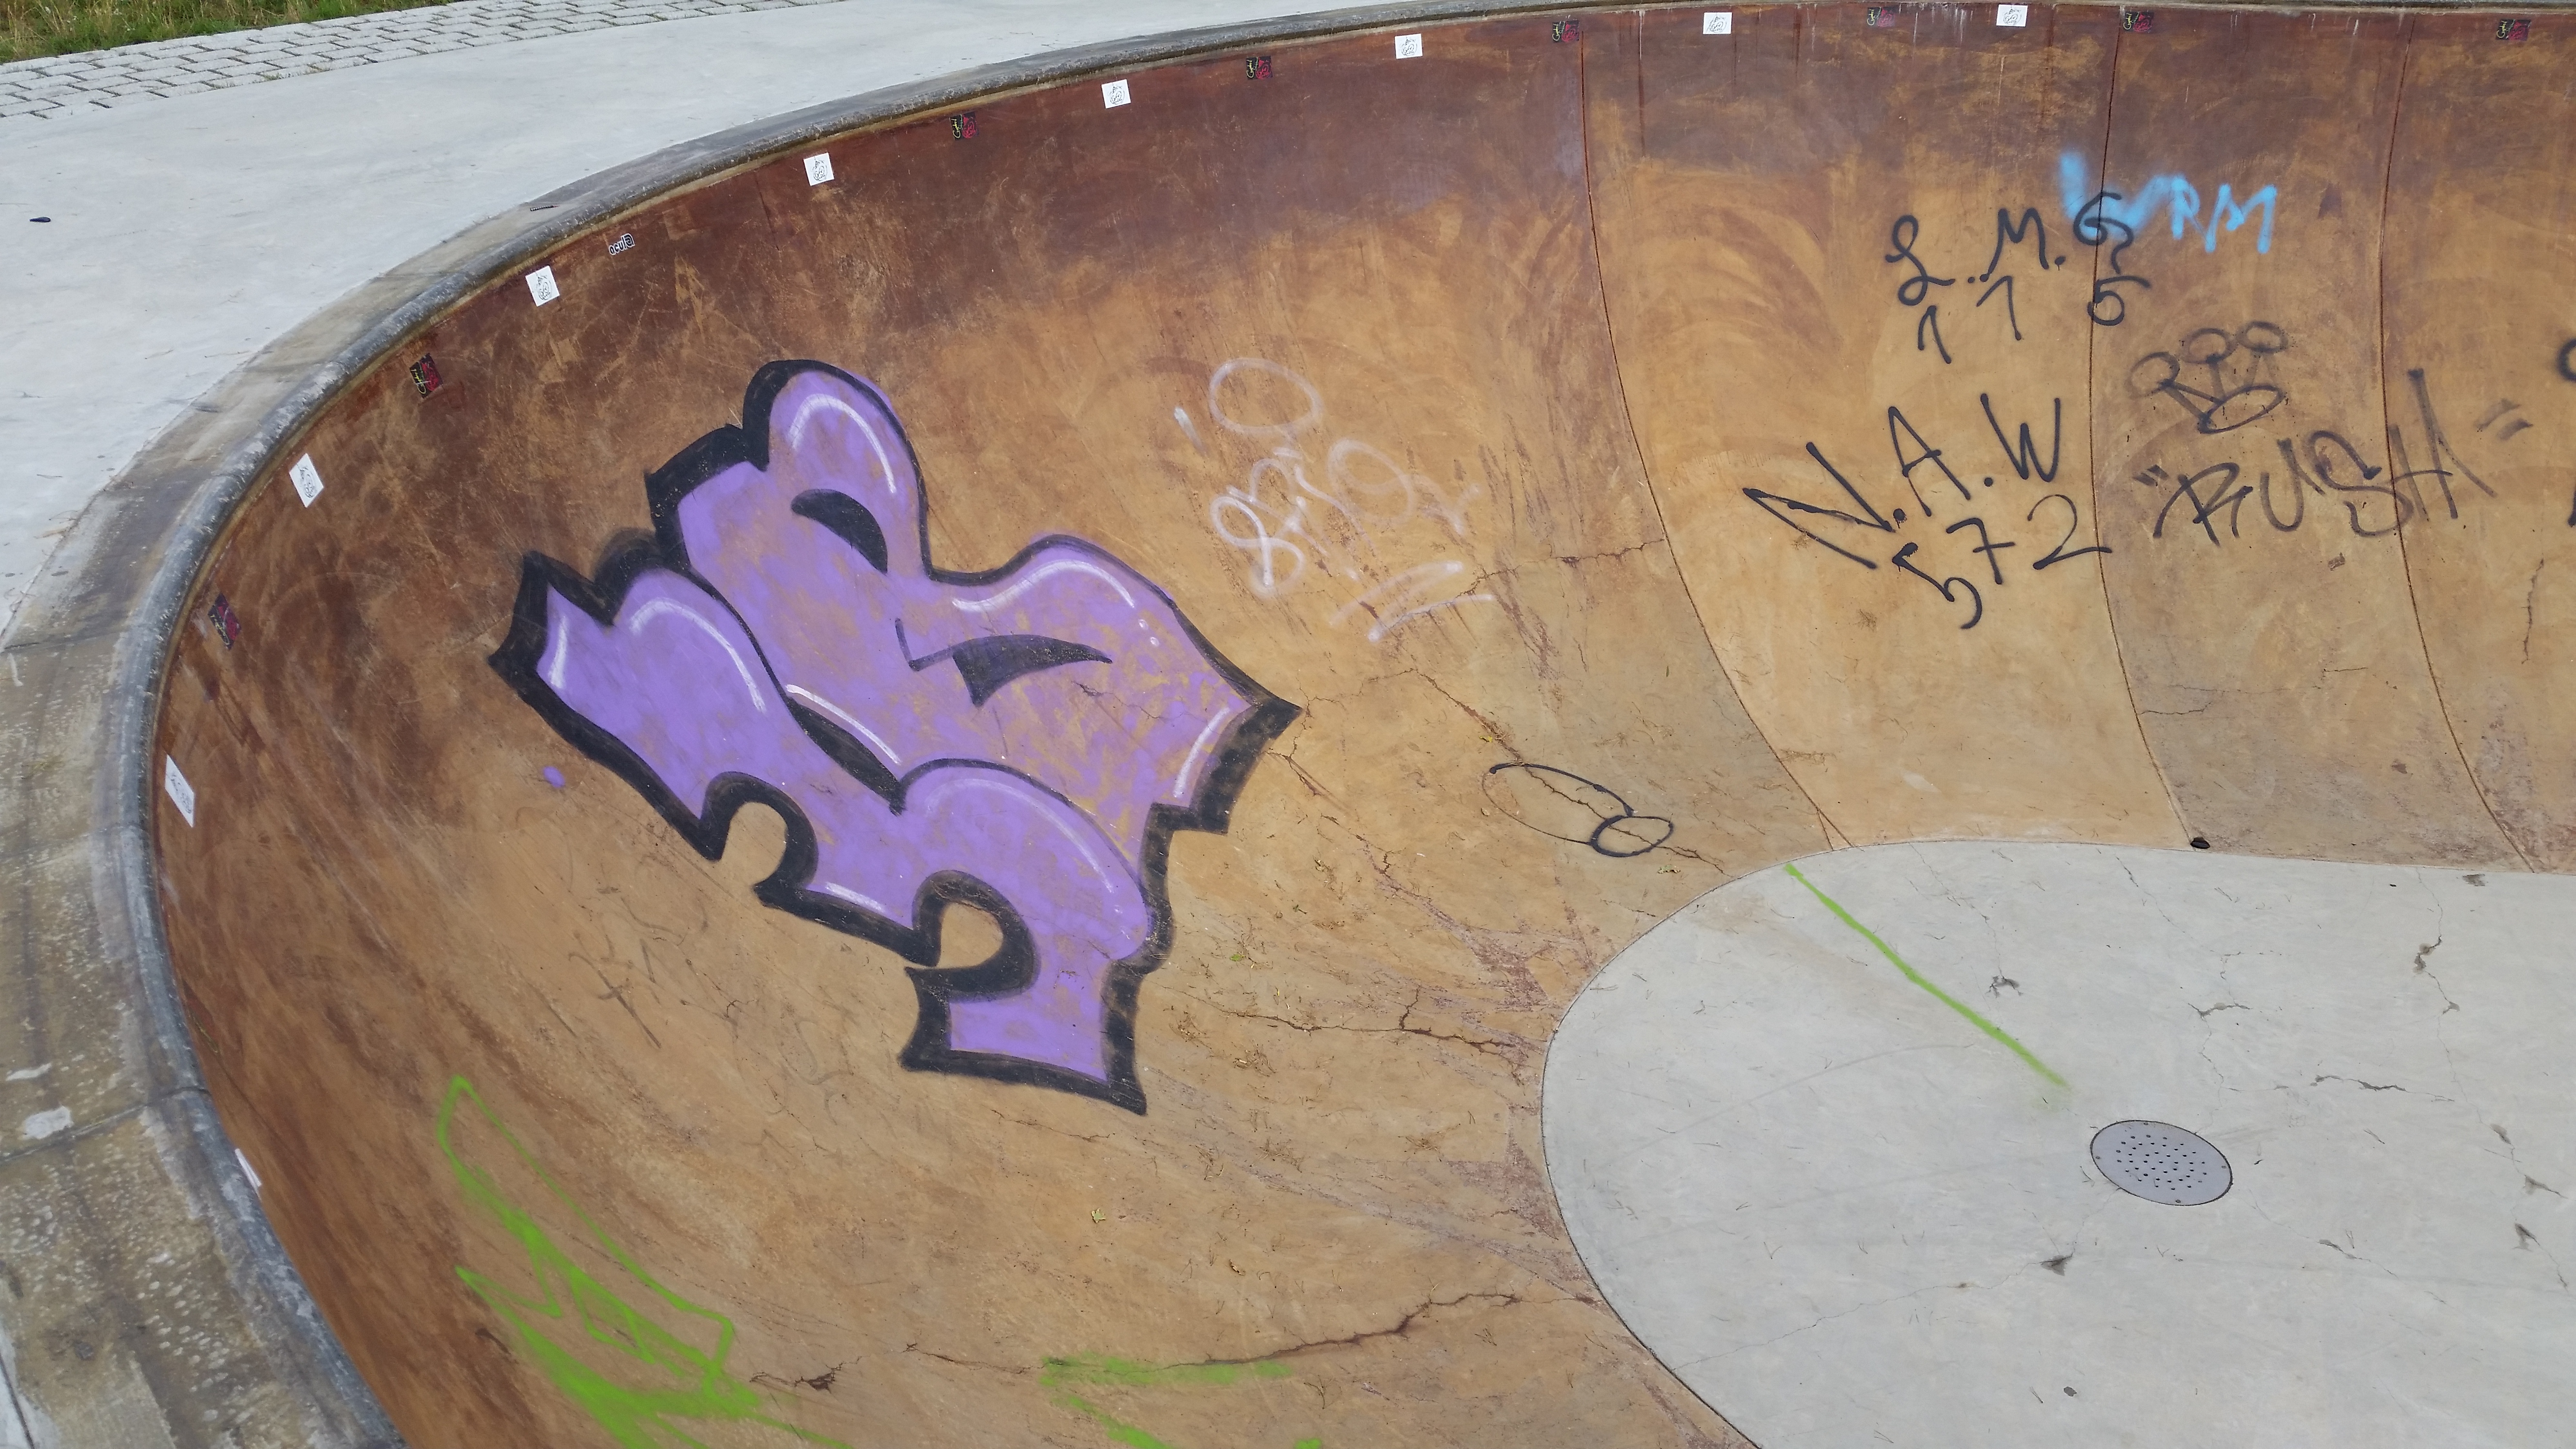
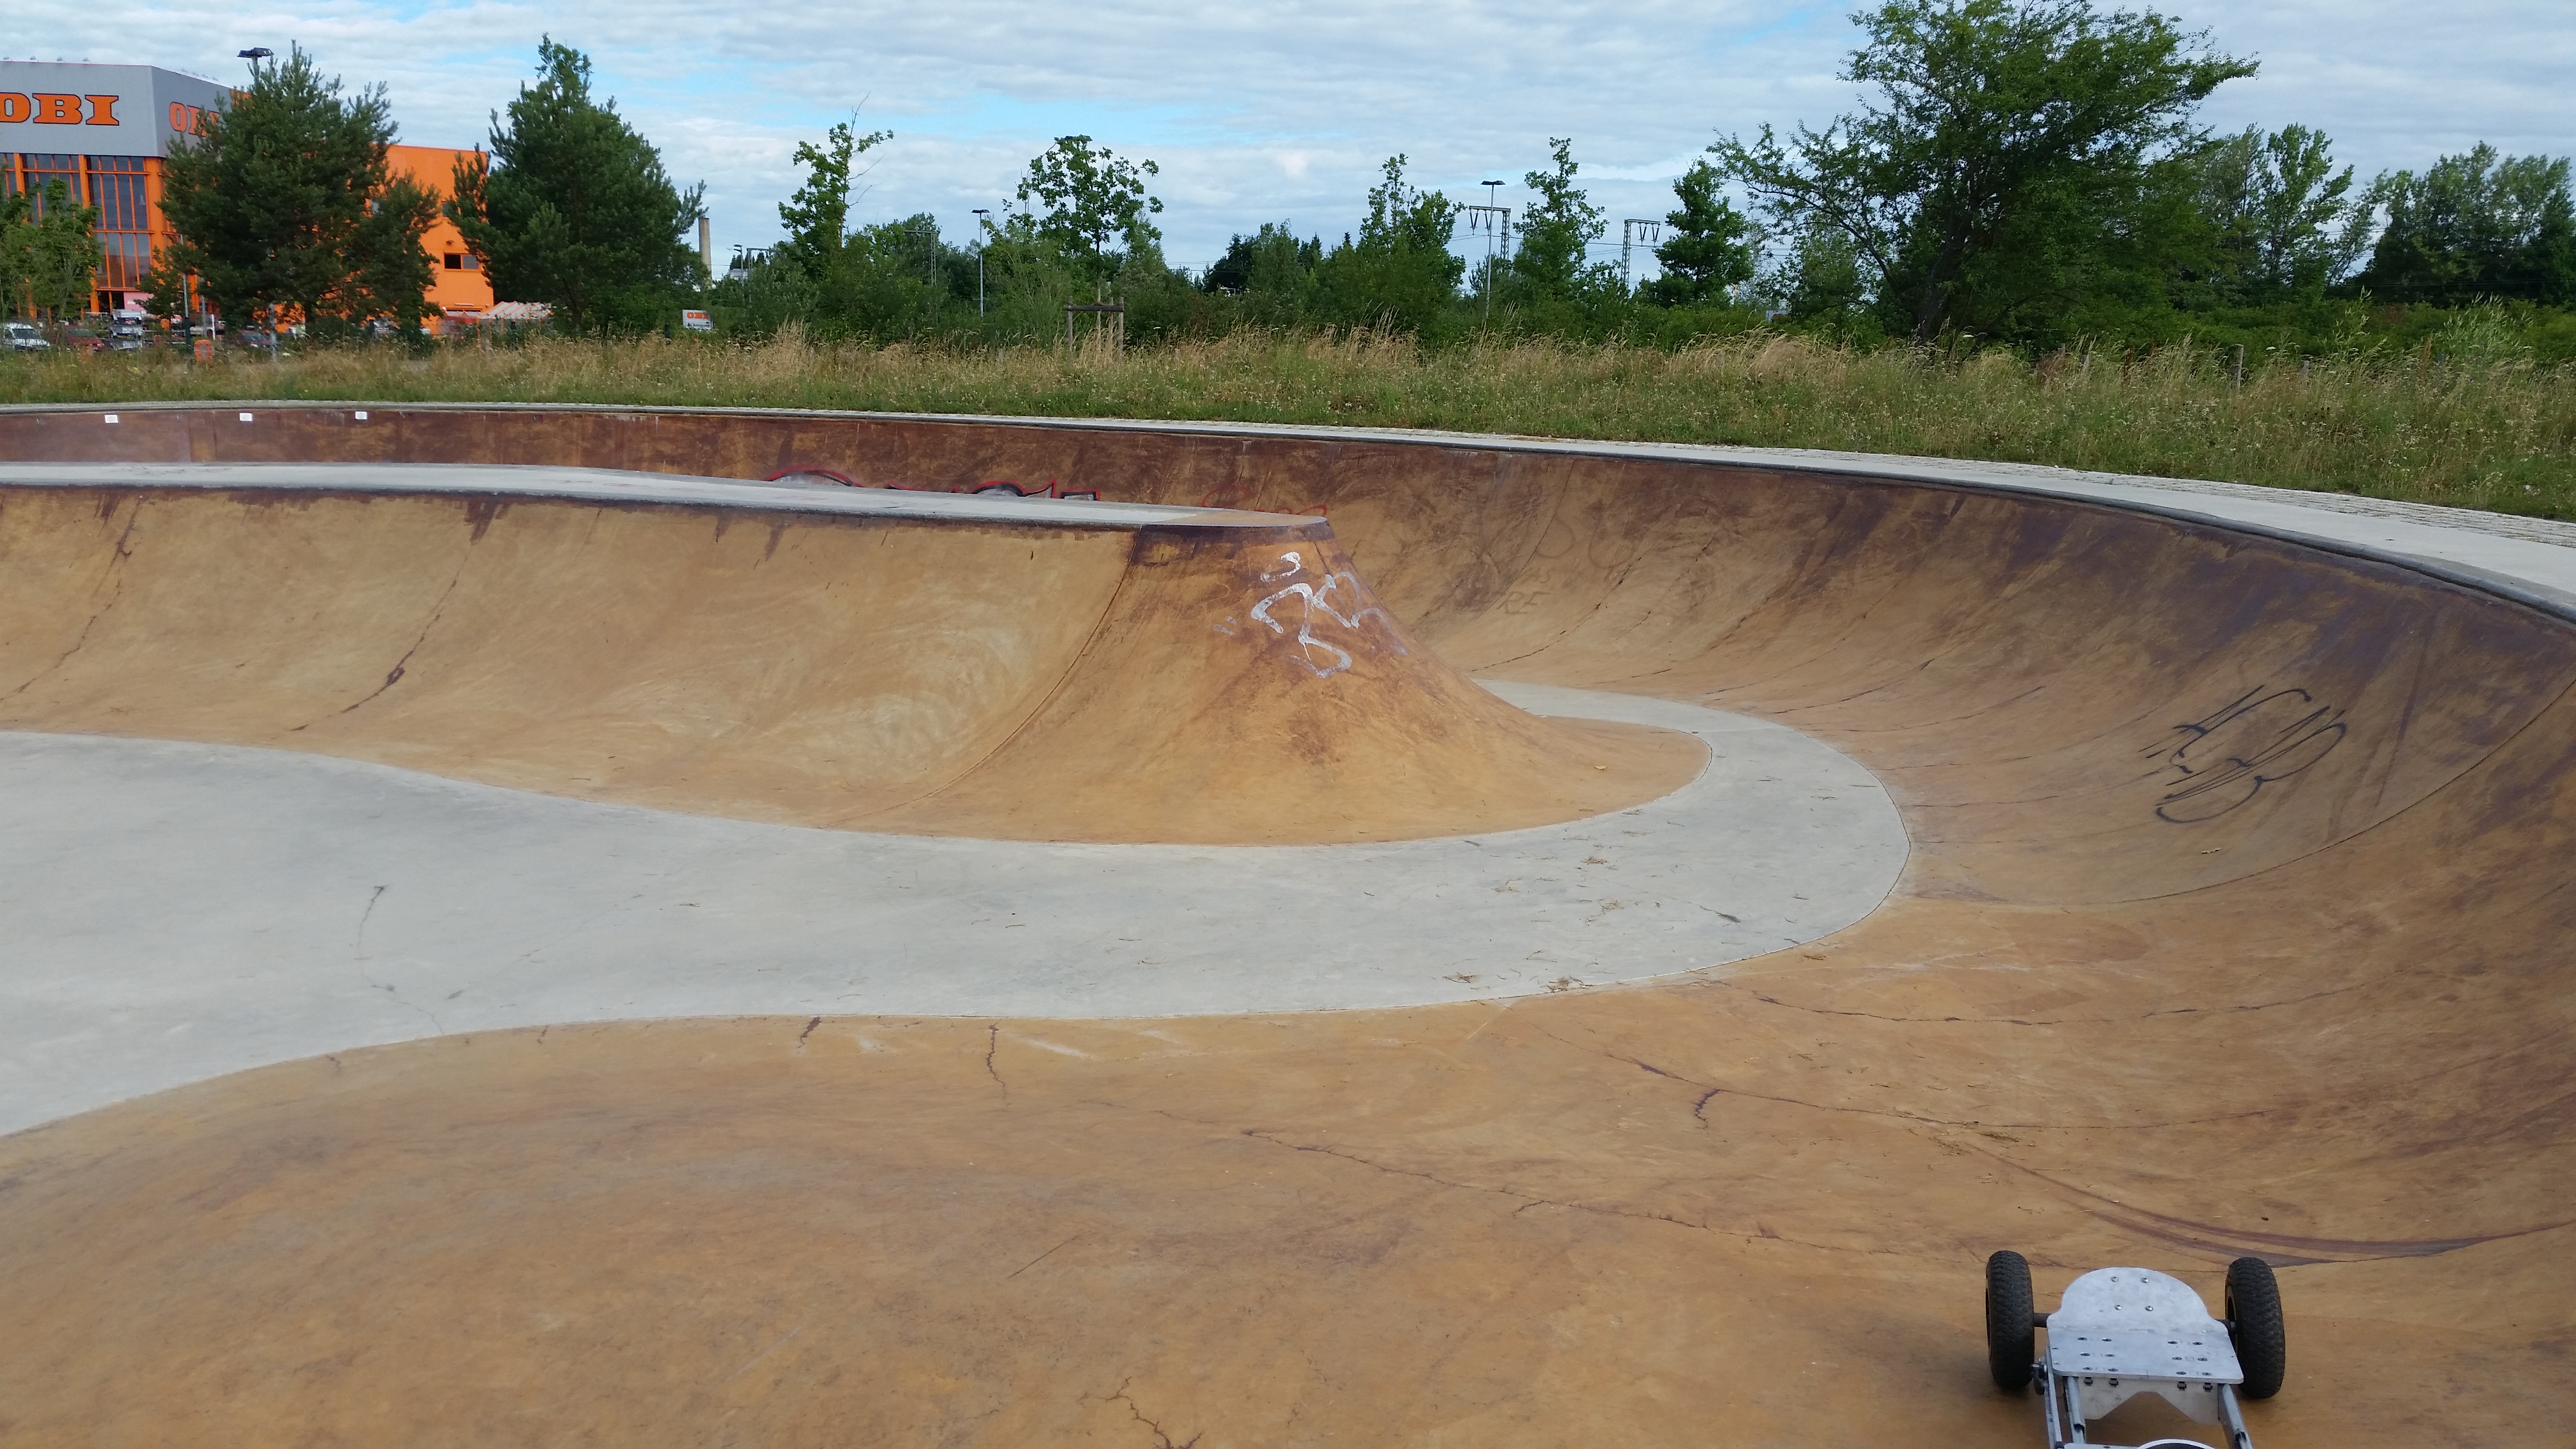
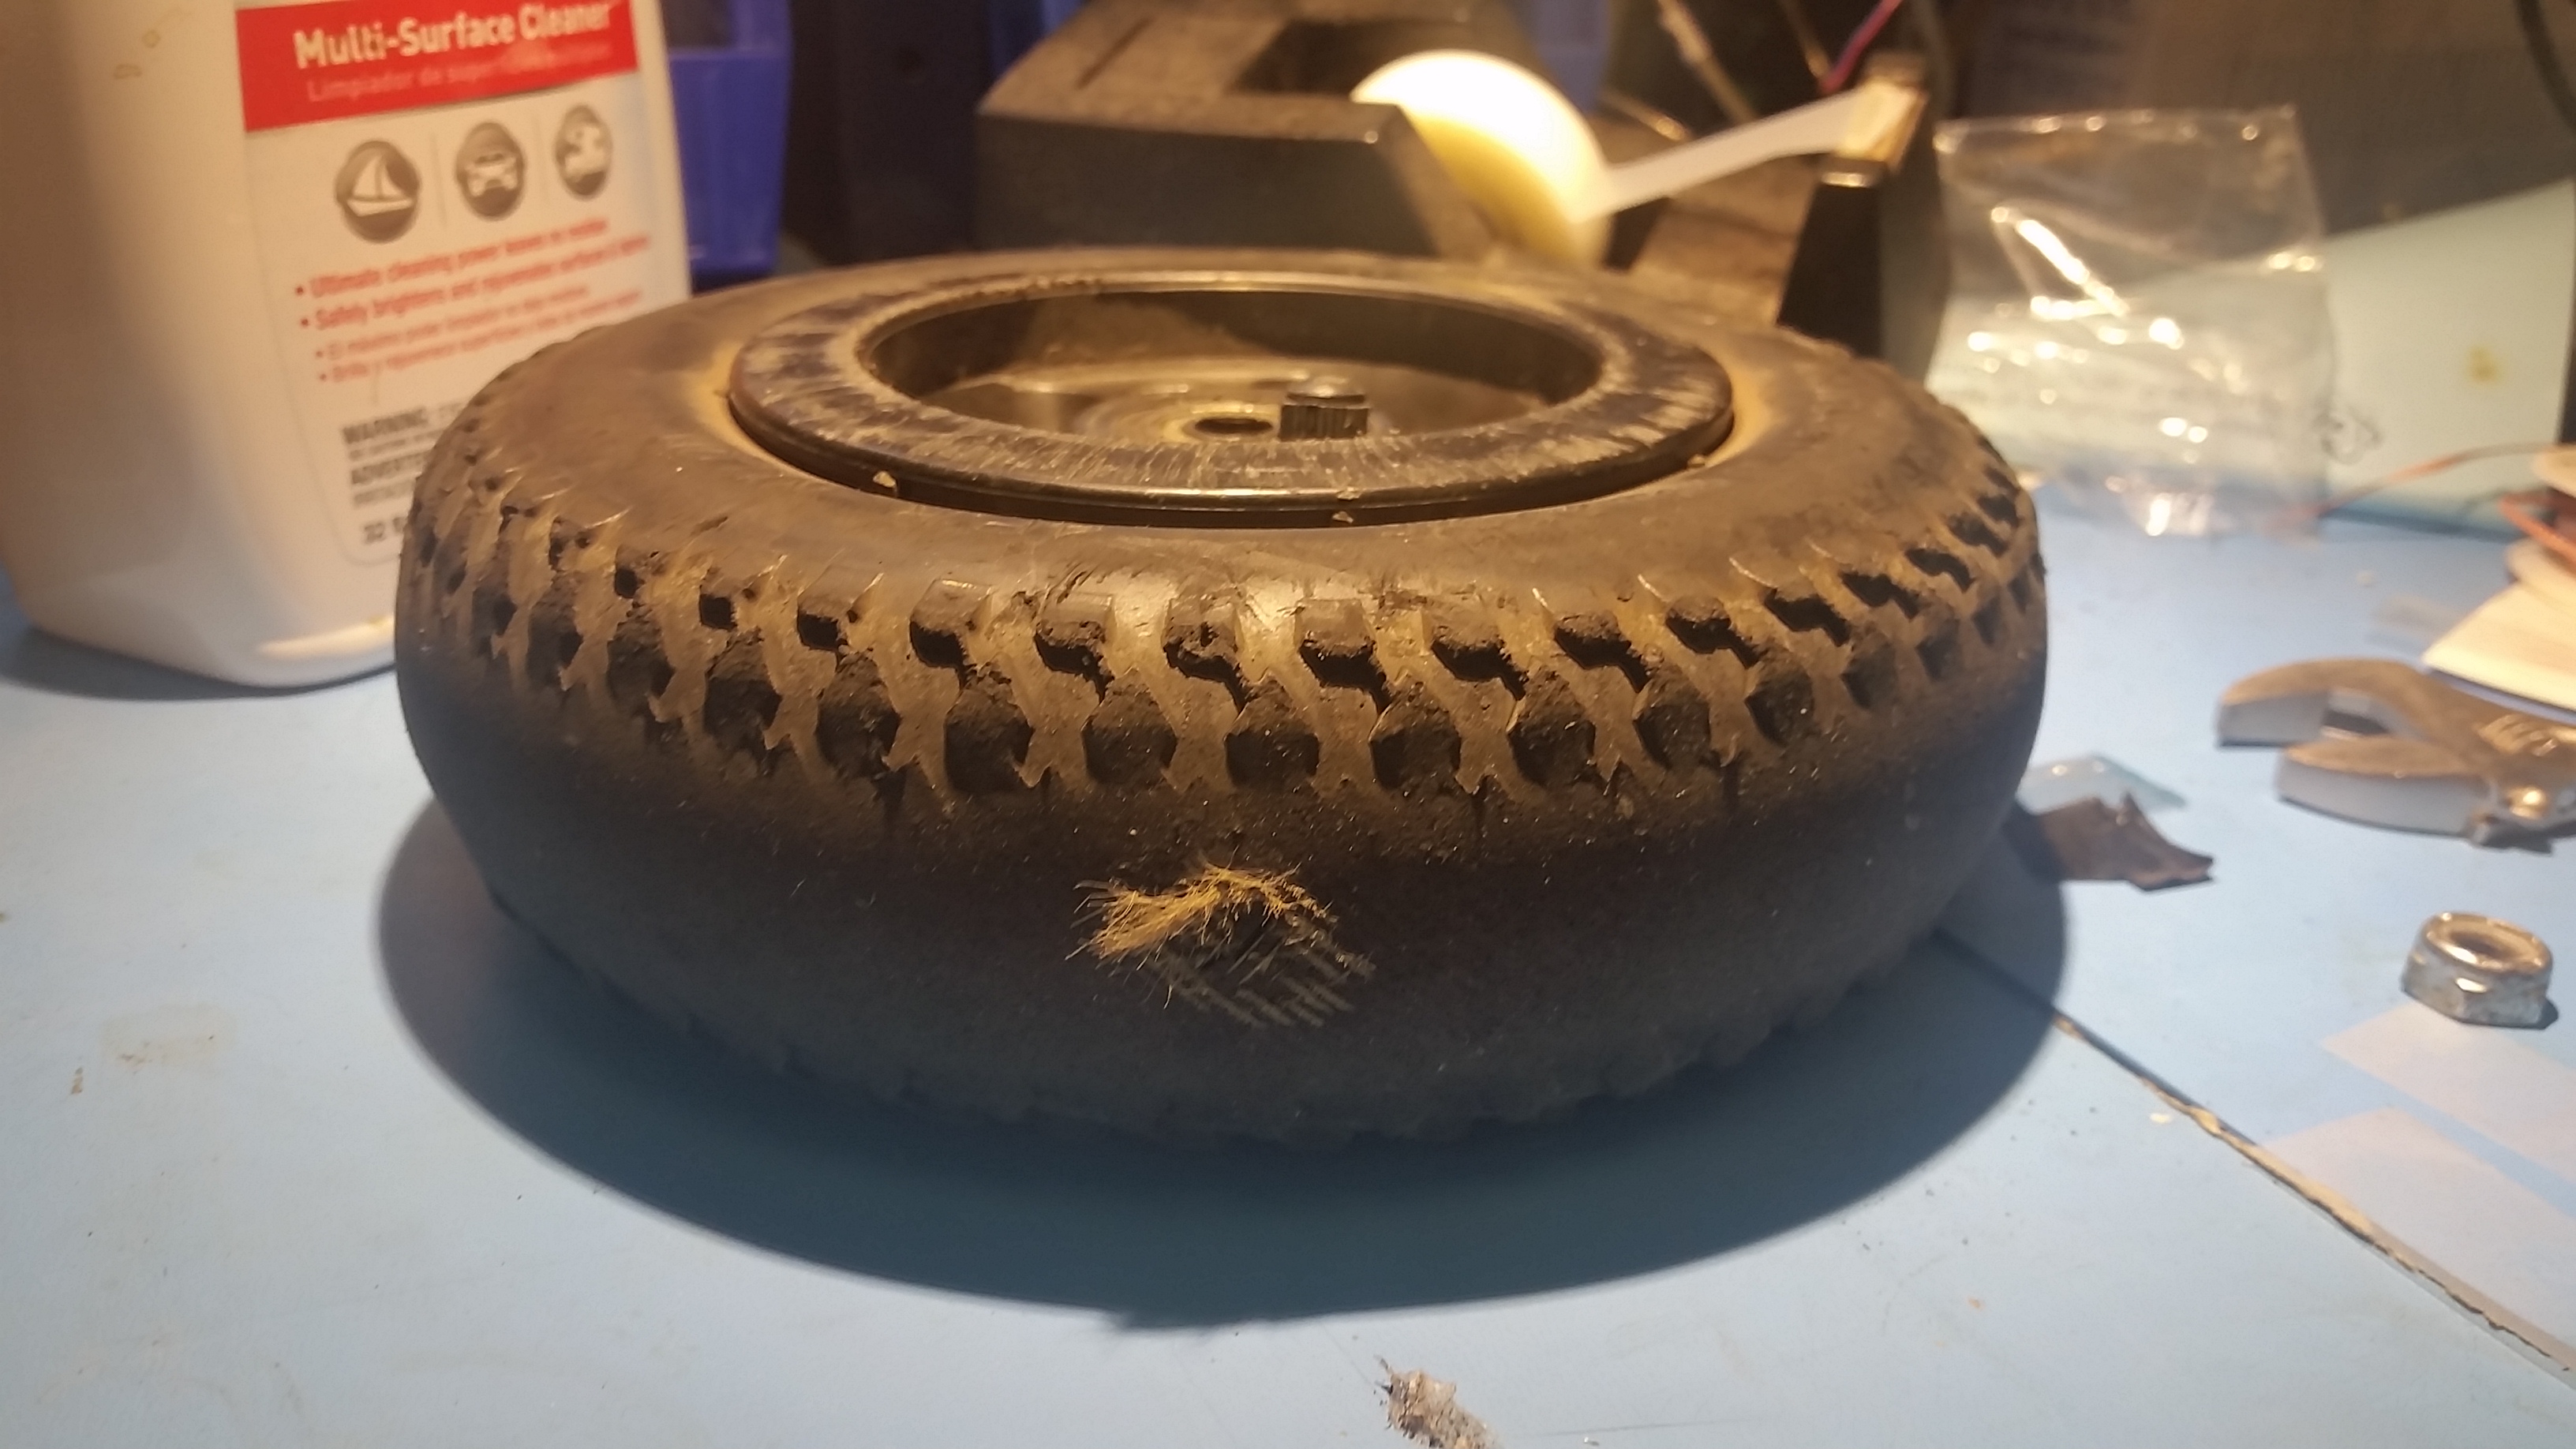
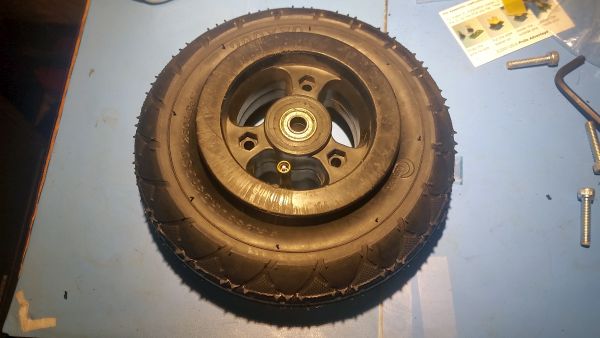
And I learned of this magic thing called ground clearance I will make a note, I have no prior experience at a skate-park or, for that matter the coordination required to use one. I slowly worked up the nerve to go faster around the fishbowl part and on the raised area afterwards, the led bulb got smashed. It ripped off the tack-welds holding it in place and lo, it remained e-taped on for the rest of the adventure. Tire wear and replacementAfter about 40 miles of skateboarding, the front wheels really started to show their wear. These were the stock tires that appeared with the skateboard itself, I was surprised how quickly they were shredded by riding on asphalt and gravel. I ordered two replacement wheels [link] as having a front tire blow out wouldn't be that much fun. 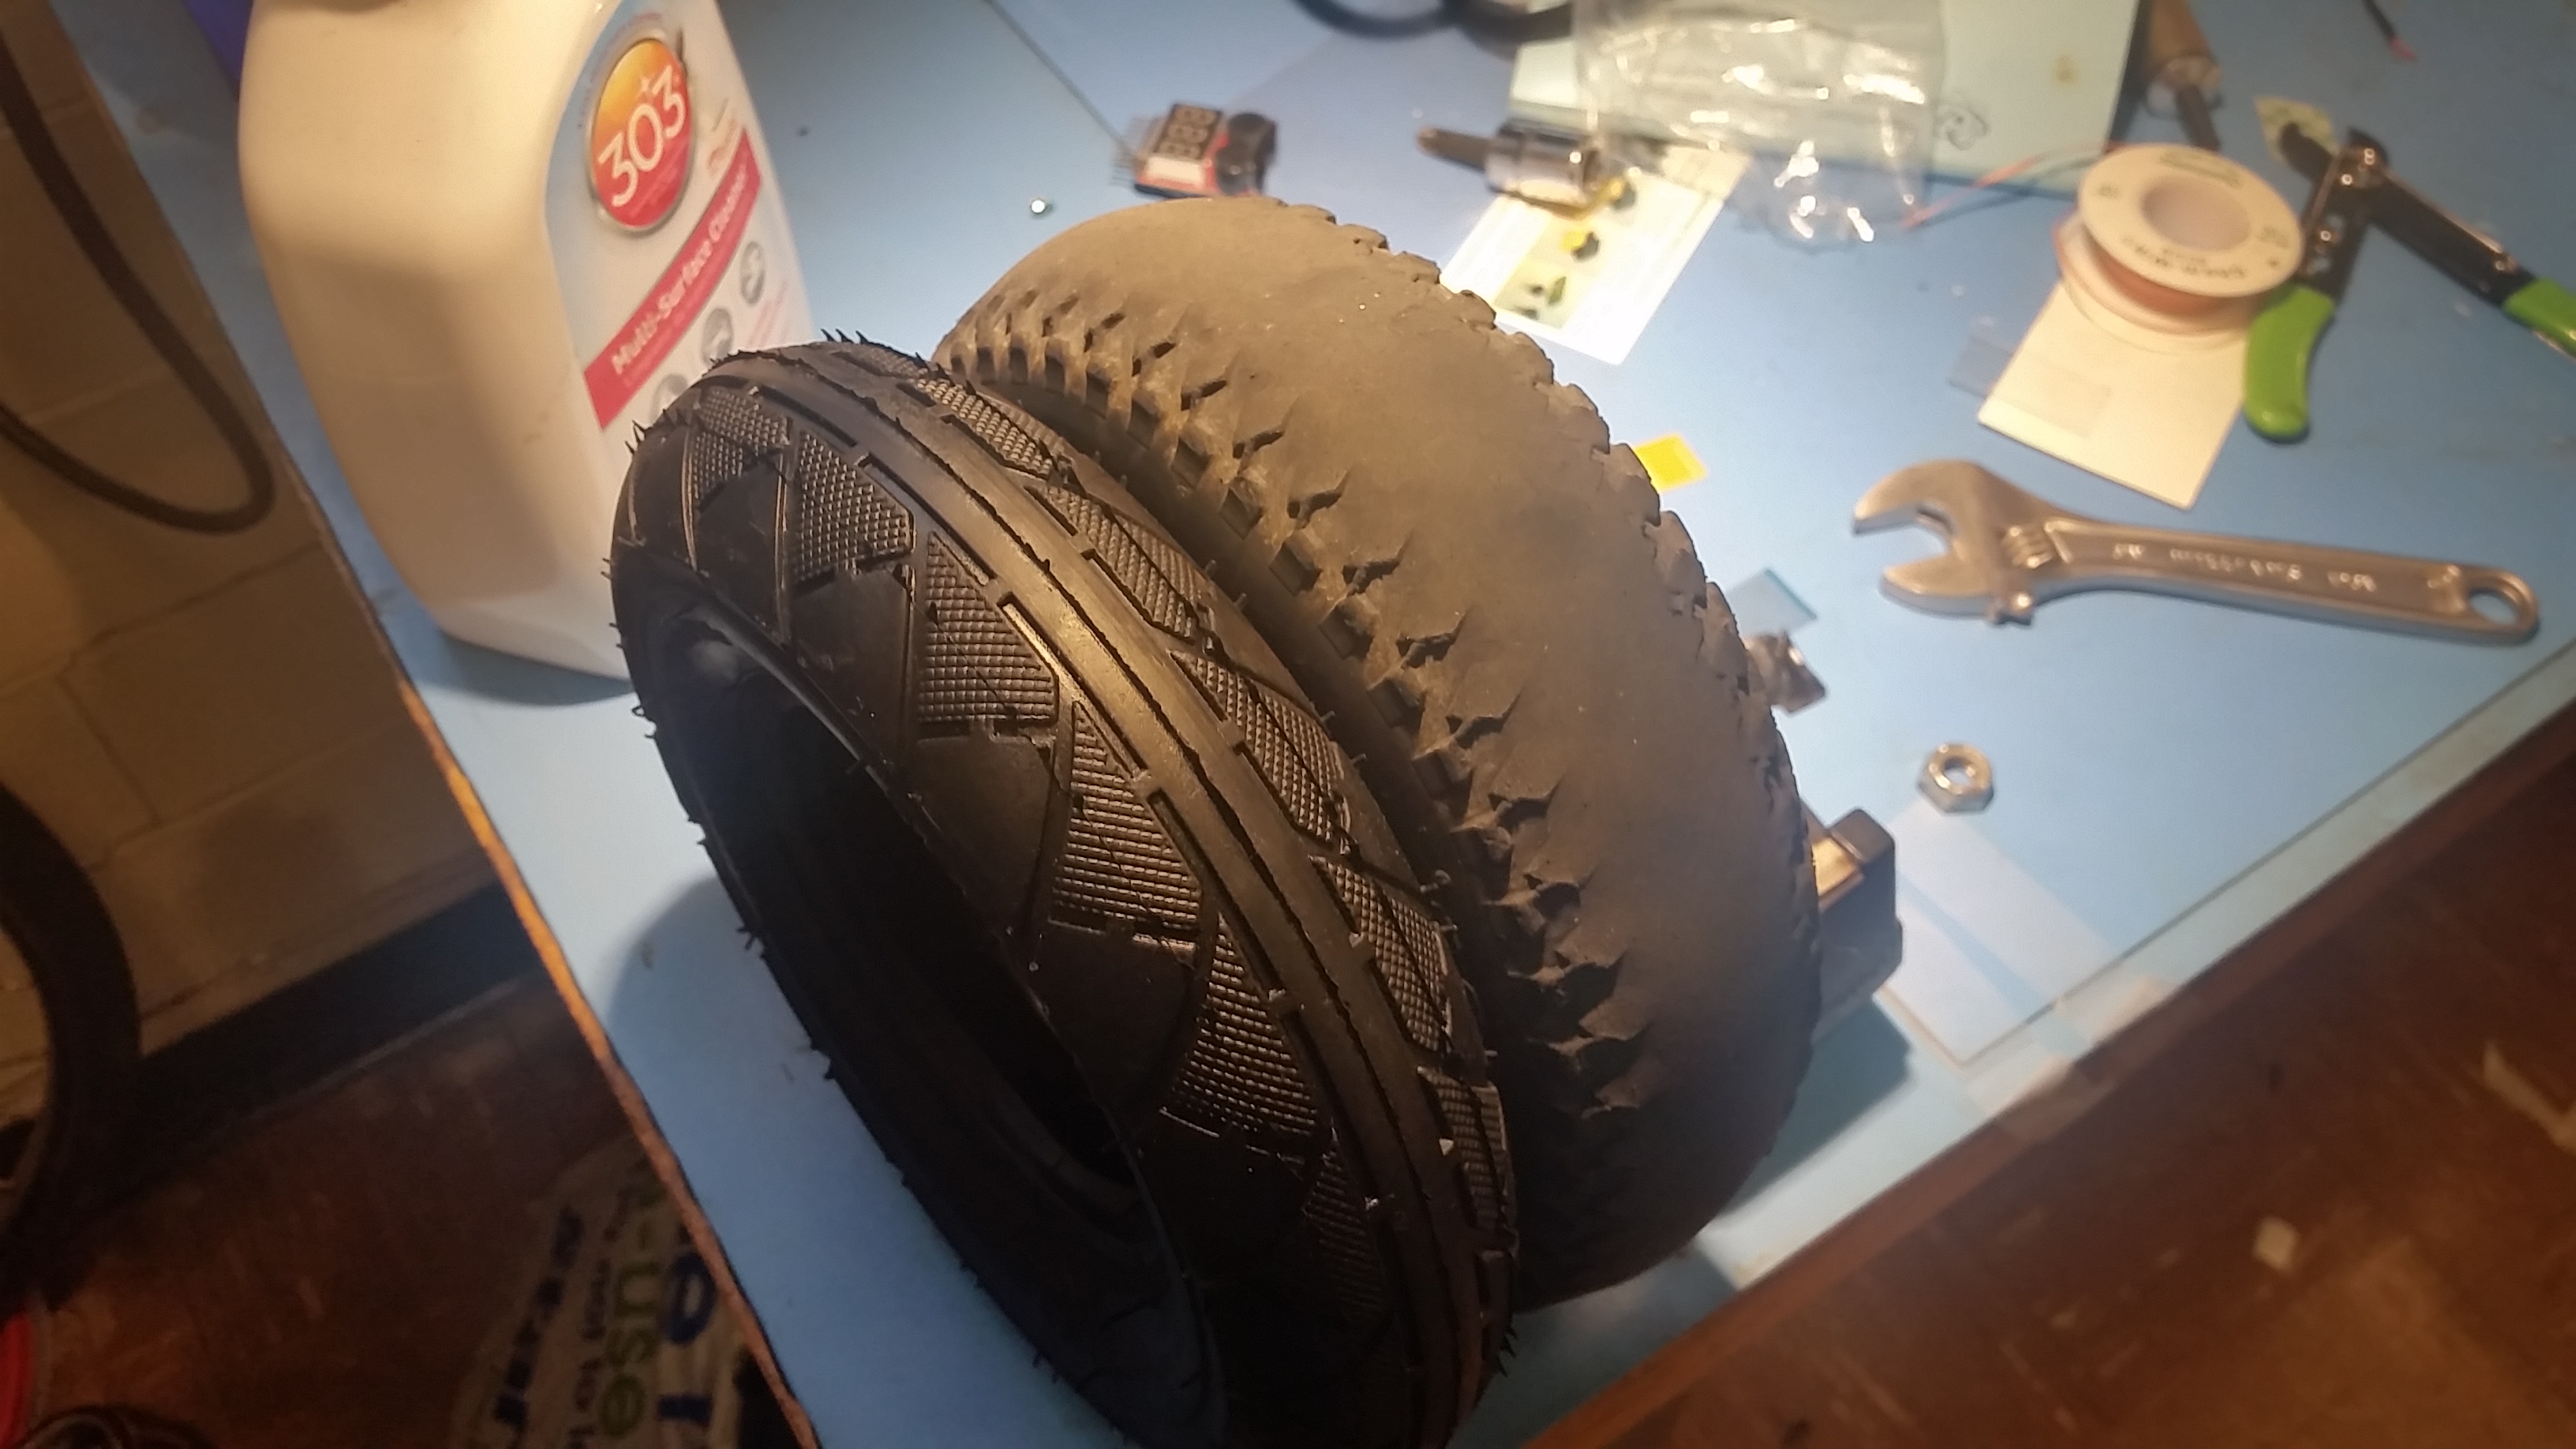
I really like this split-hub design. I was a bit curious as to how much of a bother replacing the tire on the skateboard would be, ranging from prying at the rims, screwdrivers and the like. Fortunately it was just three allen-key screws and hex head nuts. After a quick deflating of the tubes and unscrewing the whole tire came apart. The swapping was rather quick. I've seen split hub designs before, and the stout reinforced injection moulded part was well designed, in comparison to the punched tin harbor-freight variants. 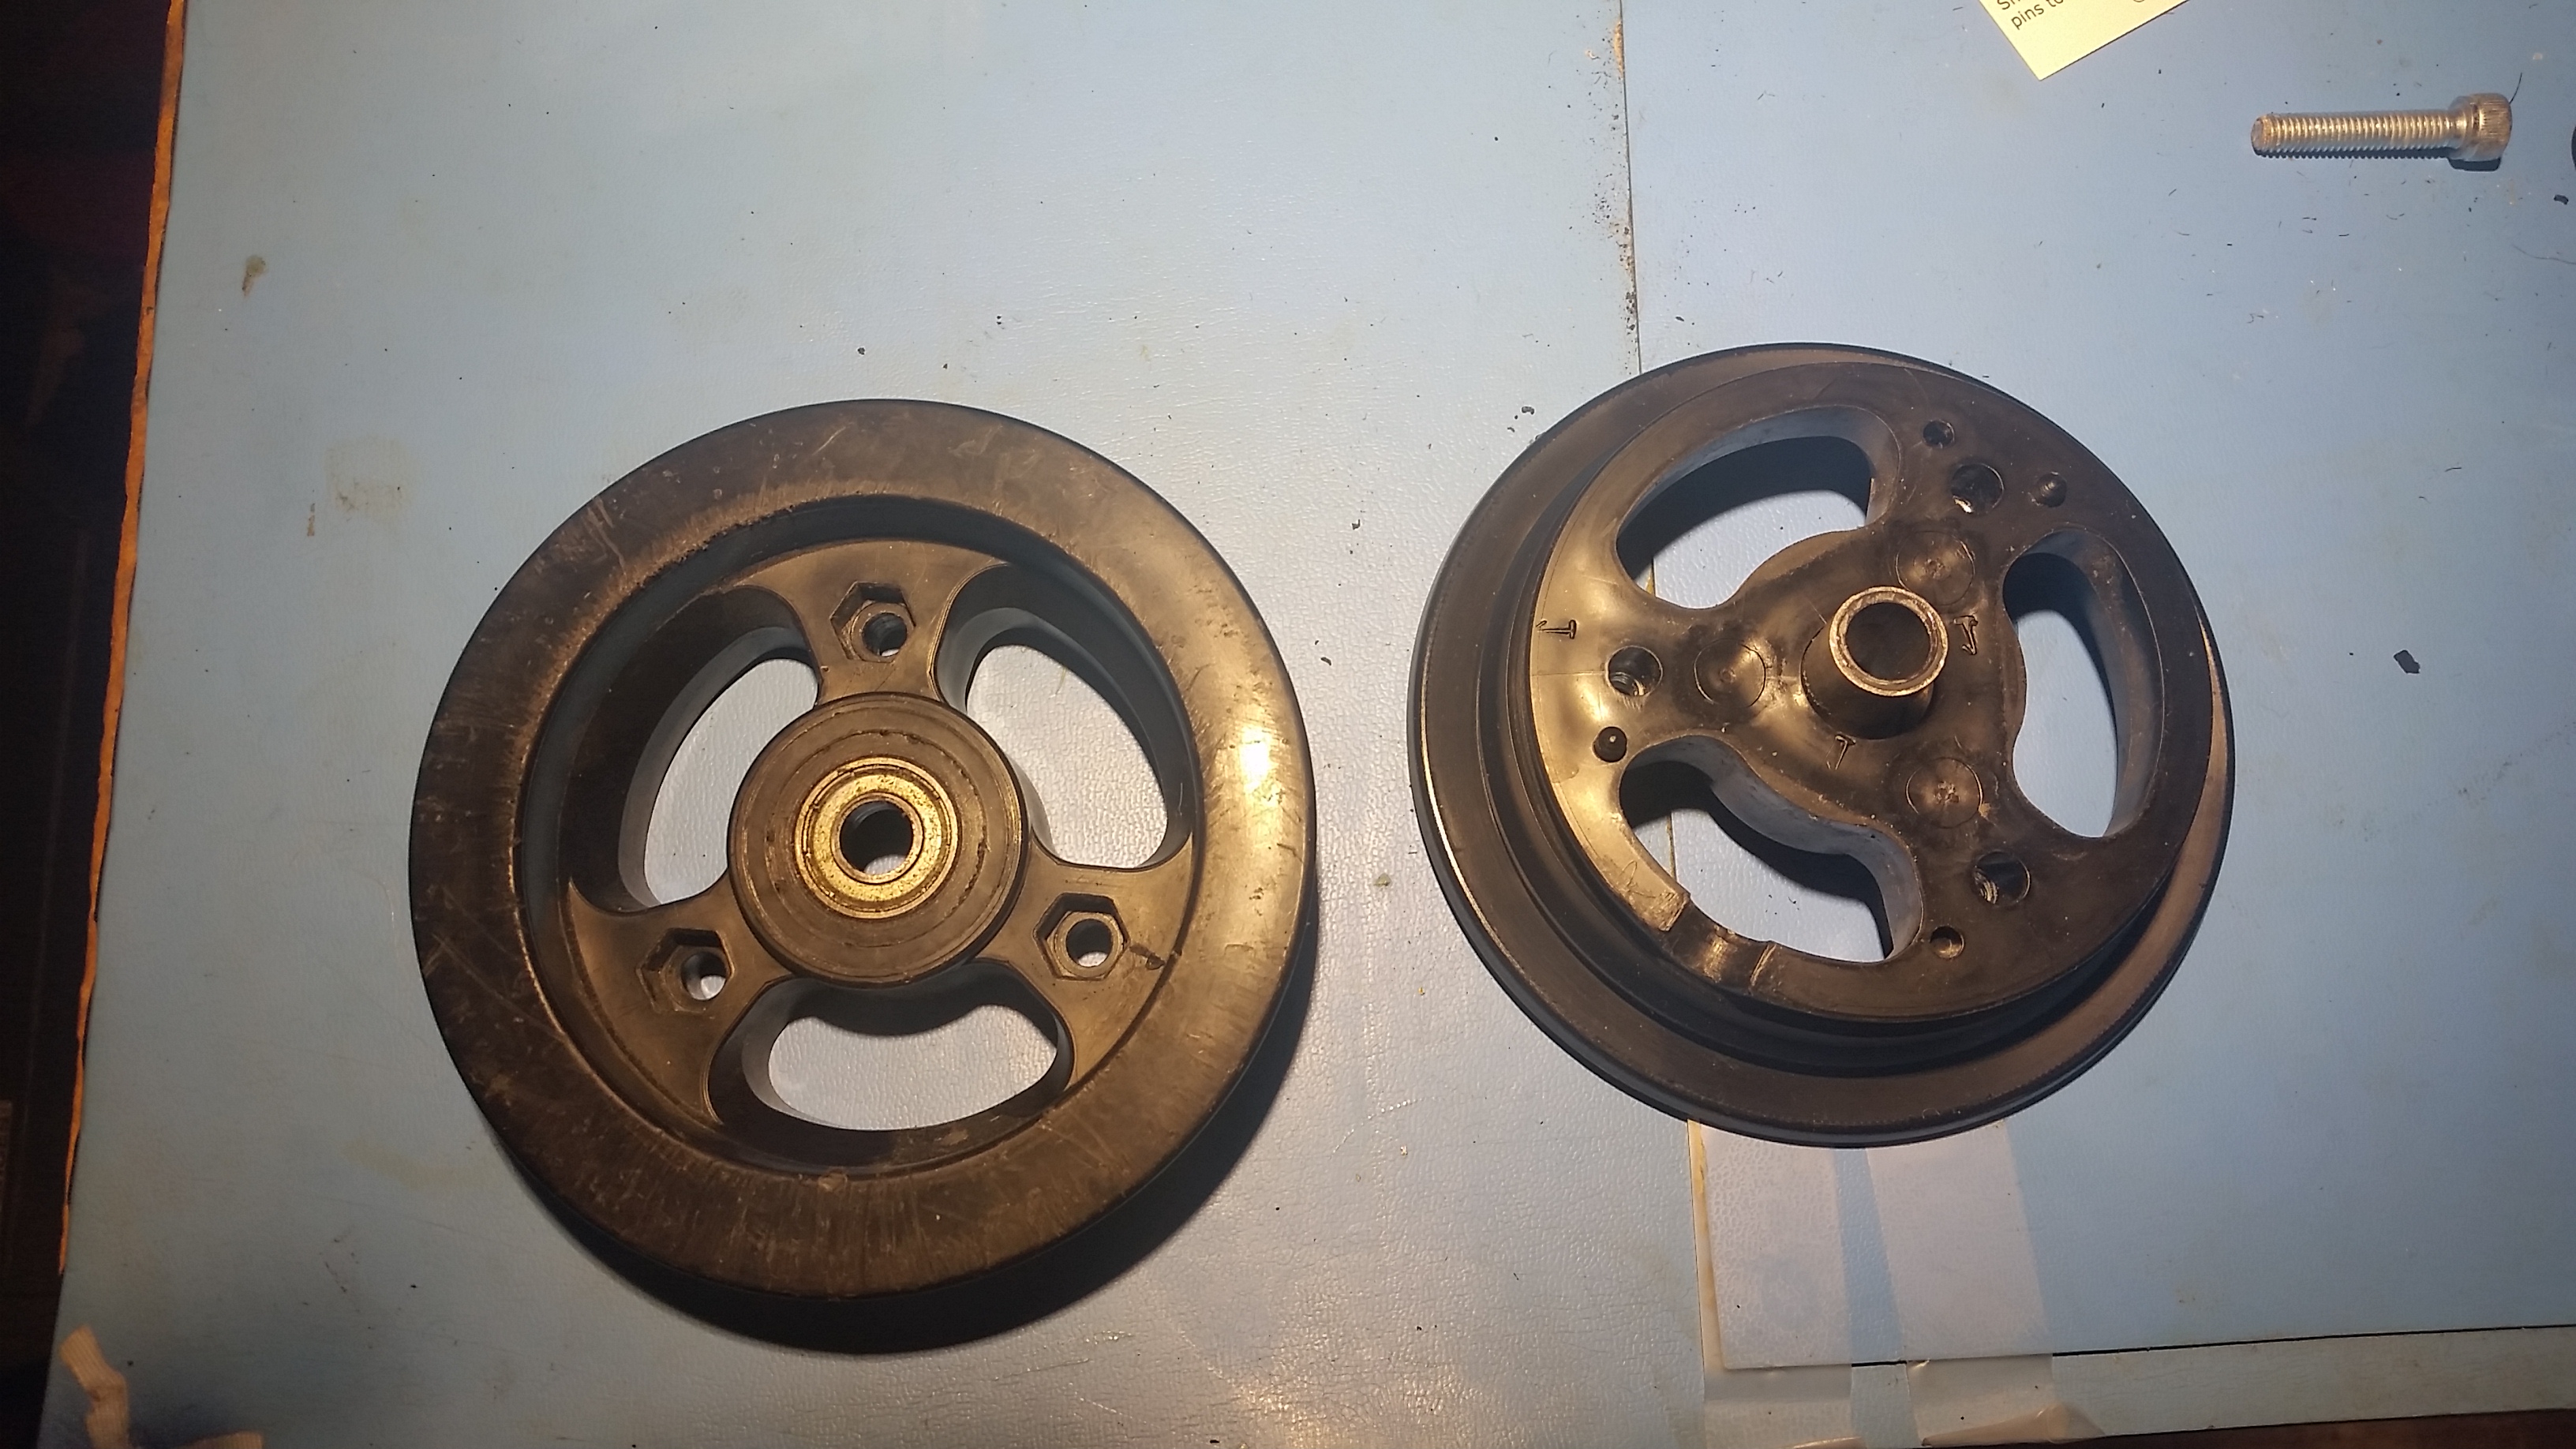

Inflating the tire and assembling was very straightforward. The only intracy was ensuring that the tire tube did not get clamped between the split hub assembly. 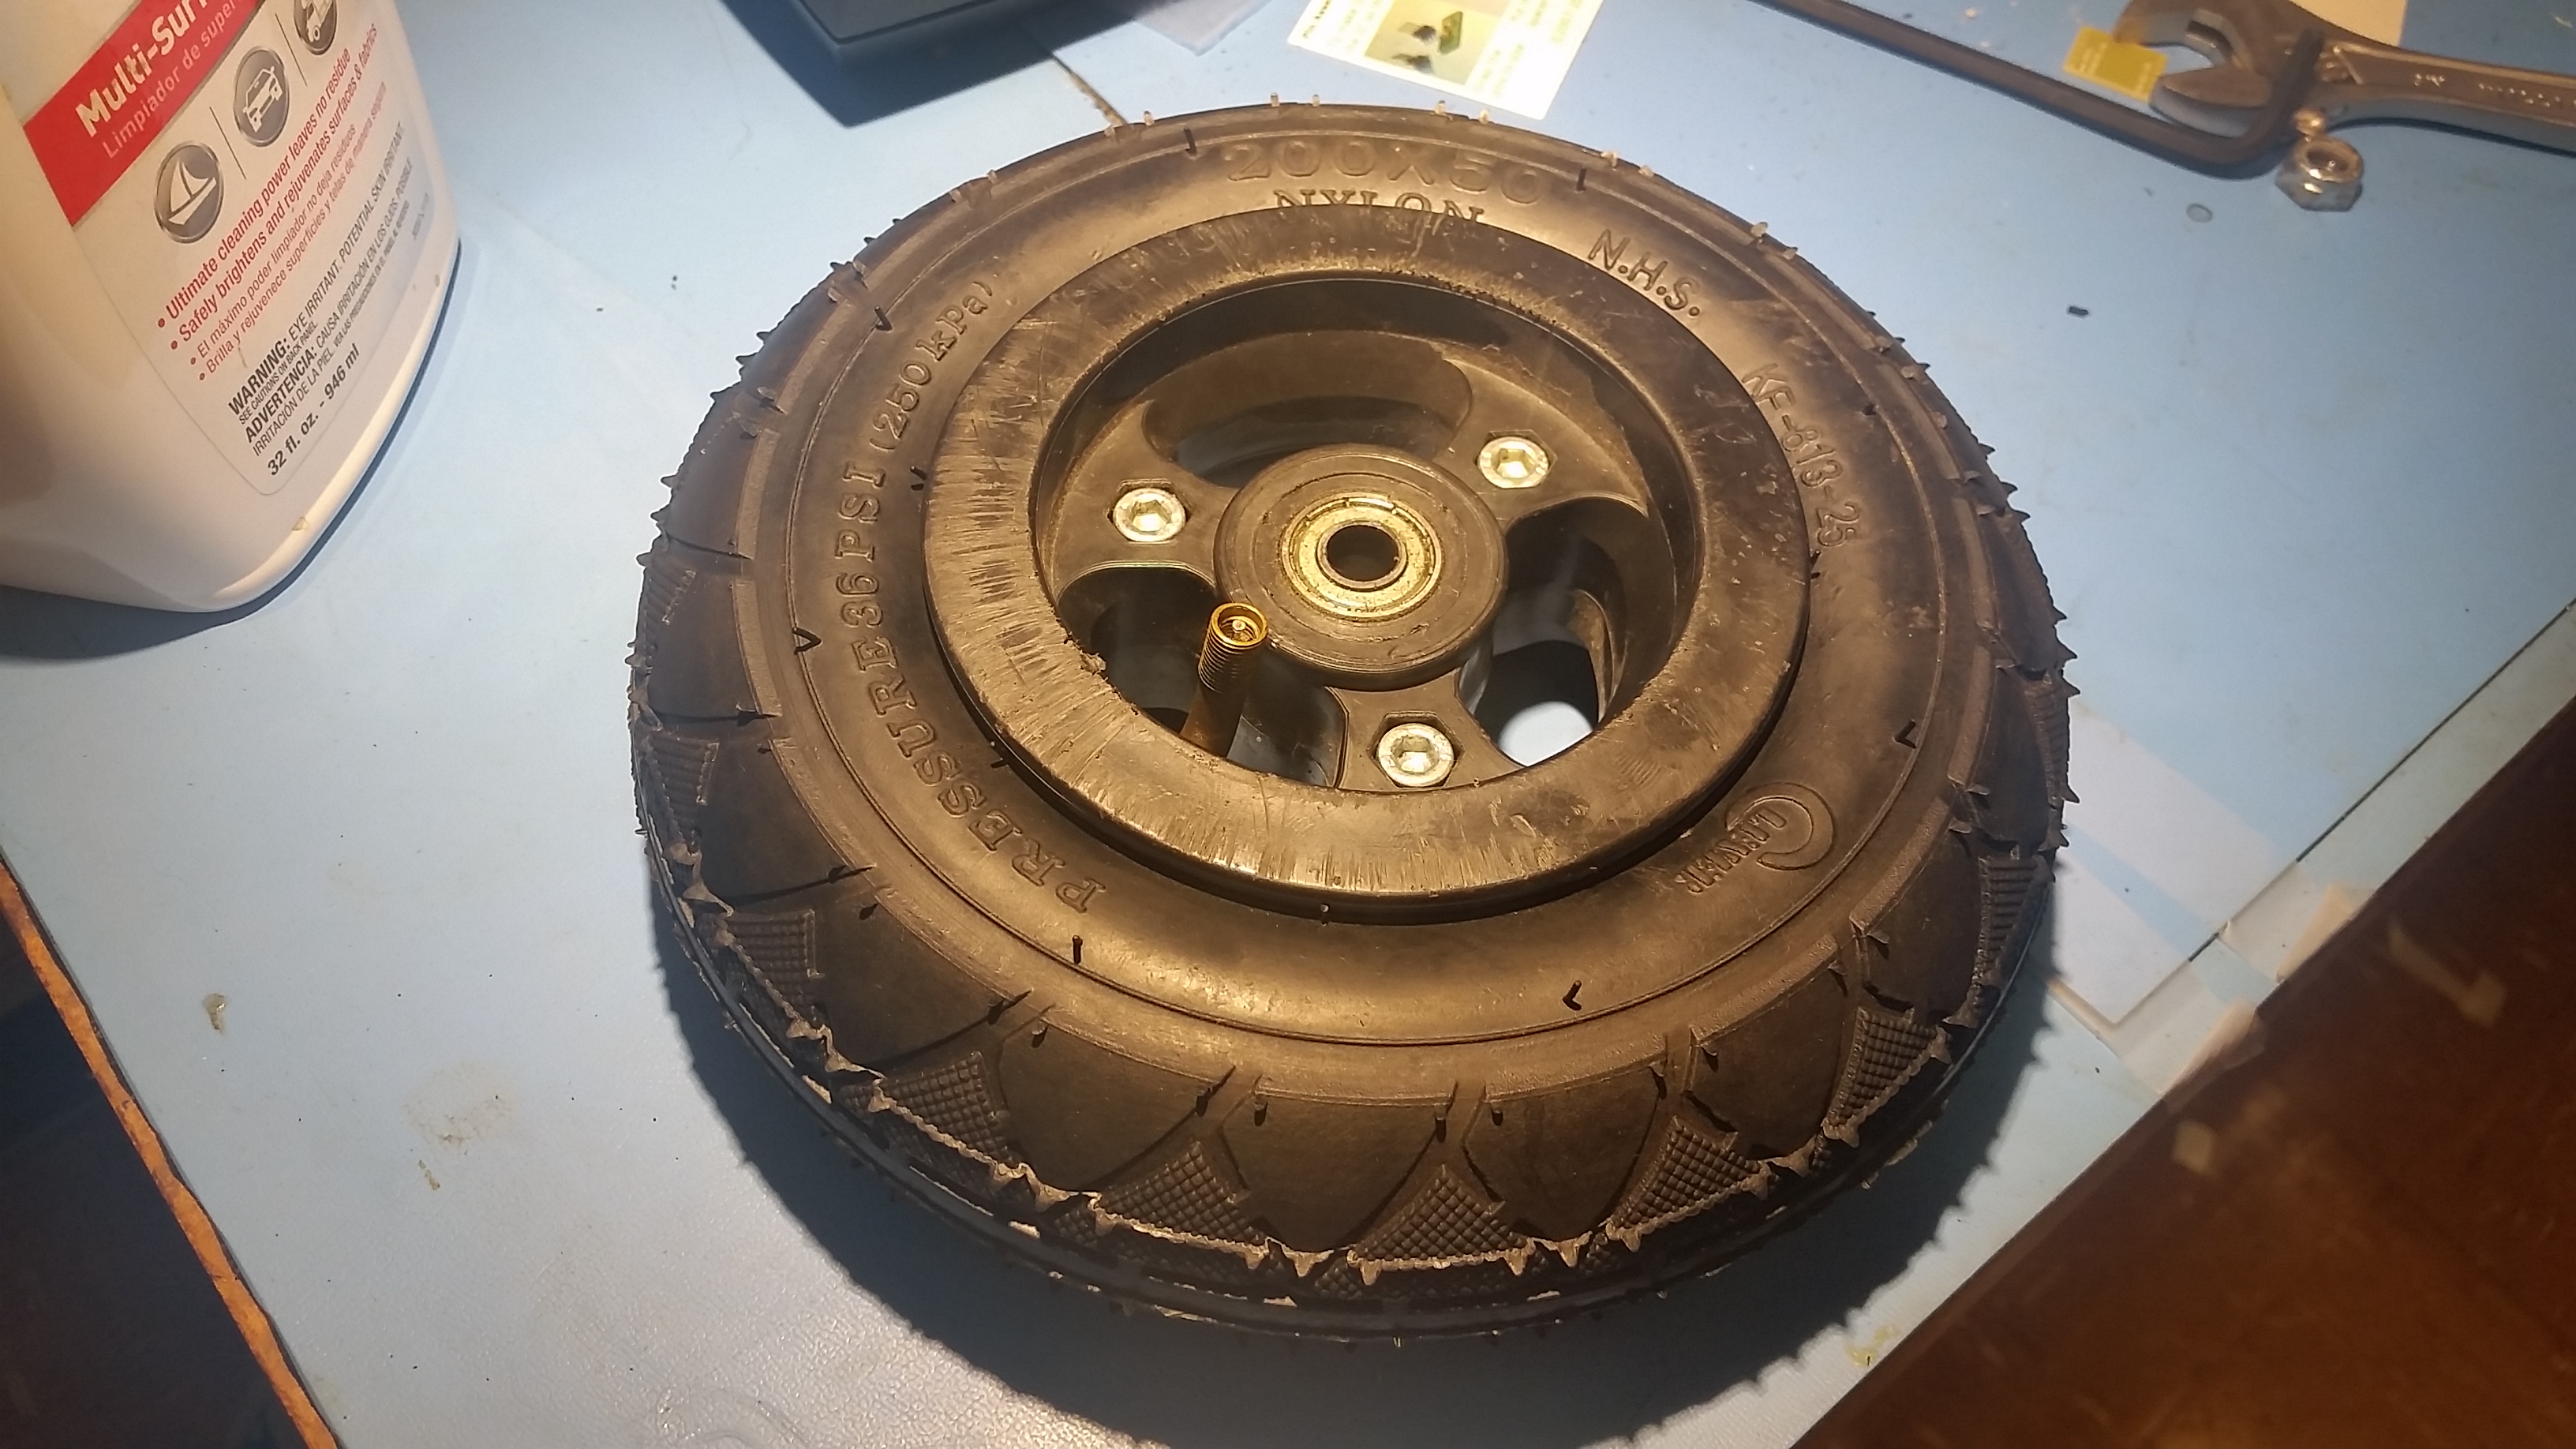
Range Testing2AH pack discharge testI opted for long-straight-unhilly roads for the first range test. Vassar street near MIT was a good choice, bike lanes on both sides and quite long. I completed a few loops, with the headlight on (10w extra loading should be a nominal difference in range). The test conditions were pretty ideal, warm-ish evening (90F), not too much wind, fully inflated tires and fully charged battery. 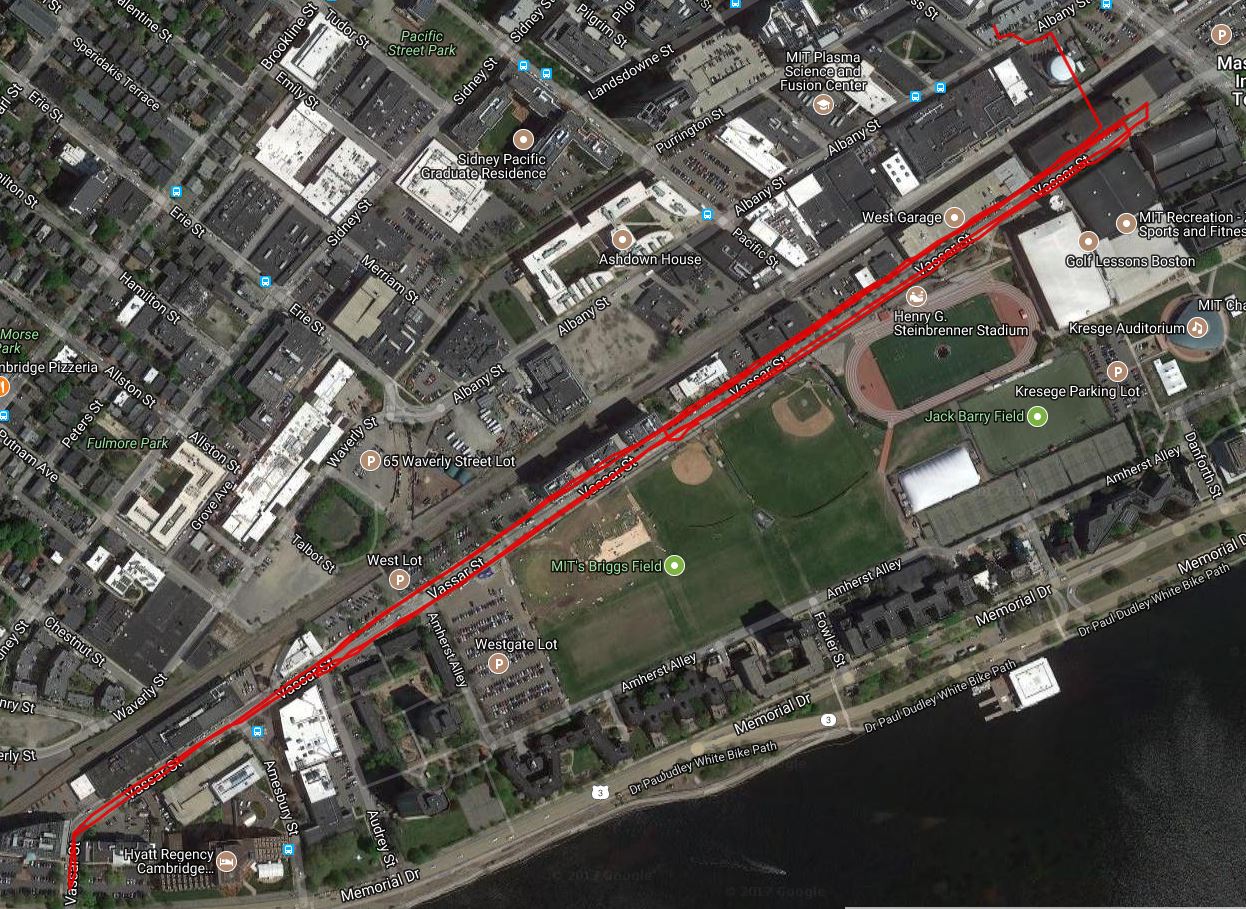
To Record the trip data I used the android app 'GEO TRACKER'. Its really reliable and the data format is useful. Cant recommend it enough. The ride clocked in 2.99 miles, and given that the pack nameplate capacity is 73wh which, puts me at 24.4 wh/mile, this is fairly high all things considered. The max velocity was 13.23 mph, hovering around 11-12mph while moving. On the street this isn't that fast its reasonableish While riding I was contemplating how to get the wh/mile lower. During the build I neglected to add in cabling for routing the hub motor sensor wires, due to time constraints. Having sensors wired in and enabled would make the startup way less power consuming. Lowering the maximum motor current may also get a bit more range. The 4AH pack, using the same route, clocked in at 7.76 miles miles, given that the nameplate capacity is 146 watt-hours, this me at 18.81 wh/mile, this is way better than the 2AH pack. The max velocity was even a bit higher, at 14.63 mph, hovering around 12 mph while moving. This fits my theory of impedance being the culprit, now to check what the heck the actual pack capacities are in comparison to their nameplates. 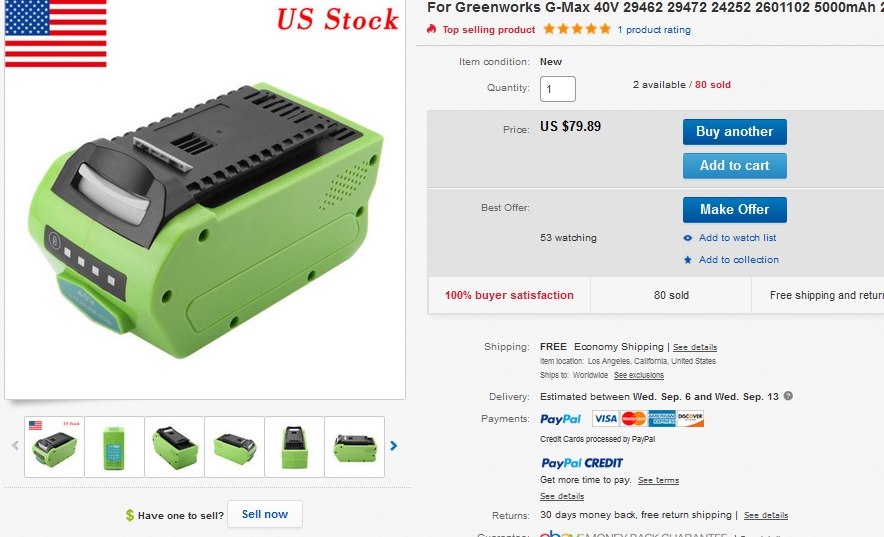
5AH off-brand pack?I was looking for a spare 4AH battery module and i ran across a reasonably priced 5AH version of the same pack. This pushes the watt-hours up to 200, or an exta 27% capacity. That should push me to about 10 miles of range! not too shabby. I could bring it on road trips and swap it in when I run out of juice. Lets see how well it performs. 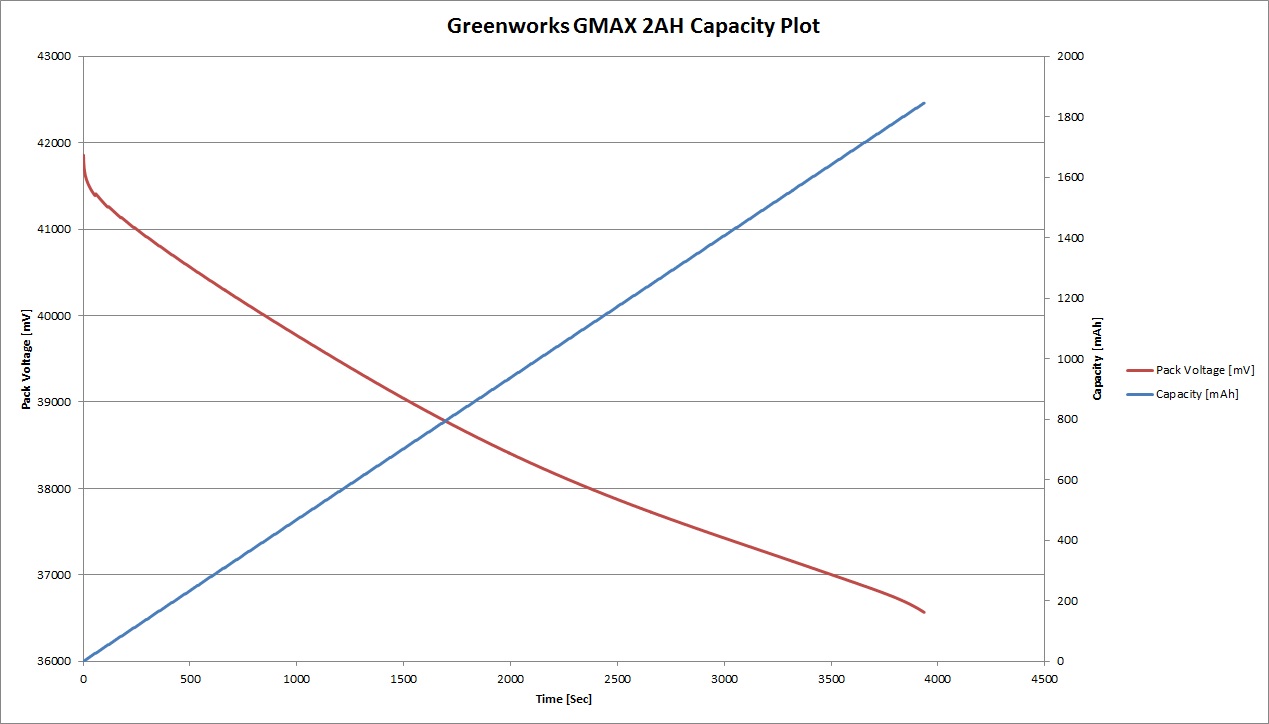
2AH pack capacity PlotThe '2ah' pack comes in at a whopping 1.845 AH, this does give a better hint as to why the range was reduced over what I had initially anticipated. The pack DCR averaged around 166 mOhm, which is on the higher end of what I had anticipated. At 30A I was burning nearly 5v of resistive drop across the cells alone. This also fills in the gap as to why the top speed with the 2ah pack was lower than the 4ah pack. The DCR ranged from 162 to 176 mili-ohms across the state of charge. Dataset including all battery plots available as xlsx here: [link] 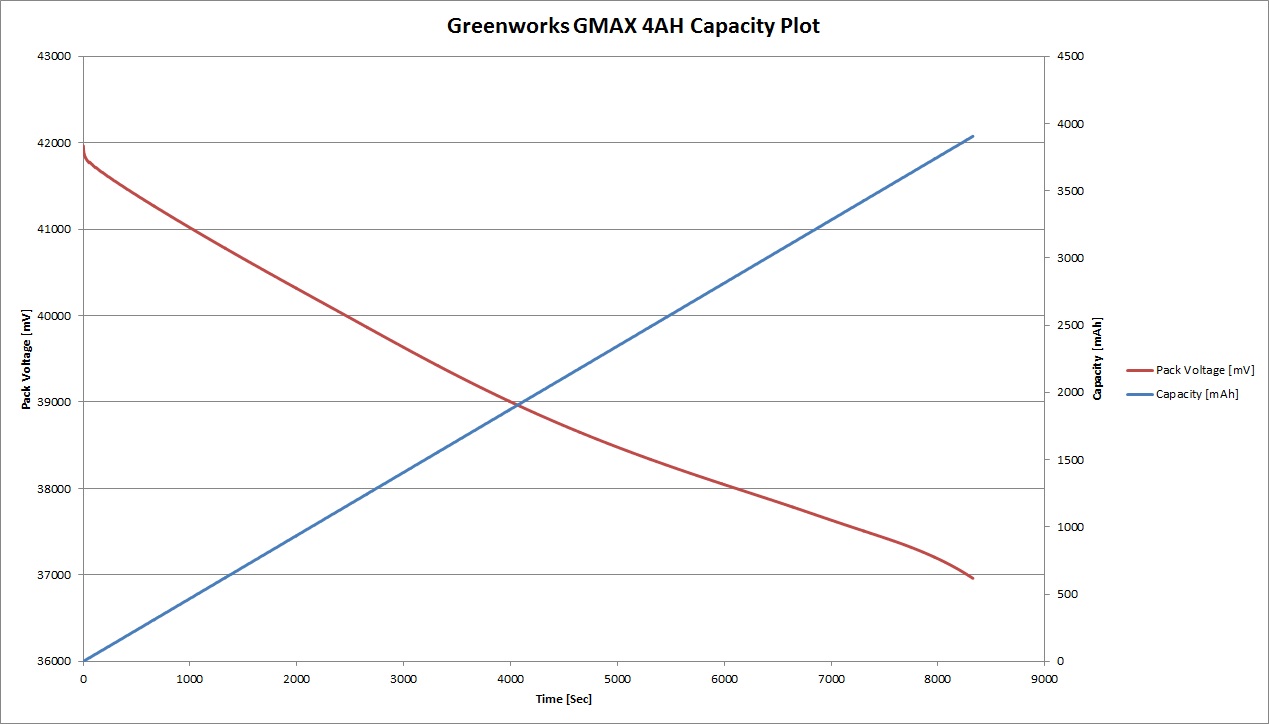
4AH pack capacity PlotThe '4ah' pack comes in at a whopping 3.905 AH. QUITE GOOD. The pack DCR averaged around 79 mili-ohms, which is what I was hoping for a 10S2P module. The DCR ranged from 72 to 84 mili ohms, but even at 79 mili-ohms, I was only loosing 2.3V across the cell group under a 30A acceleration, thats not great but way better than with the 2AH pack. Dataset including all battery plots available as xlsx here: [link] 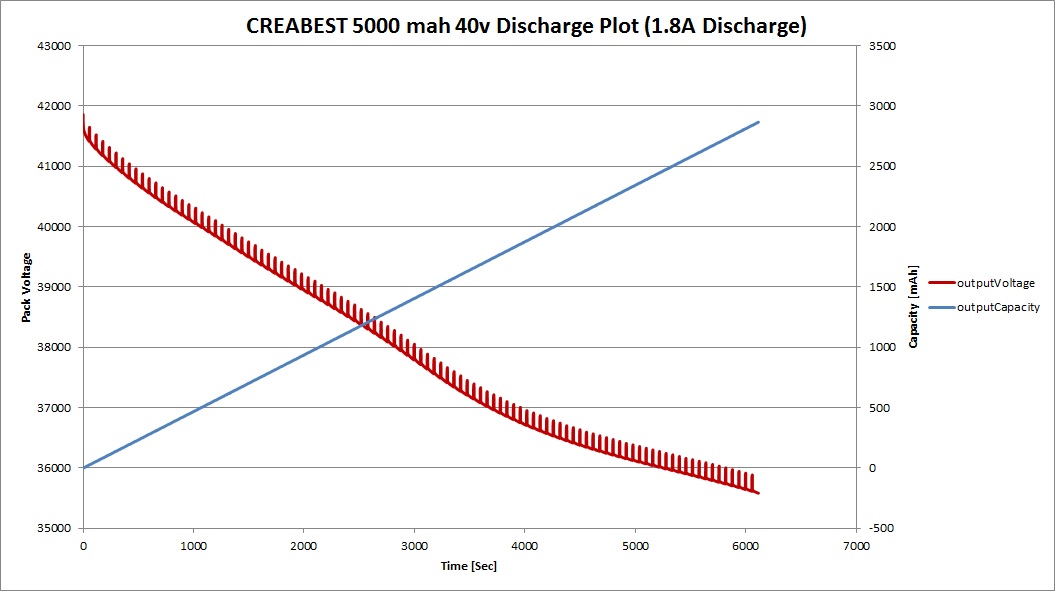
'5AH' pack capacity PlotThe '5ah' pack comes in at a whopping 3.240 AH. Yep, not even close to 5AH. I contacted the seller who claimed this was a measurement error on my part. The pack DCR averaged around 90 mili-ohms, which is ok, but nothing fantastic. The DCR ranged from 84 to 98 mili ohms, again not that great. I've attempted to get a refund and send back the falsely-labeled contraption. Dataset including all battery plots available as xlsx here: [link] Some Photos of the creabest 5000 mah battery pack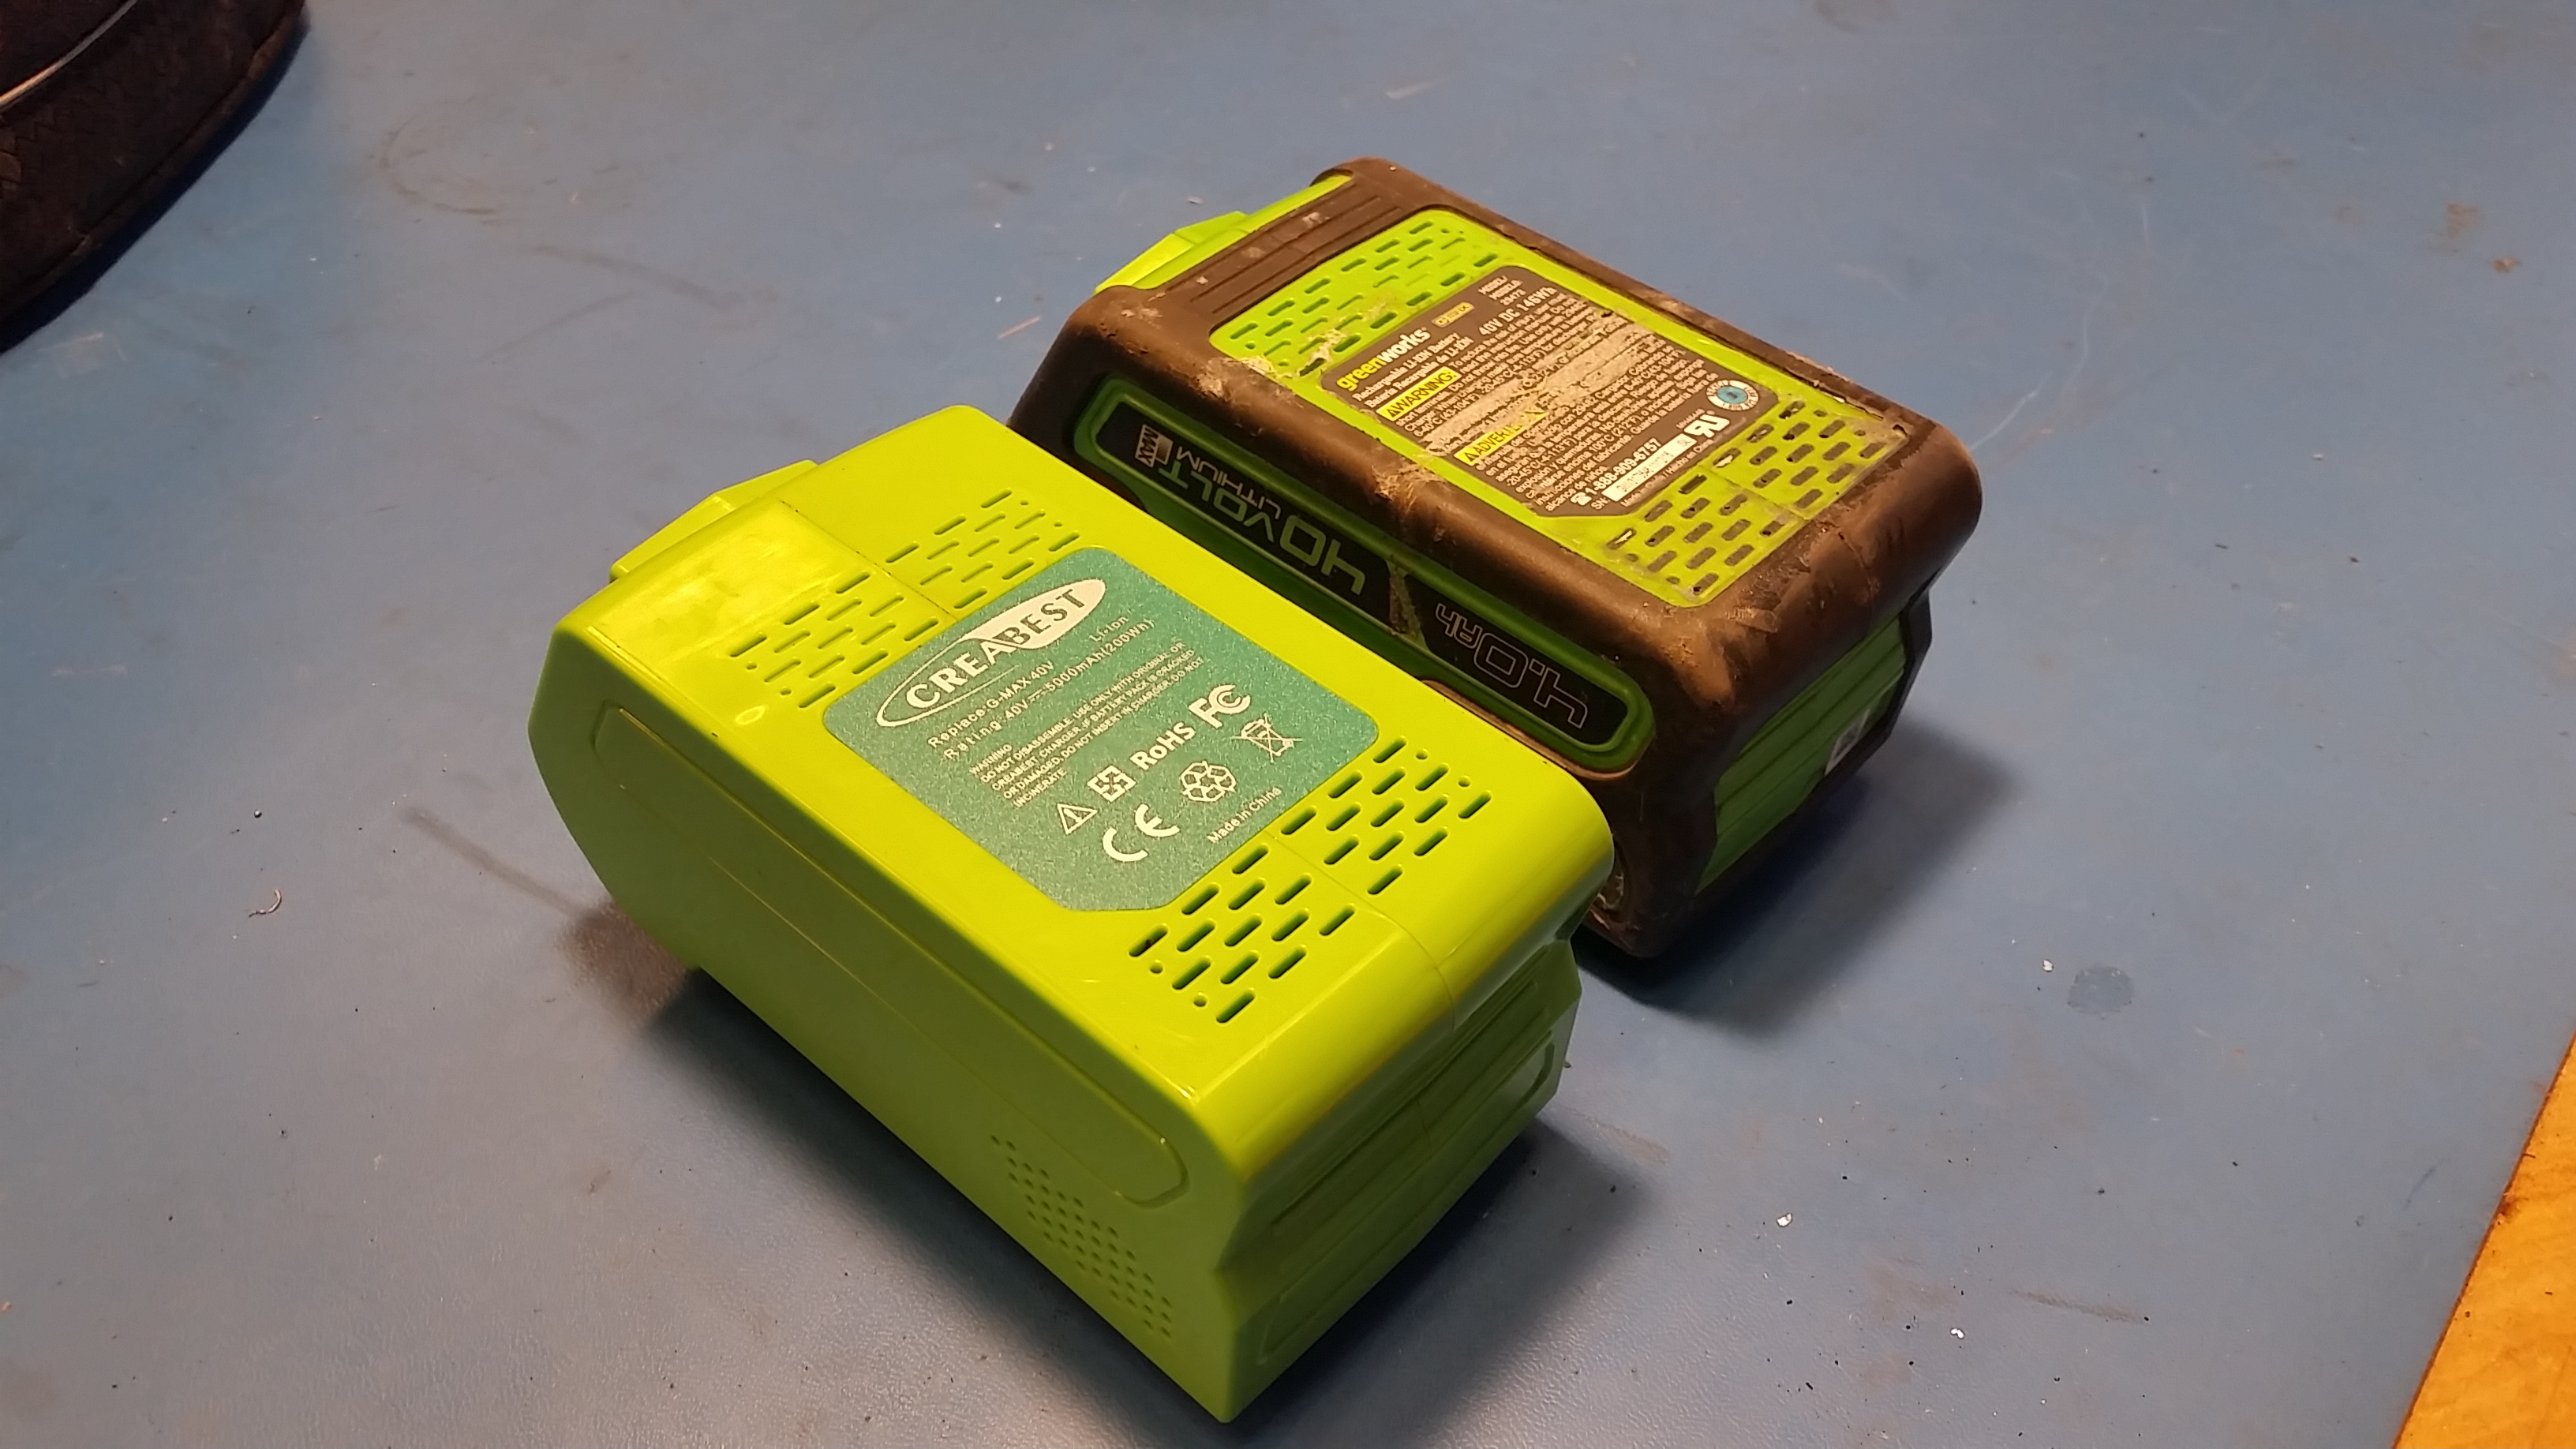
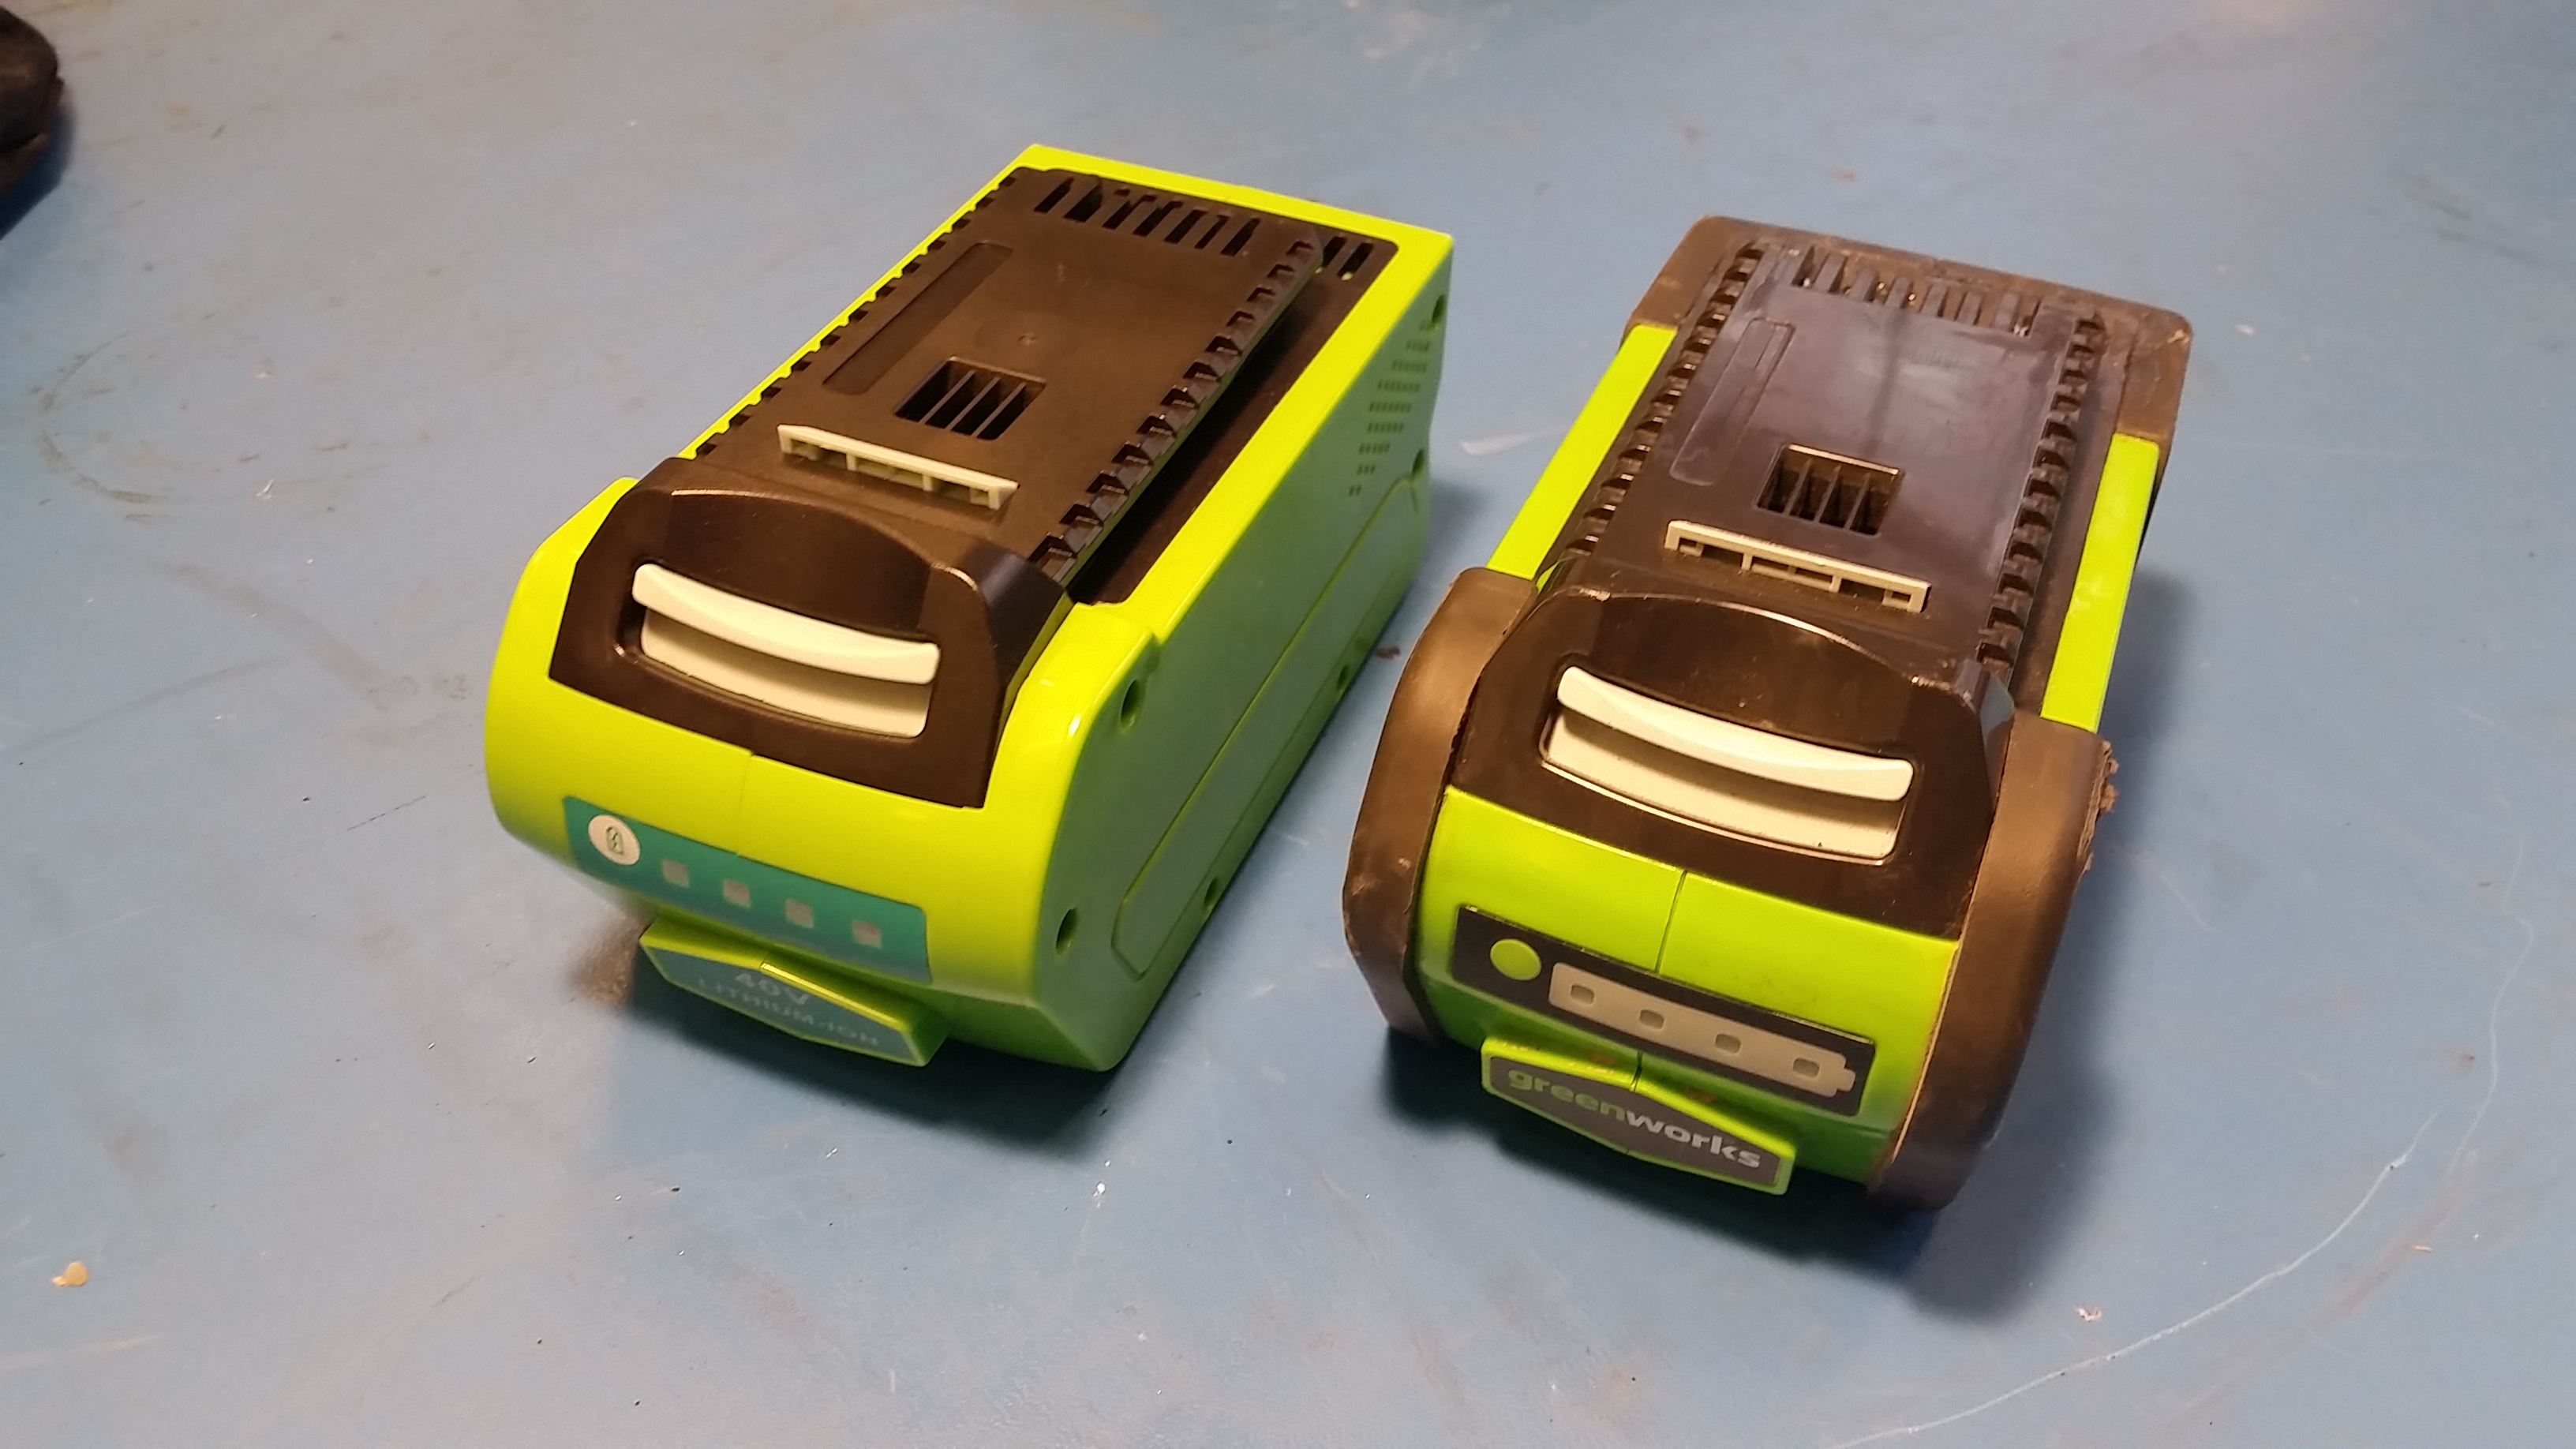
Shown is the creabest '5000' mah pack vs the 4ah greenworks module, very comparable dimensions 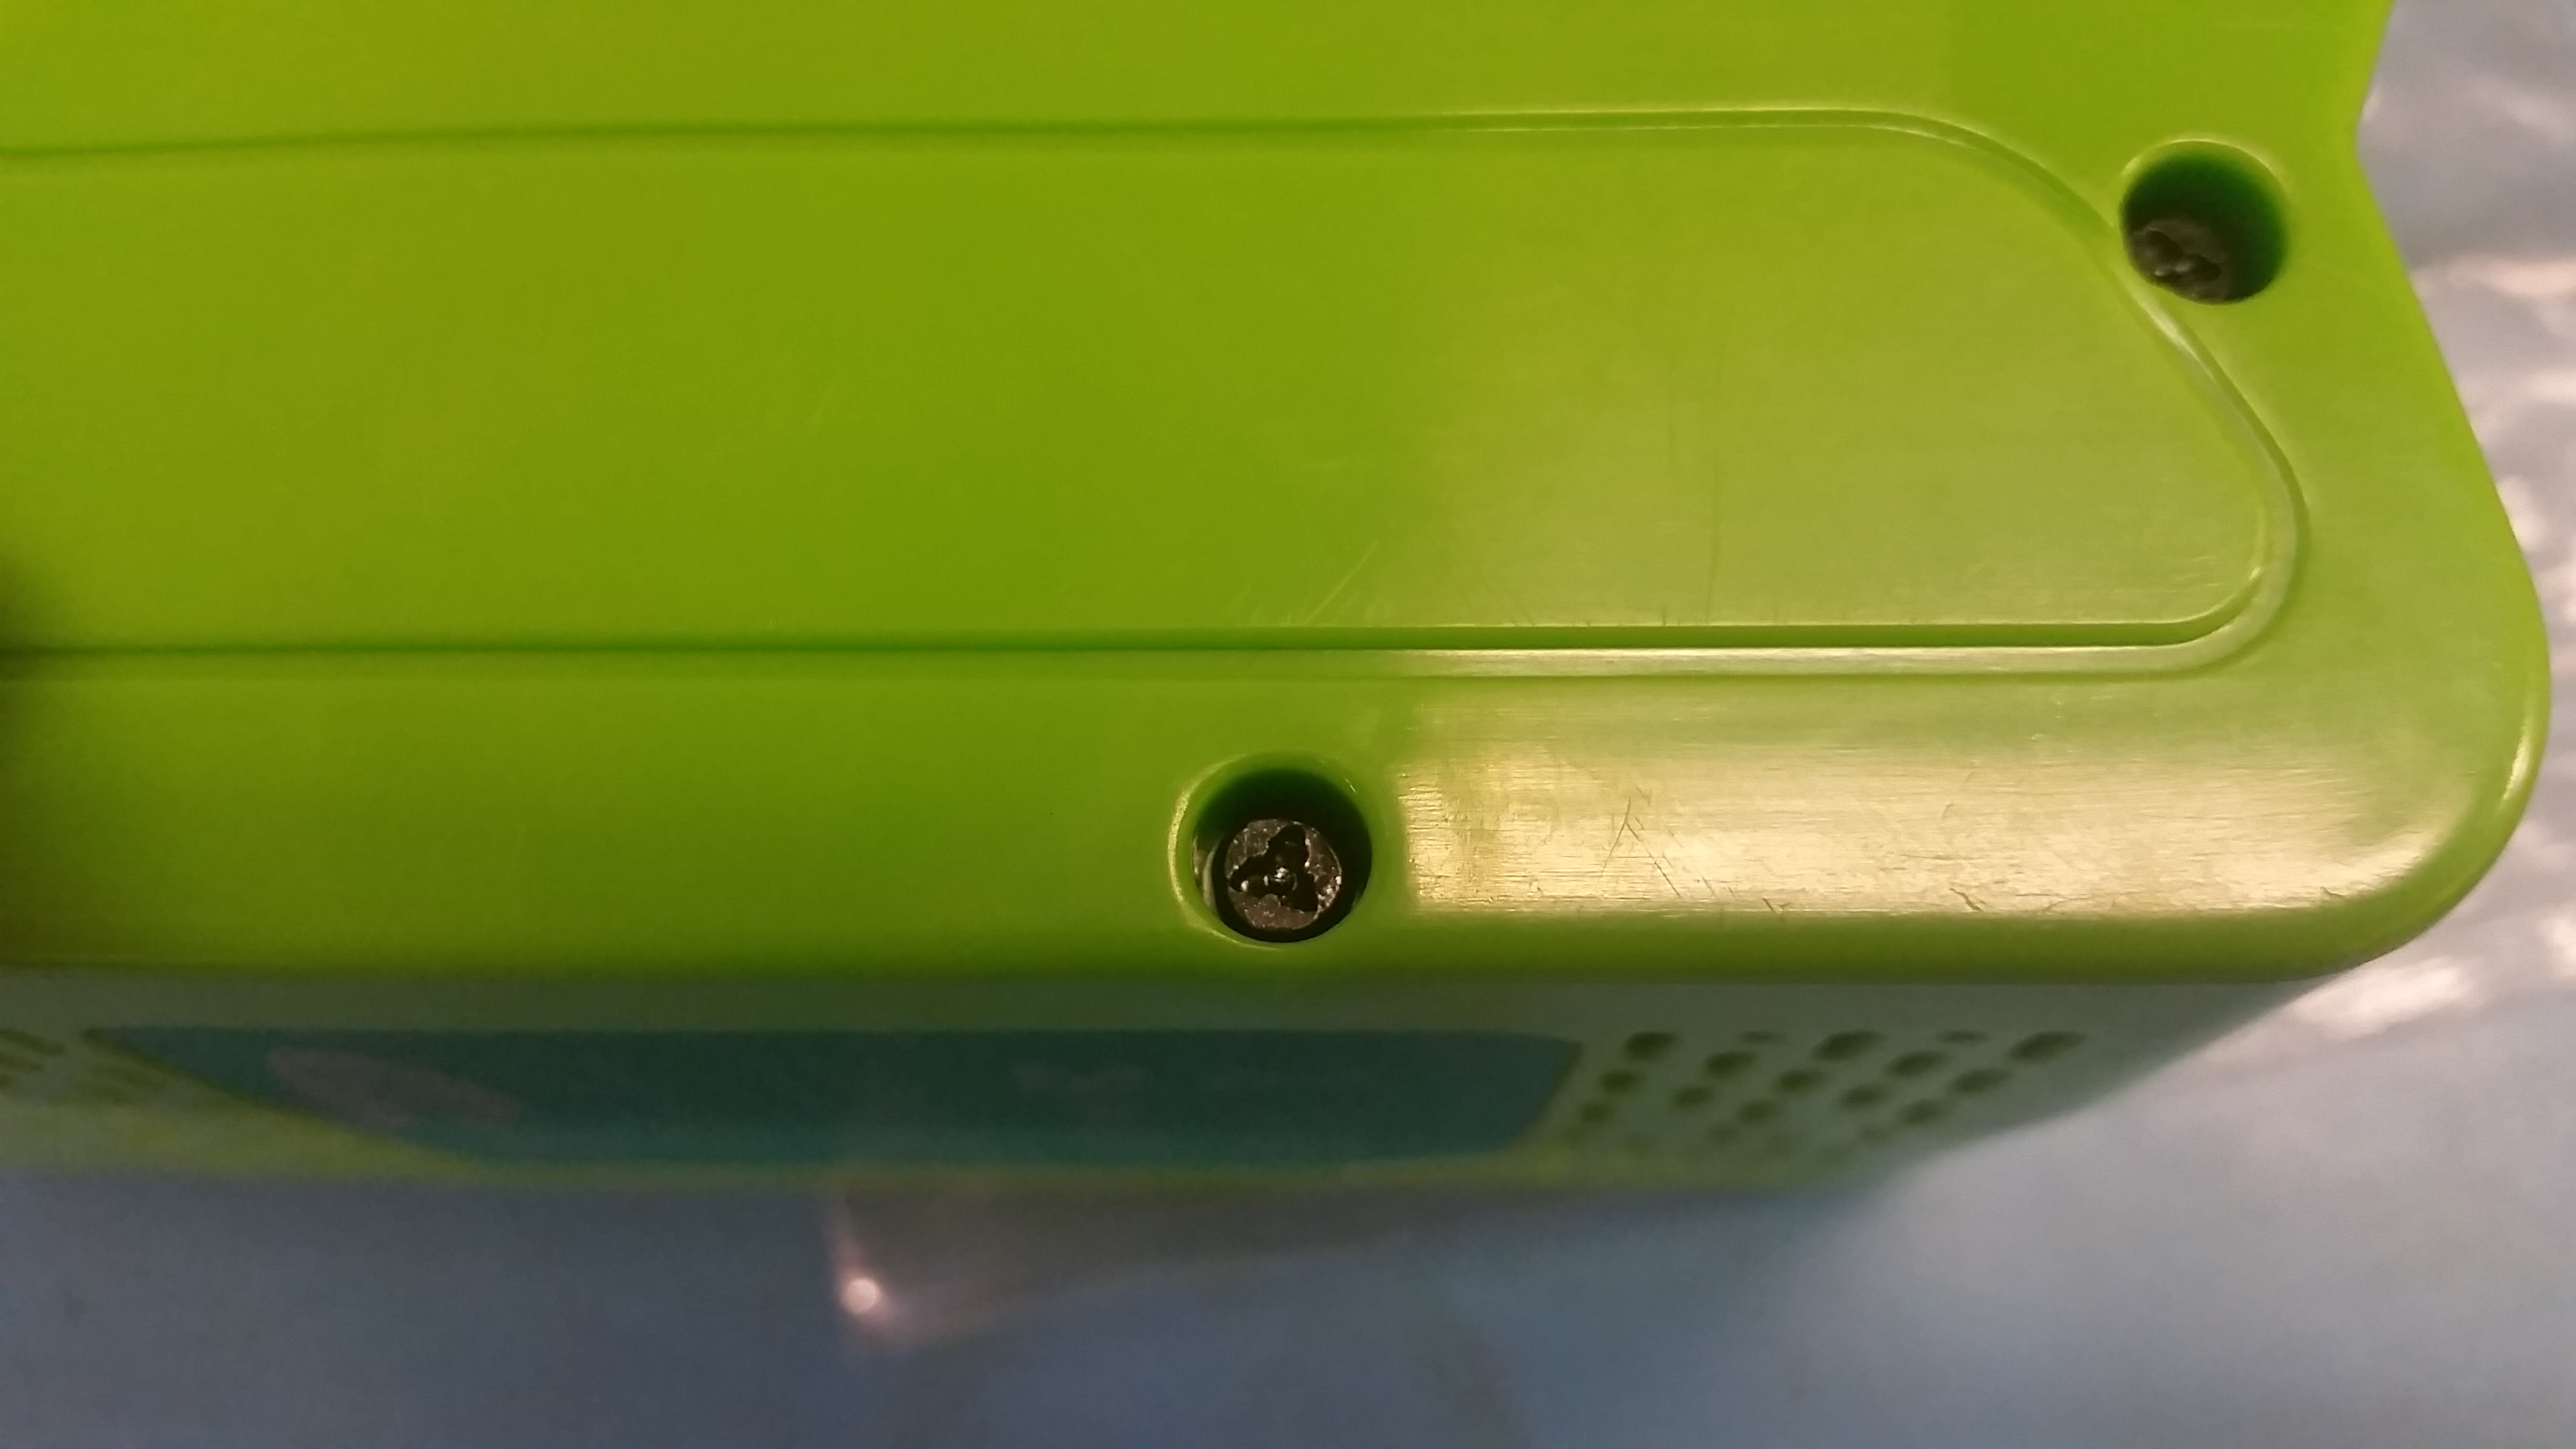
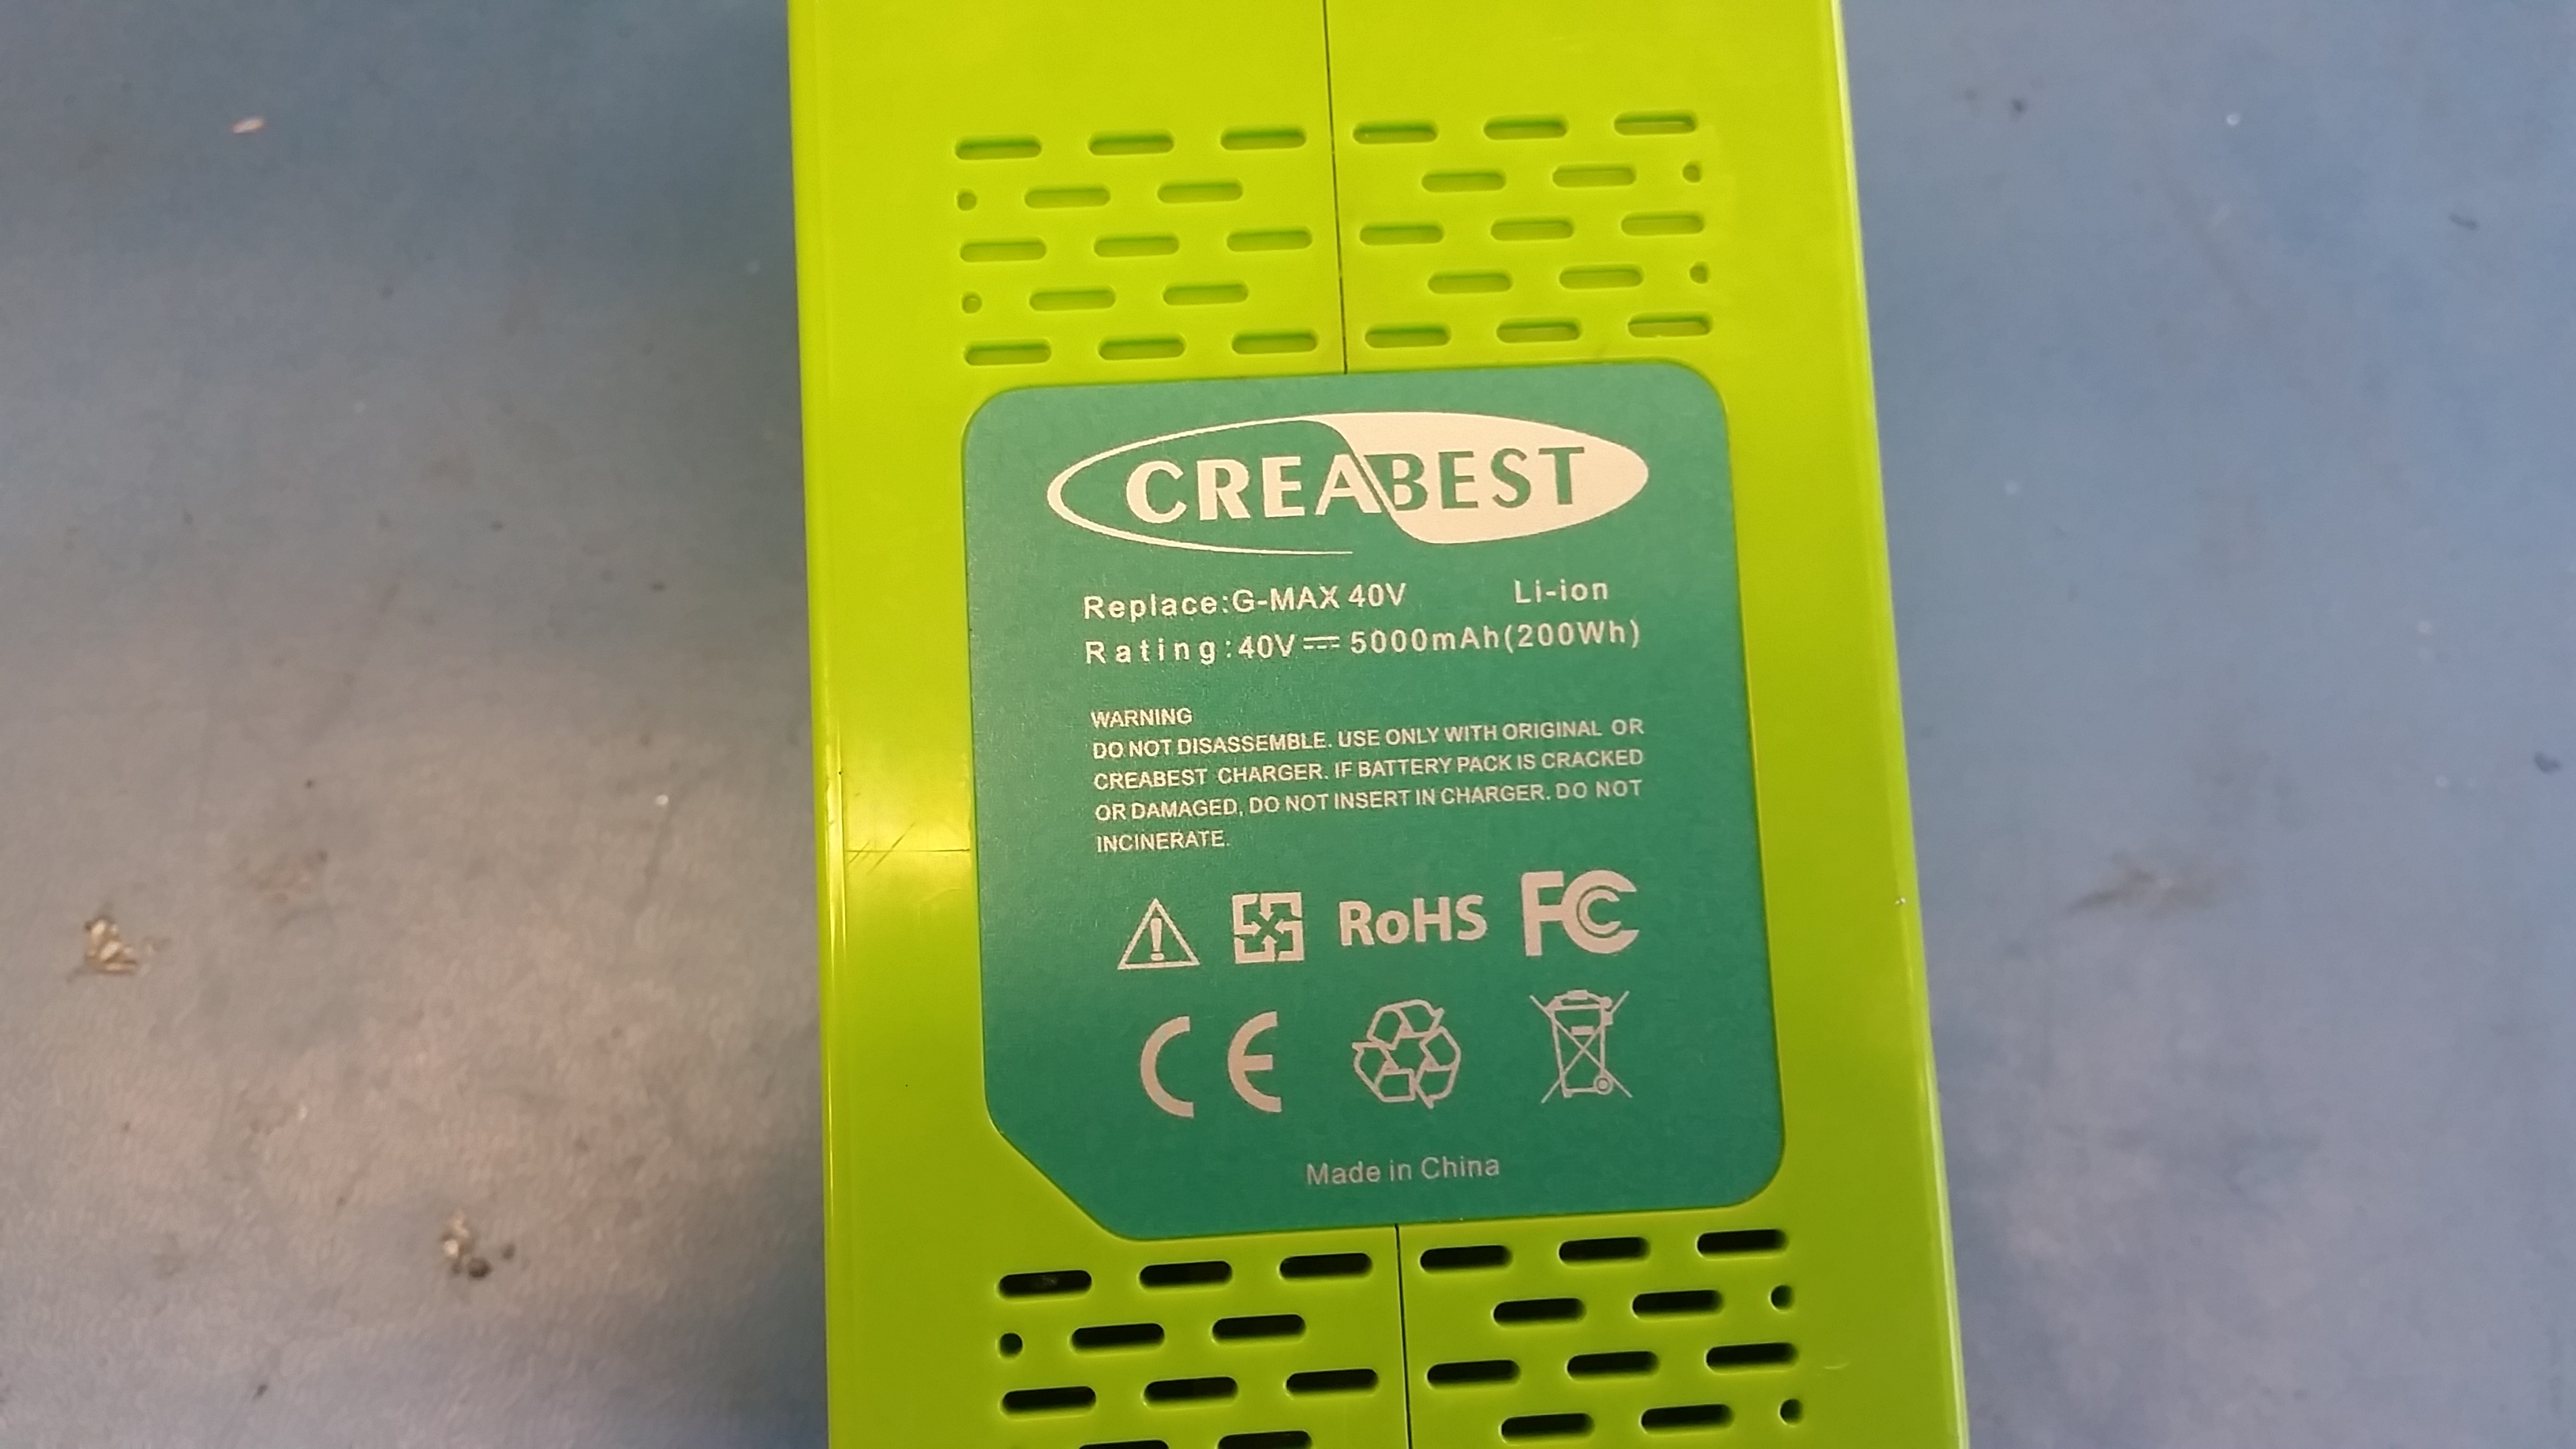
Here's whats frustrating at this label. The pack is not even close to 200 watt-hours, yet this label prevents it from being brought on a plane. Finally the battery uses the most bizarre screwdriver bit known to man, which did a reasonable job at preventing me from opening it up. Its not tri-wing, its bizarro. Solidpart files and drawings.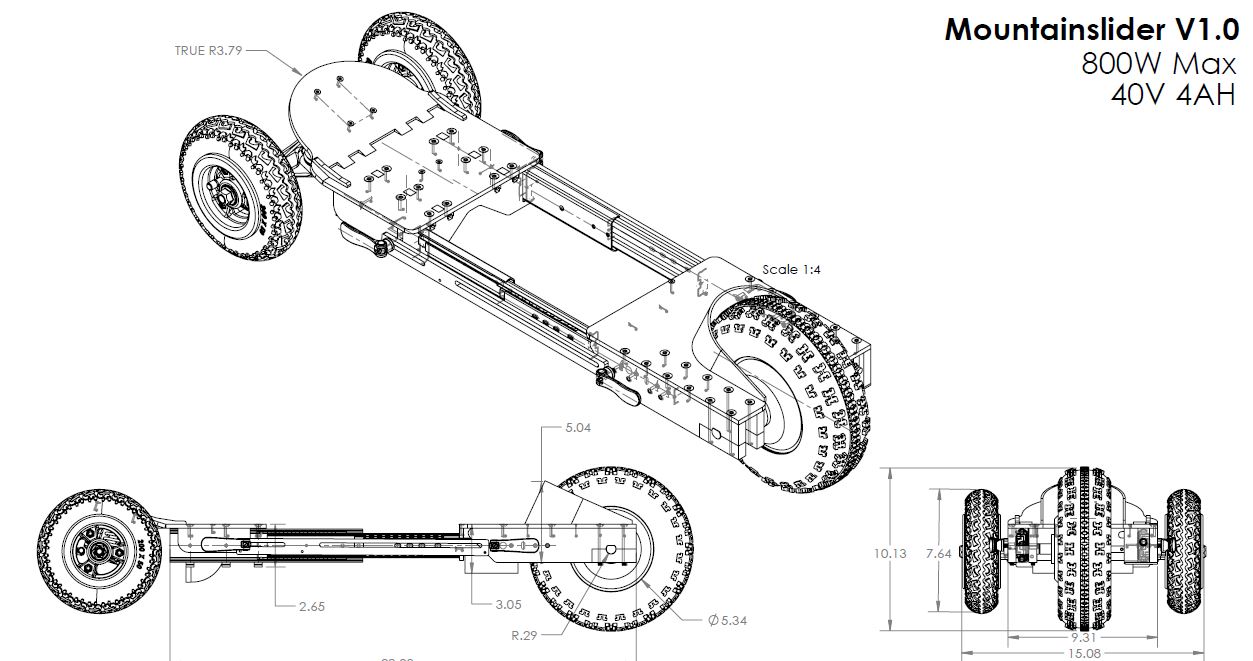
Here's the whole thing in one screencapture and a link to a pdf copy. This is just an overarching model for rough dimensions. The whole pile of cad (Solidworks 2014) is avalable here [link]
(There's other photos in the photo gallery)
Concluding Remarks:
Have you noticed that there are no advertisements or ridiculous pop ups?
|

Overview
CAD and Plotting
First Draft
Electronics Overview
Assembly Begins
Drawer-Slides
Welding and Machining
Weatherproofing
Mountainslider Overseas
Germany Notes
Rivers and Trails
Tire Wear
Range Testing
Conclusion
Post your comments! |
|
Comment Box loading
|